


Images and other media files are fundamental components of any successful WordPress website. To leverage them effectively, it's crucial to have a solid understanding of how the WordPress Media Library functions.
This essential WordPress feature allows you to store and efficiently manage your website's images and other media assets over time. By gaining some expert insights and mastering a few straightforward techniques, you can significantly enhance your site's performance and user experience through your Media Library.
This comprehensive guide will explore all aspects of the WordPress Media Library, detailing processes for importing and downloading content. We will also delve into image editing capabilities, strategies for long-term file management, and present four powerful techniques for integrating advanced functionalities. Let's begin our exploration!
Understanding the WordPress Media Library
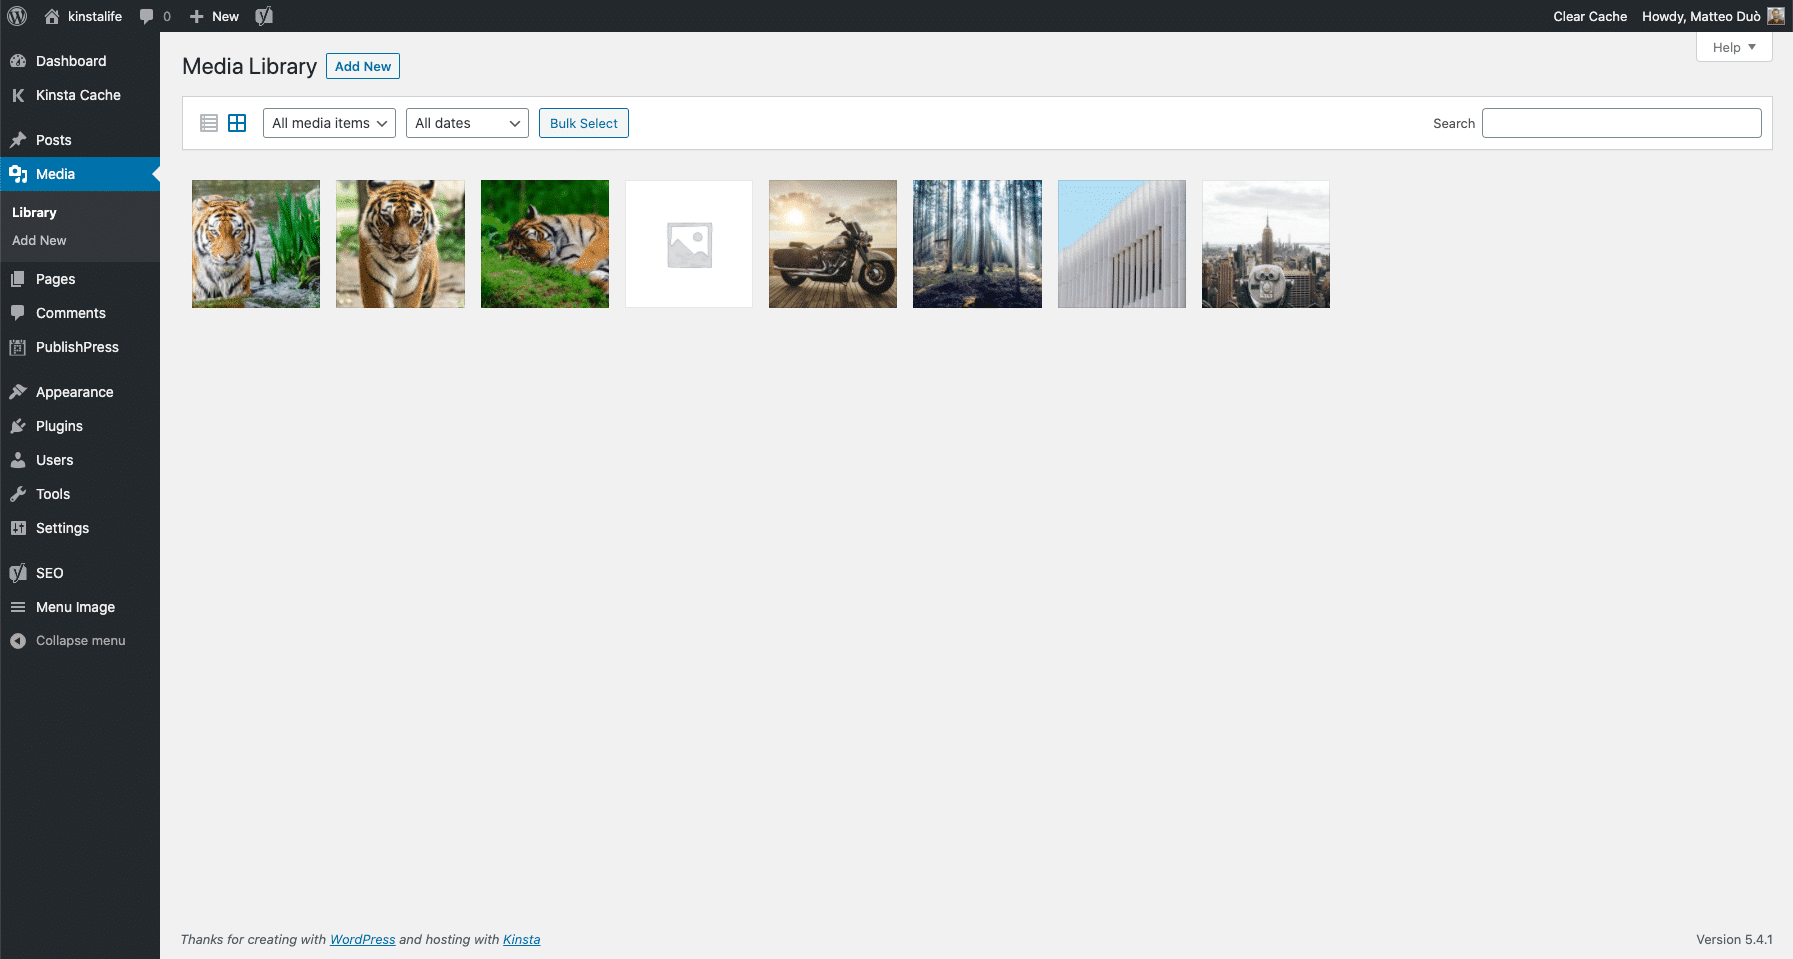
Essentially, the WordPress Media Library serves as a centralized catalog for all the media files you have uploaded to your website. It's designed to provide a comprehensive overview and access point for your digital assets.
 WordPress Media Library
WordPress offers robust support for a diverse range of media file types, ensuring flexibility for your content needs. These include:
- Images: Common formats like .jpg, .jpeg, .png, .gif, and .ico.
- Audio files: Such as .mp3, .m4a, .ogg, and .wav.
- Videos: Including .mp4, .m4v, .mov, .wmv, .avi, .mpg, .ogv, .3gp, and .3g2.
- Documents: PDFs, Word documents, Excel spreadsheets, and PowerPoint presentations.
- Design Files: Adobe Photoshop documents.
Beyond storage, WordPress also provides basic photo-editing functionalities, allowing you to make quick adjustments directly from your administration dashboard. It's worth noting that while WordPress continuously evolves, native support for WebP images is not yet available out of the box, though solutions exist for this.
Accessing and Managing Your Media
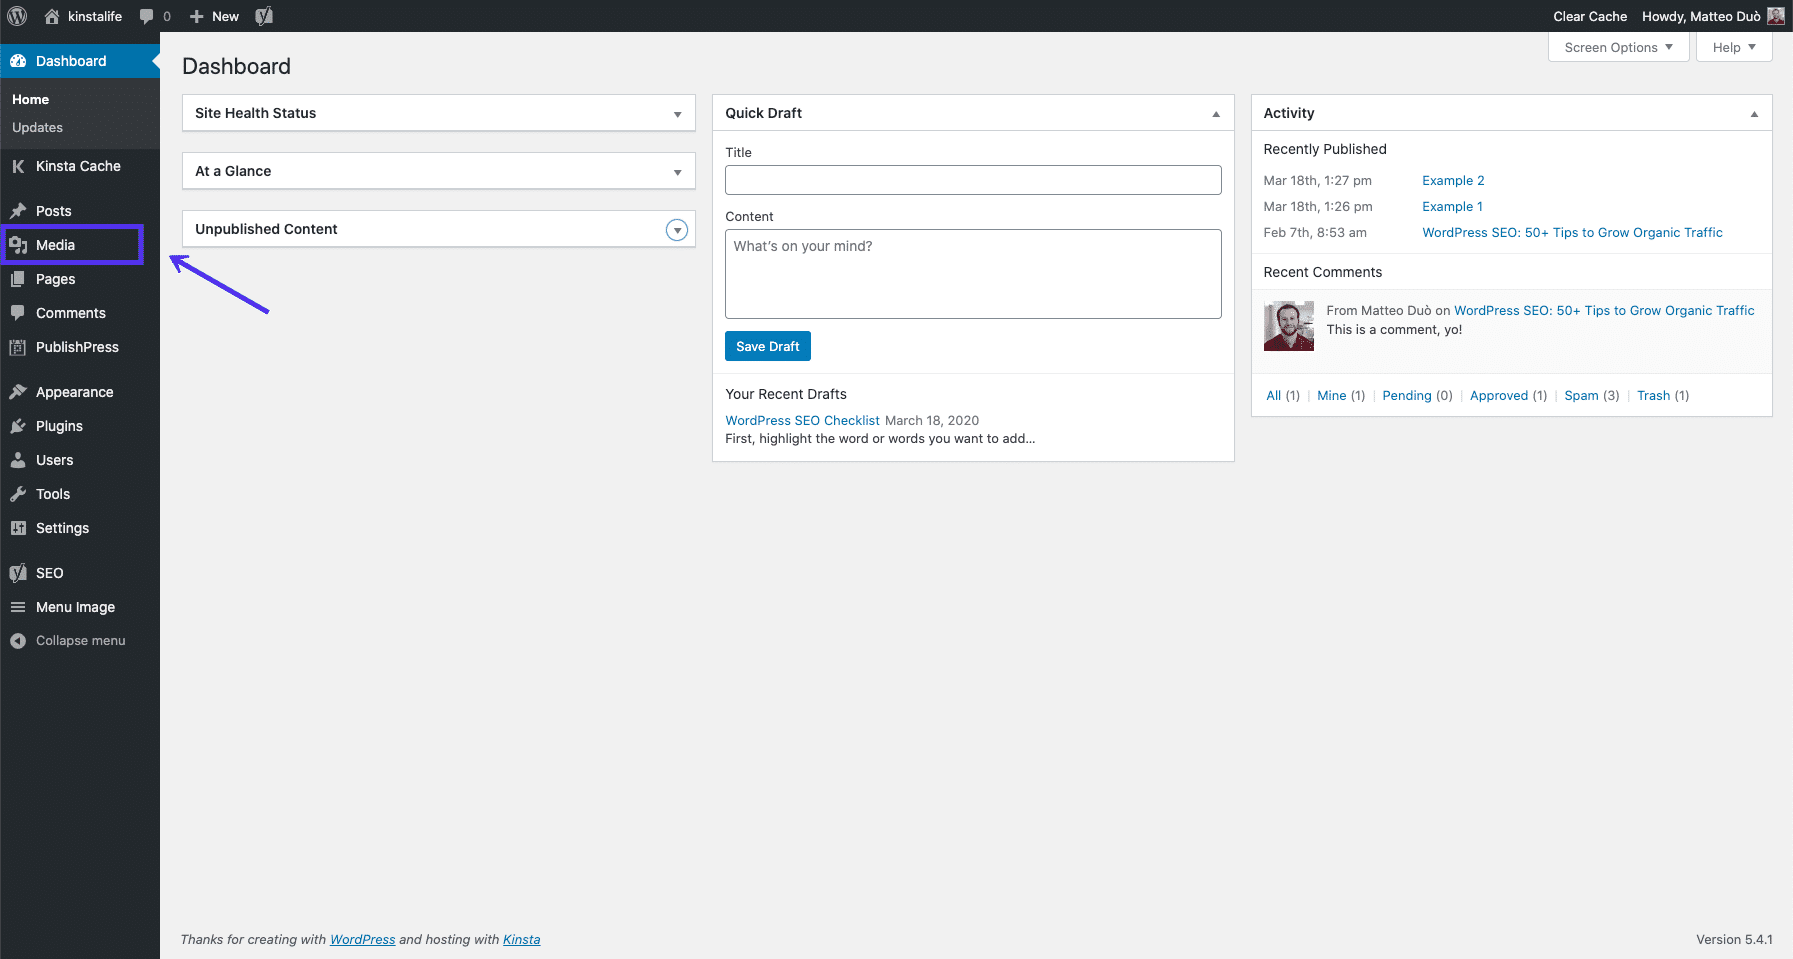
To access your Media Library, simply click on the Media option located in your WordPress admin sidebar. This central hub provides several fundamental options for organizing and viewing your files.
 Accessing the WordPress Media Library
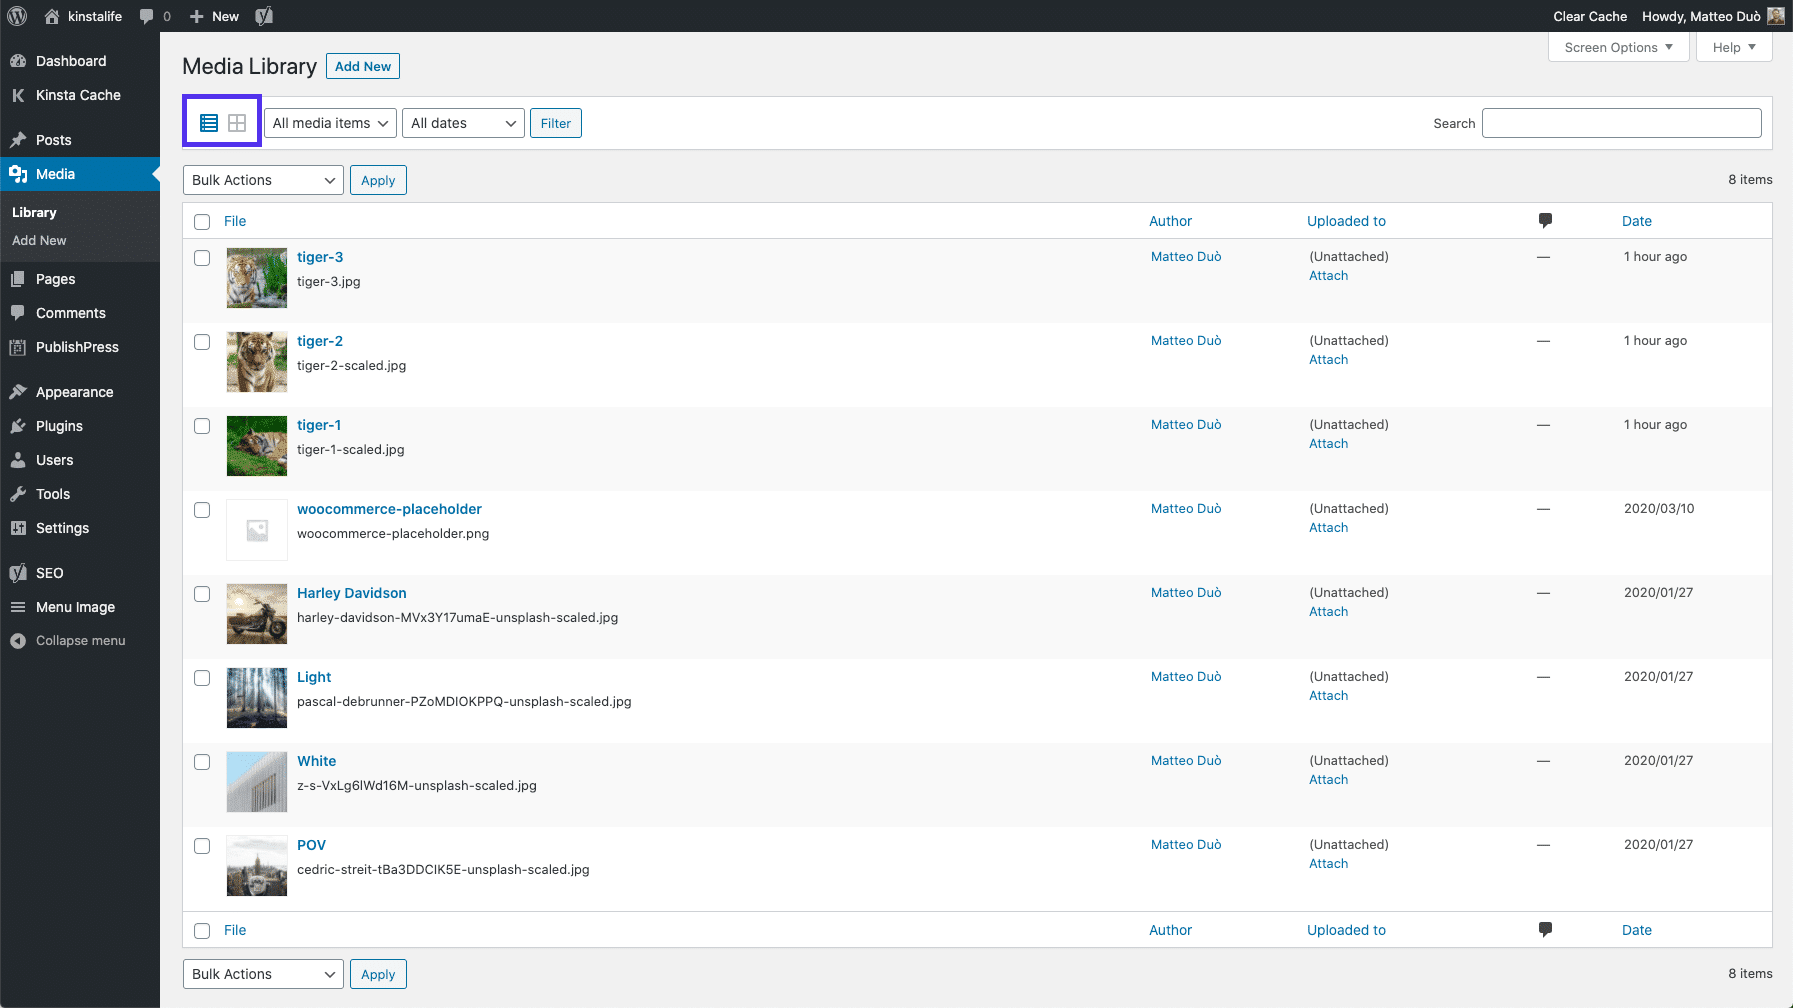
Upon entering the Media Library, you'll find basic viewing and management tools. You can choose to display your files in either a list or grid view by selecting the corresponding icons, tailoring the interface to your preference.
 WordPress Media Library view options
To further refine your view, WordPress offers filtering capabilities through drop-down menus.
 Filtering WordPress Media Library files
The first menu allows you to sort your media by its specific type, while the second enables filtering by the dates on which the files were uploaded. For quick retrieval, a search bar is also available, letting you find particular files by their names.
 WordPress Media Library search bar
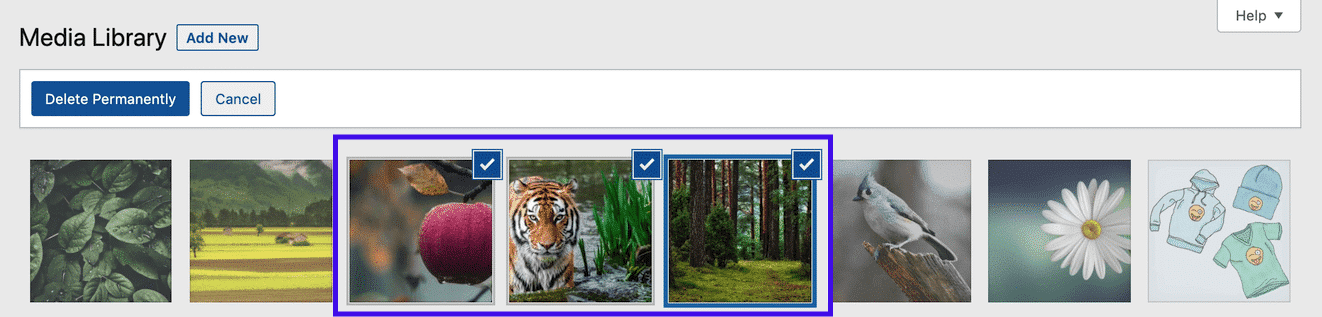
For managing multiple files simultaneously, the Bulk Select feature is invaluable. This option facilitates the deletion of several files from your WordPress installation in a single action, streamlining cleanup processes.
 Bulk select option in the WordPress Media Library
These functionalities represent the core native features of the WordPress Media Library screen. While these tools are foundational, there are numerous ways to extend and enhance this experience, which we will explore further. First, let's cover the various methods for adding files to your WordPress site.
Adding and Downloading Media Files
Uploading Media to Your WordPress Site
There are several convenient methods for adding various files, such as your site’s favicon, to your WordPress Media Library. The most direct approach is to navigate to Media > Add New in your admin dashboard.
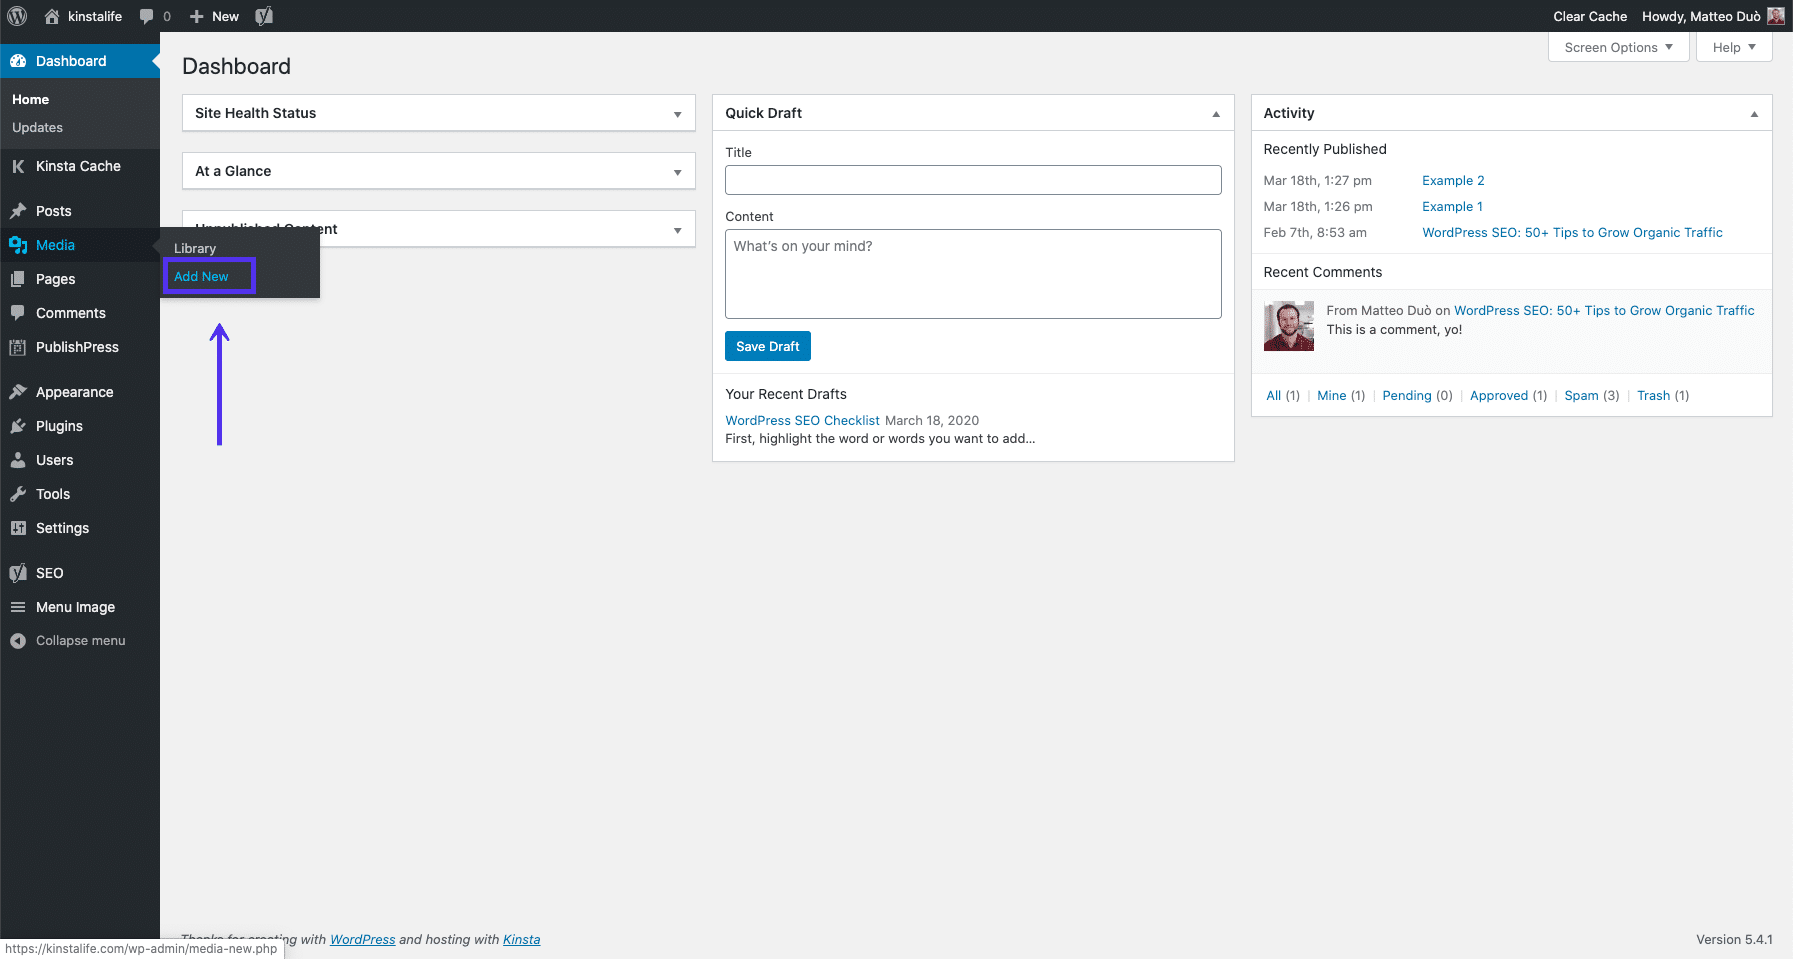 Accessing the WordPress Media Uploader
From this screen, you can easily upload files stored on your local computer or any connected device.
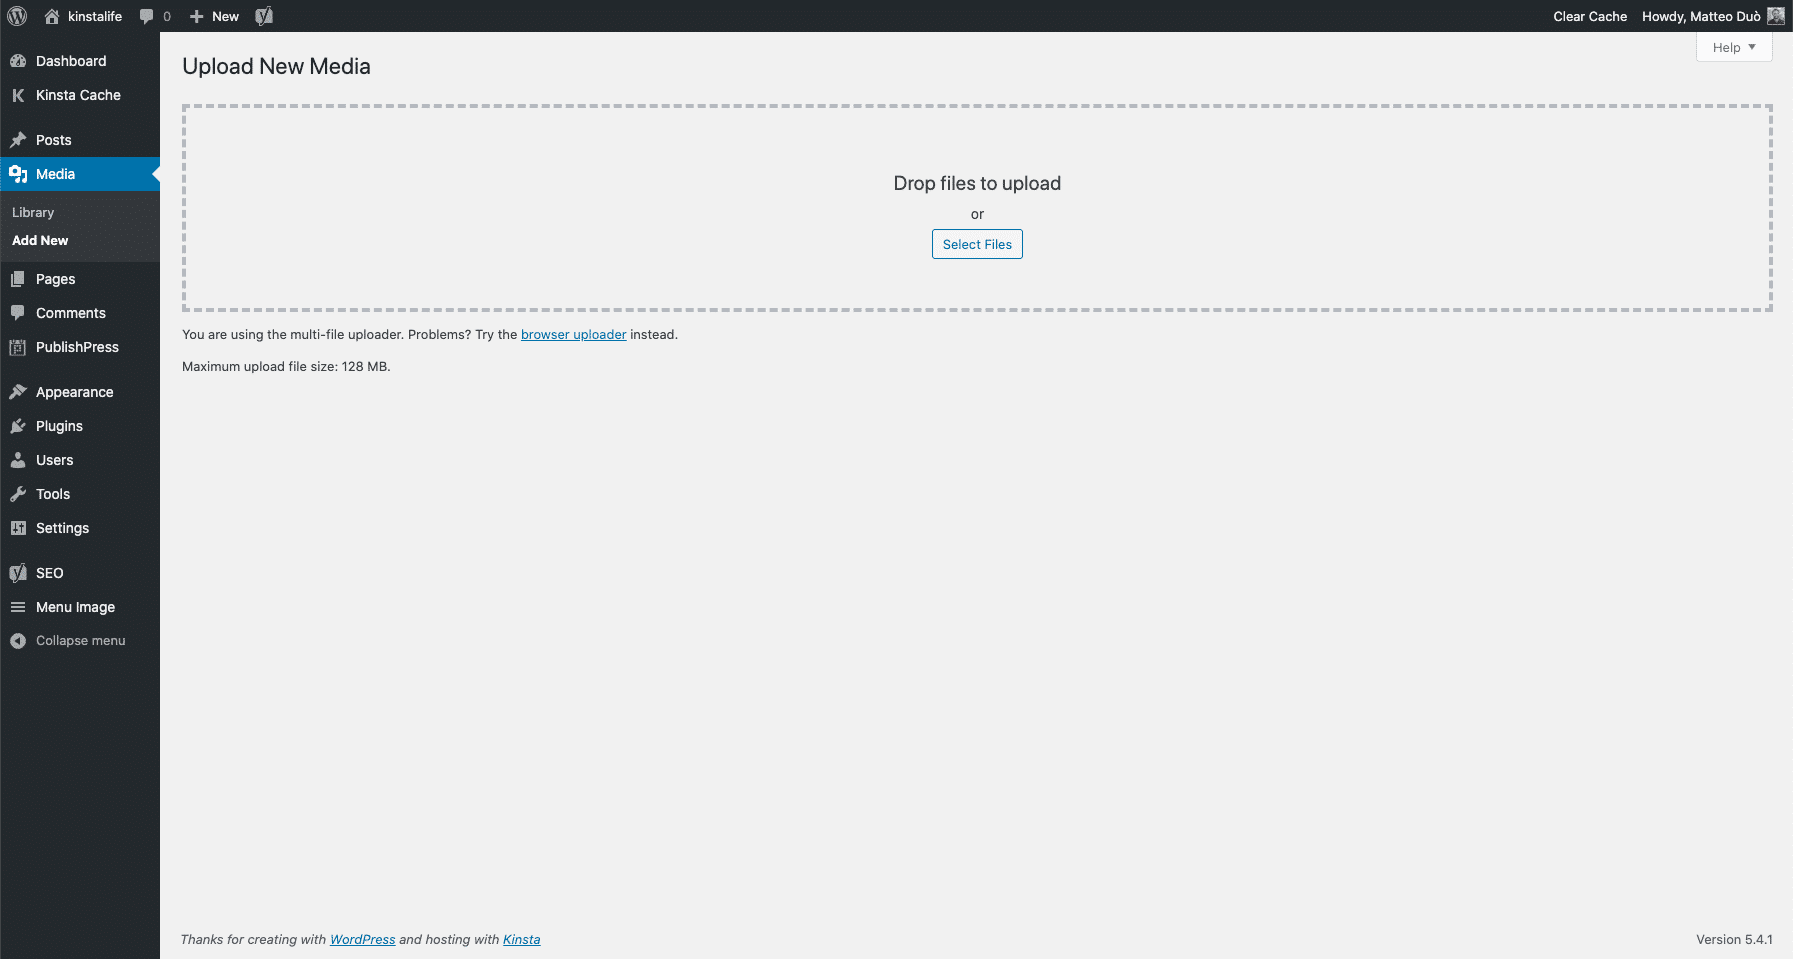 WordPress Media Uploader
Alternatively, media can be added directly within the WordPress editor. When using the Block Editor, you begin by inserting the appropriate block for the media type you wish to include, such as an Image block or a Video block.
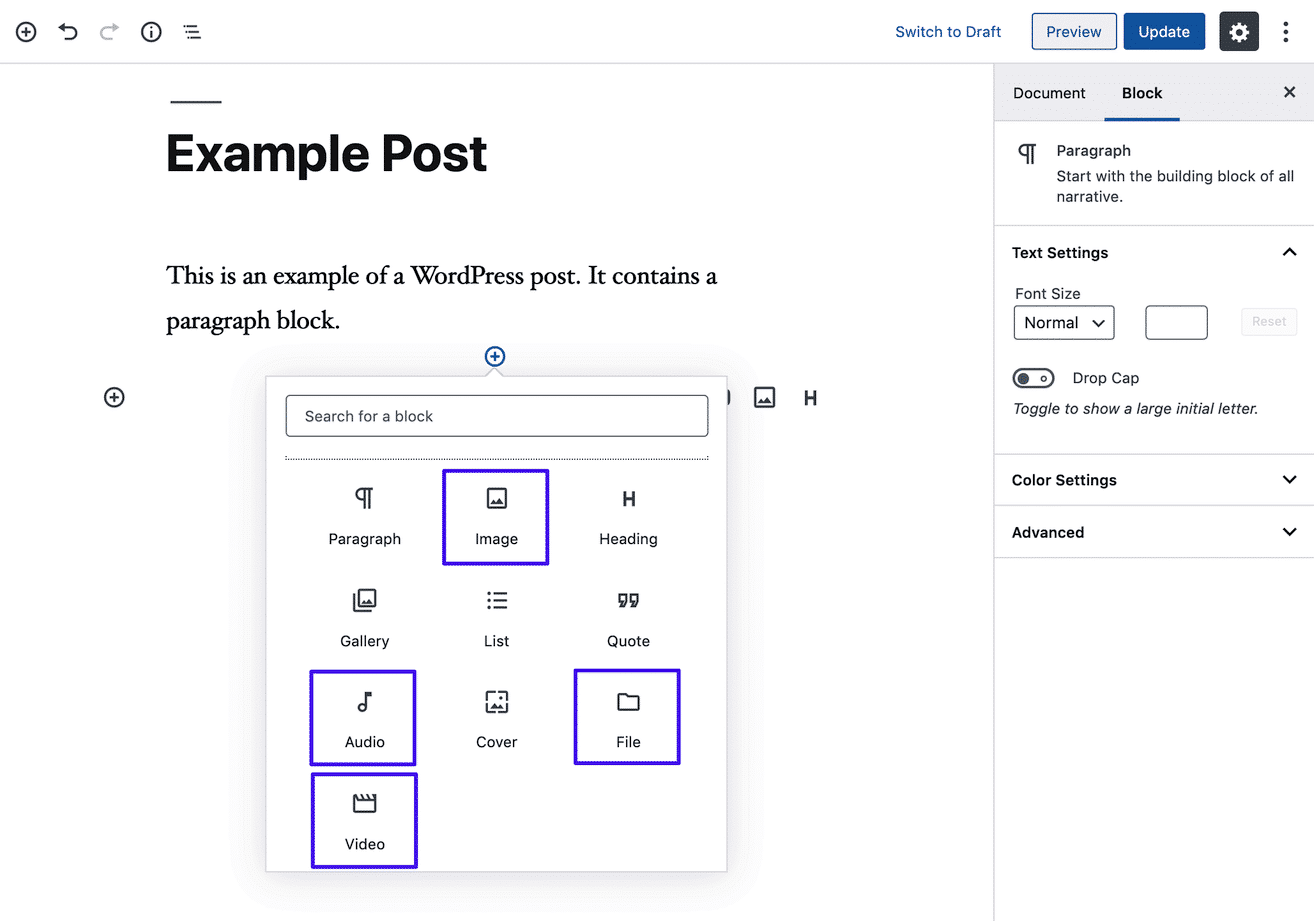 WordPress media blocks
Within the newly added block, select the Upload option and then choose a file from your computer.
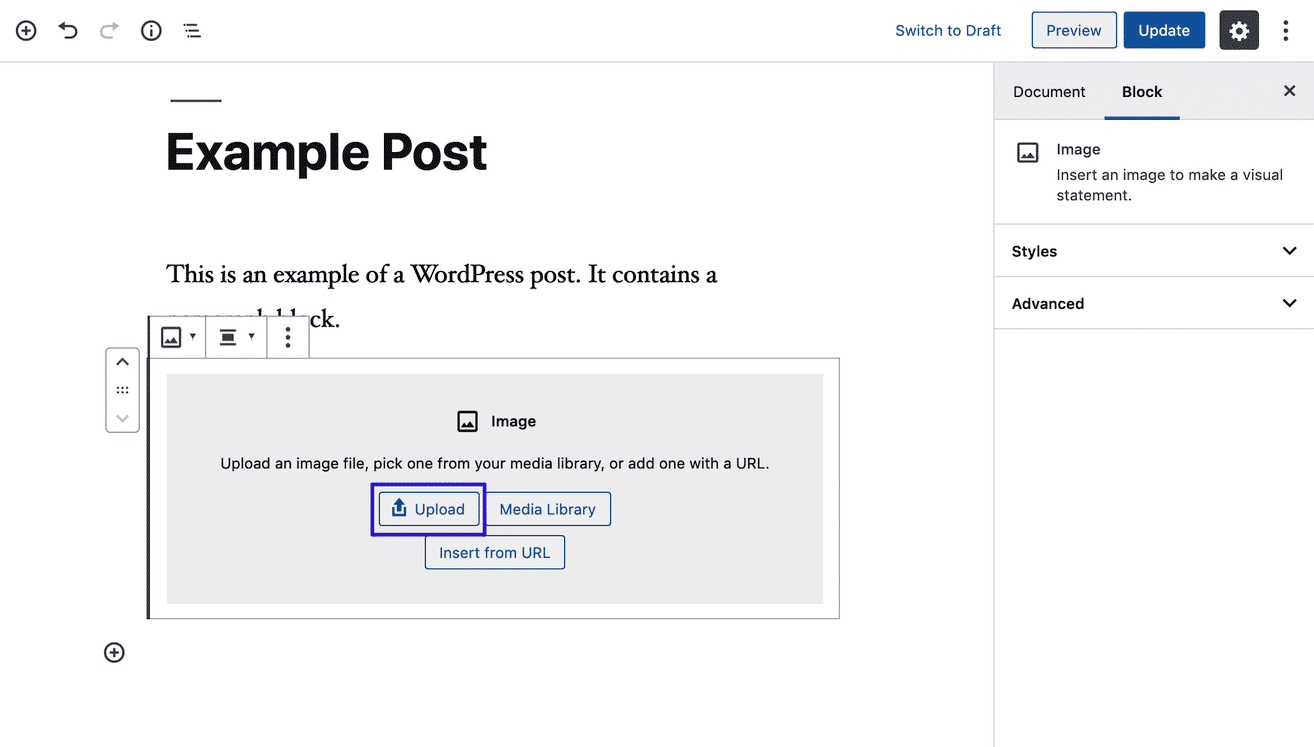 Uploading media from the Block Editor
A more intuitive method is to simply drag and drop the desired file from your desktop directly into the relevant block within the editor.
For those utilizing the Classic Editor, the process involves clicking the Add Media button.
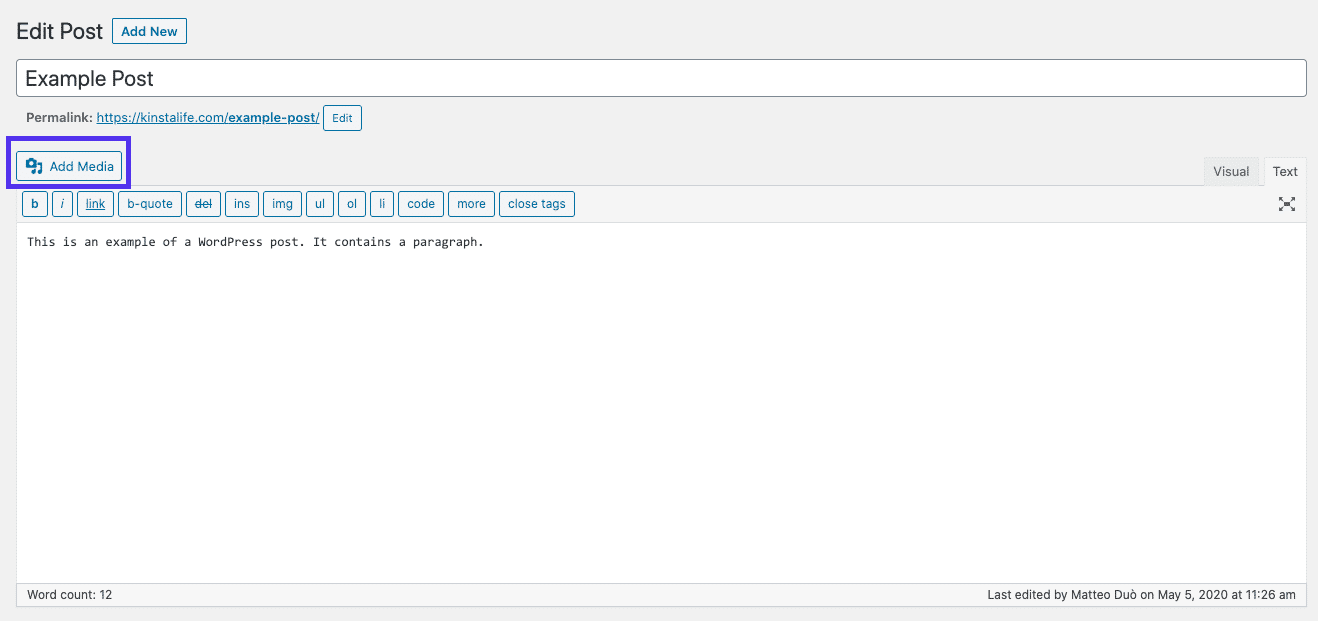 Classic Editor Add Media button
Subsequently, navigate to the Upload tab and select a file from your computer.
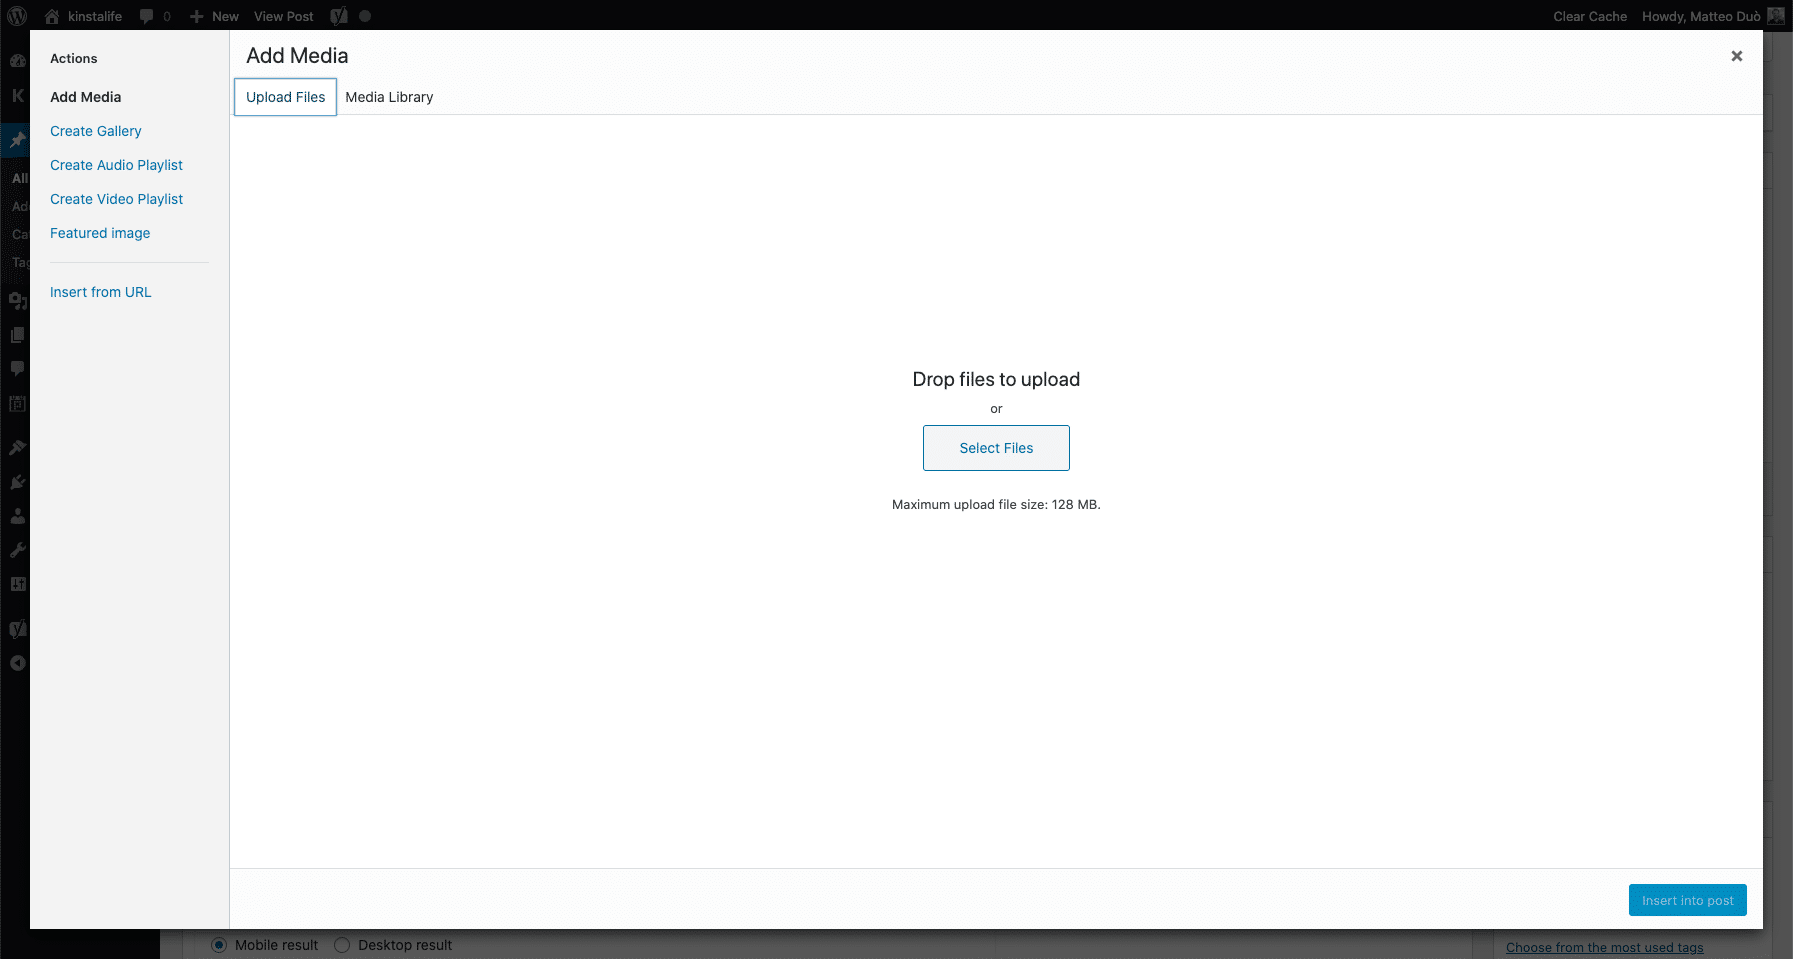 Uploading media from the Classic Editor
Similar to the Block Editor, the Classic Editor also supports dragging and dropping files directly from your desktop into the editing area at any point.
In specific scenarios, you might need to manually upload media files to your WordPress site via FTP (File Transfer Protocol). This can be accomplished using an FTP client like FileZilla. Once connected to your server, navigate to the wp-content > uploads directory. Uploading files directly into this directory will integrate them into your Media Library.
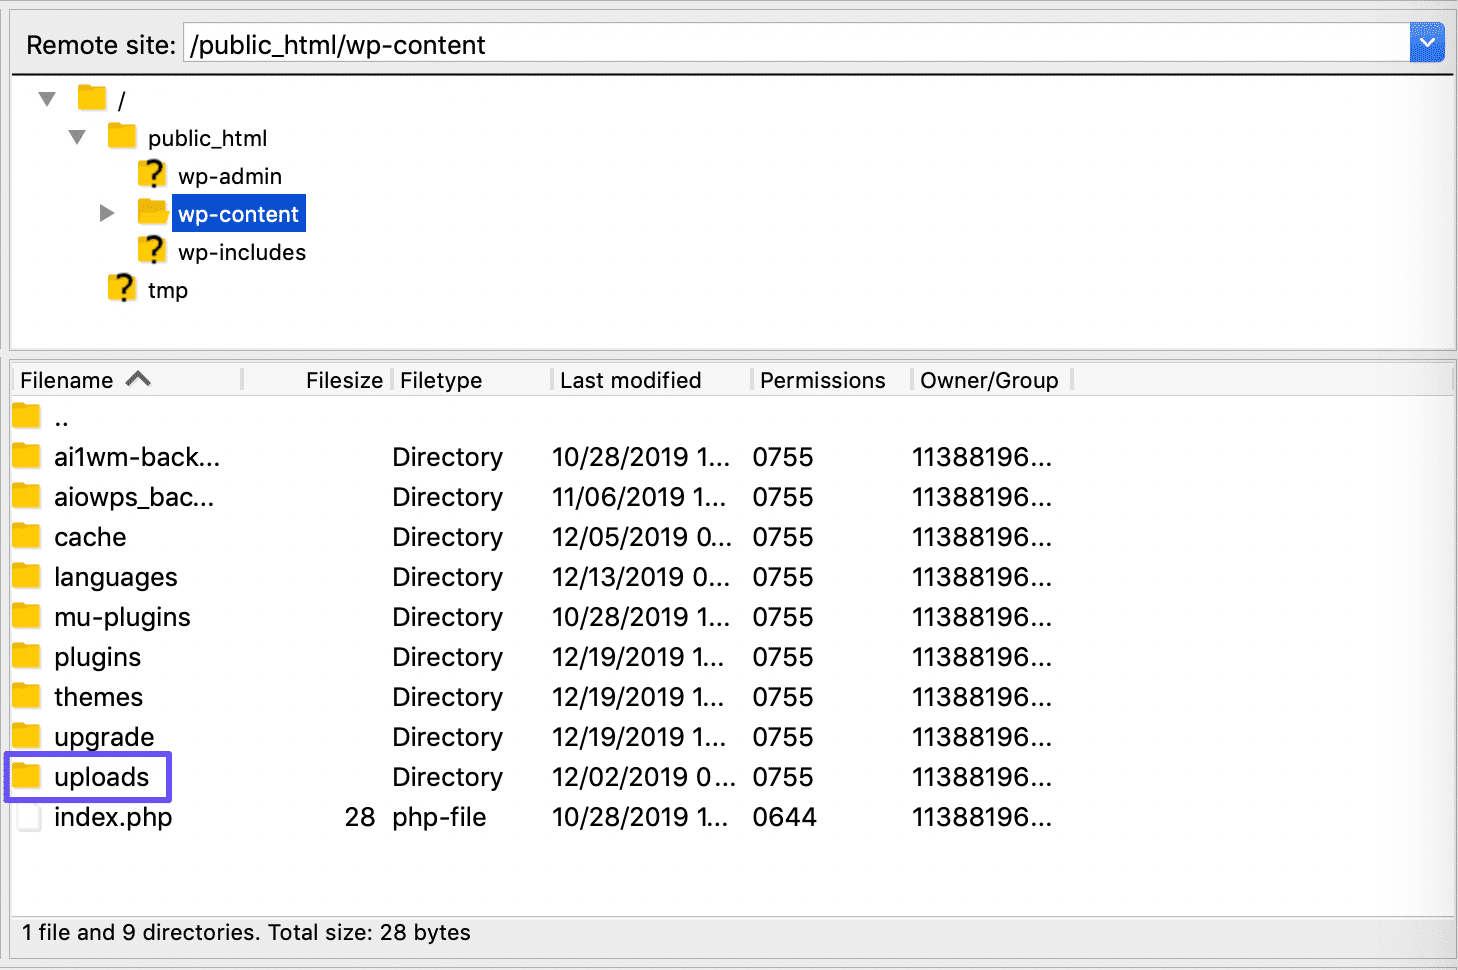 Uploading files to WordPress Media Library directory via FileZilla
Downloading Content from Your Media Library
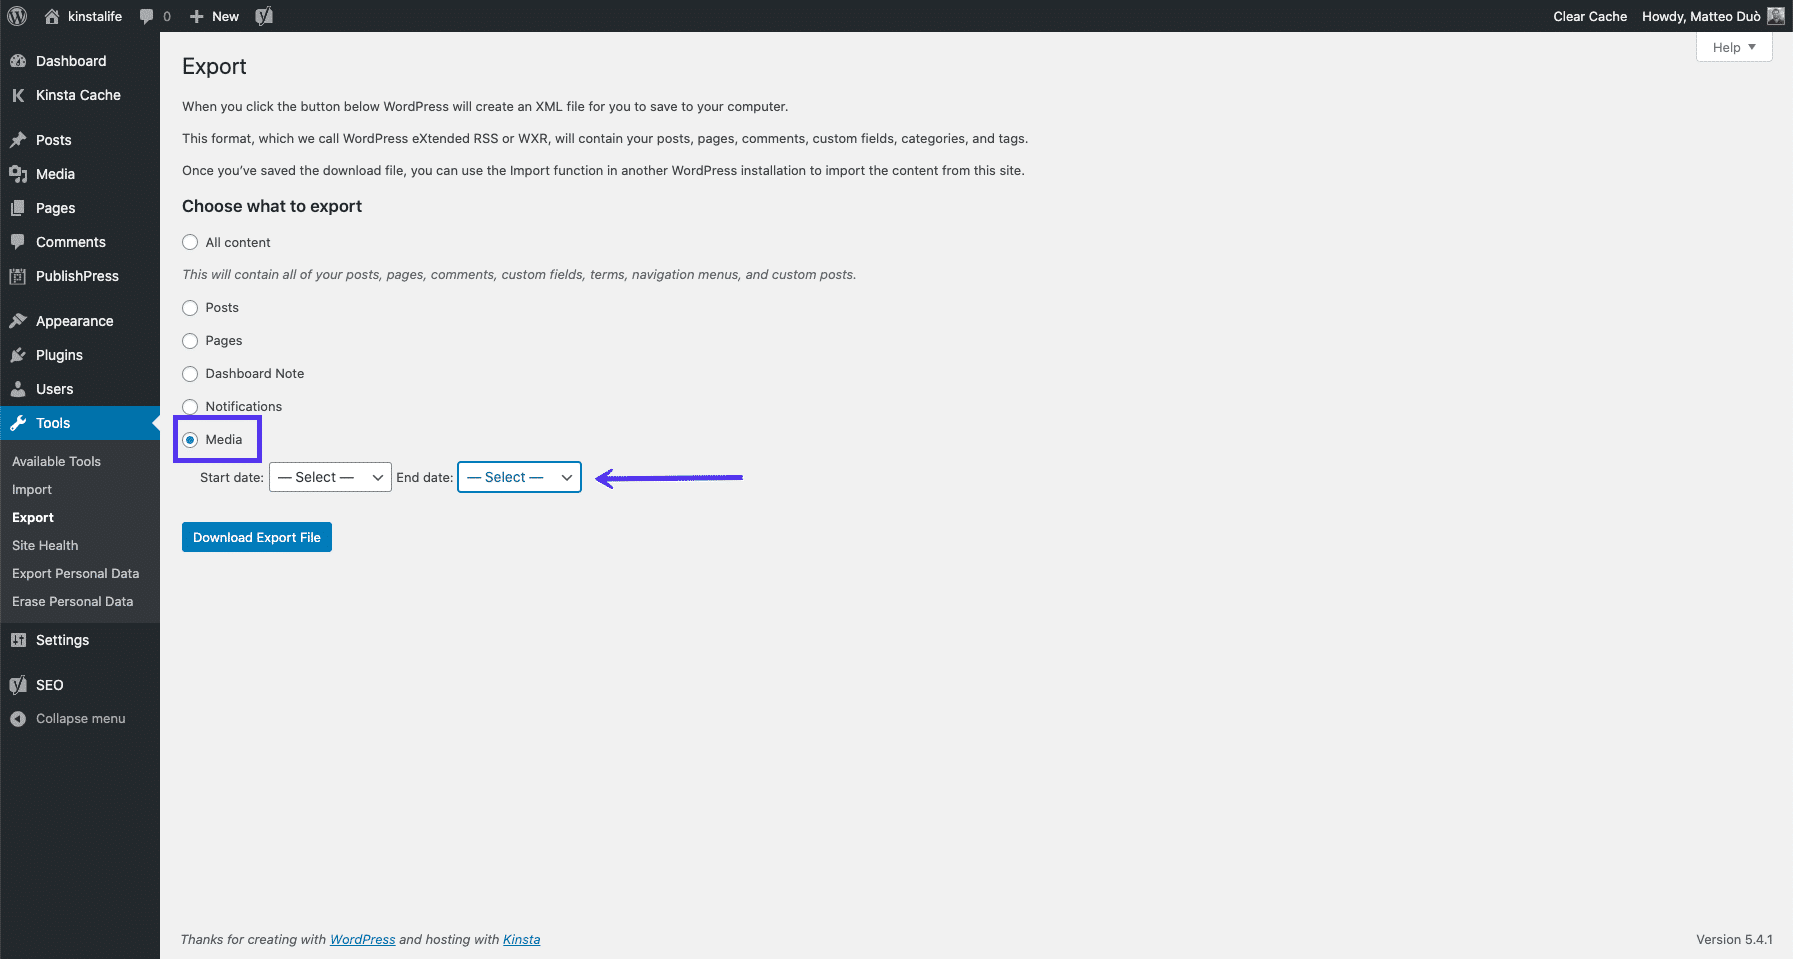
There may be instances where you need to download specific files from your Media Library to your local computer. WordPress provides a built-in functionality for this through its export tool. To initiate a download, navigate to Tools > Export in your WordPress dashboard.
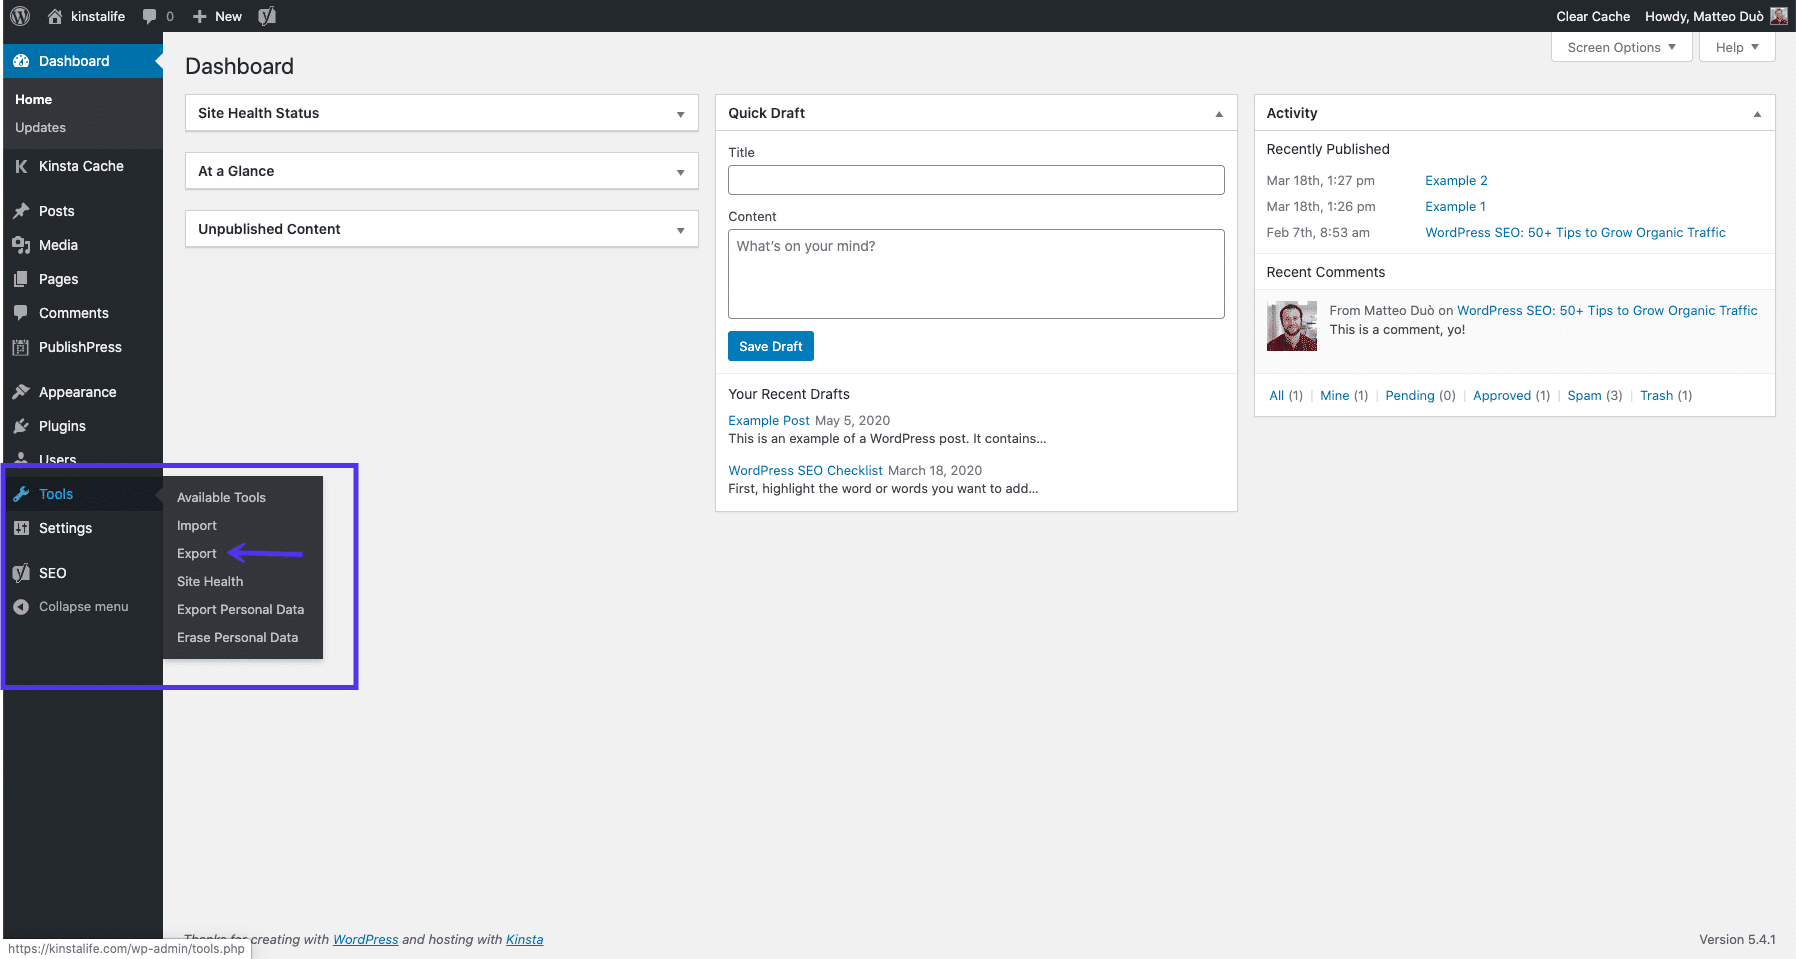 WordPress export tool
On the export screen, select the Media option. If your requirements are more precise, you can utilize the provided dropdown menus to specify a particular time frame for the uploaded files you wish to download.
 Exporting WordPress media
Once your selections are made, click the Download Export File button. This action will compile and download the chosen media files to your computer, making them available for offline use or migration.
Editing Images Within the Media Library
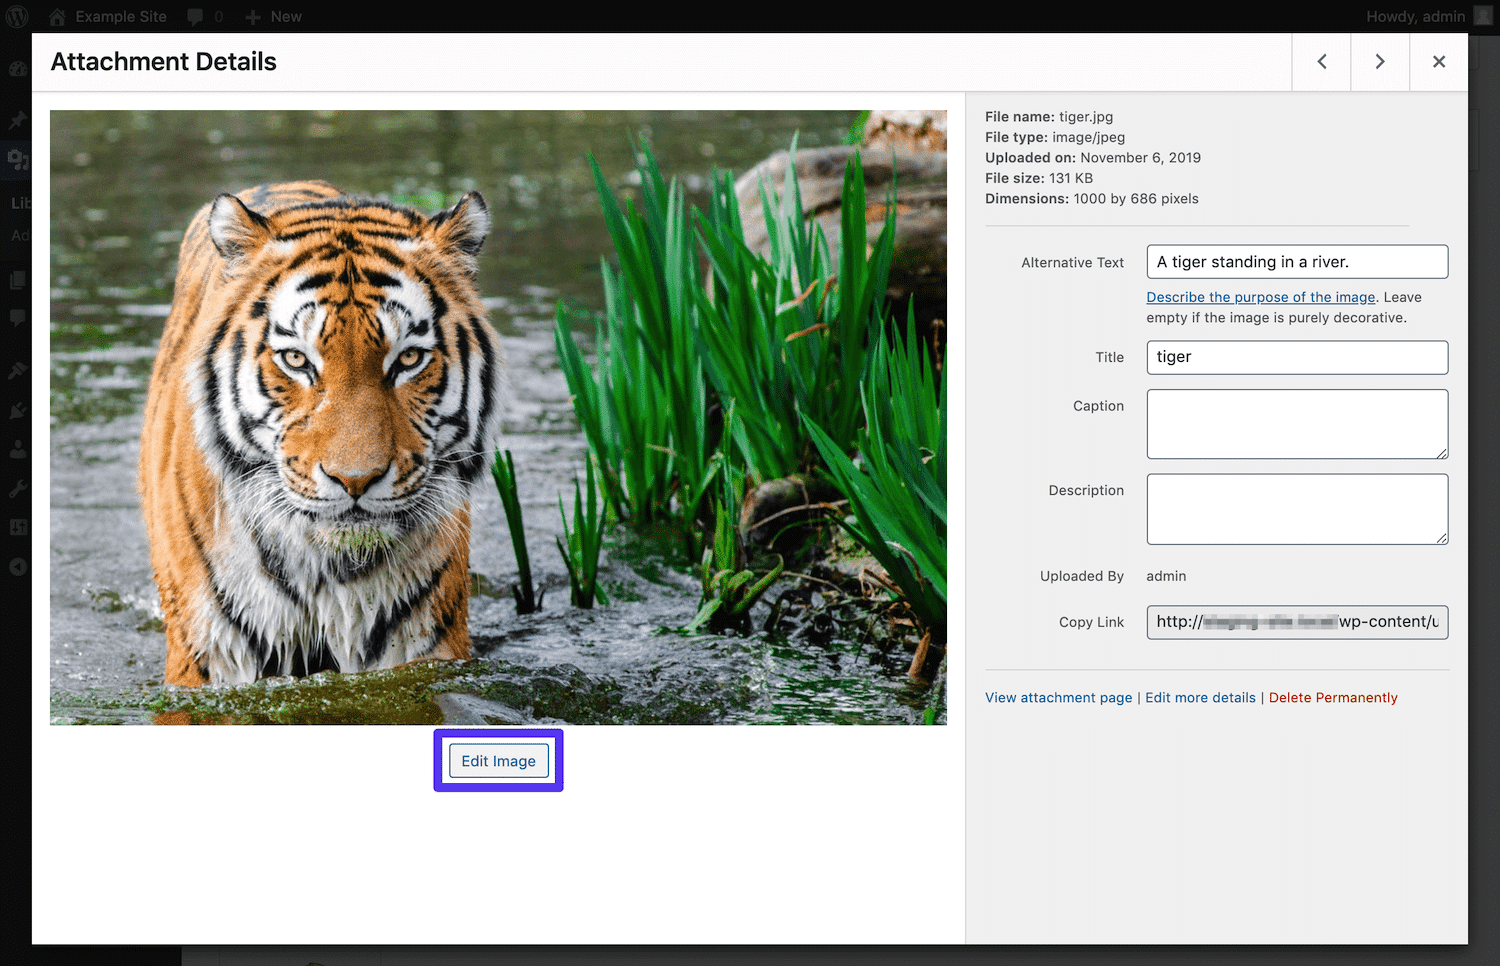
As previously mentioned, WordPress includes several native features for basic image editing. To access these tools, navigate to your WordPress Media Library, select the image file you wish to modify, and then click on the Edit image button.
 Edit Image button in WordPress
This action will open the integrated image editor, presenting you with a range of fundamental adjustments.
 WordPress image editor
The editor provides five primary modifications you can perform:
- Cropping: This function allows you to trim unwanted sections from your image.
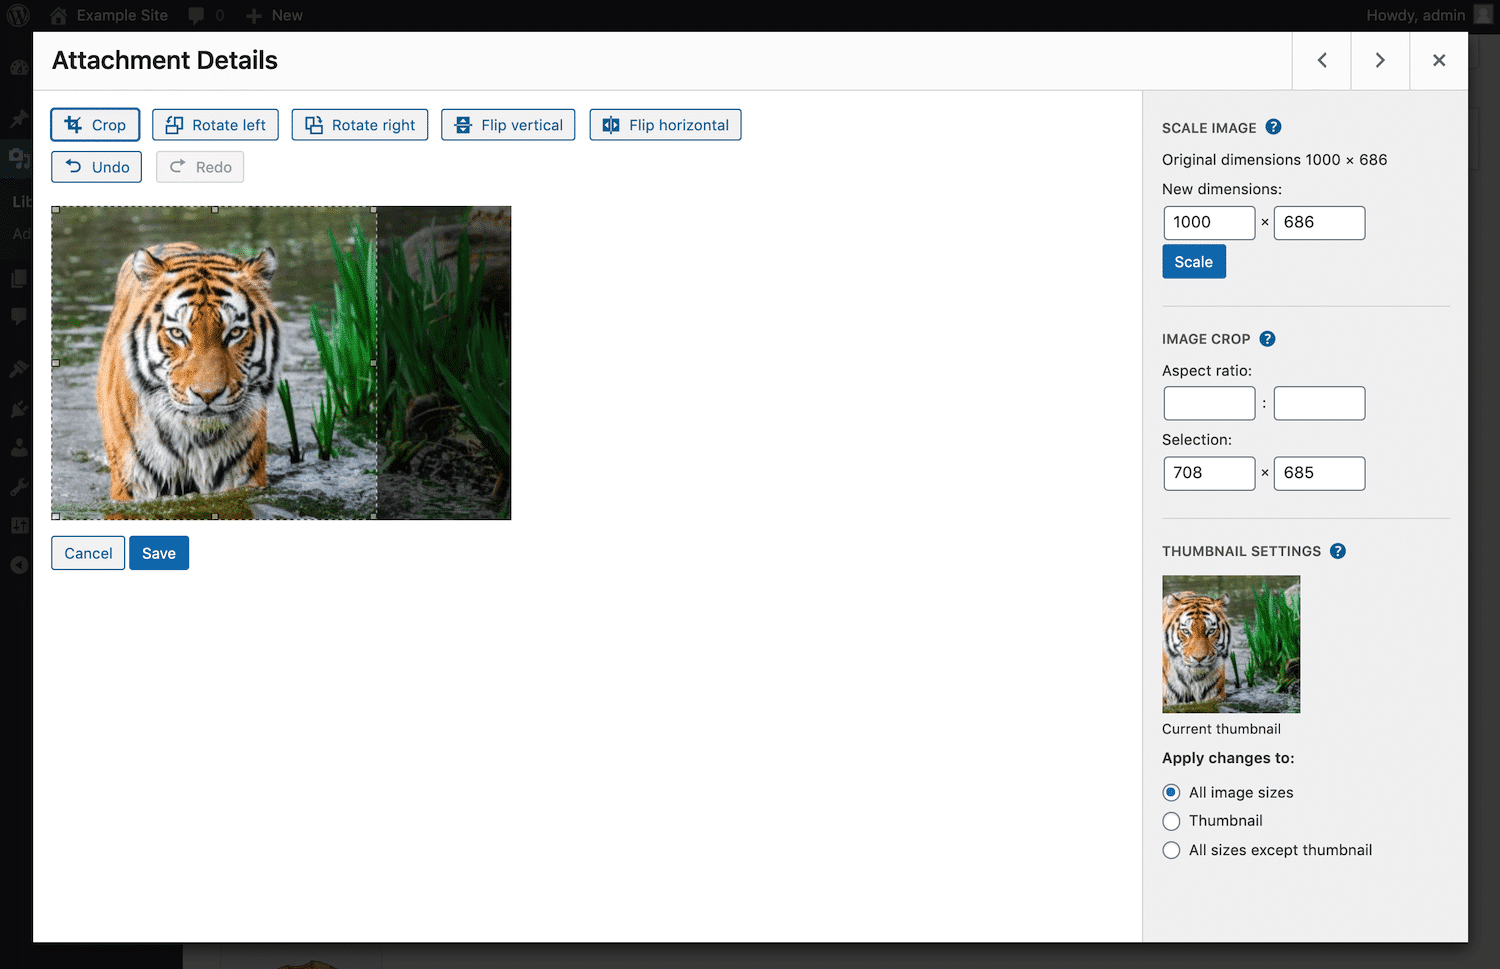 Image crop in WordPress
 - Rotating: You can rotate the image in 90-degree increments, either counterclockwise or clockwise.
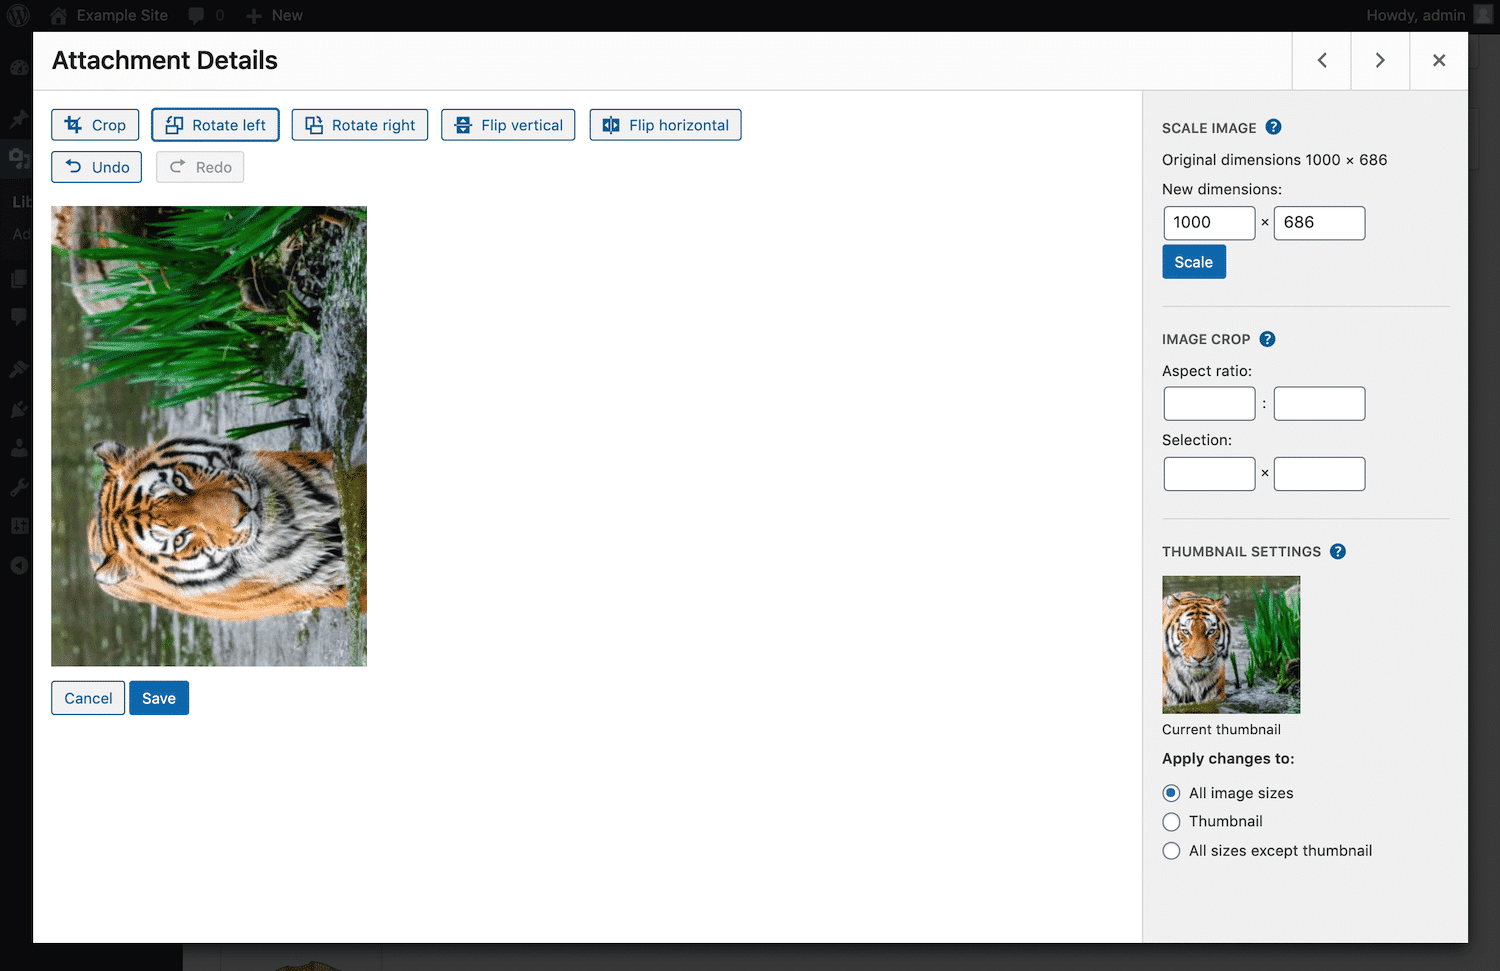 Image rotate left in WordPress
 - Flipping: Images can be flipped horizontally or vertically, creating a mirrored effect.
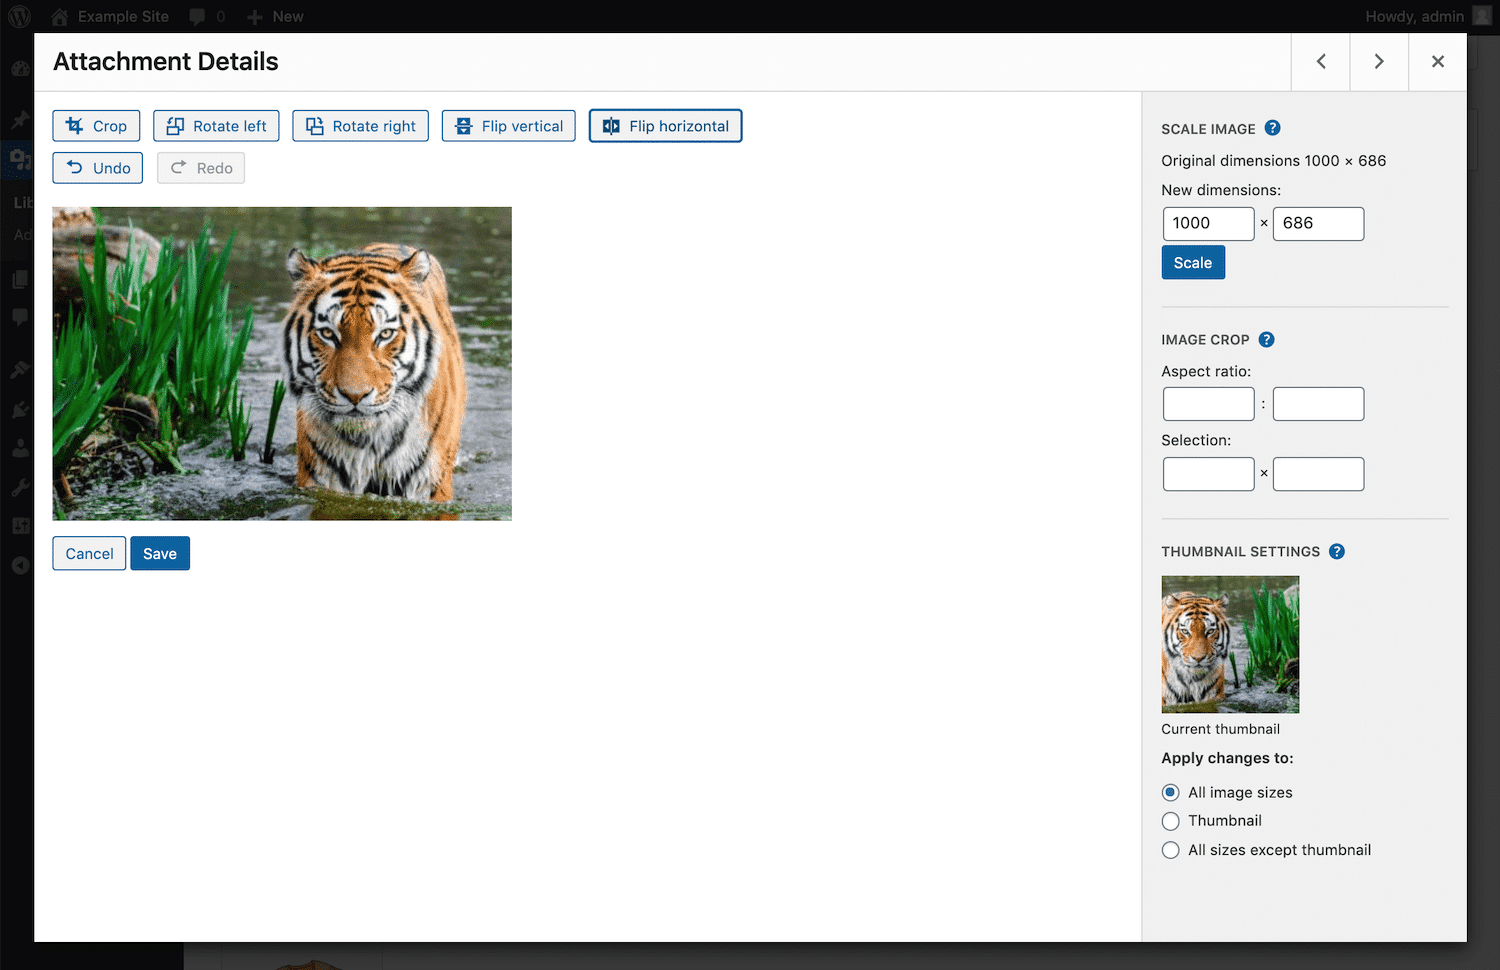 Image horizontal flip in WordPress
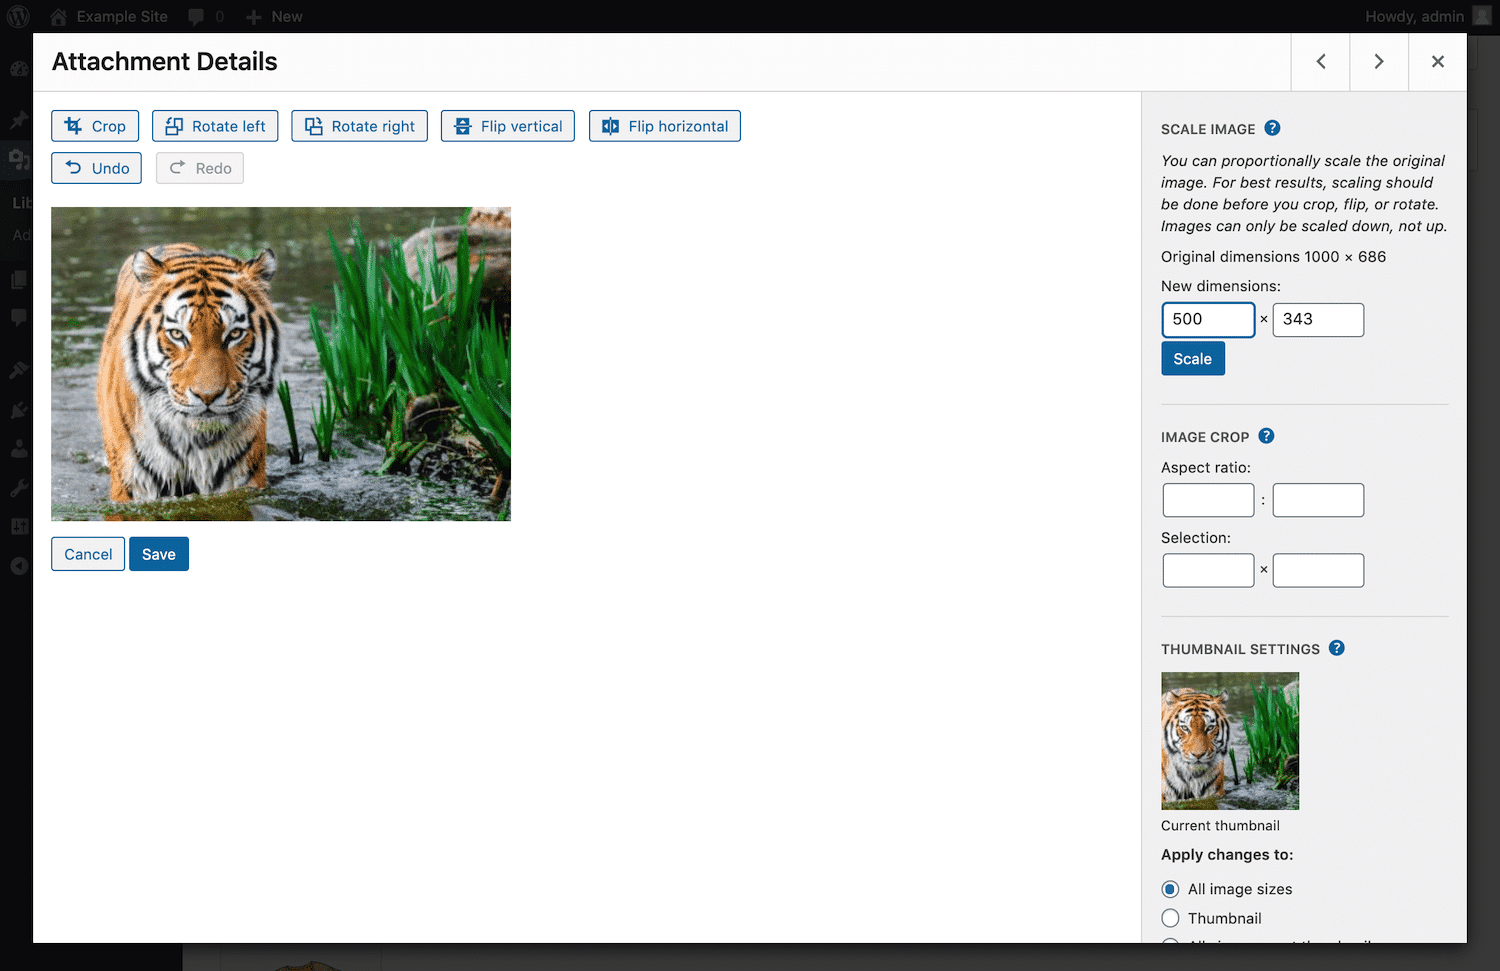
The remaining three settings are located in the sidebar. The first enables you to adjust the image's dimensions by scaling it. Simply input your desired height or width, and the complementary field will automatically populate, maintaining the aspect ratio. Afterward, click the Scale button to apply the changes.
 Scaling an image in WordPress
It is important to understand that while scaling down larger images is possible, increasing the size of an image within WordPress is not supported and can lead to a degradation in image quality.
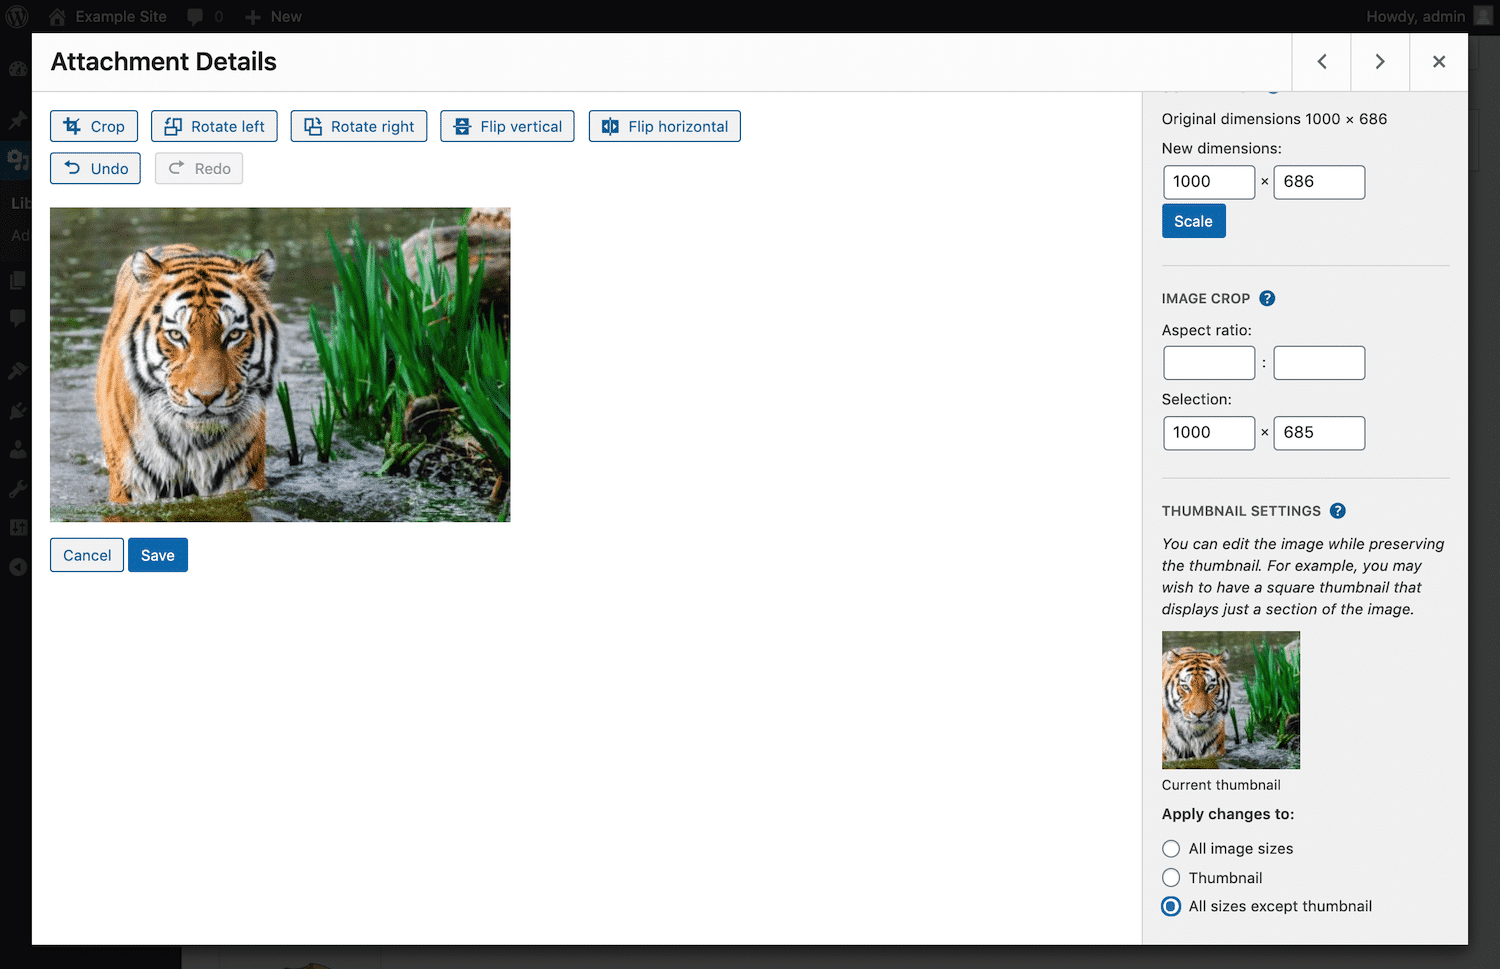
For more precise cropping, you can define specific aspect ratios or dimensions using the Aspect Ratio and Selection fields found under the Image Crop section.
 Setting the image crop selection dimensions in WordPress
Lastly, the Thumbnail Settings allow you to manage existing image thumbnails. You can preserve the current thumbnail or apply your edits to specific versions of the image by selecting the appropriate radio button.
 Thumbnail settings in the WordPress image editor
While WordPress's default image editing tools are convenient for quick adjustments, they offer limited functionality compared to professional photo editing software. They are suitable for basic tasks but will not replace more extensive modification tools, particularly for sites heavily reliant on photography or visual content.
Troubleshooting Common Media Library Issues
Despite its robustness, the WordPress Media Library can occasionally encounter issues. Understanding how to troubleshoot these common problems can save you considerable time and frustration.
Resolving HTTP Errors During Uploads
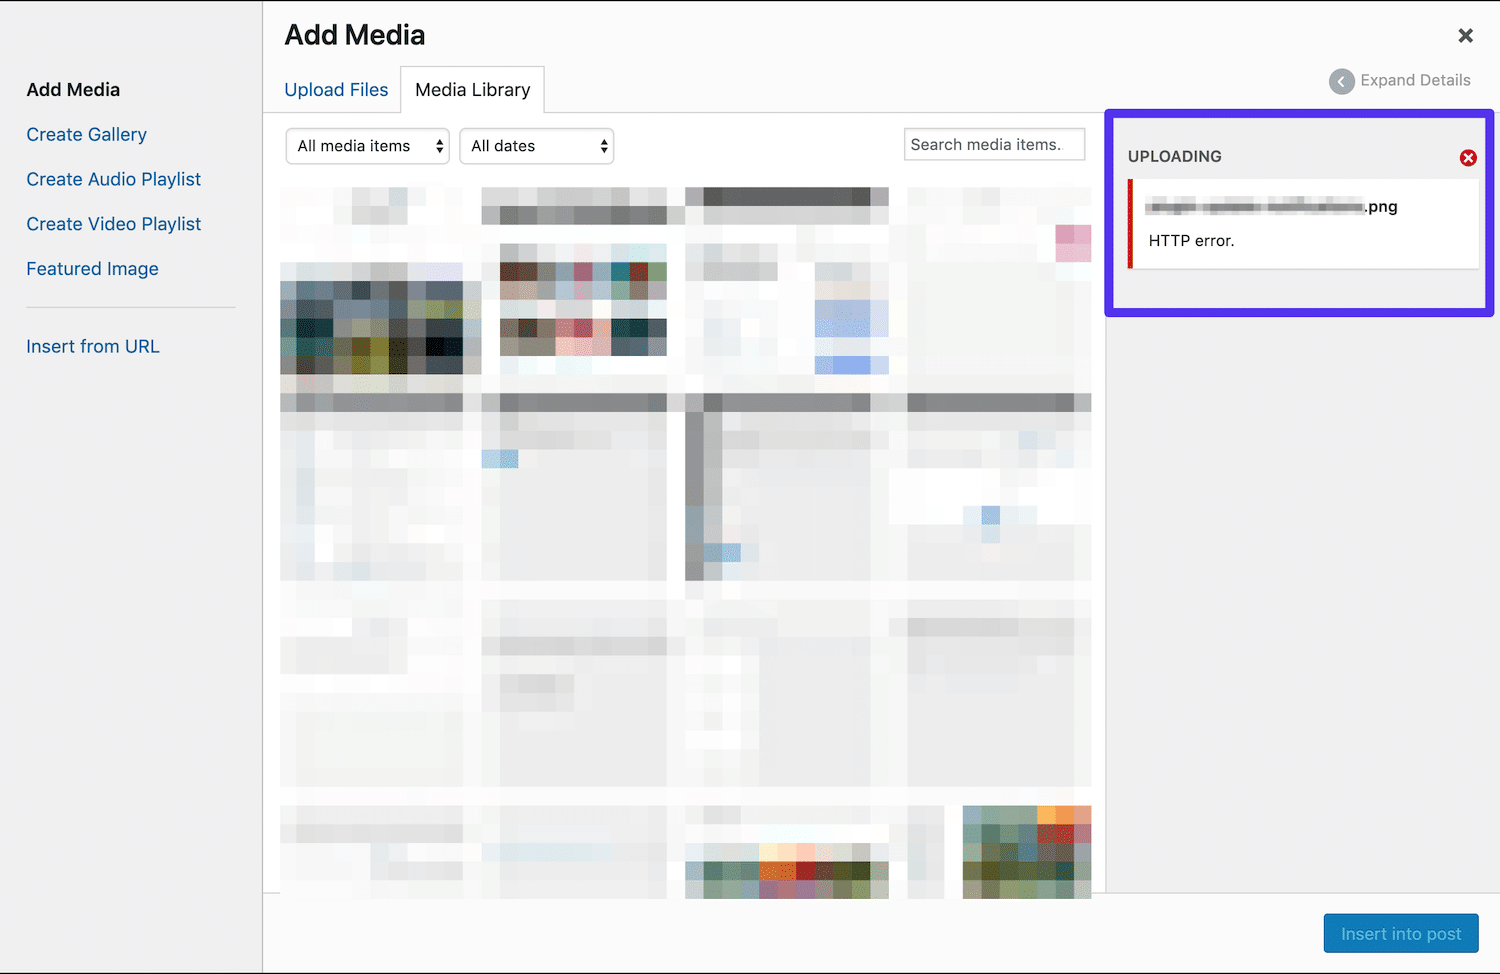
One frequently reported issue is an unspecified “HTTP error” that may appear when attempting to upload a new file through the editor.
 HTTP error on media upload
Often, this error is temporary, and simply waiting a few minutes before attempting the upload again can resolve it. If the HTTP error persists, it might indicate that your WordPress session has expired. In such cases, you will need to log in to your WordPress dashboard once more and then retry the file upload.
Addressing Media Library Loading Failures
Another problem some users encounter is the Media Library failing to load its content. This issue is frequently linked to conflicts involving your active plugins or your website's theme. To diagnose this error, a good first step is to deactivate all your plugins and switch to a default WordPress theme.
If the Media Library then loads correctly, it confirms a conflict. You will need to systematically reactivate your plugins and switch themes one by one to pinpoint the exact cause of the conflict and resolve it permanently.
Fixing “Failed to Write File to Disk” Errors
Occasionally, you might encounter an “Upload: Failed to Write File to Disk” error when uploading files via the Media Library. This problem typically arises when your upload directory lacks the necessary write permissions. You can verify and adjust your filesystem permissions using WordPress’s built-in Site Health tool, ensuring the directory is properly configured for file uploads.
Enhancing Your Media Library with Plugins
While WordPress offers robust native functionality for its Media Library, extended use often reveals opportunities for improvement through external solutions. For instance, as your collection of files grows, maintaining organization within the Media Library can become challenging.
Beyond the basic search and filter options, WordPress doesn't inherently offer advanced organizational tools for large volumes of media. Fortunately, several plugins are available that allow you to structure your media files into a more manageable folder system.
Organizing Media with Folder Plugins
The WordPress Media Library Folders plugin stands out as a popular choice for this purpose.
 WordPress Media Library Folders WordPress plugin
In addition to enabling the creation of media file folders, this plugin seamlessly integrates with MaxGalleria, allowing you to build image galleries directly from within the Media Library.
 WordPress Gallery MaxGalleria WordPress plugin
An enhanced version of WordPress Media Library Folders offers advanced integration with other popular gallery and custom fields plugins. This expanded functionality includes the ability to create custom categories and tags, providing even greater flexibility for organizing your digital assets.
Replacing Media Files Efficiently
Another functional gap in WordPress is the native ability to replace existing media files with updated versions. Given that media files can be quite large, repeatedly uploading new versions and manually deleting old ones can be inefficient. To streamline this process, the Enable Media Replace plugin offers a significant time-saving solution.
 Enable Media Replace WordPress plugin
This plugin allows you to directly replace old images or files with new ones. Critically, it also provides the option to update all links pointing to the previous file, effectively preventing broken media links across your site.
The Real Media Library is another highly regarded folder and file manager that simplifies your media management workflow.
 Real Media Library WordPress plugin
This tool empowers you to manage various file types—including pictures, videos, and documents—directly within WordPress. A notable advantage is its availability in 12 languages, enhancing usability for a global audience. While a free version is available, a more feature-rich version can be acquired for users with more extensive needs.
Advanced Media Library Features: Four Practical Hacks
While the native functionalities of the WordPress Media Library fulfill most administrative requirements, WordPress also provides a rich set of functions and hooks that allow users to significantly enhance specific features without relying on third-party plugins. Let’s explore four practical examples of how to leverage these capabilities.
1. Adding Custom Metadata to Attachment Post Types
Each time you upload a media file, WordPress automatically generates an attachment post type. These attachments, similar to other post types, are recorded in the wp_posts table of your database, with their associated metadata stored in the wp_postmeta table.
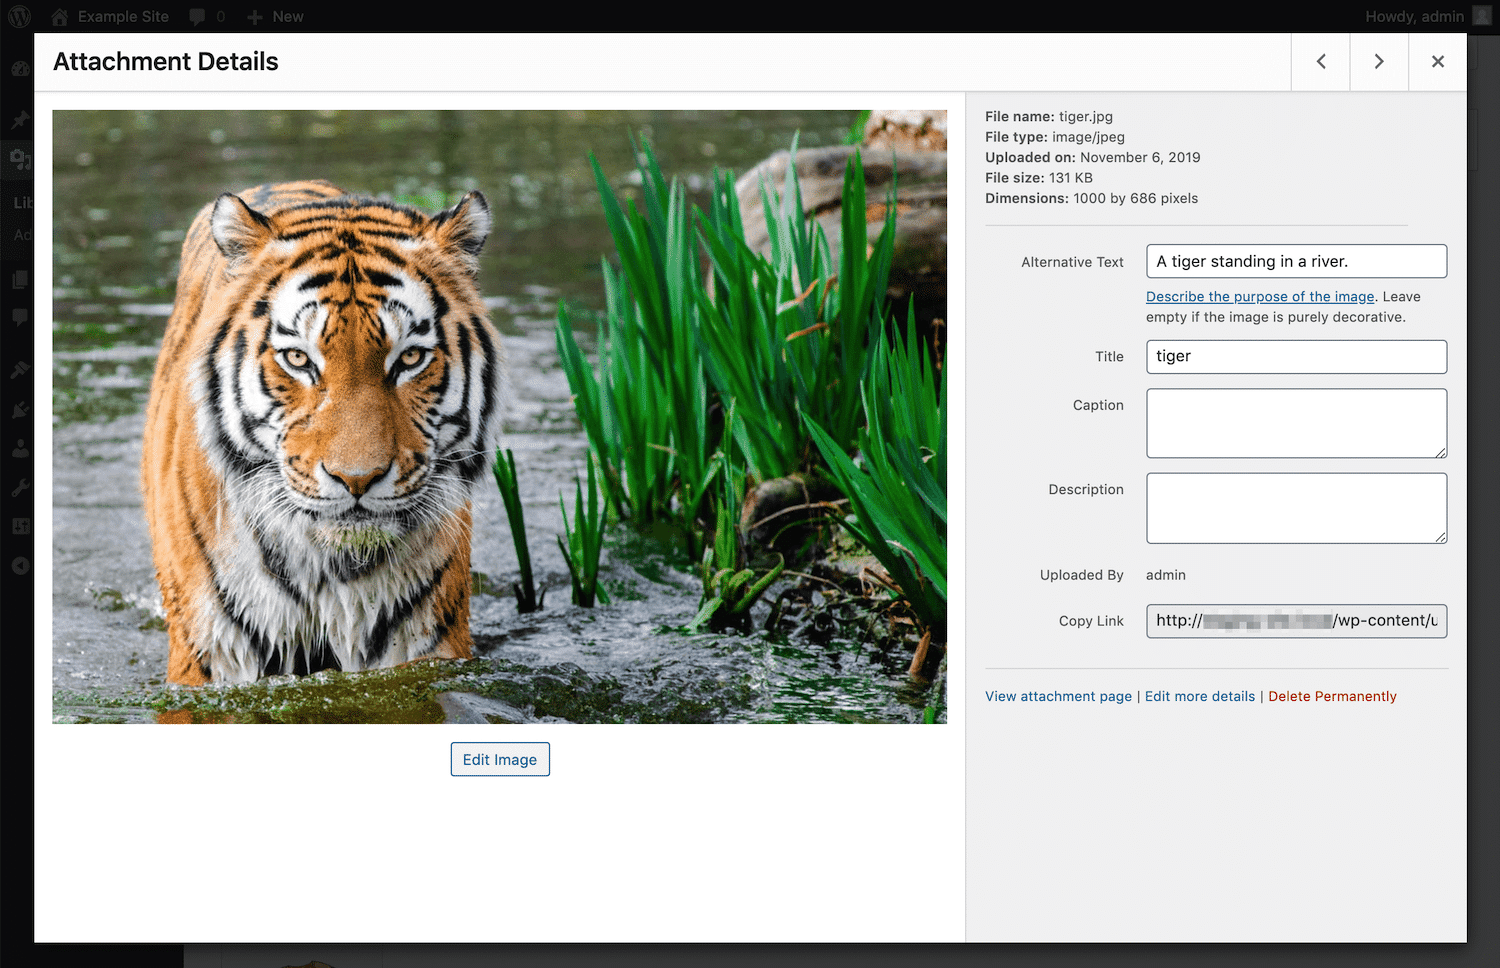 Default attachment details panel
The wp_posts table holds essential data such as the attachment's description (post_content), caption (post_excerpt), author (post_author), title (post_title), status (post_status), and MIME type (post_mime_type). The wp_postmeta table, on the other hand, stores diverse metadata including the attached file URL, image dimensions, MIME types, and detailed EXIF (Exchangeable Image File format) and IPTC (International Press Telecommunications Council) metadata.
Occasionally, you might need to extend attachments with custom metadata, such as a document's author, an associated external URL, or the precise location where a photograph was captured. Implementing custom meta fields for attachments differs slightly from adding them to standard posts and necessitates the use of specific hooks and functions.
To begin, you’ll need to integrate the required custom fields into the Edit Media screen. This is achieved by filtering the available attachment fields through the attachment_fields_to_edit filter, typically located in wp-admin/includes/media.php. Here's an example:
function media_hacks_attachment_field_to_edit( $form_fields, $post ){
	$media_author = get_post_meta( $post->ID, 'media_author', true );

	$form_fields['media_author'] = array(
		'value' => $media_author ? $media_author : '',
		'label' => __( 'Author' )
	);
	return $form_fields;
}
add_filter( 'attachment_fields_to_edit', 'media_hacks_attachment_field_to_edit', 10, 2 );
This function takes two arguments: the $form_fields array (containing existing form fields) and the $post object. It first retrieves any existing 'media_author' value using get_post_meta and then adds a new 'media_author' element to the $form_fields array. The callback then returns the modified $form_fields array.
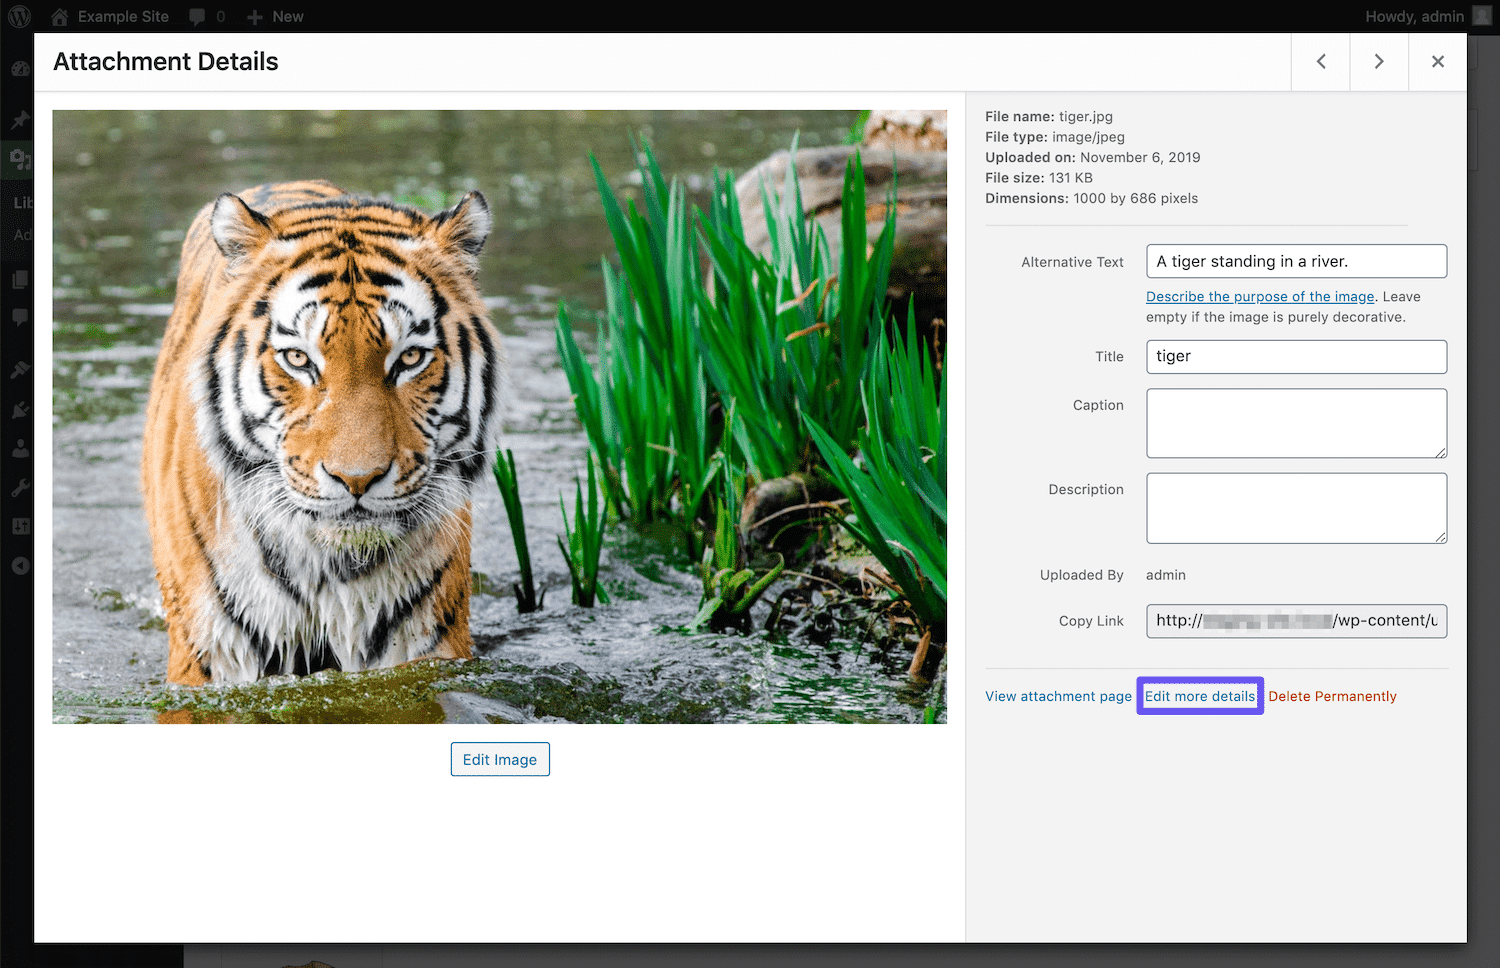
Once implemented, this will display a new custom field on the Edit Media page. You can access this page by selecting an image from your Media Library and clicking the Edit more details link.
 Accessing WordPress Edit Media page
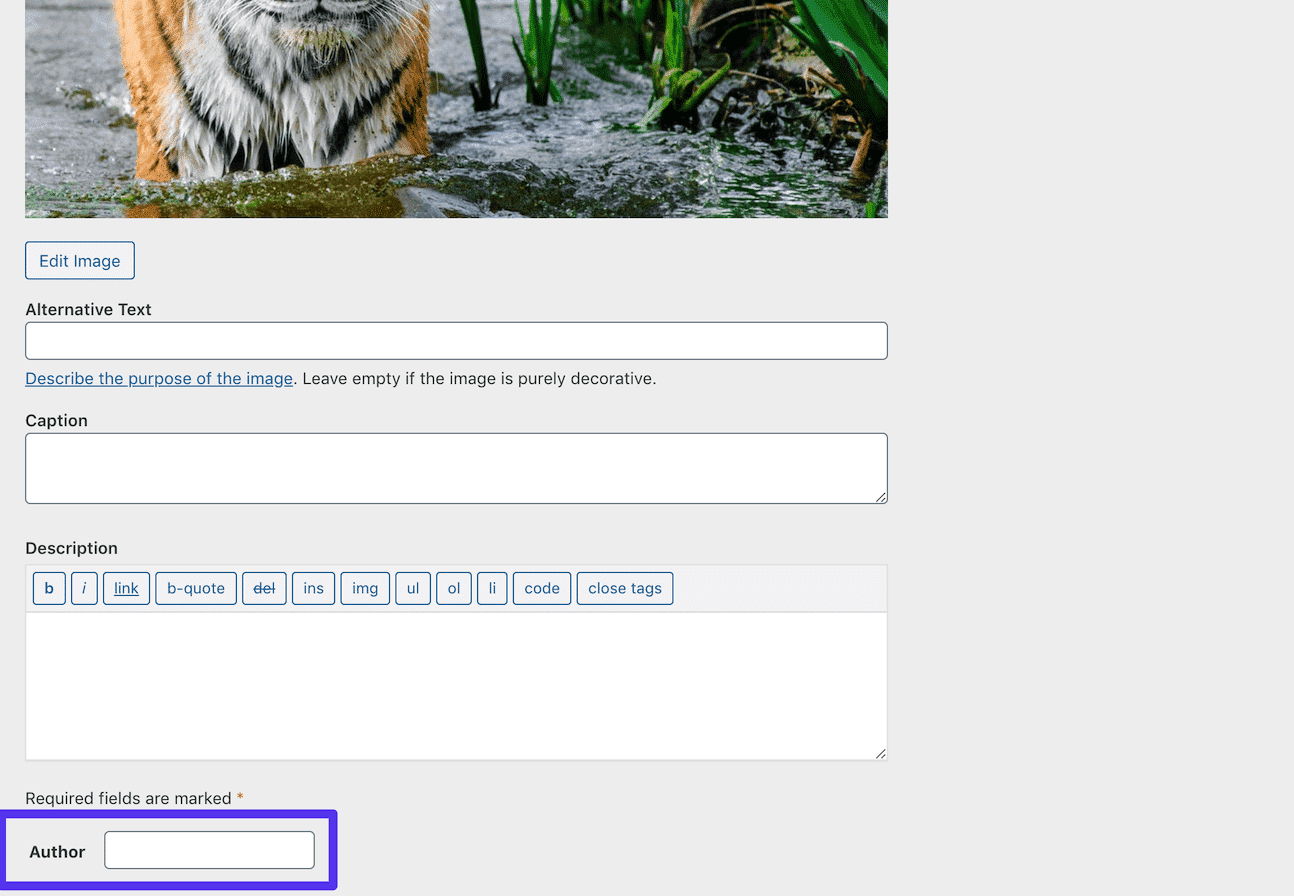
On the subsequent screen, your newly added custom metadata field, such as "Author," will be visible at the bottom.
 New “author” metadata field
The next crucial step is saving the user's input. This is accomplished by hooking a new function to the edit_attachment action, as demonstrated below:
function media_hacks_edit_attachment( $attachment_id ){
	if ( isset( $_REQUEST['attachments'][$attachment_id]['media_author'] ) ) {

		$media_author = $_REQUEST['attachments'][$attachment_id]['media_author'];

		update_post_meta( $attachment_id, 'media_author', $media_author );
	}
}
add_action( 'edit_attachment', 'media_hacks_edit_attachment' );
This function accepts the $attachment_id of the current media file. It first verifies if a valid value for the custom meta field has been submitted and then registers this value using the update_post_meta function. After these steps, the 'media_author' value can be retrieved using get_post_meta($post->ID, 'media_author', true); and subsequently displayed anywhere on the frontend of your website.
2. Displaying EXIF and IPTC Metadata in the Edit Media Screen
WordPress inherently stores extended metadata, such as EXIF and IPTC, for JPEG and TIFF image types. Building on the knowledge of adding custom fields to the Edit Media screen, you can extend this functionality to display this automatically captured data.
To achieve this, you need to modify the initial callback function as follows, typically within wp-admin/includes/media.php:
function media_hacks_attachment_fields_to_edit( $form_fields, $post ){
	// get post mime type
	$type = get_post_mime_type( $post->ID );
	// get the attachment path
	$attachment_path = get_attached_file( $post->ID );
	// get image metadata
	$metadata = wp_read_image_metadata( $attachment_path );
	if( 'image/jpeg' == $type ){
		if( $metadata ) {
			$exif_data = array(
				'aperture'          => 'Aperture',
				'camera'            => 'Camera',
				'created_timestamp' => 'Timestamp',
				'focal_length'      => 'Focal Length',
				'iso'               => 'ISO',
				'shutter_speed'     => 'Exposure Time',
				'orientation'       => 'Orientation' );
			foreach ( $exif_data as $key => $value ) {
				$exif = $metadata[$key];
				$form_fields[$key] = array(
					'value' => $exif ? $exif : '',
					'label' => __( $value ),
					'input' => 'html',
					'html'  => "<input type='text' class='widefat' name='attachments[".$post->ID."][$key]' value='" . $exif . "' />"
				);
			}
		}
	}
	return $form_fields;
}
add_filter( 'attachment_fields_to_edit', 'media_hacks_attachment_fields_to_edit', 10, 2 );
This code snippet effectively utilizes several core WordPress functions:
get_post_mime_type: Retrieves the MIME type of an attachment based on its ID.get_attached_file: Obtains the full file path for an attached media item.wp_read_image_metadata: Extracts EXIF or IPTC metadata from an image file, if available.
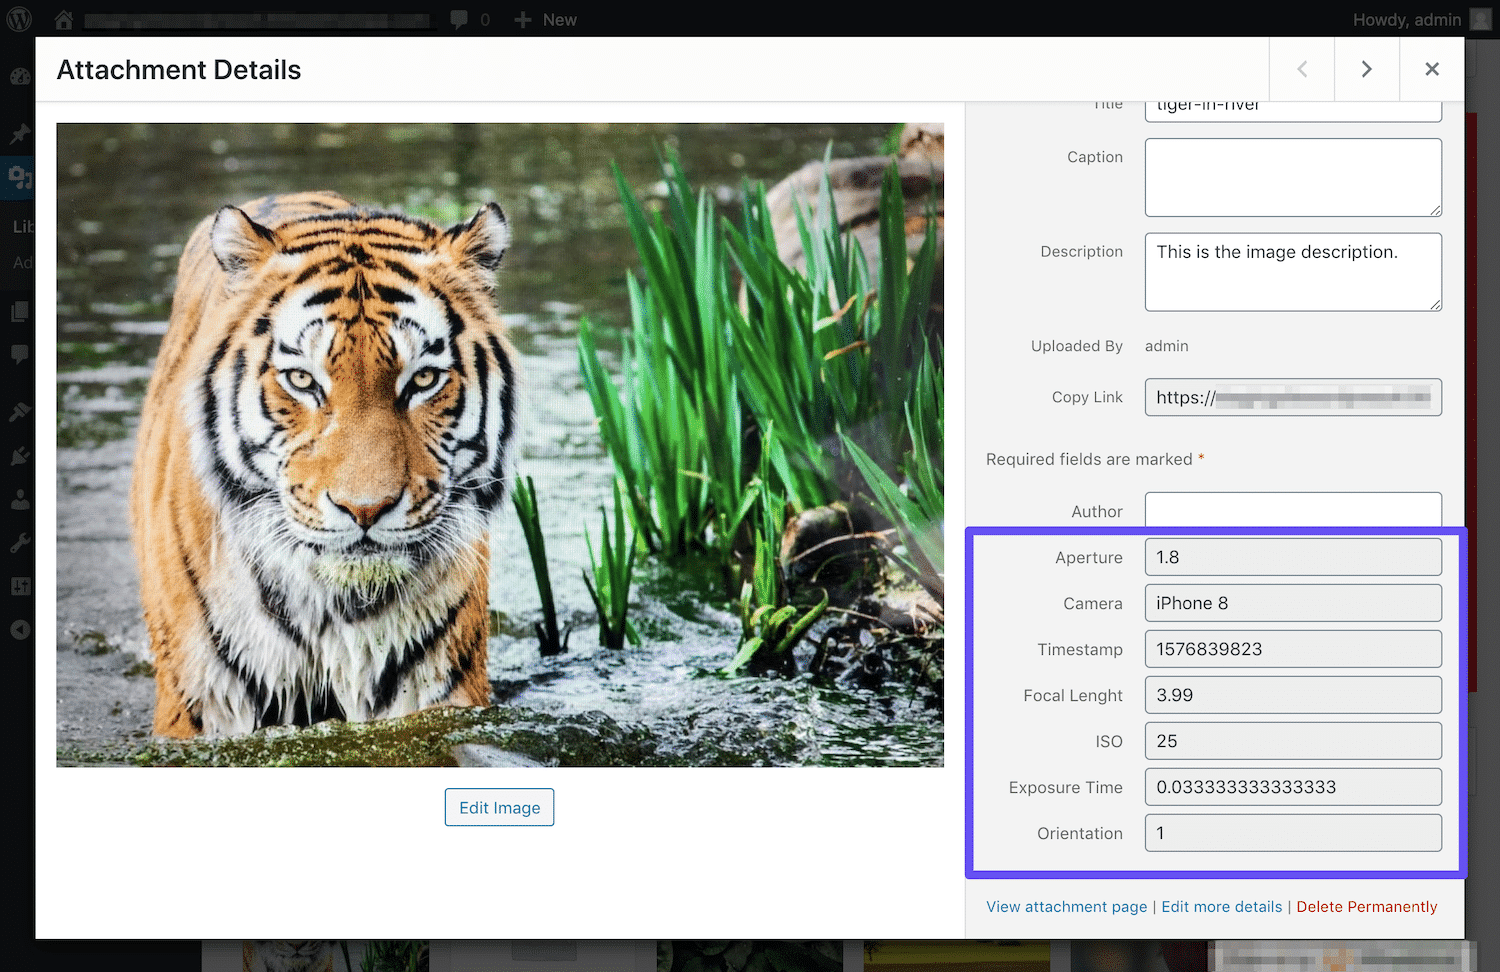
The logic checks if the image's MIME type is "image/jpeg" and if any metadata exists. If both conditions are met, an array defining the desired EXIF data fields is created. Subsequently, a form field is generated for each element in this array, populating the 'html' input with the corresponding metadata. This process automatically displays detailed information such as aperture, camera model, and exposure time.
 EXIF and IPTC metadata fields in WordPress attachment details
It's important to note that you do not need to explicitly save EXIF and IPTC metadata, as WordPress automatically stores this information in the wp_postmeta table during the initial image upload.
3. Displaying Extended Metadata on the Frontend
While accessing detailed image information on the backend is valuable, you might also want to present this extended metadata to your website visitors on the frontend. This requires a minor modification to your theme's files.
You can achieve this by appending the metadata to the attachment description using the the_content filter, typically applied in wp-admin/includes/post.php, as shown in this example:
function media_hacks_the_content( $content ){
global $post;
if( is_attachment() && 'image/jpeg' == get_post_mime_type( $post->ID ) ) {
$fields = wp_get_attachment_metadata( $post->ID );
$meta = $fields['image_meta'];
if( ! empty( $meta['camera'] ) ){
$custom_content = "
<ul>
<li>Camera: {$meta['camera']}</li>
<li>Created timestamp: {$meta['created_timestamp']}</li>
<li>Aperture: {$meta['aperture']}</li>
<li>Focal length: {$meta['focal_length']}</li>
<li>ISO: {$meta['iso']}</li>
<li>Shutter speed: {$meta['shutter_speed']}</li>
<li>Orientation: {$meta['orientation']}</li>
</ul>";
$content .= $custom_content;
}
}
return $content;
}
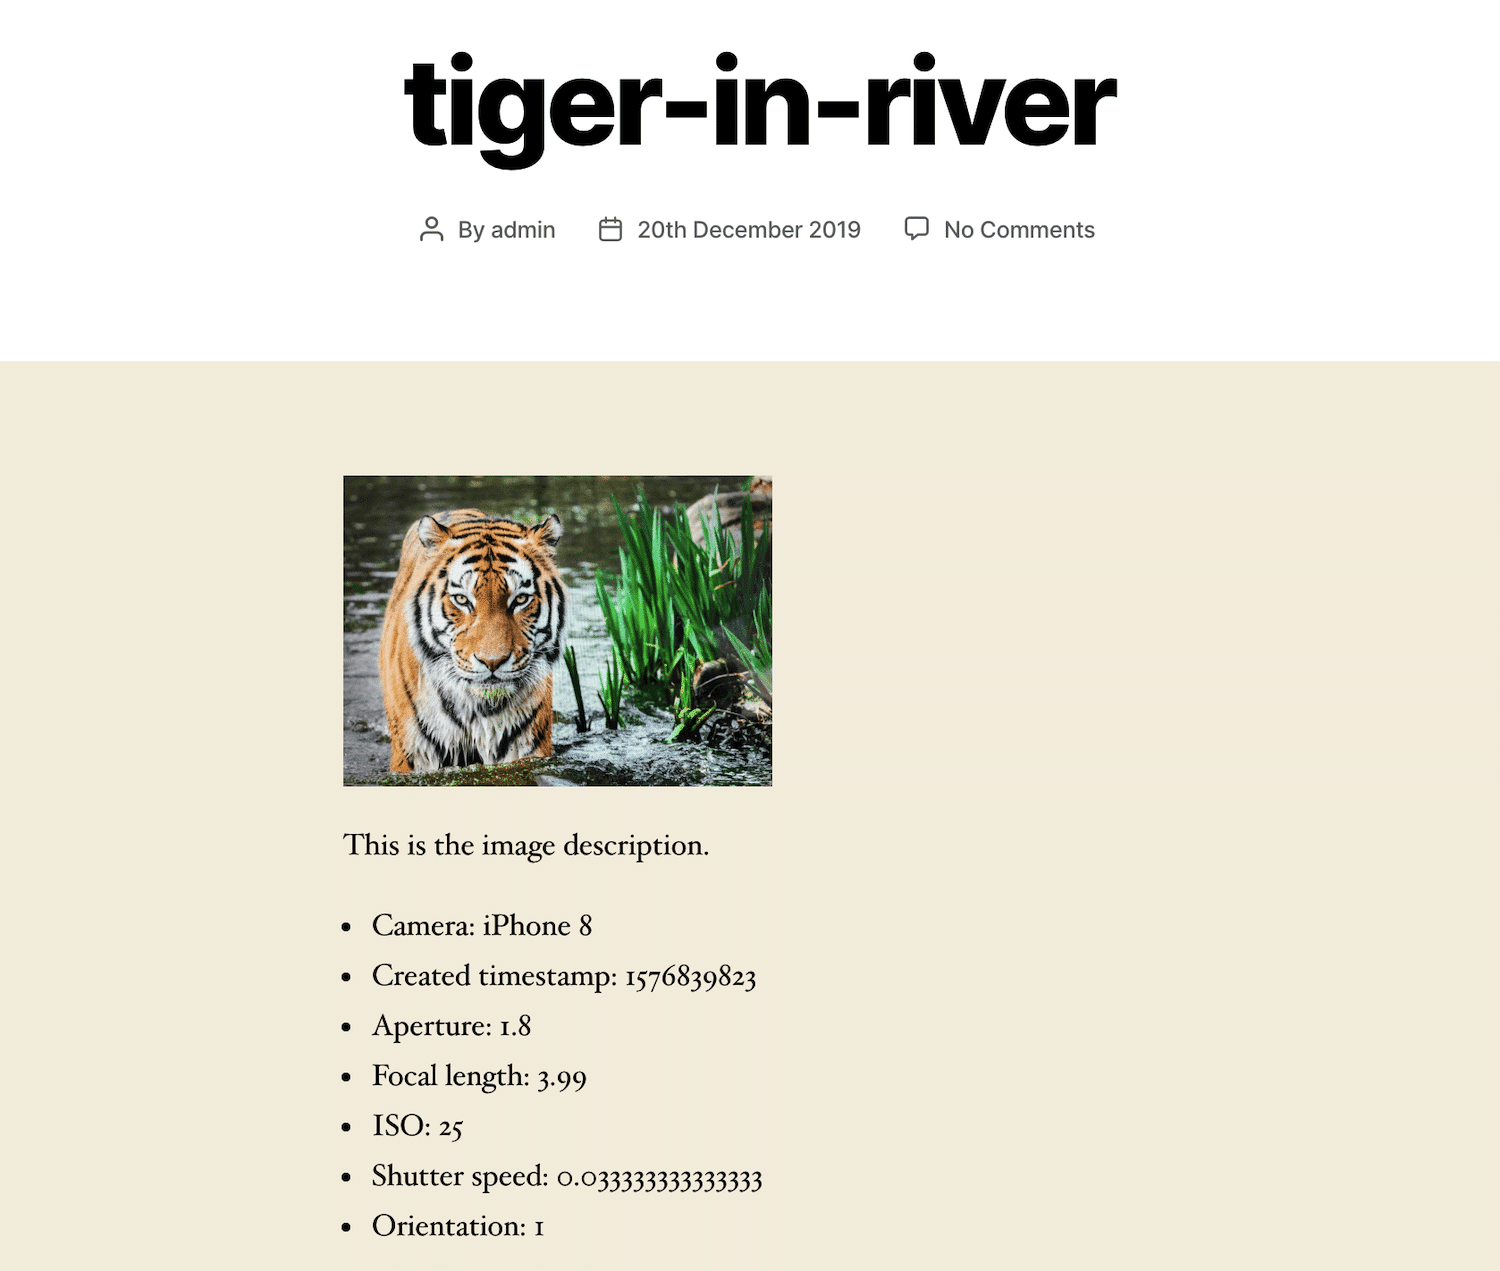
add_filter( 'the_content', 'media_hacks_the_content' );In this function, the wp_get_attachment_metadata function is invoked to retrieve all available metadata for the current attachment. If the current post type is "attachment" and its MIME type is "image/jpeg", the relevant image metadata is extracted and formatted into an unordered list of fields. This list is then appended to the existing post content, making the technical details of the image visible to frontend users.
 EXIF and IPTC metadata displayed on an attachment page
The screenshot above illustrates how the extended EXIF and IPTC metadata can be elegantly displayed directly on an attachment page, enriching the content for visitors.
4. Publishing a Photo Archive
By default, WordPress does not display archives of attachment post types. This behavior stems from the has_archive option for attachment post types being set to false. Furthermore, while standard posts typically have a default post_status of "publish" in the $query object, attachments default to "inherit." Consequently, attachments will not appear in archives unless the query's post_status is explicitly set to "inherit" or "any."
To enable and display image archives, you will need to define two distinct functions. The first function filters the arguments of a specified post type and sets the has_archive property for attachments to true:
function media_hacks_register_post_type_args( $args, $post_type ){
	if( $post_type == 'attachment' ){
		$args['has_archive'] = true;
	}
	return $args;
}
add_filter( 'register_post_type_args', 'media_hacks_register_post_type_args', 10, 2 );
The second function is responsible for setting custom values for the post_mime_type and post_status query variables:
function media_hacks_pre_get_posts( $query ){
	if ( !is_admin() && $query->is_main_query() ) {
		if( is_post_type_archive('attachment') ){
			$query->set('post_mime_type', 'image/jpeg');
			$query->set( 'post_status', 'inherit' );
		}
	}
}
add_action( 'pre_get_posts', 'media_hacks_pre_get_posts' );
This function is hooked to the pre_get_posts action, which executes after the main query has been generated but before it runs. Since the $query object is passed by reference, any alterations to this instance will directly impact the original query. Therefore, it is crucial to ensure you are modifying the correct query. Once these functions are implemented, navigating to https://yourdomain.com/?post_type=attachment in your browser should reveal an archive dedicated to your JPEG images.
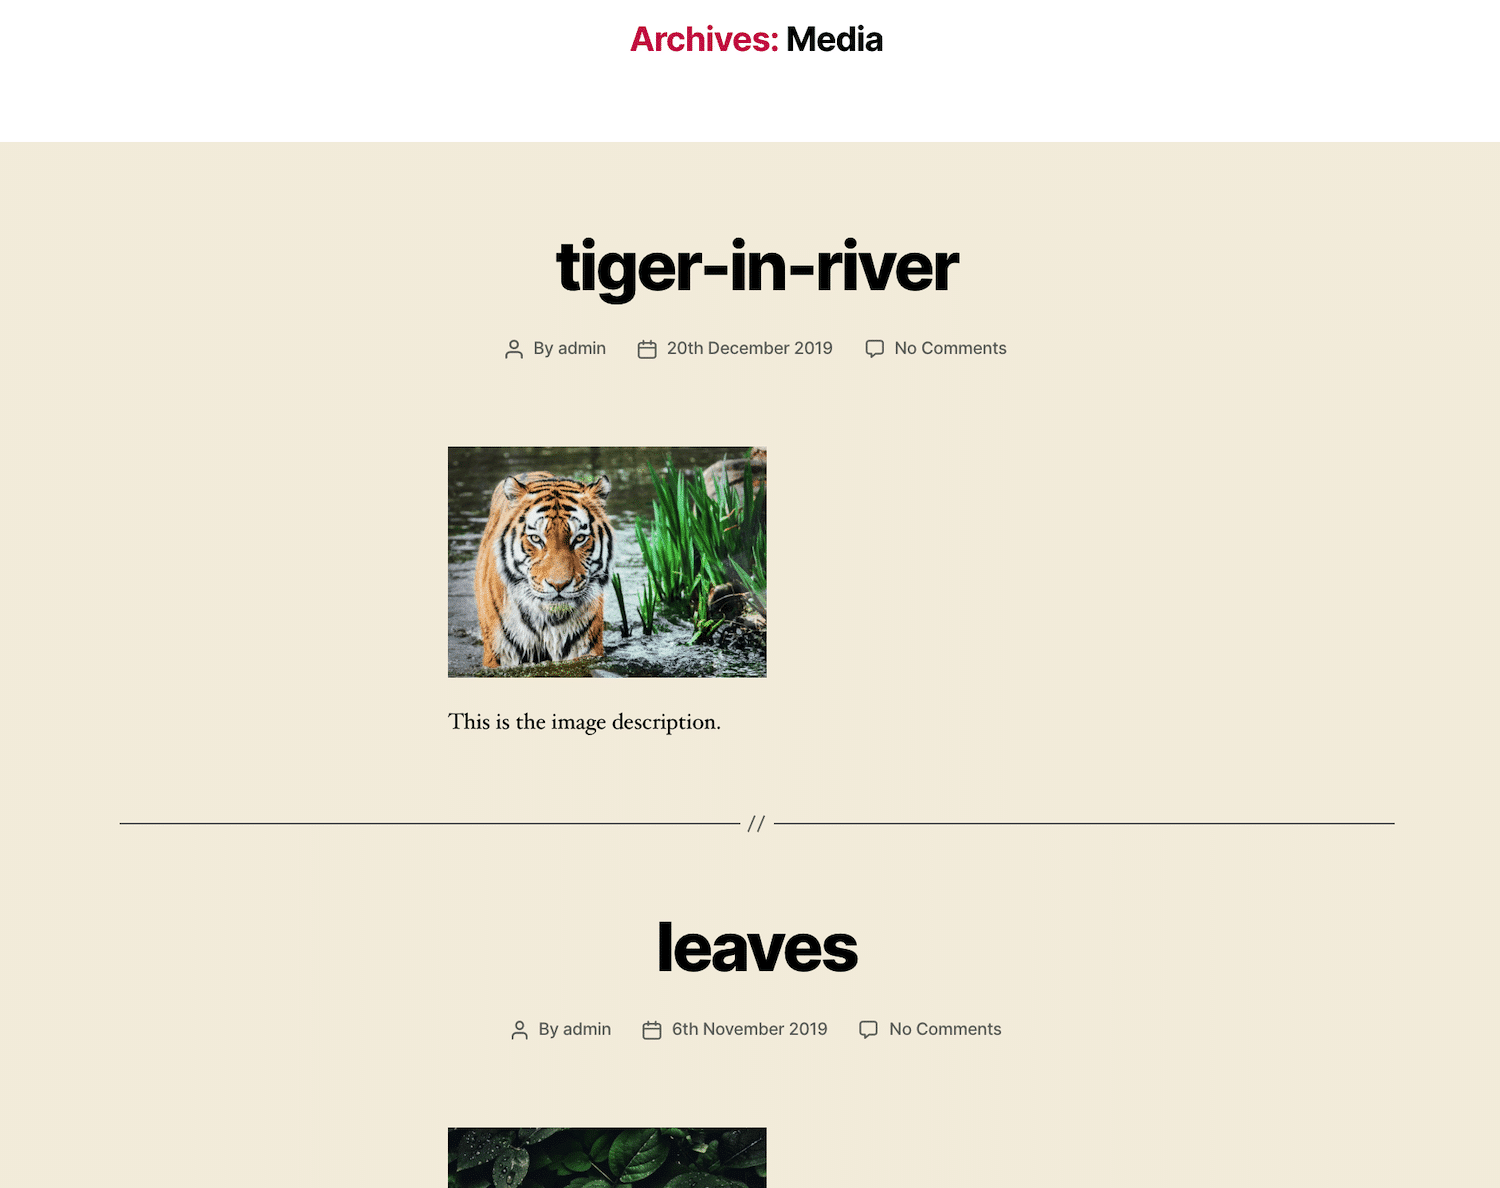 WordPress Media Archive
For convenience, the complete code for all these advanced hacks is often made available as a downloadable plugin, frequently hosted on platforms like public Gists. You can typically download such a file as a .zip archive and upload it to your WordPress site. This approach allows you to implement all four hacks efficiently without the need for manual file editing, simplifying the process of extending your Media Library's capabilities.
Summary
Effective utilization of images, videos, audio files, and documents significantly enhances the value and engagement of your website for users. The WordPress Media Library is an indispensable tool, serving as the central hub for uploading, publishing, and dynamically modifying these diverse files to align with your content requirements and strategic objectives. Mastering its features, from basic management to advanced customizations, empowers you to maintain a rich, organized, and high-performing media ecosystem within your WordPress environment.
