


In the competitive world of reseller hosting, establishing a distinctive and memorable brand is crucial. Your brand identity is not just about your logo or company name; it extends to every touchpoint your customers have with your services. By strategically personalizing your reseller hosting platform, specifically your Plesk dashboard, you can cultivate a strong brand image that not only differentiates you from competitors but also significantly boosts trust and loyalty among your clients. Imagine your customers logging into their control panel and being greeted by your custom logo and company colors – it’s a subtle yet remarkably effective way to reinforce your brand’s recognition and build lasting relationships. This personalized approach can transform a one-time transaction into a loyal, long-term customer relationship.
This comprehensive guide will walk you through the process of adjusting various settings within Plesk. You will learn how to implement custom branding, modify interface preferences, and introduce personalized buttons that can link directly to important pages on your own website, such as support resources, terms of service, or your main homepage. Ready to elevate your Plesk dashboard with a unique, professional touch? Follow these detailed steps to achieve a fully branded and personalized experience.
Prerequisites
- A whitelabel reseller hosting plan is essential for implementing custom branding.
- Plesk Host Edition, which is typically included as standard with reseller hosting plans, is required for these customization options.
How to Personalize Your Plesk Environment for Enhanced Branding
Step 1: Accessing Your Plesk Panel
- Begin by logging into your client area.
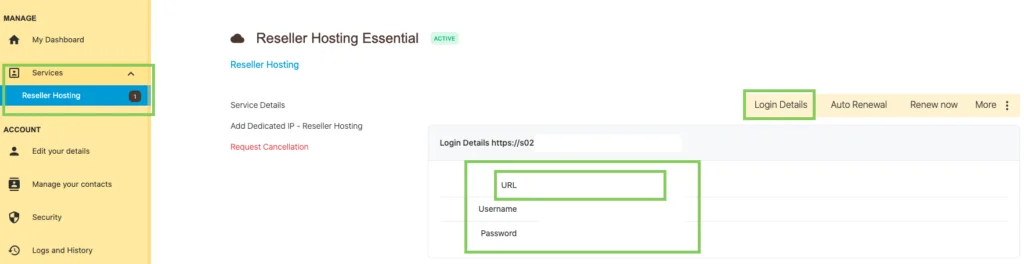
- Once in your dashboard, locate and click on your active Reseller Hosting service.
- Within your service package details, find and click on "login details" (usually located at the top right) to view your Plesk login credentials.
- Proceed to log into your Plesk panel. This is typically done by clicking on the provided URL under login details, which will direct you to the Plesk login screen where you can enter your username and password.
Step 2: Customizing Interface Preferences
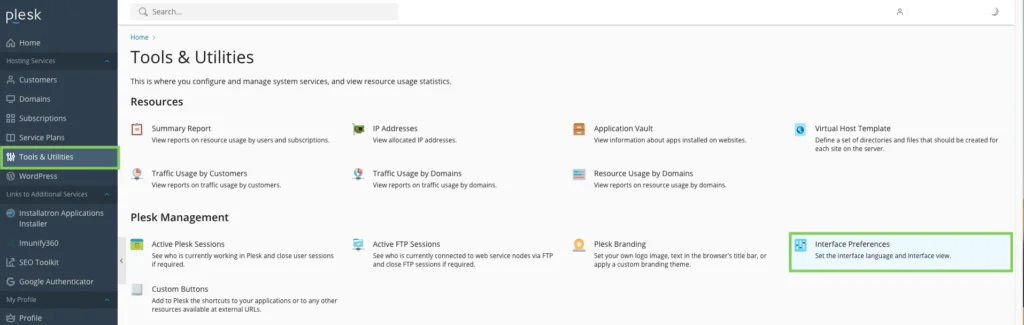
- In the left-hand navigation panel of your Plesk dashboard, click on “Utilities”.
- Next, select “Screen Preferences” from the options.
- Here, you can modify the “interface language” to suit your preferences or those of your clients.
- Adjust the “interface view”. The provider view is designed for managing all your reseller settings, while the power user view allows for efficient management of individual customer websites.
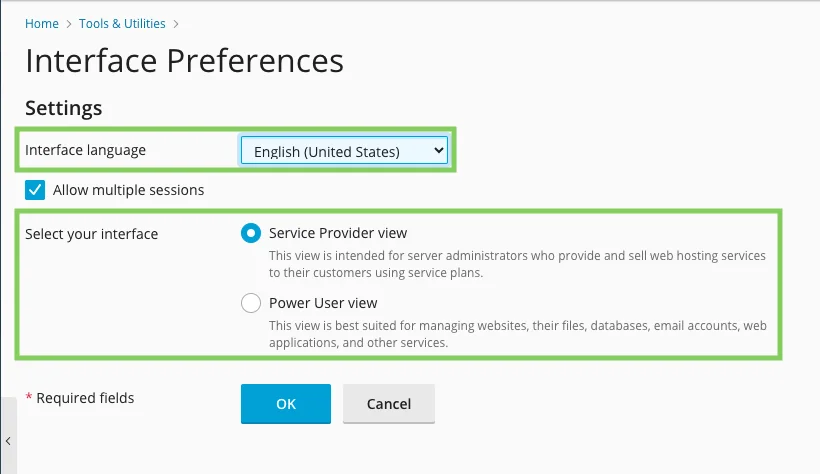
- Click “OK” to successfully save these updated settings.
Step 3: Implementing Your Corporate Identity
Integrating your corporate identity directly into the Plesk interface reinforces your brand and creates a seamless experience for your users.
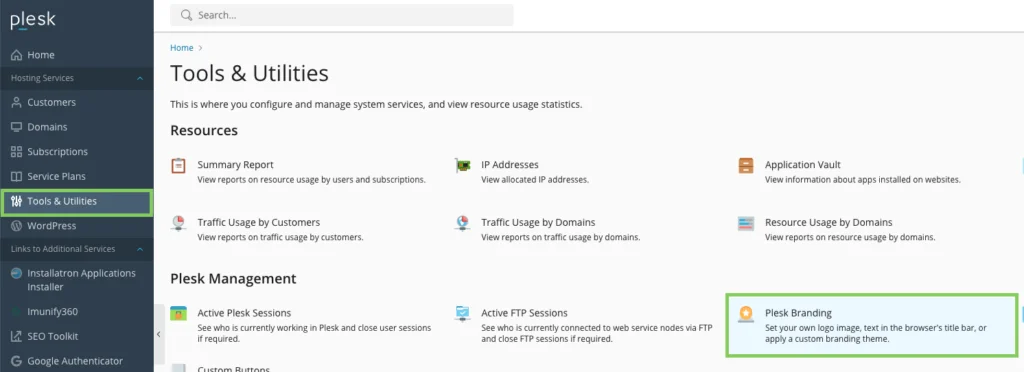
- From the left-hand panel, navigate to “Utilities”.
- Then, click on “Branding from Plesk”.
- Check the option “Enable custom title on Plesk pages” to prominently display your company name or a compelling slogan across your Plesk pages.
- Check “Enable custom panel logo”. This feature allows you to replace the default Plesk logo with your own. You can either upload a logo file directly or provide a URL to your logo image. This custom logo will appear to your customers in the top-left corner of their dashboard.

- Finally, click the “Save” button to apply your branding changes.
Step 4: Adding Custom Buttons for Enhanced Navigation
Custom buttons can significantly improve the user experience by providing quick access to essential resources. You have the flexibility to add standard buttons to the home page of your own Plesk environment or your customers' panels. These can be used to link to important resources such as your terms of service, a dedicated support page, your main website homepage, or any other relevant information.
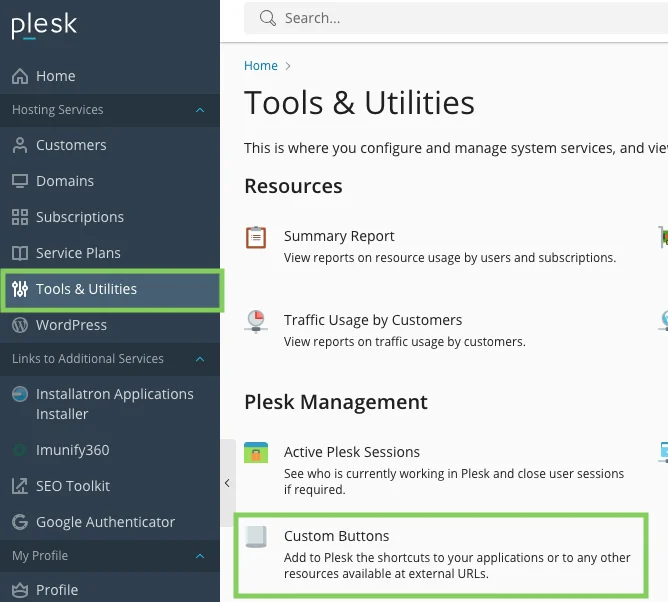
- In the left-hand panel, click on “Tools & Utilities”.
- Then, select “Custom Buttons”.
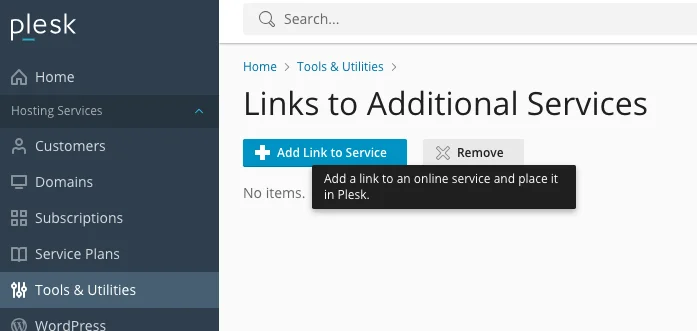
- Click on “+Add link to service” to create a new custom button.
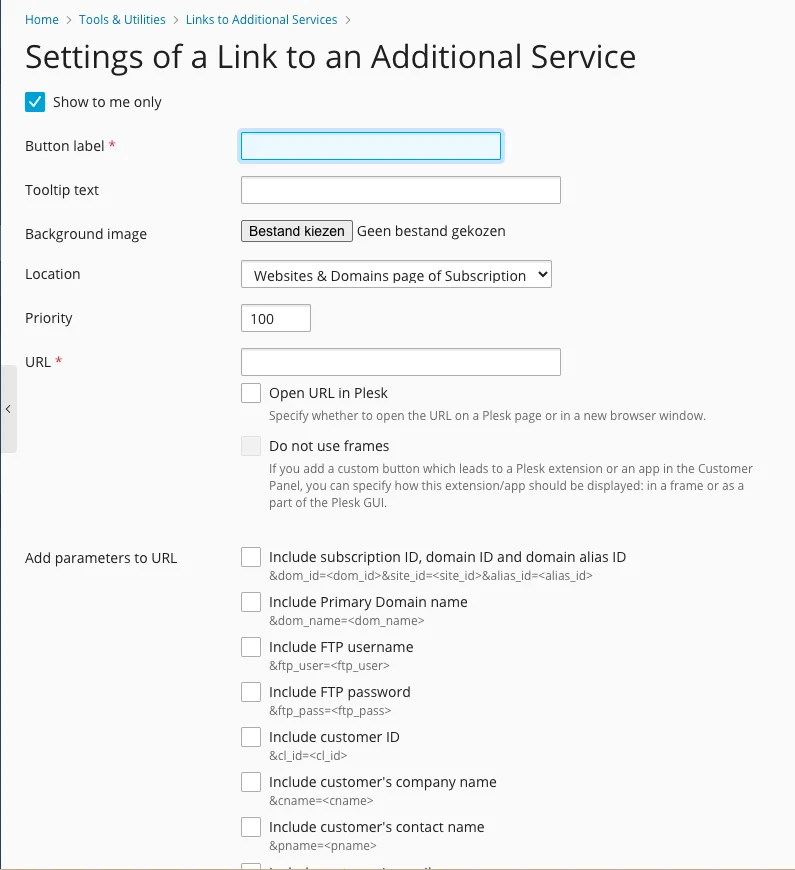
- If you wish for the button to be visible only to you, check “show to me only”. Uncheck this option if the button should be displayed within your customers' Plesk panels.
- Fill in the required data for the button, including its name, URL, and any other relevant details.
- Under “Location”, specify where this new button will appear within the Plesk interface for you or your customers.
- Click “OK” to save these custom button settings.
Ready to Showcase Your Hosting Brand to Your Customers
Congratulations! You have successfully completed the steps to fully personalize your Plesk dashboard and effectively integrate your unique brand identity within your reseller hosting environment. By implementing these straightforward yet impactful changes, you have significantly elevated your company’s recognizability, professionalism, and overall appeal. This level of customization can make a profound difference in how your customers perceive your services, ultimately helping you cultivate a stronger, more trusted, and sustainable brand in the hosting market. Your personalized Plesk panel now serves as a powerful extension of your brand, providing a consistent and professional experience for all your clients.
