


In this comprehensive guide, we will walk you through the essential steps required to restore or recover a website using JetBackup 5. This powerful plugin, readily available in cPanel, offers a robust solution for restoring your website files and databases from previously created backups. Understanding how to utilize JetBackup 5 is crucial for maintaining the integrity and availability of your website data.
Understanding JetBackup 5
JetBackup is a sophisticated and intuitive tool integrated into your cPanel, offering a powerful suite of backup and recovery solutions. Recognized as a leading backup solution in the web hosting industry, JetBackup simplifies the process of retaining secure copies of your site's valuable data.
This versatile tool supports both remote and local incremental backups, ensuring that your data is not only backed up efficiently but also stored securely. Essentially, JetBackup serves as an indispensable resource for backing up critical website content, including emails, databases, and various files. JetApps recently released JetBackup 5 to the EDGE tier, introducing significant core bug fixes, plugin updates, new features, and an enhanced graphical user interface (GUI).
This tutorial will cover the following key JetBackup 5 options in detail:
- Full Account Backups
- File Backups
- Database Backups
- Email Backups
Quick Overview: Website Restoration with JetBackup 5
File Restoration Quick Steps
- Log in to your cPanel.
- Navigate to the Files section in cPanel and launch JetBackup 5.
- Click the Home Directory tab within JetBackup 5 to access the file restoration tool.
- Select the desired backup from the provided list.
- Click the Change File Selection button to specify the exact files or folders for restoration.
- A window displaying your home directory's folders and files will appear.
- Browse through the directories, select the specific file(s) or folder(s) by ticking the checkbox, and then click Select Files.
- Choose between Restore to recover the files directly to your account or Download to save them as a zip file.
- Confirm the restoration by clicking the Restore selected items button in the popup.
- Access the Queue option on the JetBackup home page to monitor the restoration progress.
Restoring a Full Account Backup Quick Steps
- Log in to your cPanel.
- Navigate to the Files section in cPanel and launch JetBackup 5.
- In JetBackup 5, click the Full Backups icon located under the Restore & Download section.
- Choose the desired backup date for restoration, then click Restore.
- A list of items to restore will be displayed. Keep all items selected and click Restore Selected Items to restore the entire cPanel account content.
- The restoration process will be queued, and you will receive a success notification.
Downloading a Full Account Backup Quick Steps
- Log in to your cPanel.
- Navigate to the Files section in cPanel and launch JetBackup 5.
- Once JetBackup 5 opens, click the Full Backups icon under the Restore & Download section.
- Select the backup date you wish to download, then click Download.
- A list of items available for download will be presented. Ensure all items are selected, then click Download Selected Items to download the full contents of your cPanel account.
- To retrieve your downloads, click the Downloads button on the Accounts screen.
- After clicking Downloads, the backup file will be saved to your computer.
Detailed Guide: Restoring Files Using JetBackup 5
To begin the detailed file restoration process, first, log in to your cPanel. Once successfully logged in, scroll down to the Files section and locate the JetBackup 5 icon to open the application.
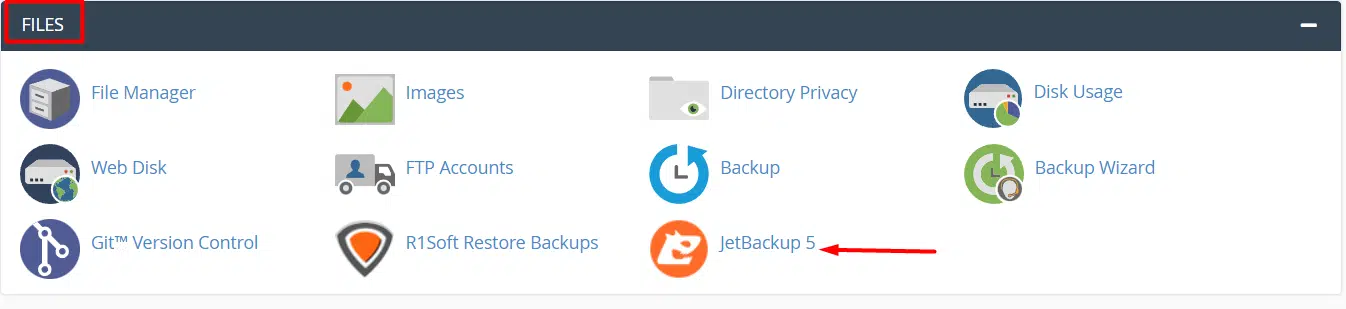 JetBackup 5 Interface upon login
Upon opening JetBackup 5, click on Home Directory to access the file restoration interface. This option allows you to restore individual files or specific folders within your account.
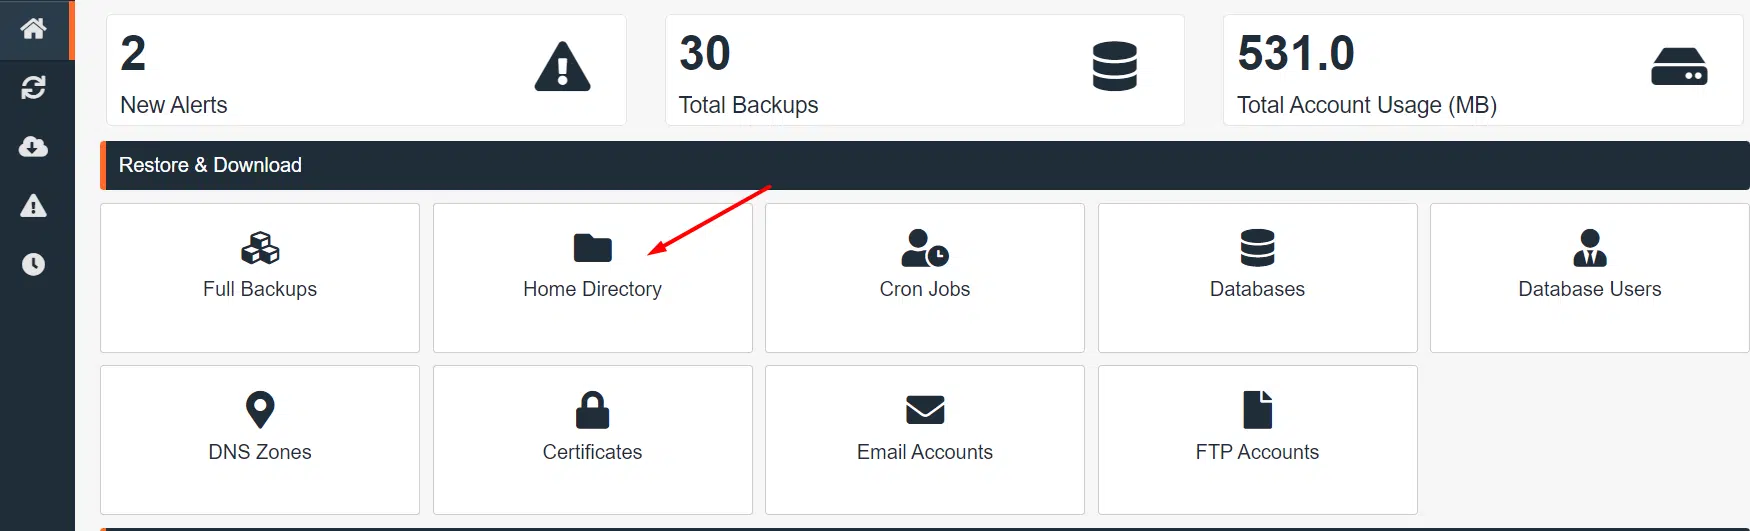 Navigating to Home Directory in JetBackup 5
After selecting Home Directory, JetBackup 5 will display a list of available backups. Carefully choose the backup point you wish to restore your files from by clicking on it. It is recommended to select the most recent stable backup.
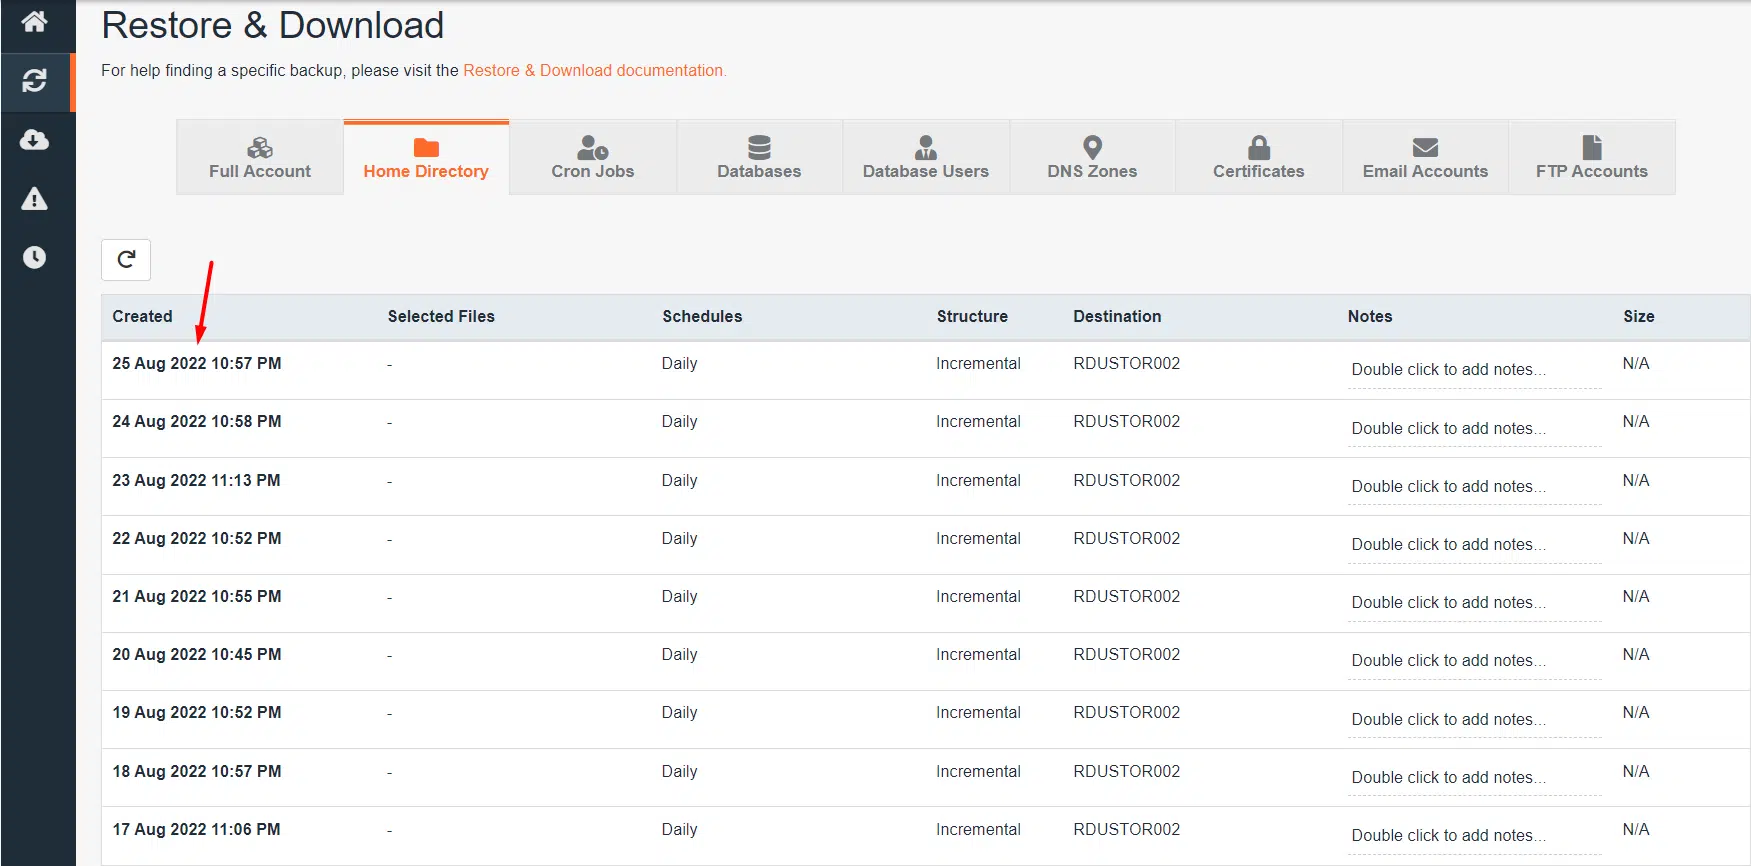 Selecting a backup for restoration
To pinpoint the specific files or folders for restoration, you must click the Change File Selection button. This action will open a detailed view of your directory structure.
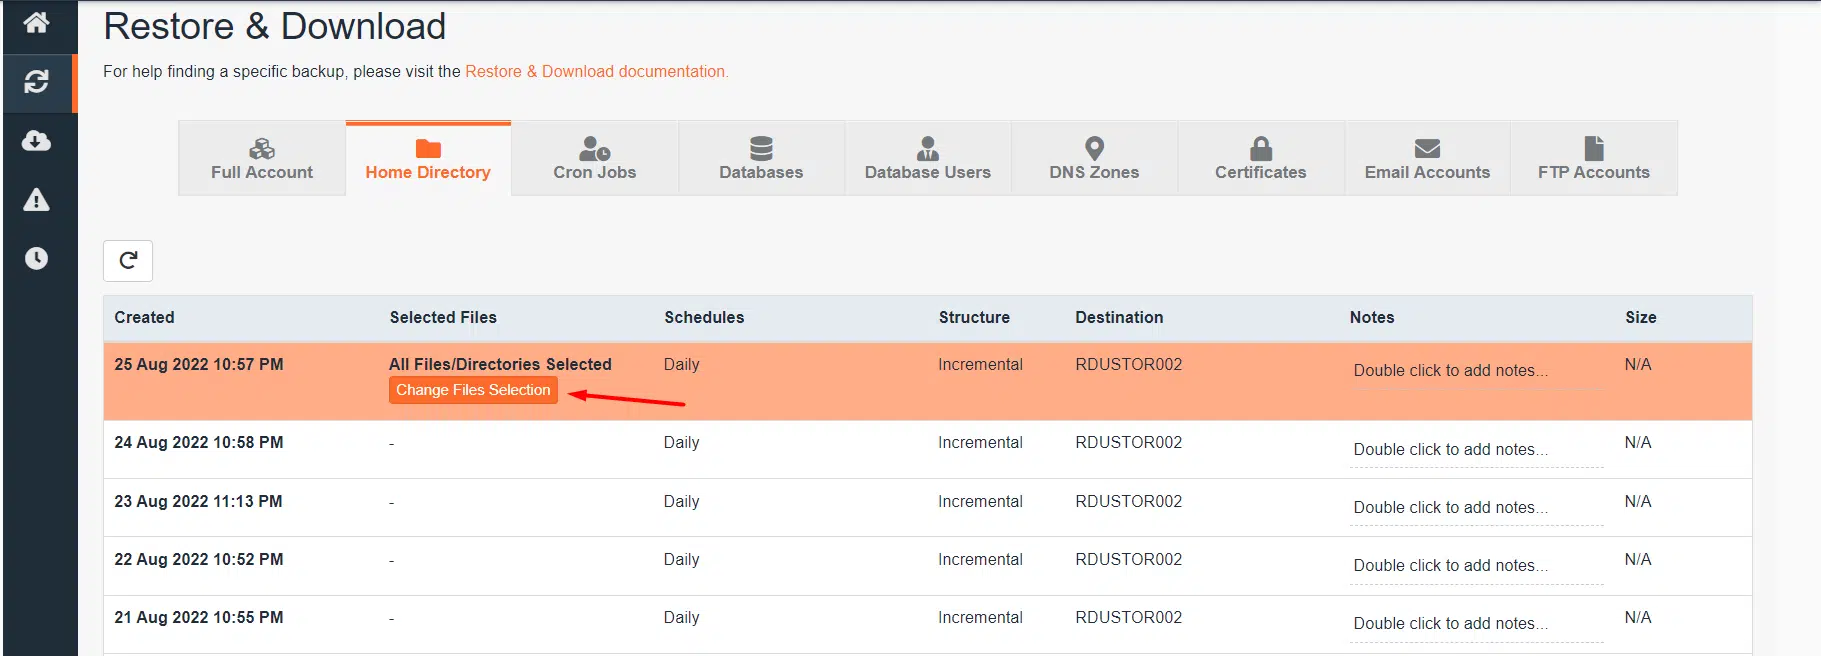 Initiating file selection for restoration
Upon clicking the button, a modal window or a detailed list of folders and files within your home directory will be presented. This allows for granular selection.
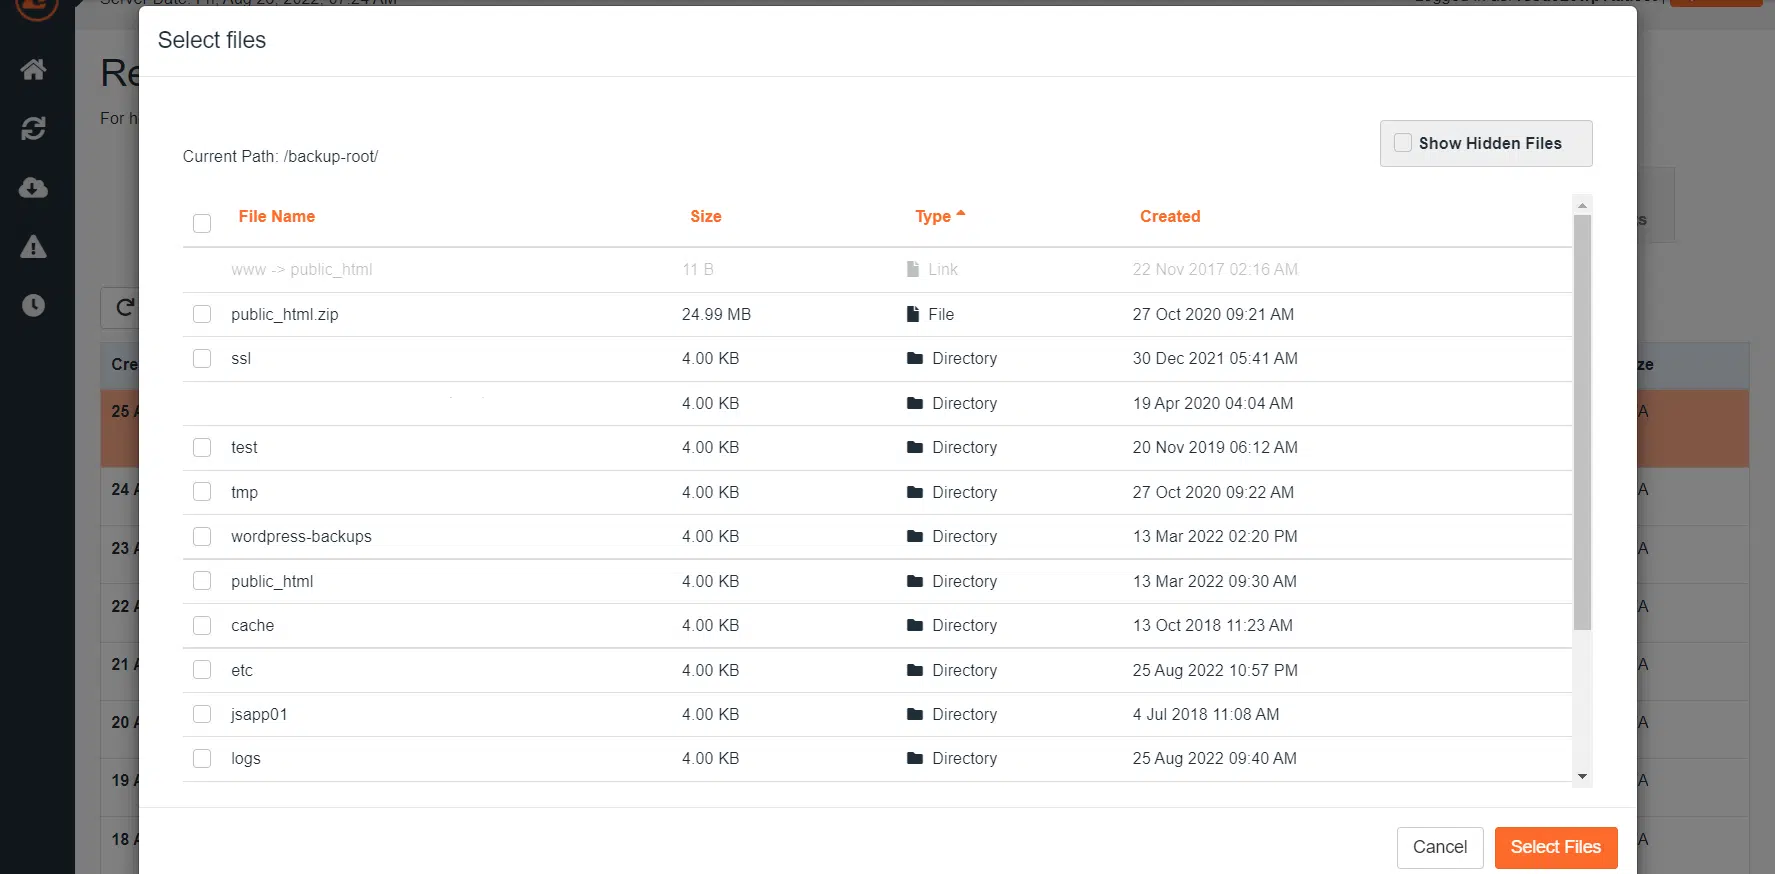 Viewing files and folders in the home directory
Navigate through these directories to locate the precise file or files you intend to restore. Once you've identified the target folder or file, tick the checkbox located to its left and then click Select Files at the bottom right of the modal.
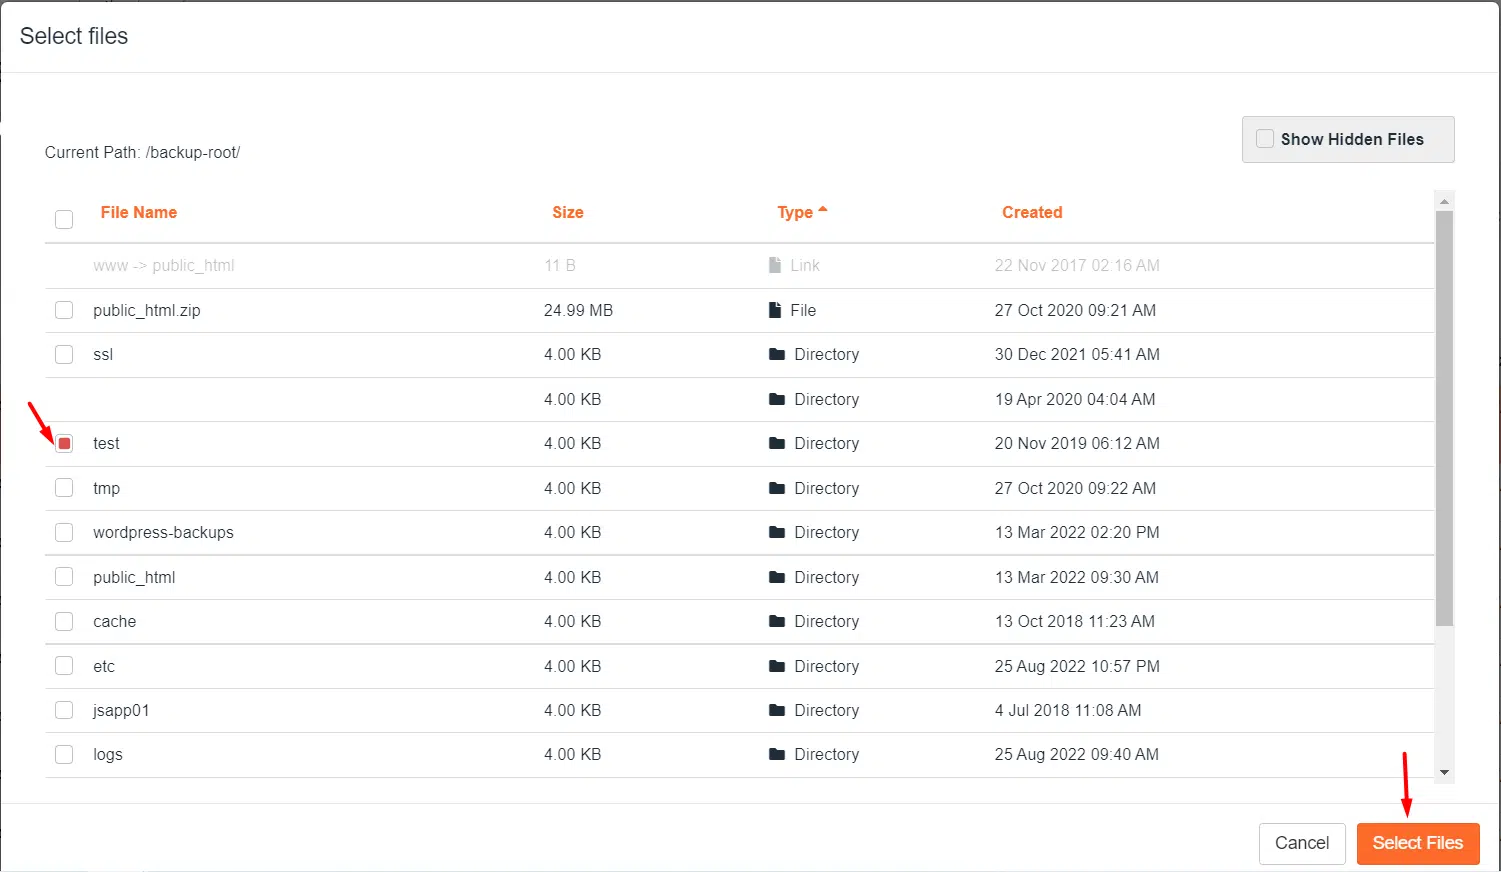 Selecting specific files or folders
At this stage, you have two primary options: Restore or Download. If your goal is to directly restore the files to their original location on your website, choose Restore. Alternatively, if you only wish to obtain a copy of the files, clicking the Download button will provide them in a convenient zip file format.
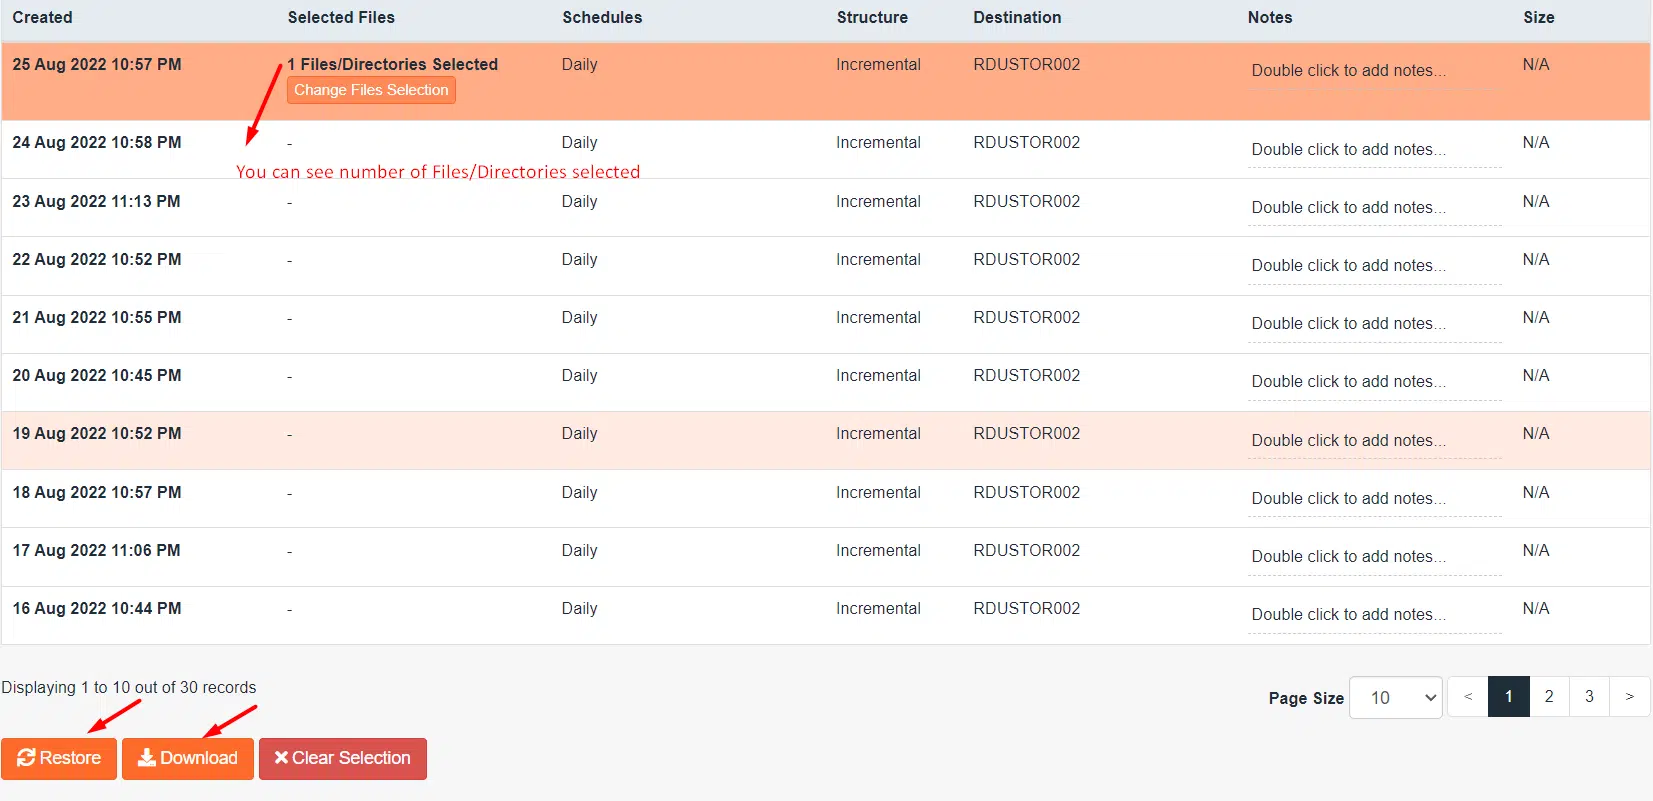 Restore or Download selected files
After selecting Restore, a confirmation popup will appear, asking you to verify the restoration. Simply click the Restore selected items button to proceed with the recovery process.
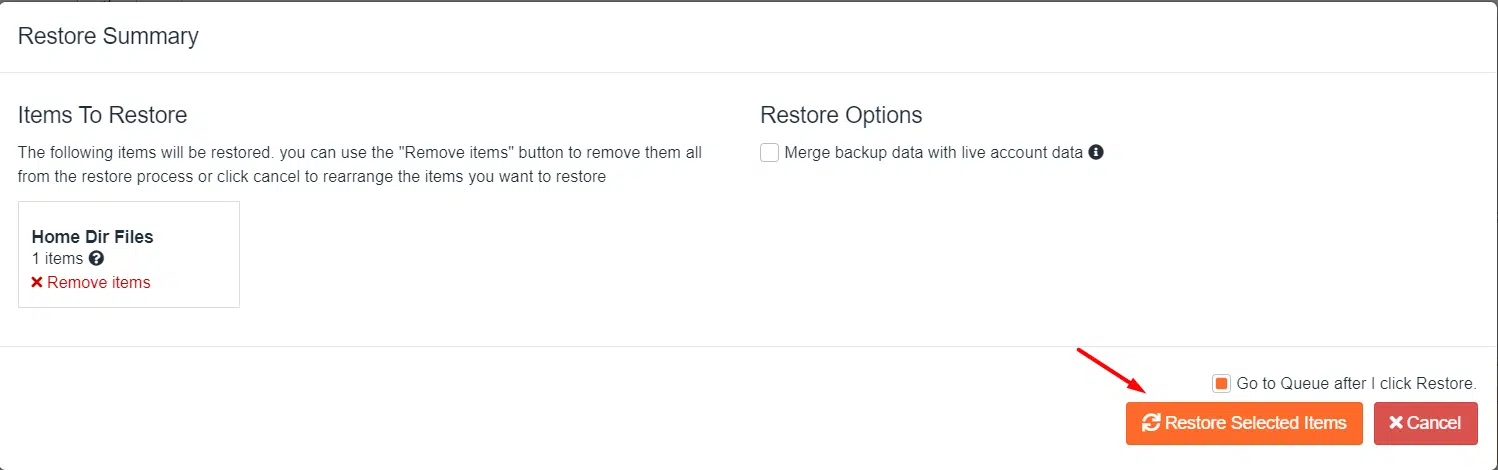 Confirming file restoration
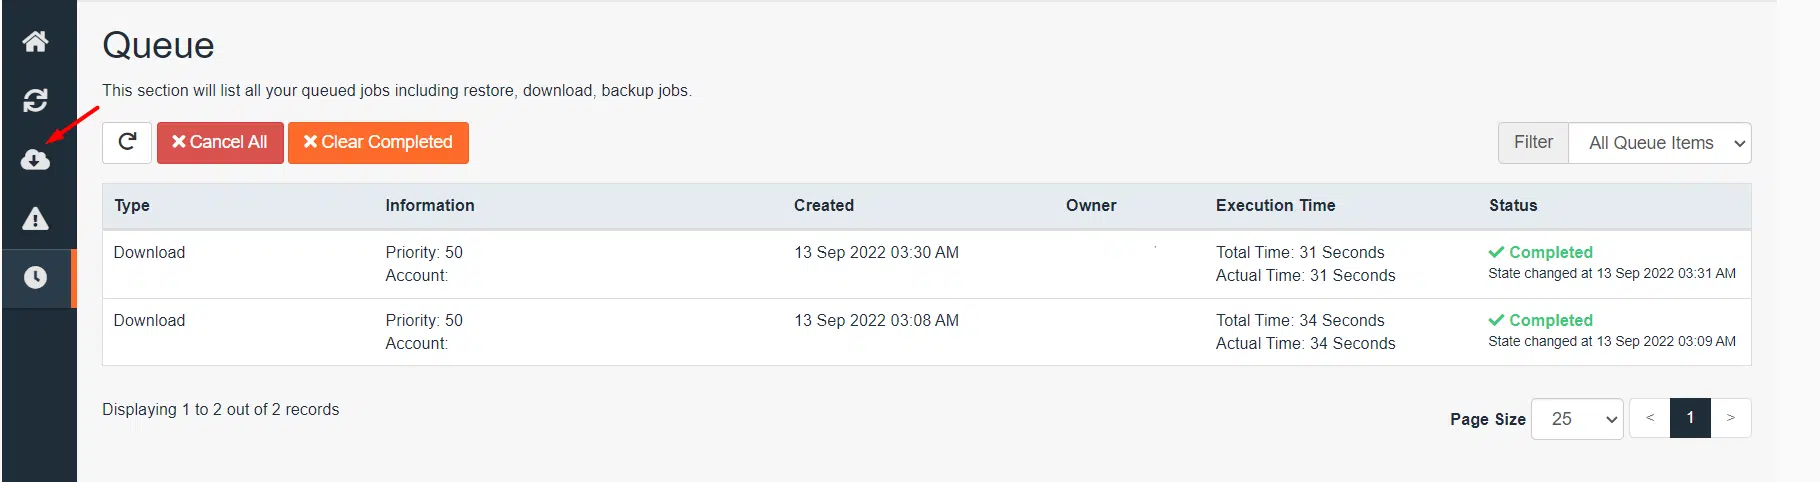
To monitor the progress of your restoration task, navigate to the Queue option on the JetBackup homepage. Here, you can track the status of all ongoing and completed backup and restoration processes.
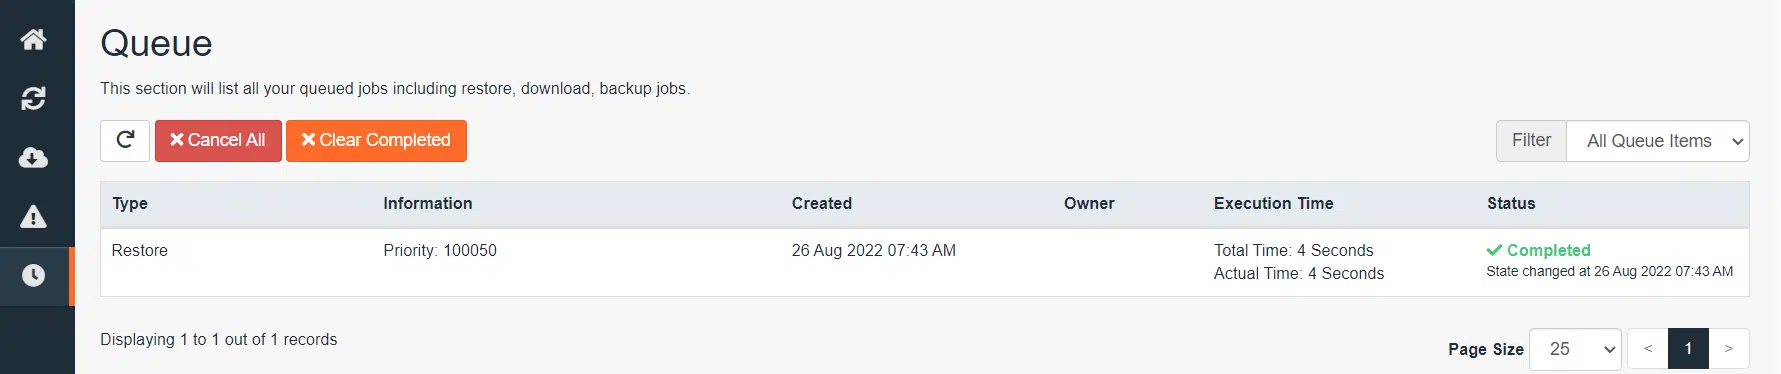 Accessing the JetBackup 5 queue
Detailed Guide: Restoring a Full Account Backup Using JetBackup 5
To restore an entire cPanel account, begin by logging in to your cPanel. Once logged in, scroll down to the Files section and launch JetBackup 5. This process is ideal for recovering your entire website, including all files, databases, and email accounts, to a previous state.
Opening JetBackup 5 from cPanel
Once JetBackup 5 is open, click the Full Backups icon located within the Restore & Download section. This will take you to the interface for managing full account backups.
 Selecting Full Backups in JetBackup 5
A list of available full account backups will be displayed. Choose the specific backup date that you wish to restore your account from, and then click Restore. It is vital to select a backup point that ensures your website's stability and data integrity.
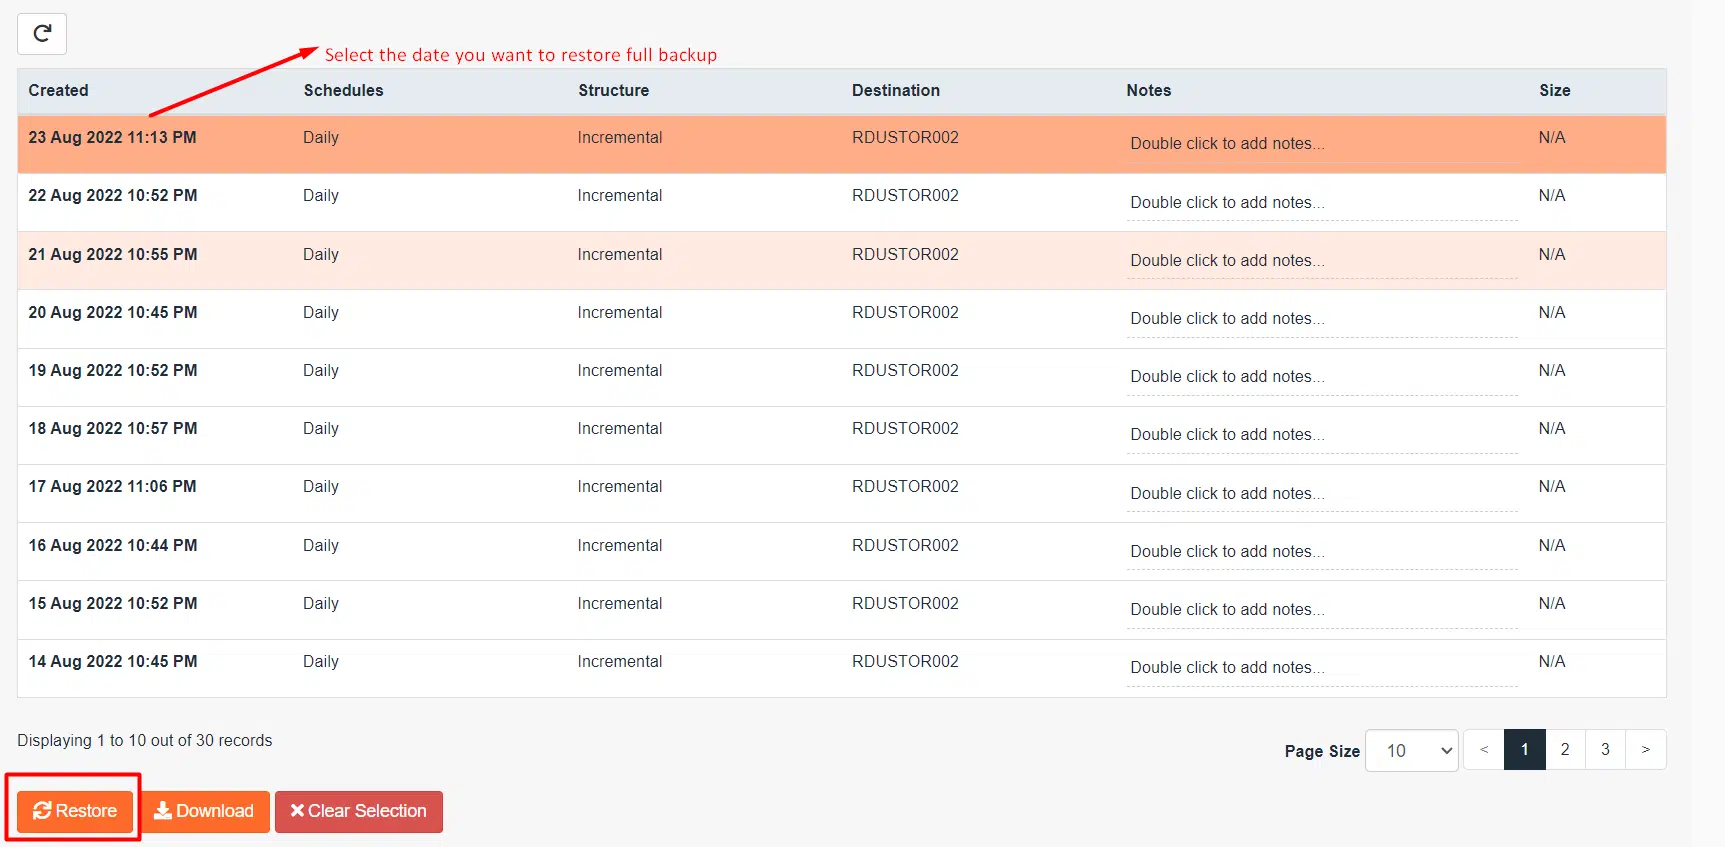 Choosing a backup date for full account restoration
You will then be presented with a list of all items that are part of the full account backup. To ensure a complete restoration of your cPanel account, keep all items selected and click Restore Selected Items. This will initiate the comprehensive recovery of your website.
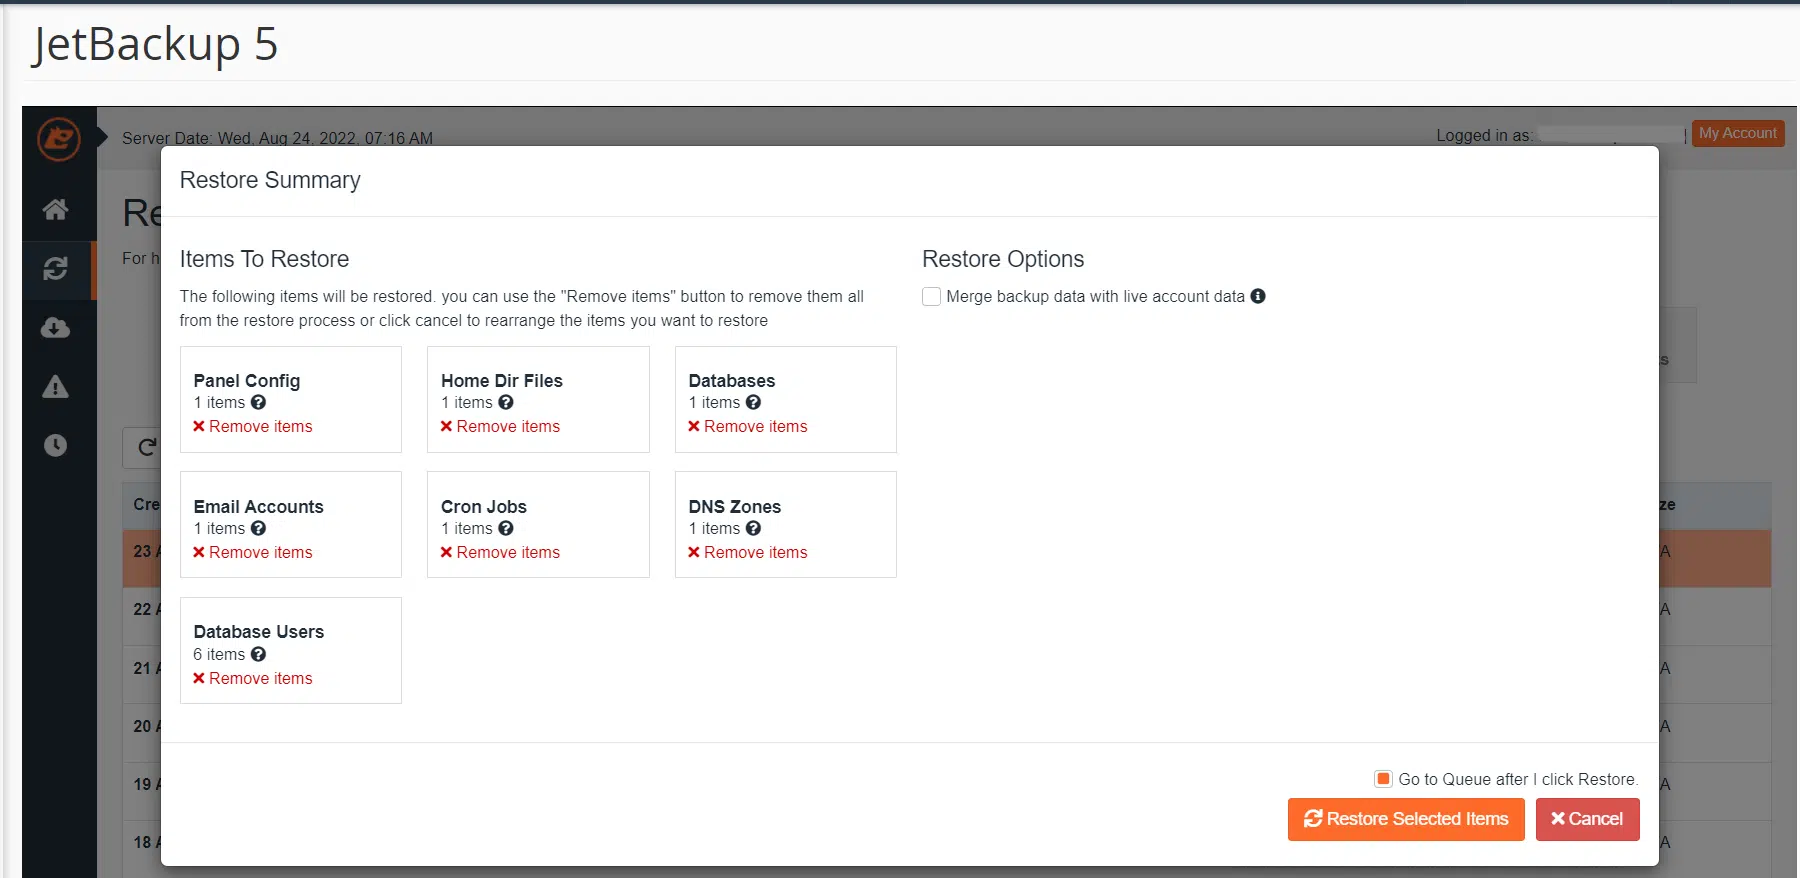 Confirming items for full account restoration
The selected account will then be placed in the restoration queue. You will typically see a success notification in the top right corner of the interface, confirming that the process has begun.
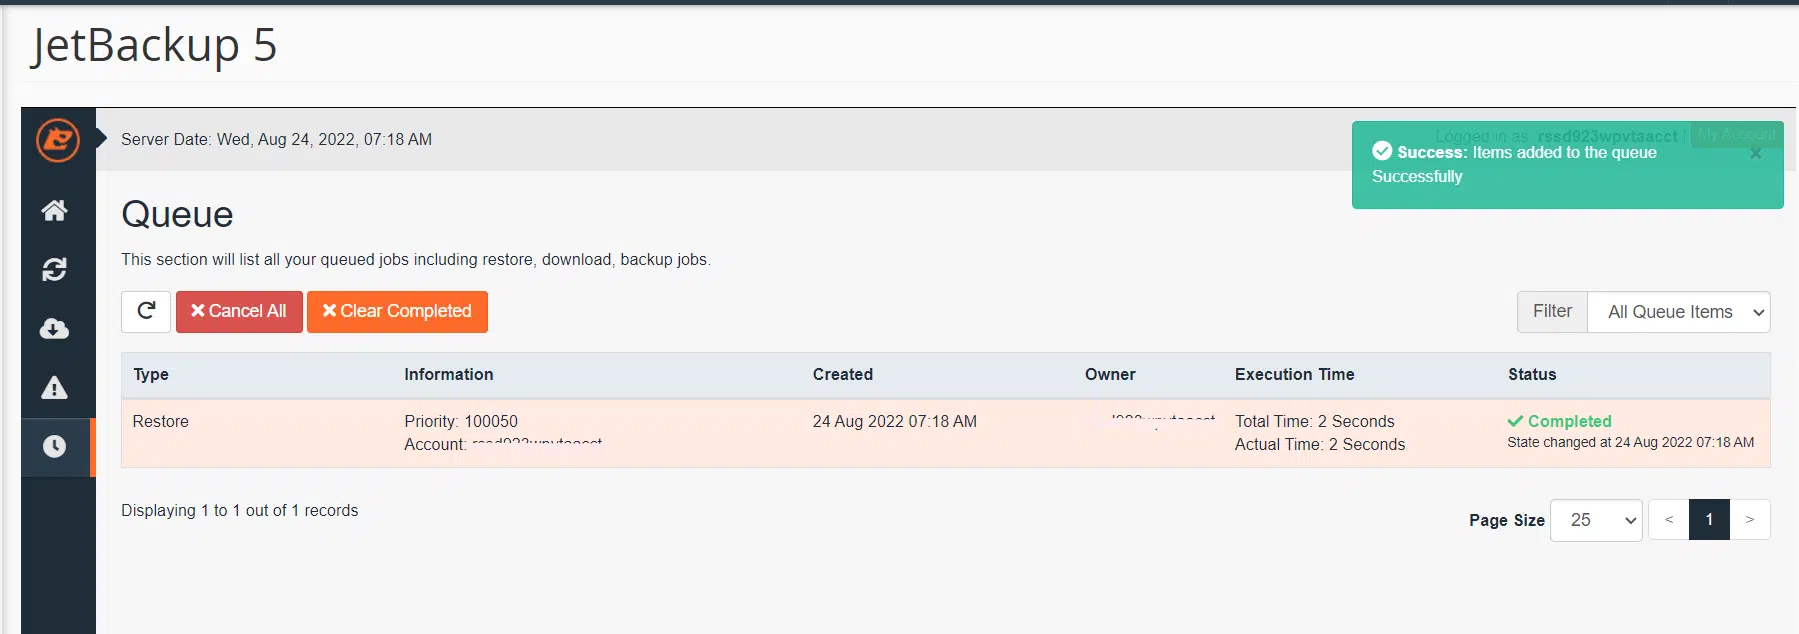 Full account restoration queued
Unlike a direct download, a full account restoration operates in the background. To view the current status of the restoration, you'll need to open the Queue. Click the Queue icon, which is usually the last icon in the row of tools on the left side. The Queue will display a list of tasks, indicating the progress or completion of your requested restoration.
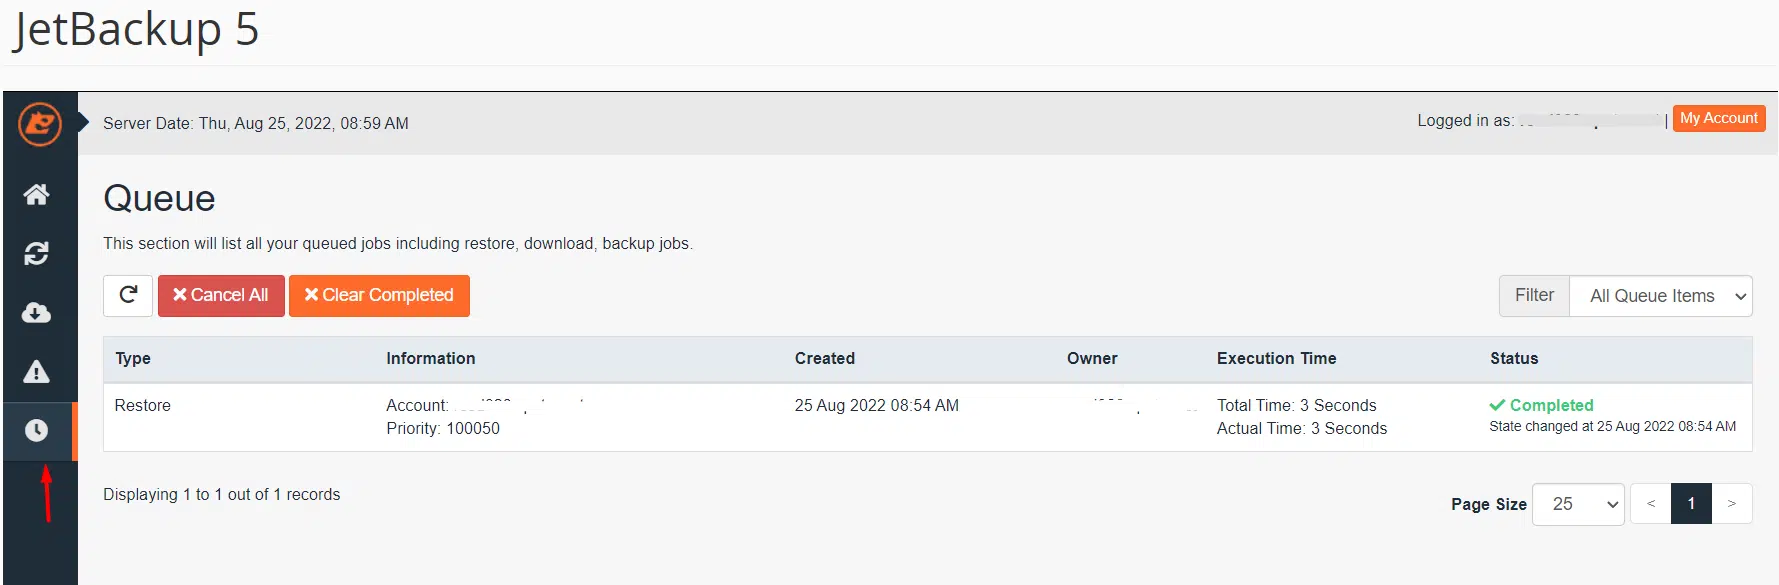 Monitoring restoration progress in the queue
Detailed Guide: Downloading a Full Account Backup Using JetBackup 5
To download a full backup of your cPanel account for offline storage or migration, start by logging in to your cPanel. Once logged in, navigate to the Files section and launch JetBackup 5. Upon opening JetBackup 5, click the Full Backups icon under the Restore & Download section to proceed.
Accessing JetBackup 5 for full account download
From the list of available full backups, choose the specific backup date you wish to download, and then click Download. This action will prepare the full account backup for transfer.
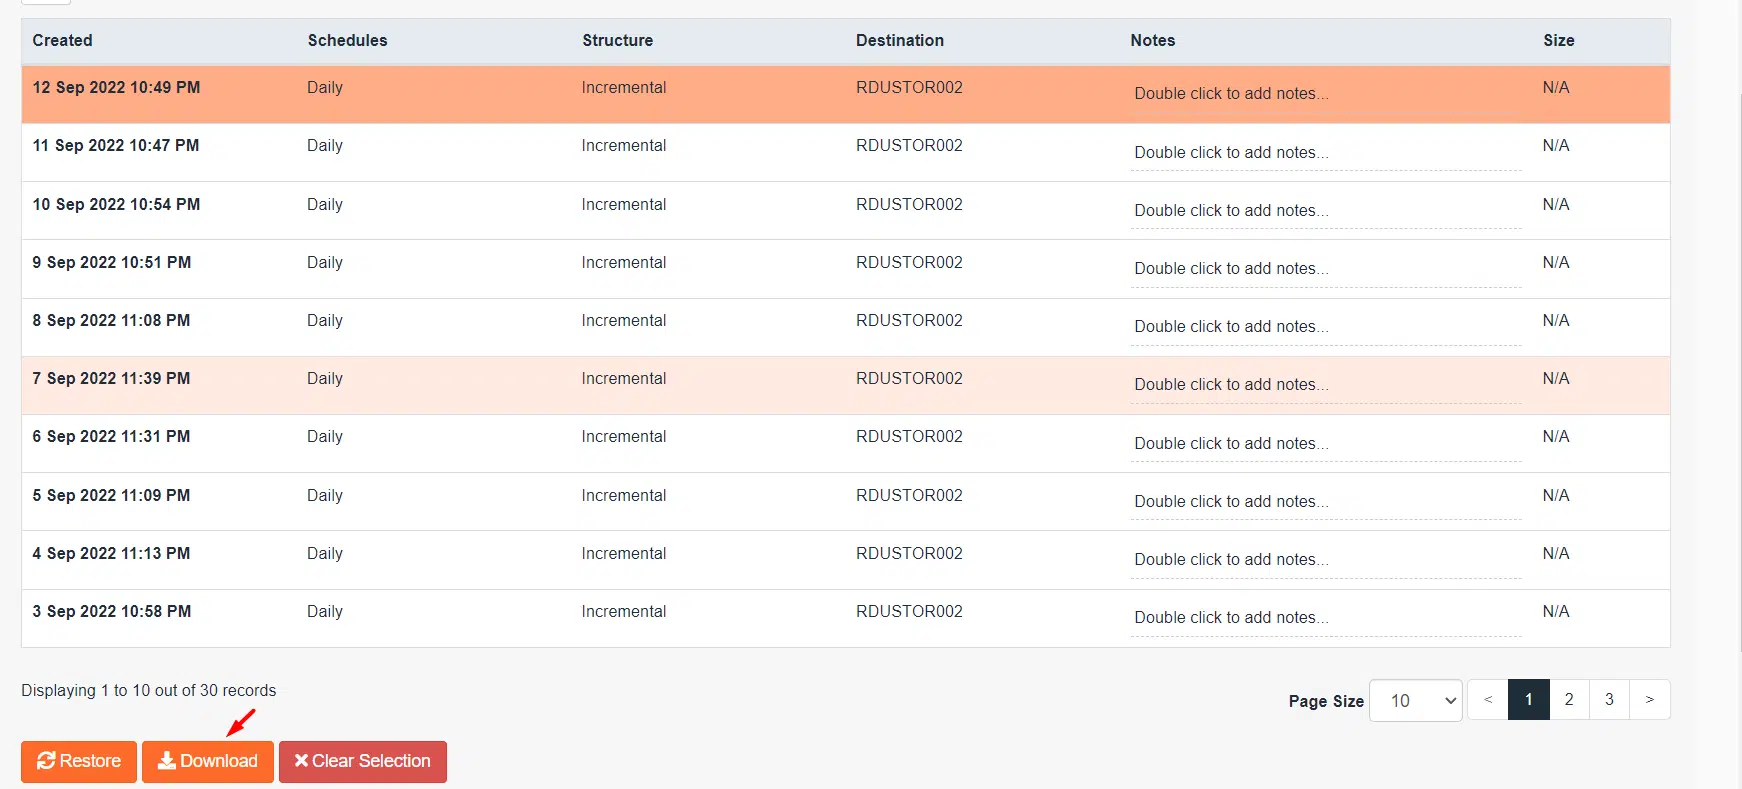 Selecting a backup for download
After clicking download, you will be presented with a list of items included in the full account backup. To ensure you download all contents of your cPanel account, keep all items selected and click Download Selected Items. This will initiate the packaging of your entire website data.
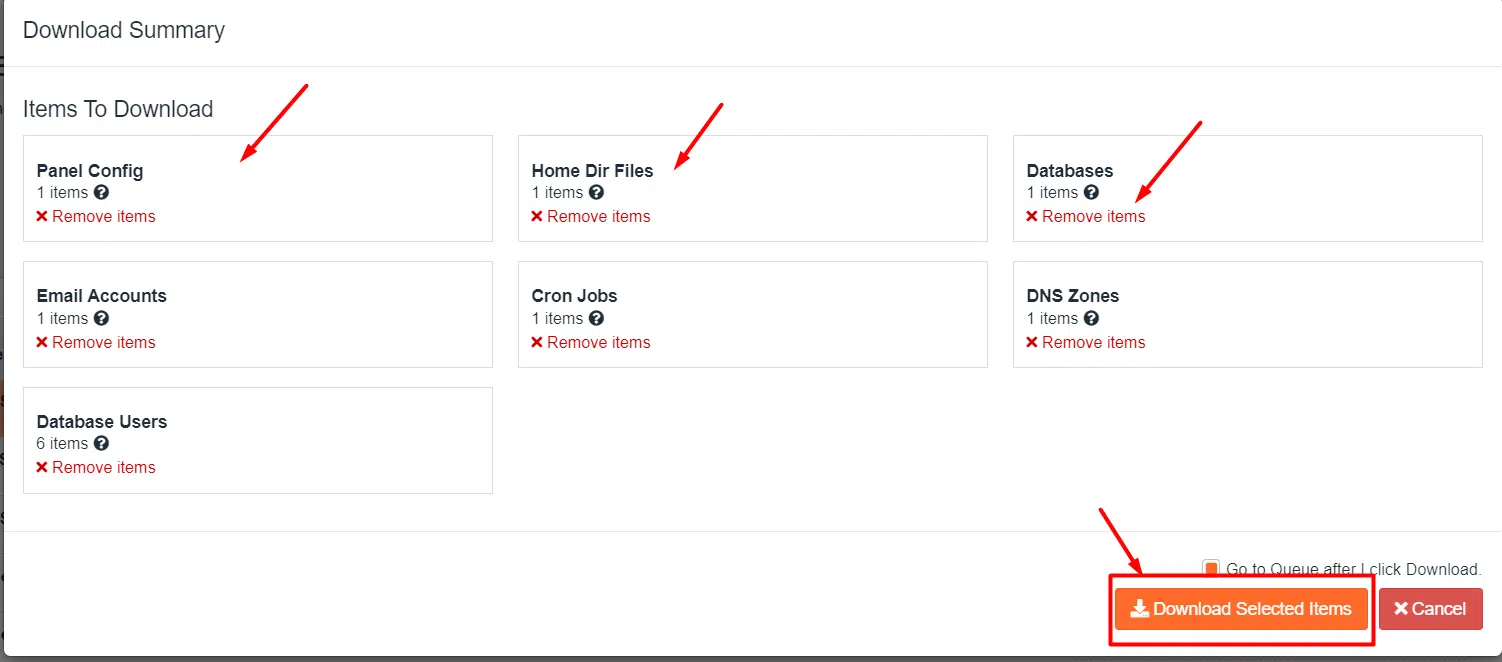 Confirming items for full account download
To access and retrieve your completed downloads, click the Downloads button on the Accounts screen. This section serves as a repository for all your generated backup files.
 Navigating to the downloads section
After clicking Downloads, a pop-up window will appear displaying your available backup files. Locate the download you wish to save to your computer and click the corresponding Download button. The file will then be securely transferred to your local machine.
 Downloading the full account backup to your computer
Conclusion
Congratulations! You have now gained a comprehensive understanding of how to effectively restore a website using JetBackup 5. By following the detailed instructions provided in this guide, you can confidently manage and recover your website's files, databases, and entire account backups, ensuring the continuous operation and security of your online presence.
Should you have any further questions regarding web hosting or require additional assistance, please do not hesitate to reach out to us. Our team is always happy to help.
