


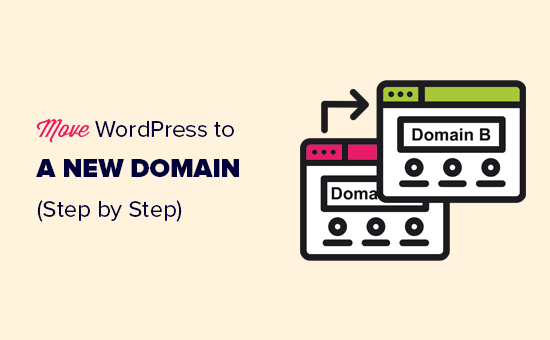
When the time comes to transition your WordPress website to a new domain, a primary concern is invariably the impact on your SEO. You strive to ensure that all the valuable traffic and authoritative presence you’ve diligently built accompany you to your new online home.
This concern is entirely understandable. This comprehensive guide has been meticulously crafted around one core objective: to facilitate a seamless relocation that fully safeguards your search engine rankings by adhering to a precise, proven methodology.
This method encompasses a series of carefully orchestrated steps, executed in the correct sequence, ensuring no detail is overlooked. It effectively communicates the change to search engines, and our aim is to empower you to navigate this transition with confidence, leading to a straightforward and successful outcome.
Migrating your WordPress site to a new domain name might seem like a daunting task, but with the right approach, it doesn't have to be. We are here to guide you through each essential step of the process, making it manageable and clear.
What to Know Before You Change Domains
Before embarking on this migration, there are several crucial considerations to keep in mind. The process of transitioning to a new domain will naturally lead to a temporary fluctuation in your search engine rankings. This occurs as major search engines, such as Google, adapt to the updated domain information.
Consequently, your search traffic may also experience a temporary dip. It’s important to recognize that this is a normal part of the domain change process for all websites. However, by diligently following this guide, you can significantly mitigate the SEO impact. We will demonstrate the correct procedures for moving your WordPress site, establishing proper 301 redirects, and effectively notifying search engines of your site's new location.
Please note that this guide is specifically tailored for changing a domain name. It is not designed for relocating a WordPress site to an entirely new hosting provider, although some steps may overlap. The unique requirements for a domain change focus on preserving your SEO rankings and traffic, which necessitates specific additional steps beyond a simple host migration.
Additionally, if your existing website is hosted on a managed WordPress platform, you may need to consult specific instructions provided by that platform for domain transfers, as their procedures can differ from a self-hosted WordPress installation.
Pre-Steps: What You Need to Get Started
For the purpose of this guide, we will assume you currently have your WordPress website established on an old domain (e.g., oldsite.com) and are preparing to migrate it to a new domain (e.g., newsite.com).
We also presuppose that you have secured a reliable web hosting account and possess a basic familiarity with its control panel interface. Furthermore, you should be comfortable with using an FTP client (a software application for transferring files between computers) or adept at managing files directly through the File Manager application typically provided within your hosting account dashboard.
If you are in the process of selecting a new web hosting provider or contemplating a switch, we recommend choosing a provider known for its robust performance and excellent customer support. Consider options that cater to the scale of your website, from smaller personal blogs to larger, high-traffic platforms or e-commerce stores.
Once these foundational elements are in place, you are ready to commence the migration process.
Step 1: Create a Migration Package of Your WordPress Site
The initial and crucial step involves creating a comprehensive backup of your WordPress website. This backup will serve as a complete duplicate of your site, which you will then use to facilitate the proper setup of redirects from your old domain to the new one.
While numerous WordPress backup and migration plugins are available, many users find a dedicated migration plugin to be highly effective for this tutorial. These tools are designed to streamline the process, ensuring reliability even for significantly large websites.
Many migration plugins offer both free and premium versions. While the free version often suffices for a basic migration, considering a premium version can unlock advanced features such as automated cloud backups, simplified one-click site recovery, and more sophisticated migration capabilities.
To begin, install and activate your chosen migration plugin on your old domain name. General instructions for installing a WordPress plugin can typically be found in beginner-friendly guides.
Once activated, the plugin will usually add a dedicated menu item within your WordPress administration area. Navigate to the plugin's backup or package creation section and initiate the creation of a new backup or copy of your WordPress site.
The plugin will then typically start an initialization wizard, automatically assigning a name to this migration package. Proceed by clicking the 'Next' or equivalent button to continue.
The plugin will conduct a series of tests to verify that all prerequisites are met. Should any issues be detected, a warning will be displayed along with instructions on how to resolve them. If all checks pass successfully, click on the 'Build' or similar button to commence the packaging process.
The plugin will now begin compiling a complete migration package of your website files. The duration of this process will vary depending on the size of your site. Once completed, you will be presented with a download option, often allowing you to download both the installer file and the archive (zip) file. Select the option to download both files to your local computer.
The archive file contains a complete copy of your WordPress installation, including your themes, plugin configurations, uploaded media, and all other files generated by WordPress and its plugins. The installer script is a PHP file specifically designed to automate the WordPress migration by unpacking the archive file on your new domain.
Step 2: Create a Database for Your New Domain Name
Prior to moving your WordPress site to its new domain, it is essential to establish a new SQL database. This database will be used to unpack and run your WordPress installation on the new domain name. If you have already prepared a database for your new site, you may proceed to the next step.
To create a new database, log into your web hosting account’s control panel (often referred to as cPanel). Locate the ‘Databases’ section and click on the ‘MySQL Databases’ icon. While the exact interface may vary slightly between hosting providers, the fundamental steps remain consistent.
For illustrative purposes, in many hosting environments, you would navigate to an ‘Advanced’ tab or section within your site settings, which then provides access to the cPanel dashboard. From there, you will find the ‘MySQL Databases’ option under the ‘Databases’ section.
Once in the MySQL Databases interface, you will be prompted to provide a name for your new database. Enter a descriptive name and click on the ‘Create Database’ button. Your control panel will then generate the new database.
Next, scroll down to the MySQL Users section. Here, you will create a new user account specifically for this database. Provide a unique username and a strong password, then click on the ‘Create User’ button. It is crucial to securely record this username and password, as you will need them shortly.
The newly created user does not yet have permissions to interact with the database. To grant these permissions, scroll down to the ‘Add User to Database’ section. From the respective dropdown menus, select the database user you just created and the new database you just created, then click on the ‘Add’ button.
You will then be asked to define the privileges for this user. It is generally recommended to select ‘All Privileges’ for the WordPress database user. After making this selection, click on the ‘Make Changes’ button to apply the permissions.
Your database is now fully prepared and ready for your WordPress site migration to the new domain name. Ensure you have accurately noted down the database name, username, and password, as this information will be indispensable in the subsequent step.
Step 3: Unpack WordPress on Your New Domain Name
With your migration package and new database ready, the next step involves uploading the migration files to your new domain and initiating the unpacking process. The migration package you downloaded earlier contains your complete WordPress installation, eliminating the need for a fresh WordPress installation on your new domain.
First, establish a connection to your new domain using an FTP client. It is critical to ensure that the root directory of your website (commonly named public_html or www) is entirely empty before proceeding. Once confirmed, upload both the archive and installer files that you downloaded earlier into this root directory.
After both files have finished uploading, you are ready to unpack your WordPress site. Open a new tab in your web browser and navigate to the following URL:
http://yournewdomain.com/installer.php
Remember to replace yournewdomain.com with your actual new domain name. This action will launch the migration plugin's wizard.
The installer will automatically detect the archive file and pre-populate certain options on the screen. Scroll down to where you can enter the database information you created in the previous step. Below this section, the migration plugin will typically display both your old domain’s URL and your new domain’s URL for verification.
If all the displayed information is accurate, click on the ‘Validate’ or equivalent button to proceed. The plugin will attempt to establish a connection to your database using the credentials you provided. Upon a successful connection, you will see a ‘Validation Pass’ message. If there are any issues, a warning will appear with details on how to rectify them.
Click on the ‘Next’ button to continue. The migration plugin will now commence the import of your WordPress website. Once this process is complete, a success message will be displayed, usually alongside an 'Admin Login' button.
The migration plugin will automatically update the URLs within your WordPress installation to reflect your new domain name. You can now click on the ‘Admin Login’ button to access your new WordPress site's dashboard and complete any final configuration steps.
Step 4: Set Up Permanent 301 Redirects
An essential step for preserving your SEO and user experience during a domain migration is to configure permanent 301 redirects. These redirects will automatically guide both users and search engines from your old domain name to the corresponding pages on your new domain.
301 redirects are vital because they signal to search engines that a page has permanently moved, ensuring that the SEO authority (link equity) built on your old URLs is transferred to the new ones. This prevents visitors from encountering 404 "page not found" errors and helps maintain your search rankings.
To ensure these redirects remain active and effective, it is necessary to keep your old WordPress installation, or at least the hosting for your old domain, active for a considerable period. This allows the redirects to function continuously, guiding traffic to your new site.
There are typically two primary methods for setting up these redirects: one involves using a dedicated plugin for ease of use, and the other requires manual file editing.
Method 1: Set Up 301 Redirects With an SEO Plugin
For this method, you will utilize a powerful WordPress SEO plugin that includes redirect management functionalities. These plugins are designed to simplify the optimization of your WordPress website for search engines and often provide user-friendly tools for managing redirects.
First, you need to install and activate a suitable SEO plugin on your old domain. If you are unfamiliar with the process, step-by-step guides on installing WordPress plugins are widely available.
Note: Many advanced redirect features are part of premium versions of these SEO plugins. Ensure the version you use offers full site redirect capabilities. While you will be setting up redirects on your old site, considering a similar SEO plugin on your new WordPress site can further enhance your search engine rankings and overall traffic.
Upon activation on your old domain, navigate to the plugin's 'Redirects' section within your WordPress admin area. Look for an option to 'Activate Redirects' or similar, and click it.
Next, switch to a tab or section typically labeled ‘Full Site Redirect’ or ‘Site Relocation’. Locate and enable the ‘Relocate Site’ toggle or checkbox. You will then be prompted to enter your new domain name into the designated field.
Finally, remember to click on the ‘Save Changes’ or equivalent button to apply and store your redirect settings.
Method 2: Manually Set Up Redirects to New Domain
This method involves directly editing the .htaccess file of your old WordPress domain. This file is a powerful configuration file for web servers.
To begin, connect to your old site using an FTP client or your hosting provider's File Manager. The .htaccess file is typically located in the root directory of your WordPress installation, often alongside folders like wp-includes and wp-admin. Open the .htaccess file for editing and insert the following lines of code at the very beginning:
#Options +FollowSymLinks
RewriteEngine on
RewriteRule ^(.*)$ http://www.newsite.com/$1 [R=301,L]
It is crucial to replace newsite.com in the code above with your actual new domain name. After inserting these lines, save the changes to the .htaccess file.
Once these modifications are applied, visit your old domain name in a web browser. It should automatically redirect you to your new domain. If the redirection does not occur, it may indicate that the redirect rules are not properly configured, or your server might not have the RewriteEngine module enabled. In such a scenario, you should contact your web hosting company’s support team to ensure that RewriteEngine is turned on for your account.
Step 5: Notify Google About Your New Domain
With your WordPress site successfully migrated to its new domain and 301 redirects in place, the next crucial step is to formally inform Google about this change of address. This action will significantly accelerate Google’s process of discovering your new website domain and incorporating it into its search results.
Firstly, ensure that both your new and old domains have been added to your search engine webmaster tools (such as Google Search Console) as distinct properties. If you haven't done so already, refer to guides on adding your website to these webmaster tools for instructions.
Next, within your search engine webmaster tools dashboard, select your old domain name as the active property. After selecting, navigate to the ‘Settings’ menu, typically located in the left-hand column.
From the settings, you should find and click on a ‘Change of address’ tool or similar option.
You will then need to select your new domain from the options provided in the ‘Update Google’ section. Finally, click on the ‘Validate & Update’ button.
That completes the notification process. Google will now proceed to validate that your old domain is correctly redirecting to the new domain and will save your change of address request. On the subsequent screen, the webmaster tools will typically present a step-by-step wizard to guide you through the submission of your change of address request.
Notify Your Users About the New Domain Name
While the 301 redirects are diligently working behind the scenes, it is always a good practice to make a public announcement regarding your website’s migration. This proactive communication can greatly assist in a smoother transition for your audience.
You can achieve this by publishing a new blog post on your new site, detailing the move, and subsequently sharing this announcement across your various social media platforms. If you maintain an email newsletter or have a base of push notification subscribers, sending out a direct announcement to them is also highly recommended.
This approach offers several key benefits. First and foremost, your loyal users are more likely to remember and adapt to your new domain once they have been directly informed about it. Secondly, this provides an excellent opportunity to engage your community and ask them to report any potential issues or bugs they might encounter on the new site. Your ability to test your site across every possible browser, device, or system environment is limited, so having fresh pairs of eyes from your user base can be incredibly valuable for identifying and resolving unforeseen problems.
Frequently Asked Questions About Moving a WordPress Site
We understand that even after reviewing the detailed steps, you might still have lingering questions about migrating your WordPress site to a new domain. Here are answers to some of the most common inquiries we receive, designed to provide you with complete confidence in undertaking this process.
1. Will changing my domain name permanently hurt my SEO?
No, a domain name change will not permanently damage your SEO if you meticulously follow the correct migration procedures. While a temporary fluctuation or dip in search rankings and traffic is a normal occurrence as search engines process the extensive changes, this guide is specifically designed to minimize that impact. By properly configuring 301 redirects (as detailed in Step 4) and officially notifying search engines via their webmaster tools (as explained in Step 5), you are explicitly communicating the move to search engines, enabling them to effectively transfer your existing domain authority and equity to your new domain.
2. Do I need to keep my old domain after moving to the new one?
Yes, it is absolutely essential to maintain your old domain name and its associated hosting active for the foreseeable future. Your old domain serves as the crucial host for the permanent 301 redirects that consistently guide both human users and automated search engine crawlers to your new site. Allowing your old domain to expire or shutting down its hosting would effectively break all of these vital redirects, leading to significant loss of traffic, numerous 404 errors, and a severe detriment to your carefully built SEO rankings. It is advised to keep the old domain active for at least 1-2 years to ensure all search engines have fully updated their indexes and all backlinks have been processed.
3. How long does the entire domain migration process take?
The technical steps outlined in this guide – encompassing site backup, database creation, unpacking WordPress, and setting up redirects – can typically be completed within a few hours. However, it is important to understand that the subsequent process of search engines like Google fully crawling, re-indexing, and recalibrating their understanding of your new domain takes considerably longer. While submitting your change of address request to search engine webmaster tools will expedite this, it is common for search rankings and traffic to take several weeks, or even a few months, to fully stabilize after the migration.
4. Can I move my WordPress site without using a migration plugin?
While it is technically feasible to perform a manual site migration by transferring files via FTP and exporting/importing the database, for the vast majority of users, we strongly advise against this approach. Manual migration is an inherently complex process that carries a significantly higher risk of errors, such as overlooked URL updates, database connection failures, or broken internal links. A dedicated migration plugin automates these critical and intricate steps, rendering the entire process much safer, considerably faster, and far more reliable, thereby minimizing potential complications and stress.
5. What is the main difference between moving to a new domain versus a new host?
To illustrate the distinction, consider this analogy: moving your website to a new domain is akin to changing your business’s street address. Your business (the website content) remains the same, but its public identifier (the domain name) changes. Conversely, moving to a new host is like changing the company that owns the building where your business operates, but your street address (the domain) stays consistent. This guide specifically addresses the former – changing your address (domain) – which introduces unique SEO requirements, such as the implementation of 301 redirects, that are absolutely critical for a successful and ranking-preserving transition.
