


If your WordPress site crashes, you won’t want to be stuck with a backup from 2 months ago. Or worse, no backup at all. Your site changes, new customer data, and fresh content will all be lost forever.
This happens more often than you’d think.
Manual backups work in theory, but they’re easy to forget. Most website owners start with good intentions, planning to back up their site every week. But life gets busy, and backup schedules slip.
Automatic backups are a highly recommended solution for this problem! They work in the background to protect your site without any ongoing effort from you.
Setting up reliable automatic backups isn’t complicated. With the right steps, you’ll ensure your WordPress site is always protected.
In this post, you’ll learn:
- Why automatic backups are essential for your site’s security.
- How to set up automated backups for your WordPress site.
- How to connect cloud services for safe, off-site backup storage.
- How to create a custom backup schedule that fits your needs.
Why Should You Automatically Back Up Your Website?
As a WordPress website owner, creating regular backups is crucial. This serves as a vital security measure in case anything goes wrong.
If you experience data loss, malware, hard drive failure, or other common WordPress errors, you can simply restore your most recent backup files.
To protect your website, you could consider manually backing up your site. However, remembering to do this consistently can be challenging.
It’s much easier to set up automatic backups.
With an automated backup schedule, your site files and database will be backed up every month, week, day, or hour. Depending on how often you want your data saved, you can customize your WordPress auto backups to meet your specific needs.
Automatic backups are essential for keeping your website secure and preventing vulnerability. Let’s explore how to create an effective automatic backup schedule!
Here’s a quick overview of the process:
- Install an automatic backup plugin: Reputable backup plugins allow you to schedule backups every hour, week, day, or month.
- Create a backup template: Define the specific data you want backed up when the schedule runs.
- Connect cloud storage locations: Set up third-party cloud storage options to keep your backups safely off-site.
- Create a backup schedule: Choose a frequency, storage location, and template to fully automate the entire backup process.
How to Automatically Back Up WordPress
Step 1: Install an Automatic Backup Plugin
By itself, WordPress does not include a built-in backup feature. To begin safeguarding your data, installing a reliable backup plugin is highly recommended. Such tools enable you to create manual backups and automatic backup schedules for your WordPress site.
Many professional backup plugins also function as migration tools, allowing you to move your WordPress installation to another host, server, or domain name. This capability is also beneficial when moving content to a staging site.
Some of the helpful features you can expect from a professional backup solution include:
- One-click restores for quick recovery
- Comprehensive disaster recovery options
- Support for large sites and multisite networks
- Cloud backup storage integration
- Remote restores for backups stored in the cloud
- Drag-and-drop migrations for ease of use
- A step-by-step migration wizard for guided processes
- Email summaries regarding backup status
To start automatically backing up your WordPress site, consider a subscription for the premium version of a chosen plugin. While free versions often exist, the premium offerings typically include scheduled backups and remote storage options.
Next, you’ll need to install and activate the plugin. After activation, navigate to the plugin's settings, usually found under a dedicated menu item. In the License Key field, paste the license key obtained with your purchase.
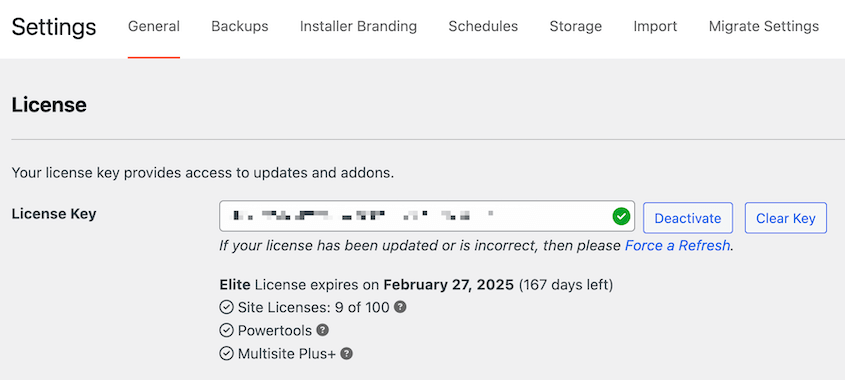
Click on Activate to complete the setup process.
Step 2: Create a Backup Template
Before establishing an automated WordPress backup schedule, it’s often beneficial to define a template for it. In many backup plugins, templates dictate precisely how a backup is constructed. You can customize your template to include only specific files and database tables that you wish to be backed up.
First, access the plugin’s tools or template section. Here, you’ll typically find a default template that automatically builds a complete backup of your entire WordPress site.
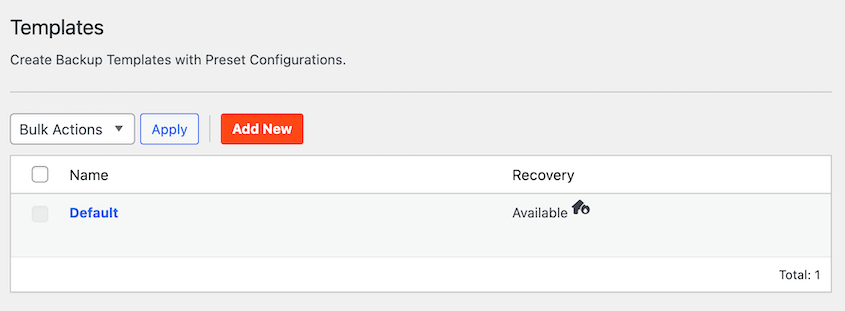
If you prefer your automatic backups to encompass all your files and database tables, you can proceed to the next step. However, if you require more granular control, you might want to create a custom template for specific types of backups. To do this, look for an "Add New" option.
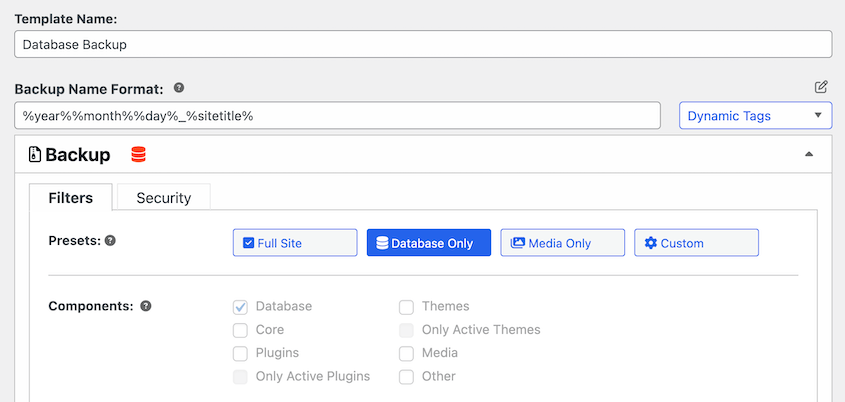
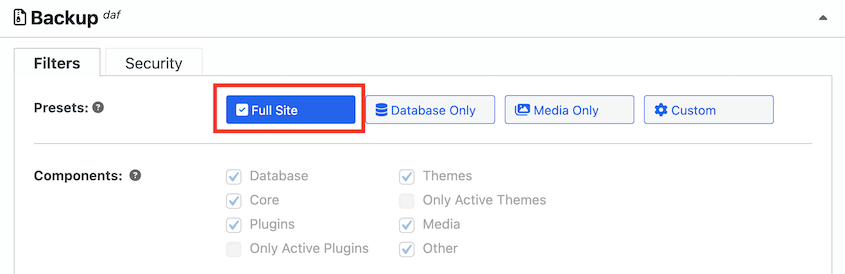
At the top of the page, give your template a descriptive name. Then, you can edit the backup configuration to include only the data you specifically want to be backed up. For instance, you could configure it for just a database backup.
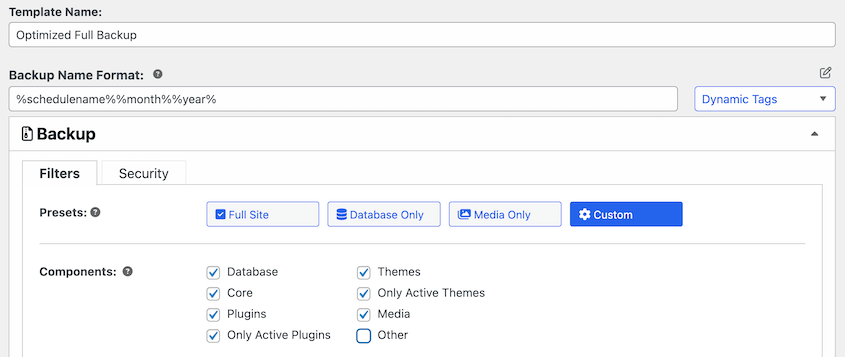
You can also select a custom combination of files to optimize your site backups. This might involve including only active plugins and themes, or excluding non-WordPress files or your media library.
Once you are satisfied with these settings, click on Save Changes.
Many backup solutions allow you to create multiple schedules, enabling you to set up different templates for specific auto backups. This flexibility helps ensure you back up the right components of your site at the most appropriate times.
Step 3: Connect Cloud Storage Locations
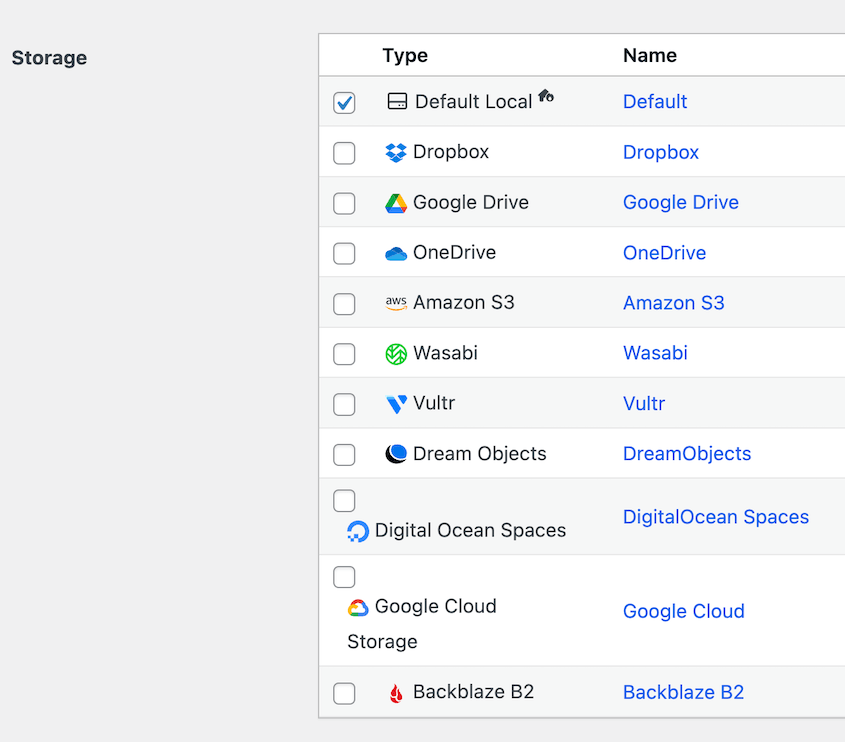
By default, many backup plugins will save your site backups to a local server. However, for enhanced security and disaster recovery, it is strongly recommended to store your backups off-site in a cloud storage service. Leading backup plugins often support a wide range of external backup locations, including:
- FTP
- Google Drive
- Dropbox
- Microsoft OneDrive
- Amazon S3
- Wasabi
- Google Cloud
- DreamObjects
- Vultr
- DigitalOcean Spaces
- Cloudflare R2
- Backblaze B2
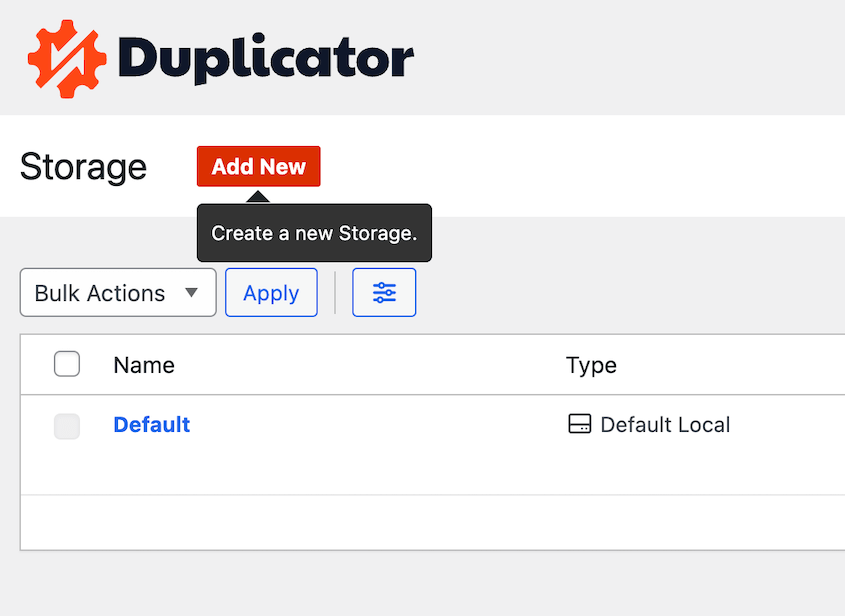
If you intend to use any of these third-party storage locations, you’ll need to connect them with your backup plugin. To initiate this, navigate to the plugin’s Storage section and select "Add New."
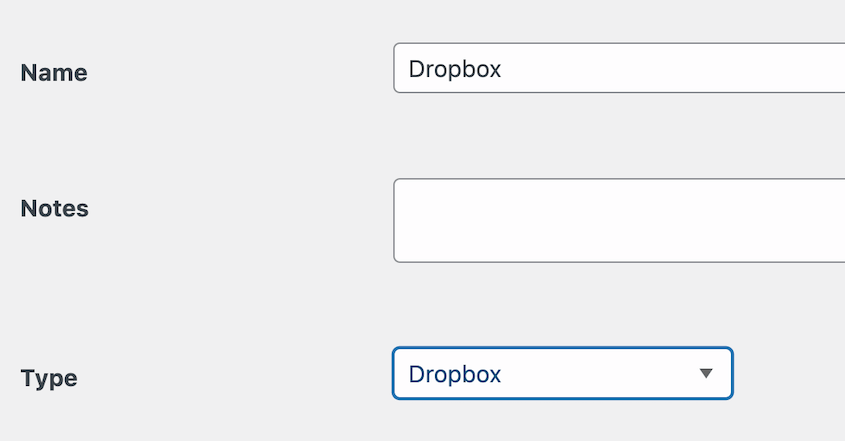
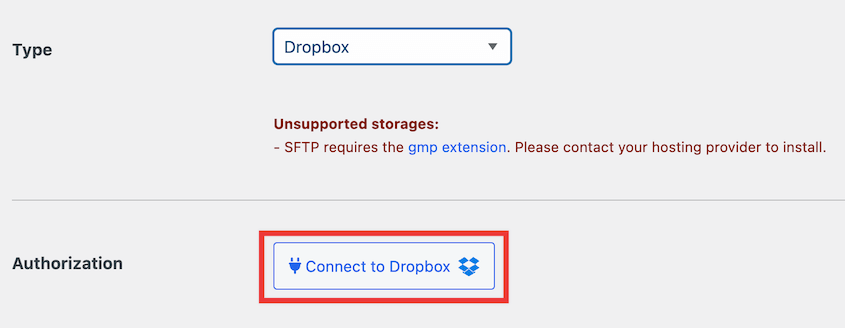
Next, provide a name for this new storage location. Using the Type dropdown, select the cloud service you wish to integrate. For example, if using Dropbox, select it from the list.
After this, click on the button to connect the plugin to your chosen cloud service (e.g., "Connect to Dropbox").
You will then see the steps required to complete the third-party storage authorization. To connect your cloud service and WordPress, typically you'll click an "Authorize" button specific to that service.
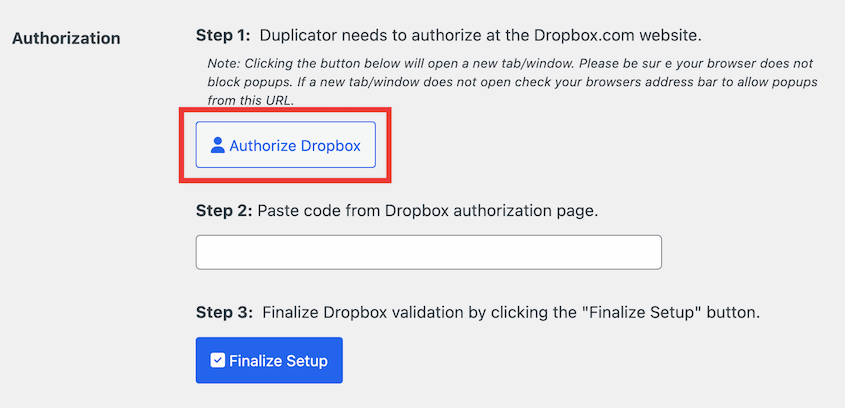
This action will usually open a new tab in your browser, redirecting you to the cloud service’s website (e.g., Dropbox). You’ll need to confirm that the plugin is authorized to access your account. After granting permission, you will likely be provided with an authorization code.
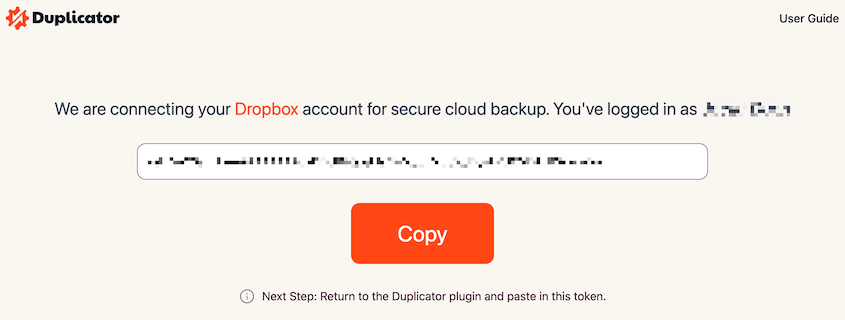
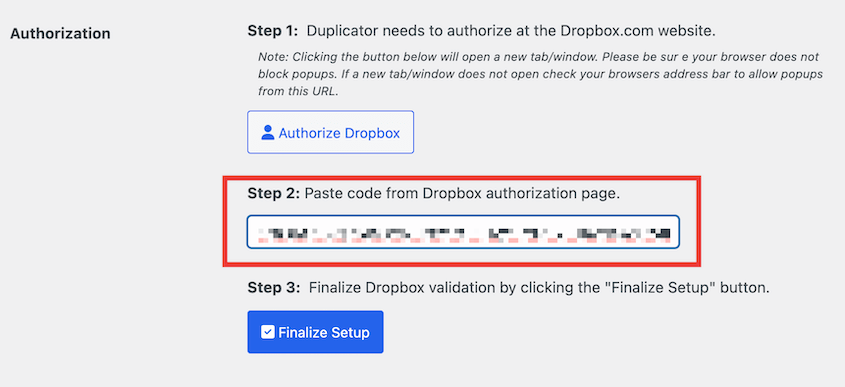
Return to your WordPress dashboard and paste the provided code into the designated field within the plugin settings. Finally, click on Finalize Setup.
With these steps completed, you can now automatically save your backups to a secure cloud storage service, adding an extra layer of protection against local server issues.
Step 4: Create a New Backup Schedule
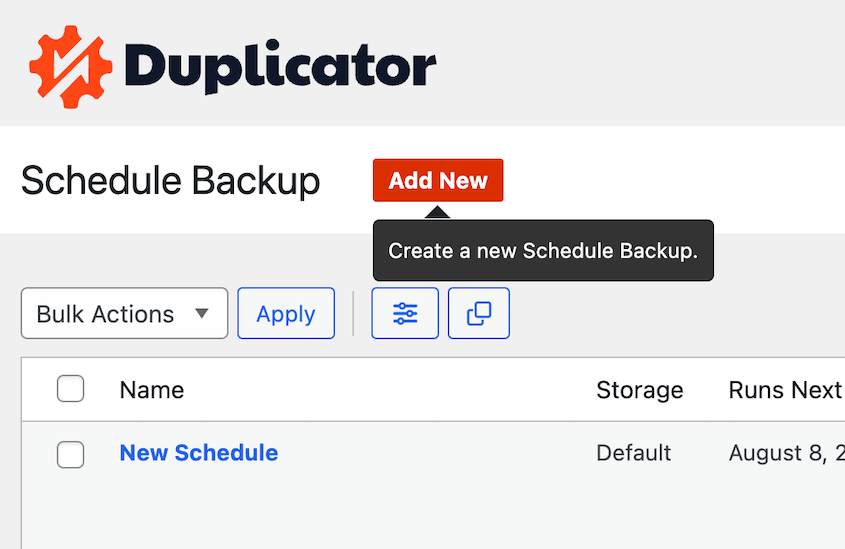
Once your templates are defined and cloud storage is connected, you can easily set up a schedule to automatically back up your WordPress site. Begin by navigating to the plugin's Schedule Backup section and selecting "Add New."
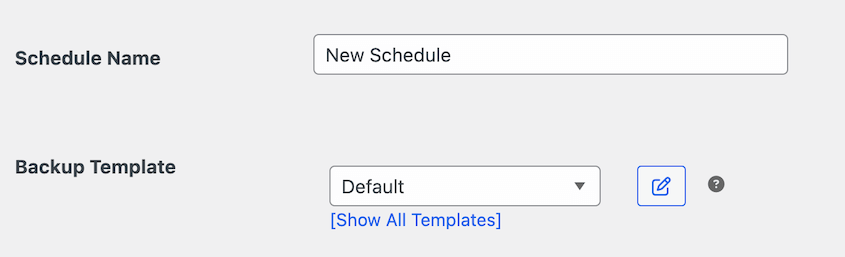
On this new page, assign a descriptive name to your backup schedule. Then, select a template; this can be the Default template for a full site backup or a custom template you created earlier for specific data.
Next, choose a storage location from the list of options you’ve already authorized and connected in the previous step.
You can then customize the frequency for when your backup will run. Many plugins offer options for monthly, weekly, hourly, or daily backups, allowing you to choose what best suits your website's update frequency.
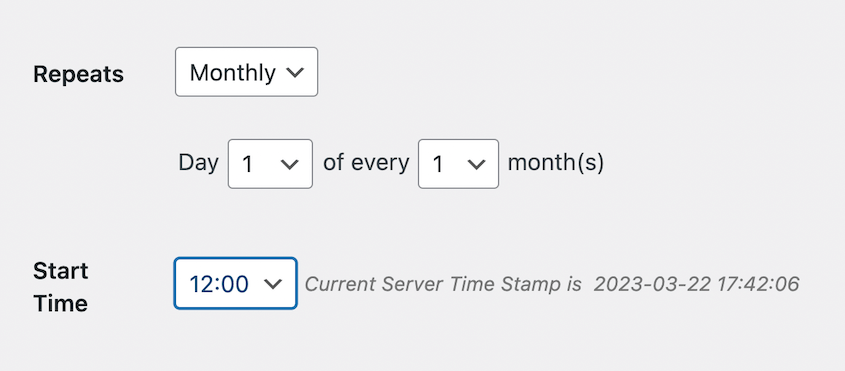
You’ll also need to select a Start Time. This will initiate the backup process at a specific time of day.
After configuring these settings, scroll to the bottom of the page and check the box next to Enable This Schedule.
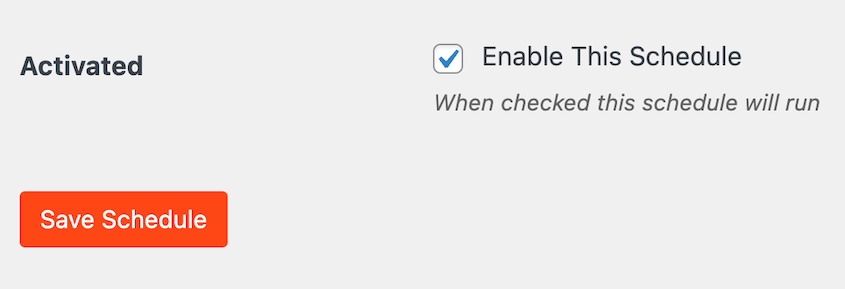
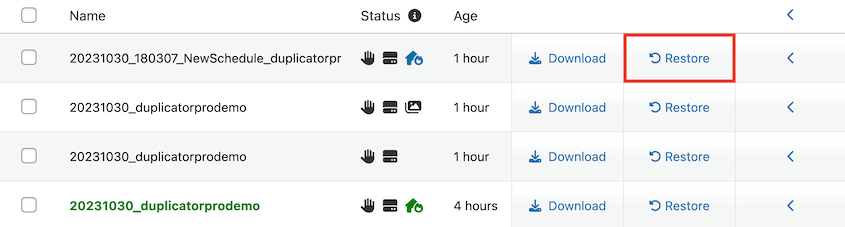
Finally, save the schedule. You can then view your new WordPress auto backup on the Schedule Backup page.
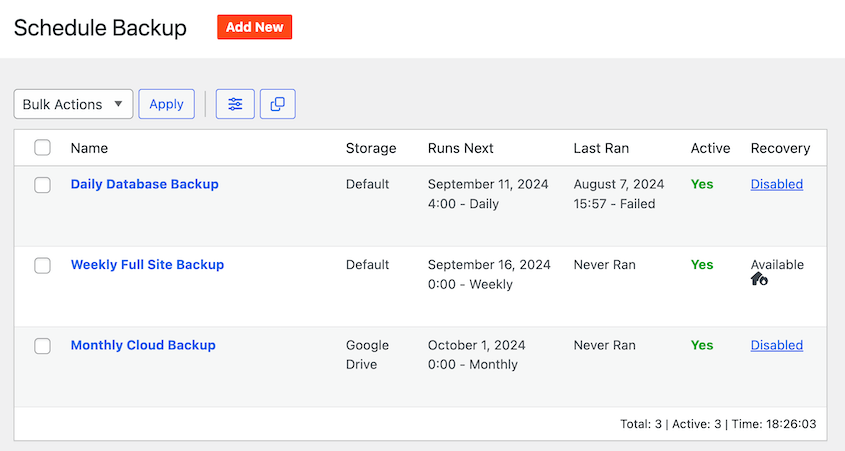
This overview will show you when the schedule was last run and when your site is next slated for backup. When the scheduled time arrives, your backup archive and installer files will be conveniently available as downloadable zip files.
Frequently Asked Questions (FAQs)
Does WordPress have a built-in backup?
No, WordPress does not come with a built-in backup service. If you wish to back up your website, you will need to install a dedicated WordPress backup plugin. Alternatively, you could manually download your site’s data or rely on your web host’s backup solutions, though these often come with limitations or additional costs.
What is the best WordPress backup plugin?
A leading WordPress backup plugin is a highly recommended solution for scheduling automatic website backups and storing them securely in off-site cloud storage services like Dropbox, Google Drive, or Amazon S3. Such comprehensive backup features provide invaluable peace of mind that your data is always secure and easily recoverable.
Alternatives such as UpdraftPlus, BackWPup, WPVivid, Jetpack Backup (VaultPress), BackupBuddy, and BlogVault are also popular choices. To decide between them, consider comparing the top WordPress backup plugins to find one that best fits your specific needs and budget.
How do I back up my WordPress website without plugins?
Your web hosting provider typically offers methods to back up your website without requiring additional plugins. Alternatively, you could manually download your website’s files using cPanel or an FTP client. Your WordPress database can usually be exported directly from phpMyAdmin, providing a raw backup of your site’s core data.
How do I do a daily backup in WordPress?
To back up your WordPress site daily, begin by installing a professional backup plugin. Then, create a new backup schedule within the plugin’s settings and set the frequency option to Daily. Ensure you save your settings to activate the daily routine.
How do I back up my WordPress site for free?
You can back up your WordPress site for free by installing the lite version of many popular backup plugins available in the WordPress repository. These free WordPress plugins typically allow you to compile all your WordPress files, themes, plugins, media files, and database information into a single downloadable zip file. After creating a backup, you can then download it directly to your computer for safekeeping.
There are plenty of free backup tools available. It's advisable to read comparisons and reviews to determine which one is right for your specific requirements.
How do I back up my entire WordPress site?
One straightforward way to back up your entire WordPress site is by installing a comprehensive backup plugin. After initiating a new backup process, select the Full Site preset or similar option. This ensures that all of your site’s data, including core WordPress files, themes, plugins, media, and database, are included in the backup archive.
How often should I back up my WordPress site?
The ideal frequency for backing up your WordPress site largely depends on the nature and activity of your website. For static sites that undergo infrequent updates, creating backups once a month might be sufficient.
However, websites with higher traffic and frequent content changes, such as e-commerce platforms or active blogs, will require more frequent backups. For these sites, consider increasing your backup schedule to once a week, day, or even hourly, to minimize potential data loss.
