


While the cPanel File Manager offers a convenient way to upload and edit your website files directly, many users find File Transfer Protocol (FTP) to be a more robust and efficient method for managing their site’s content. This guide will walk you through the essential steps of setting up and managing FTP user accounts in cPanel, providing you with the knowledge to effectively handle your website’s file structure.
What Is an FTP Account?
An FTP account provides direct access to your website’s files, enabling users to upload, download, delete, and modify permissions on files within their designated directories. This level of access is crucial for website development, maintenance, and content updates. Most FTP programs, such as FileZilla, WinSCP, Transmit, or Cyberduck, are desktop applications installed on your computer that connect directly to your website’s server.
A significant advantage of using FTP is the ability to create user accounts with restricted access. This feature allows you to grant specific individuals access only to the directories you define, ensuring that they can manage particular sections of your site without having full access to all your website’s files. This is ideal for collaborators or developers working on specific parts of your site.
How Do I Set Up an FTP Account?
Setting up an FTP account in cPanel is a straightforward process. All you need is your cPanel login credentials and the desired username and a strong password for the new FTP account. Let’s proceed with the step-by-step instructions.
1. Create a New FTP User Account in cPanel
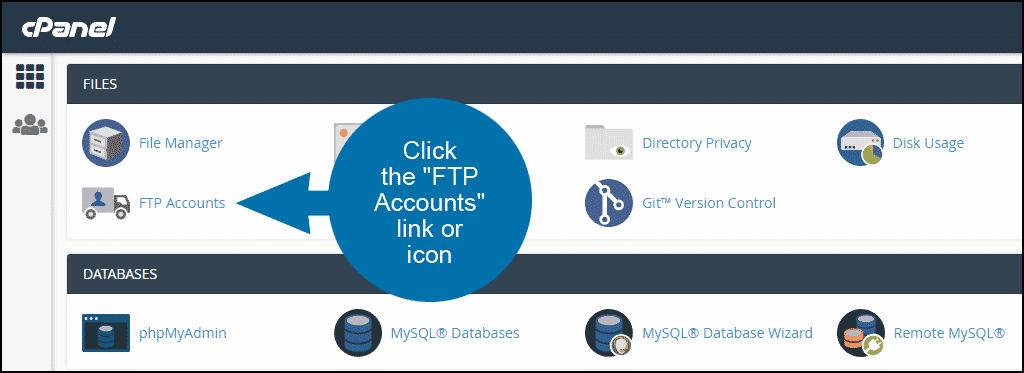
First, log in to your cPanel interface. Navigate to the “FILES” section and click on the “FTP Accounts” link or icon. This will take you to the FTP account management page.
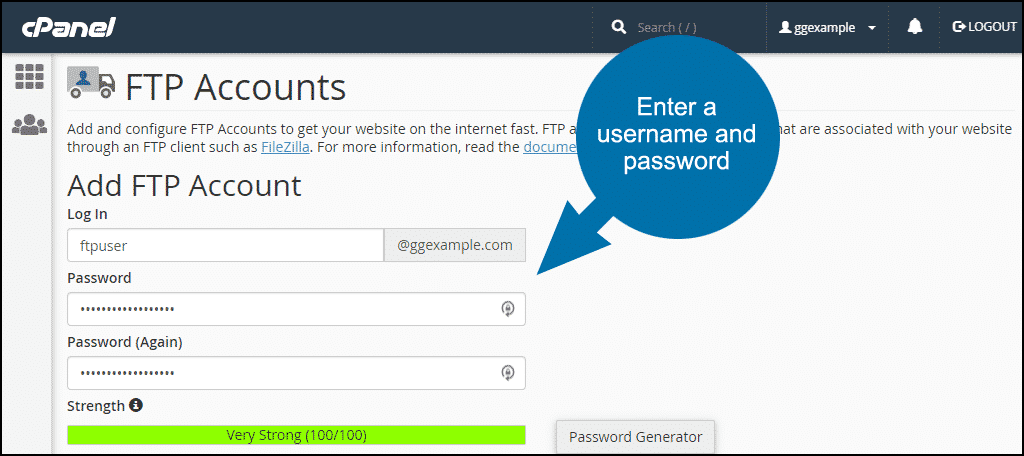
On the FTP Accounts page, locate the section for creating new FTP accounts. Enter your desired FTP username in the “Log In” field. Next, input a strong, secure password in both the “Password” and “Password (again)” fields. It is critical to choose a robust password, as cPanel will analyze its strength and may reject it if it is too short or not sufficiently complex, ensuring the security of your account.
2. Specify Which Directories the FTP User Can Access
The “Directory” field determines the highest level of access the FTP user will have. By default, this field is automatically populated with a path similar to public_html/your_domain.tld/ftpuser (where “ftpuser” is the username you just entered, and “your_domain.tld” represents your cPanel account's primary domain). This means the user will only have access within that specific subdirectory.
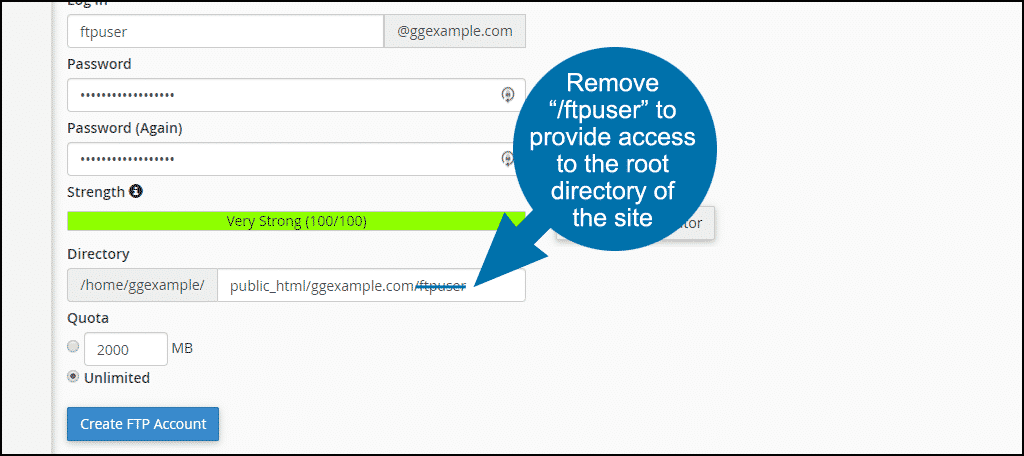
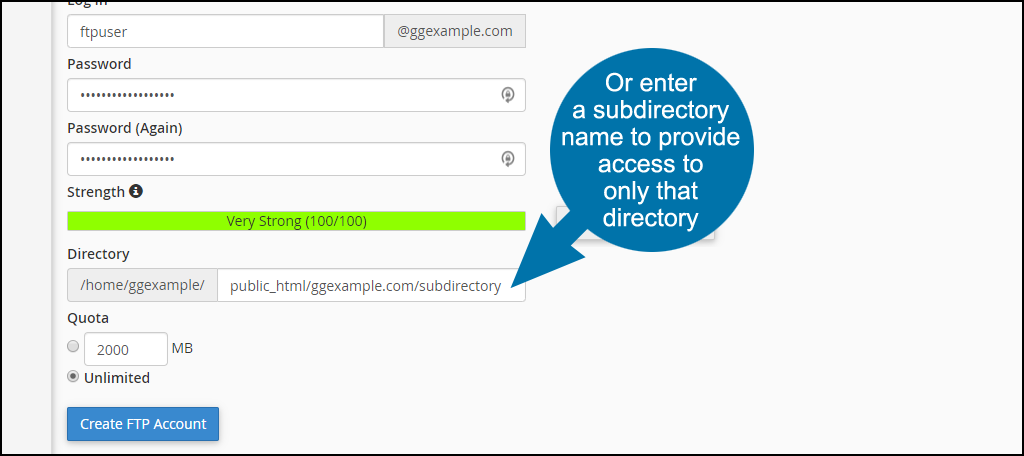
If you intend for the new user to have full access to your website’s root directory (typically public_html), you will need to modify this default entry. For example, to grant access to the root of your main domain, you would change the directory to public_html. Conversely, if you want to restrict access to a particular subdirectory, such as for a specific project or a section of your site, replace /ftpuser with the name of that desired directory (e.g., public_html/my-project). It’s important to note that the specified subdirectory does not necessarily need to exist beforehand; cPanel can create it for you upon the FTP account's creation.
3. Set a Quota for the FTP User and Create the Account
The “Quota” setting allows you to impose a storage limit on the FTP user. Once this limit is reached, the user will be unable to upload further files. For most general purposes, leaving the quota set to “Unlimited” is recommended to avoid upload interruptions. However, if you are creating an account for a third party and wish to manage their disk space usage, setting a specific quota can be beneficial.
After configuring the directory and quota, click the “Create FTP Account” button. Upon successful creation, cPanel will display an “Account Created” success notice, confirming that your new FTP user is ready.
4. How to Log In to an FTP Account
Once your FTP account has been successfully created, you will need to configure your FTP client to connect to it. Scroll down to the “FTP Accounts” section on the same page and locate the newly created account. Click the “Configure FTP Client” link next to it.
This section provides the necessary manual FTP settings, including the hostname, username, and port, which you can use to set up your preferred FTP program. Additionally, cPanel often provides downloadable configuration files for popular FTP clients. If available, click the “FTP Configuration” button to download a file that can be imported directly into your FTP program, simplifying the setup process. If your client is listed, look for specific instructions; otherwise, consult your FTP program's documentation for guidance on importing configuration files or manually entering settings.
What to Do if You Forget Your FTP User Account Password
For security reasons, cPanel does not allow you to view an existing FTP account's password. However, if you forget the password, you can easily reset it. To do so, log in to cPanel and go to the “FILES” section, then click on the “FTP Accounts” link or icon. In the “FTP Accounts” section, find the account for which you wish to reset the password. Click the “Change Password” link or icon located to the right of that account. Enter a new, strong password in the provided fields and confirm it, then click the “Change Password” button to update the credentials.
How to Delete an FTP Account in cPanel
If an FTP account is no longer needed, it can be securely deleted from cPanel. Access cPanel, navigate to the “FILES” section, and select “FTP Accounts.” Scroll down to the list of existing “FTP Accounts.” Find the account you wish to remove and click the “Delete” link or icon to its right.
You will be presented with an option to “Delete the User’s Home Directory.” It is crucial to consider this option carefully. In most scenarios, you should not check this box, as doing so will permanently delete all files and folders within that user’s assigned home directory. Unless you are absolutely certain you want to remove all associated files, it is best to leave this unchecked to preserve your data. Finally, click the “Delete” button to confirm the removal of the FTP user account.
Why Use FTP Rather Than a Web-Based File Manager?
While web-based file managers offer convenience for minor tasks, FTP often provides a more efficient and powerful solution for comprehensive website file management. Beyond the ability to set up user restrictions, FTP clients streamline the workflow, especially for bulk transfers or complex directory navigation. With an FTP program, you can quickly open the application on your desktop, drag and drop files, and manage your entire website's directory structure with ease, both locally and on the server. This direct interaction and speed can significantly enhance productivity compared to the multiple clicks and page loads often required by web-based interfaces.
If you haven’t yet experienced the benefits of using FTP for managing your website, now is an excellent time to explore this robust tool for enhanced file handling and control.
