


cPanel offers a comprehensive array of integrated backup tools, essential for website management and data security. This guide provides an in-depth look at leveraging these cPanel utilities for both creating backups and restoring important files within your cPanel account. Understanding how to effectively use these features is crucial for safeguarding your website data against unforeseen issues and ensuring business continuity.
Generating a Full cPanel Backup
This powerful utility creates a comprehensive compressed archive of your entire cPanel account, which you can then download and store securely on your local computer. It is crucial to understand that these full backups should not be stored within your server's File Manager; they must be downloaded and kept off the server to ensure data redundancy and security.
- Access your cPanel account.
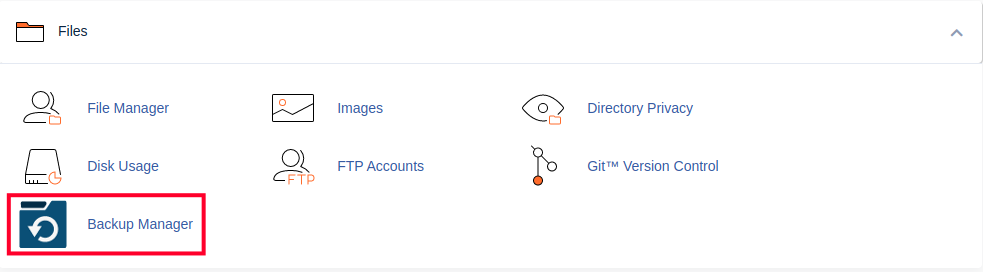
- Navigate to the Files section and click on the Backup Manager button.
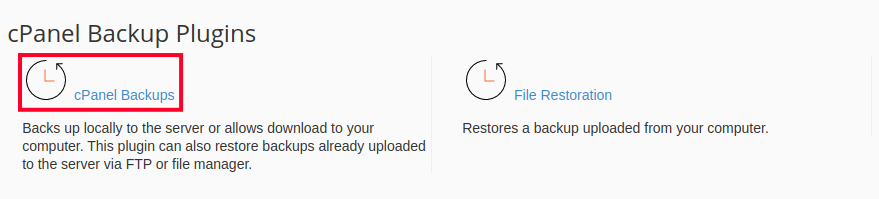
- Within the Other cPanel Backup Plugins area, select cPanel Backups.
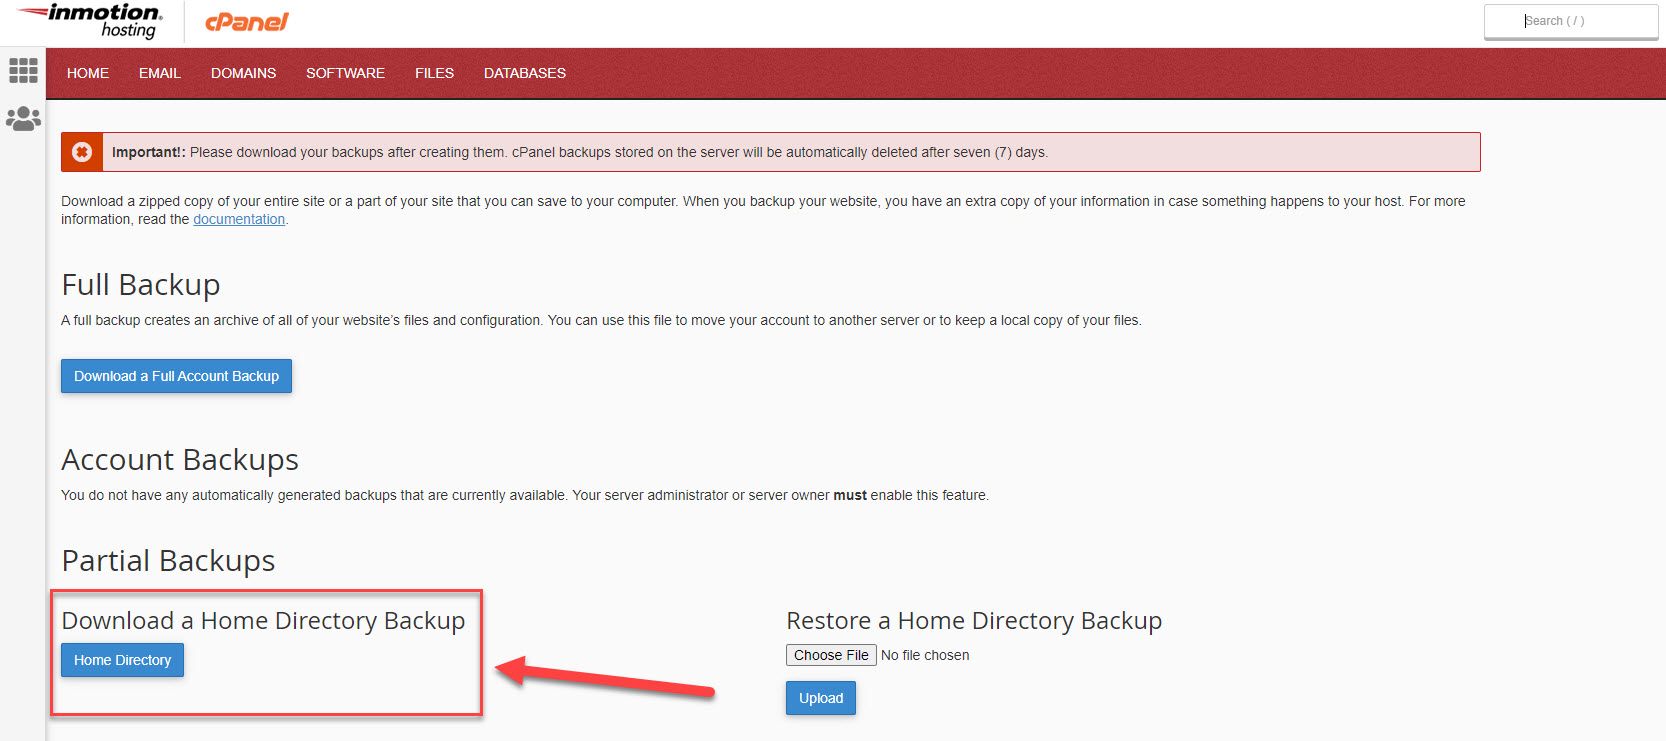
- Locate the Full Backup section and click the Download a Full Account Backup button.
- On the subsequent screen, ensure that the Home Directory option is selected as the backup target.
- To receive an email notification upon backup completion, enter your preferred email address. If you prefer not to receive an email, check the box labeled Do not send email notification of backup completion.
- Initiate the **Full cPanel Backup** process by clicking the Generate Backup button. A message indicating “Full Backup in Progress…” will appear. The backup duration can vary based on the size of your account. An email notification will be sent once the process is complete, if you opted for it.
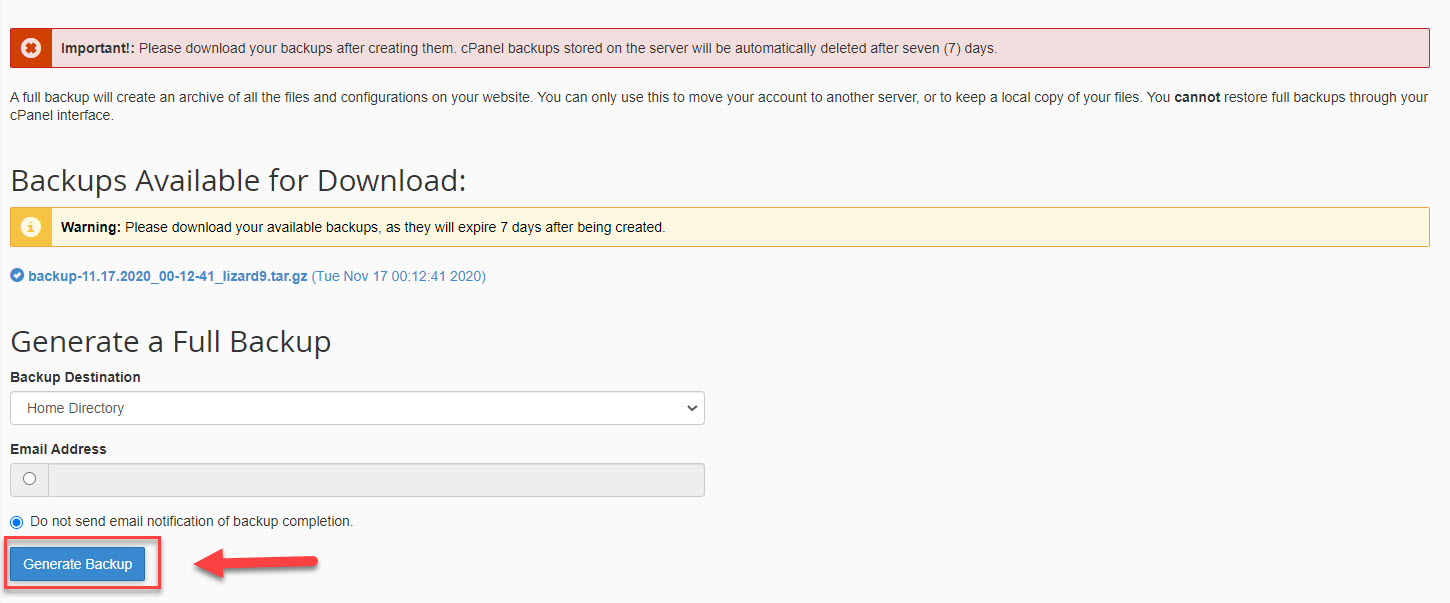
- Once generated, the backup file will be available for download from your cPanel. It will typically be found in your /home directory, starting with 'backup' and including the date. For example, you might see a file named backup-10.26.2020_15-51-32_example.tar.gz. Download this file to your local machine for safekeeping.
Downloading a Home Directory Backup
A home directory backup provides a partial but often sufficient backup of your website files, excluding databases and email configurations. This method is ideal for quickly backing up your website's core files and folders.
- Access your cPanel.
- In the Files section, click on the **Backup Manager** link.
- Under Other cPanel Backup Plugins, click on **cPanel Backups**.
- Within the Download a Home Directory Backup section, click the **Home Directory** button. The download of your Home Directory backup will commence. The completion time will vary depending on the total size of your website content.
- Once the download is complete, the file will be accessible in your web browser’s default download directory. For instance, a home directory backup file might be named backup-example.com-10-4-2017.tar.gz.
By following these steps, you will have successfully created and downloaded a partial backup of your website's home directory using cPanel.
Retrieving a Standard Database Backup
Regular database backups are paramount for any dynamic website, as they secure all your crucial site data, such as posts, user information, and settings. This section outlines the process for downloading a standard MySQL database backup directly from cPanel.
- Log into your cPanel account.
- In the Files section, click on the **Backup Manager** link.
- Under Other cPanel Backup Plugins, click on **cPanel Backups**.
- Navigate to the Download a MySQL Database Backup section. Here, you will see a list of your databases. Click on the name of the specific database you intend to download. If you are uncertain which database corresponds to your website, consult your site's configuration files (e.g., for WordPress, this information is found in your wp-config.php file).
- After clicking the database name, your web browser will download a compressed .sql.gz file to your local machine. Locate this file in your browser’s designated download folder.
With this process completed, you now possess a reliable, localized copy of your database, safely stored on your computer. This backup is invaluable for recovery purposes, allowing you to restore your database in case of accidental data deletion or other unforeseen issues, ensuring the integrity of your website's information.
Utilizing the Backup Wizard
The cPanel Backup Wizard offers an intuitive, step-by-step approach to creating backups, mirroring the functionality of the standard cPanel backup tools but with a more guided interface. This wizard is particularly beneficial for users new to the backup process or those who prefer a streamlined method to ensure all necessary components are included, or when focusing on backing up specific elements of their account.
Creating a Backup with the Backup Wizard
- Access your cPanel account.
- Navigate to the Files section and click the **Backup Manager** link.
- Select the **cPanel Backup Wizard** link.
- Click the prominent blue button labeled **Back Up** to begin.
- You will then be prompted to choose your desired backup type: **Full Backup** or a **Partial Backup**. Partial backup options allow you to download smaller, targeted files. The **Home Directory** option secures all contents within your user’s Home Directory. Other partial backup options specifically target databases (**MySQL Databases**) or email-related data (**Email Forwarders & Filters**). The **Full Backup** option comprehensively archives your entire cPanel account, similar to the full backup method detailed earlier.
- Next, specify the backup's destination. Use the drop-down menu to choose from options such as **Home Directory**, **Remote FTP server**, **Remote FTP server (passive mode transfer)**, or **Secure Copy (SCP)**.
- Provide an email address if you wish to receive a notification once the backup process is complete. If notifications are not required, select the corresponding radio button.
- Initiate the backup by clicking on **Generate Backup**.
- Upon successful completion, a link labeled **Backups Available for Download** will appear. Click this link to download your generated backup file to your local system.
Additional Backup Methods
Beyond the standard cPanel backup utilities, other tools are available for more specialized backup needs, particularly for database management. PHPMyAdmin is a robust tool that allows for detailed control over your MySQL databases, including custom export options.
Creating a Custom Database Backup in PHPMyAdmin
- After logging into cPanel, locate the Databases section and click on the **PHPMyAdmin** icon. This will open the PHPMyAdmin interface.
- In the sidebar on the left, select the specific database you wish to export by clicking on its name.

- From the menu at the top of the PHPMyAdmin screen, click on **Export**. This action will present various export options and confirm the source of the export.
- For a straightforward export, utilize the **Quick** export method, which will export the database in SQL format. If advanced customization is required, select **Custom** to choose specific export settings. The custom option is recommended only for users who are well-versed in exporting MySQL databases. Click **Go** to finalize the export process.
- A prompt will then appear, asking you to specify the save location for the exported file and offering the opportunity to rename the database backup file. Ensure you save the file to a secure and easily accessible location on your local machine once the export is complete.
Restoring Files from Backups
The restoration process is a critical component of any comprehensive backup strategy, allowing you to revert your website or specific files to a previous, stable state. It is important to note that these restoration procedures are effective only if you have previously created and saved one or more backups to a local storage device.
Before initiating any restoration, consider the impact on your current website. If you have made recent changes to your account or directories since the last backup was created, it is highly recommended to save any newly added or edited files separately. Files that exist on your live site but were not present in the backup (e.g., a new file like /public_html/index2.htm) will typically not be overwritten during a restoration process.
Conversely, when restoring a partial home directory backup, any existing files on your account that share the same path and name as files within the backup will be overwritten. For example, if both your live site and the backup contain a file named /public_html/index.htm, the version from the backup will replace the current live version. Always exercise caution and ensure you have a clear understanding of what will be affected by the restoration.
Restoring a Home Directory Backup in cPanel
Follow these steps to restore a partial backup of your website, encompassing all the files within your home directory:
- Log into your cPanel account.
- In the Files section, click on **Backup Manager**.
- Select **cPanel Backups**.
- Under the Restore a Home Directory Backup section, click on **Choose File**.
- Browse your local computer, select the appropriate backup file, and click **Open**.
- Once the backup file's name is displayed, click on **Upload**.
- The system will then show the progress of your files being restored.
Guidelines for Restoring MySQL and PostgreSQL Databases
Database restoration is facilitated directly within their respective cPanel applications, provided the database size is under 50MB:
- For MySQL databases, you can import them using phpMyAdmin.
- For PostgreSQL databases, the import can be managed through phpPgAdmin.
If your database exceeds 50MB, alternative methods are required. You can import larger databases using SSH, a more advanced command-line interface. Alternatively, for assistance with data recovery, it is advisable to contact technical support. When seeking technical support for large database restorations, first upload the database file to your cPanel account. Then, submit a support ticket providing the exact file path and the name of the database to which you wish it to be restored.
