


Overview
This guide offers a comprehensive overview of the process for establishing a new email account and subsequently connecting it to your preferred webmail interface or mail client. Whether you're setting up for personal use or for a business, understanding these steps is fundamental for effective communication.
Creating an Email Account
To establish a new email account swiftly and efficiently, follow these straightforward instructions:
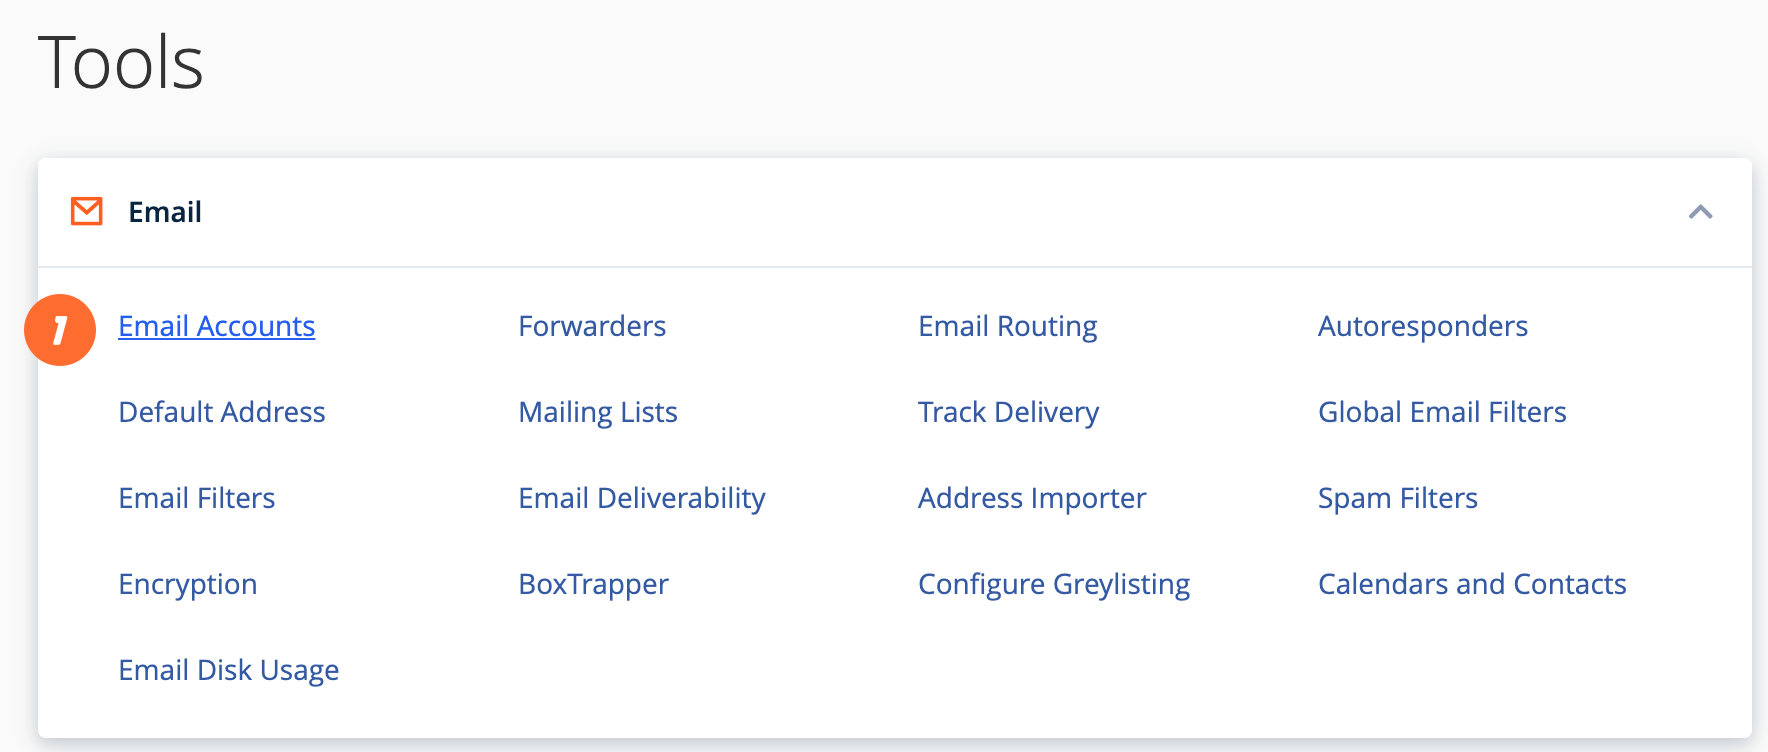
- Access the 'Email Accounts' interface within your hosting control panel. This can typically be found under the 'Email' section of your main dashboard.
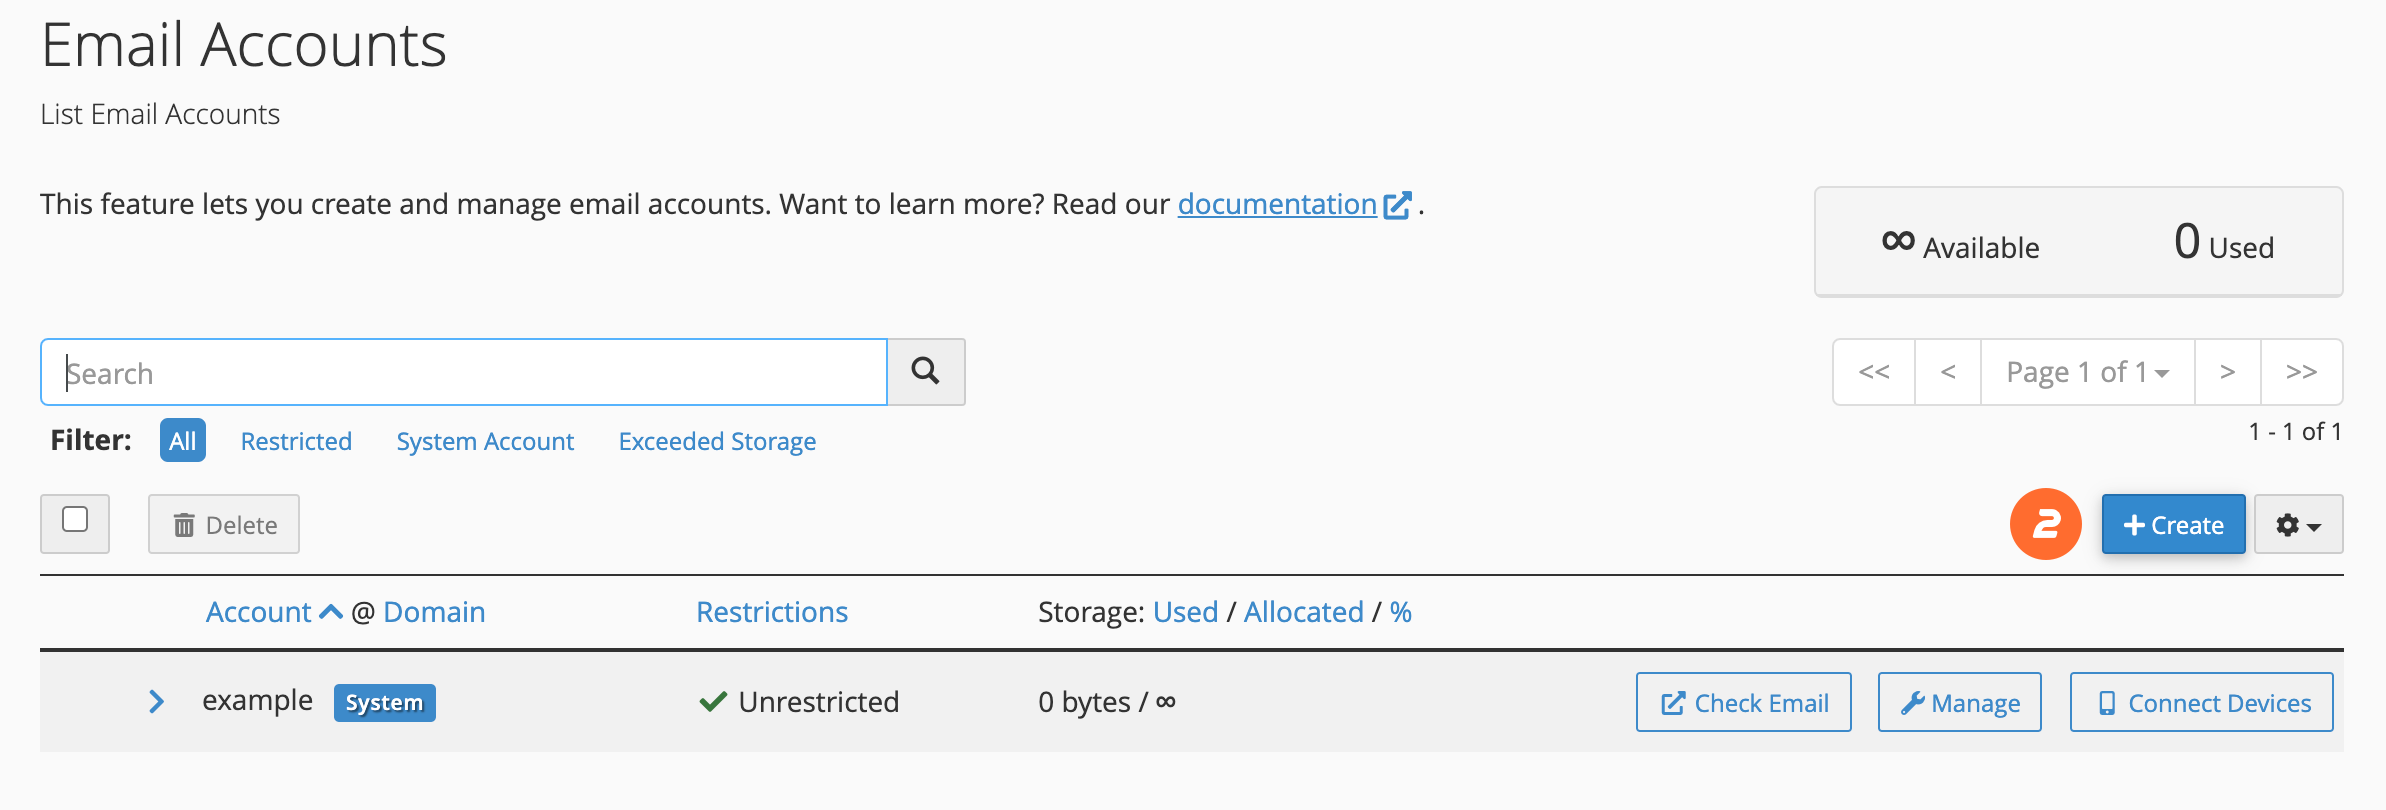
- Click on the 'Create' button. A new configuration page will then be displayed, prompting you for account details.
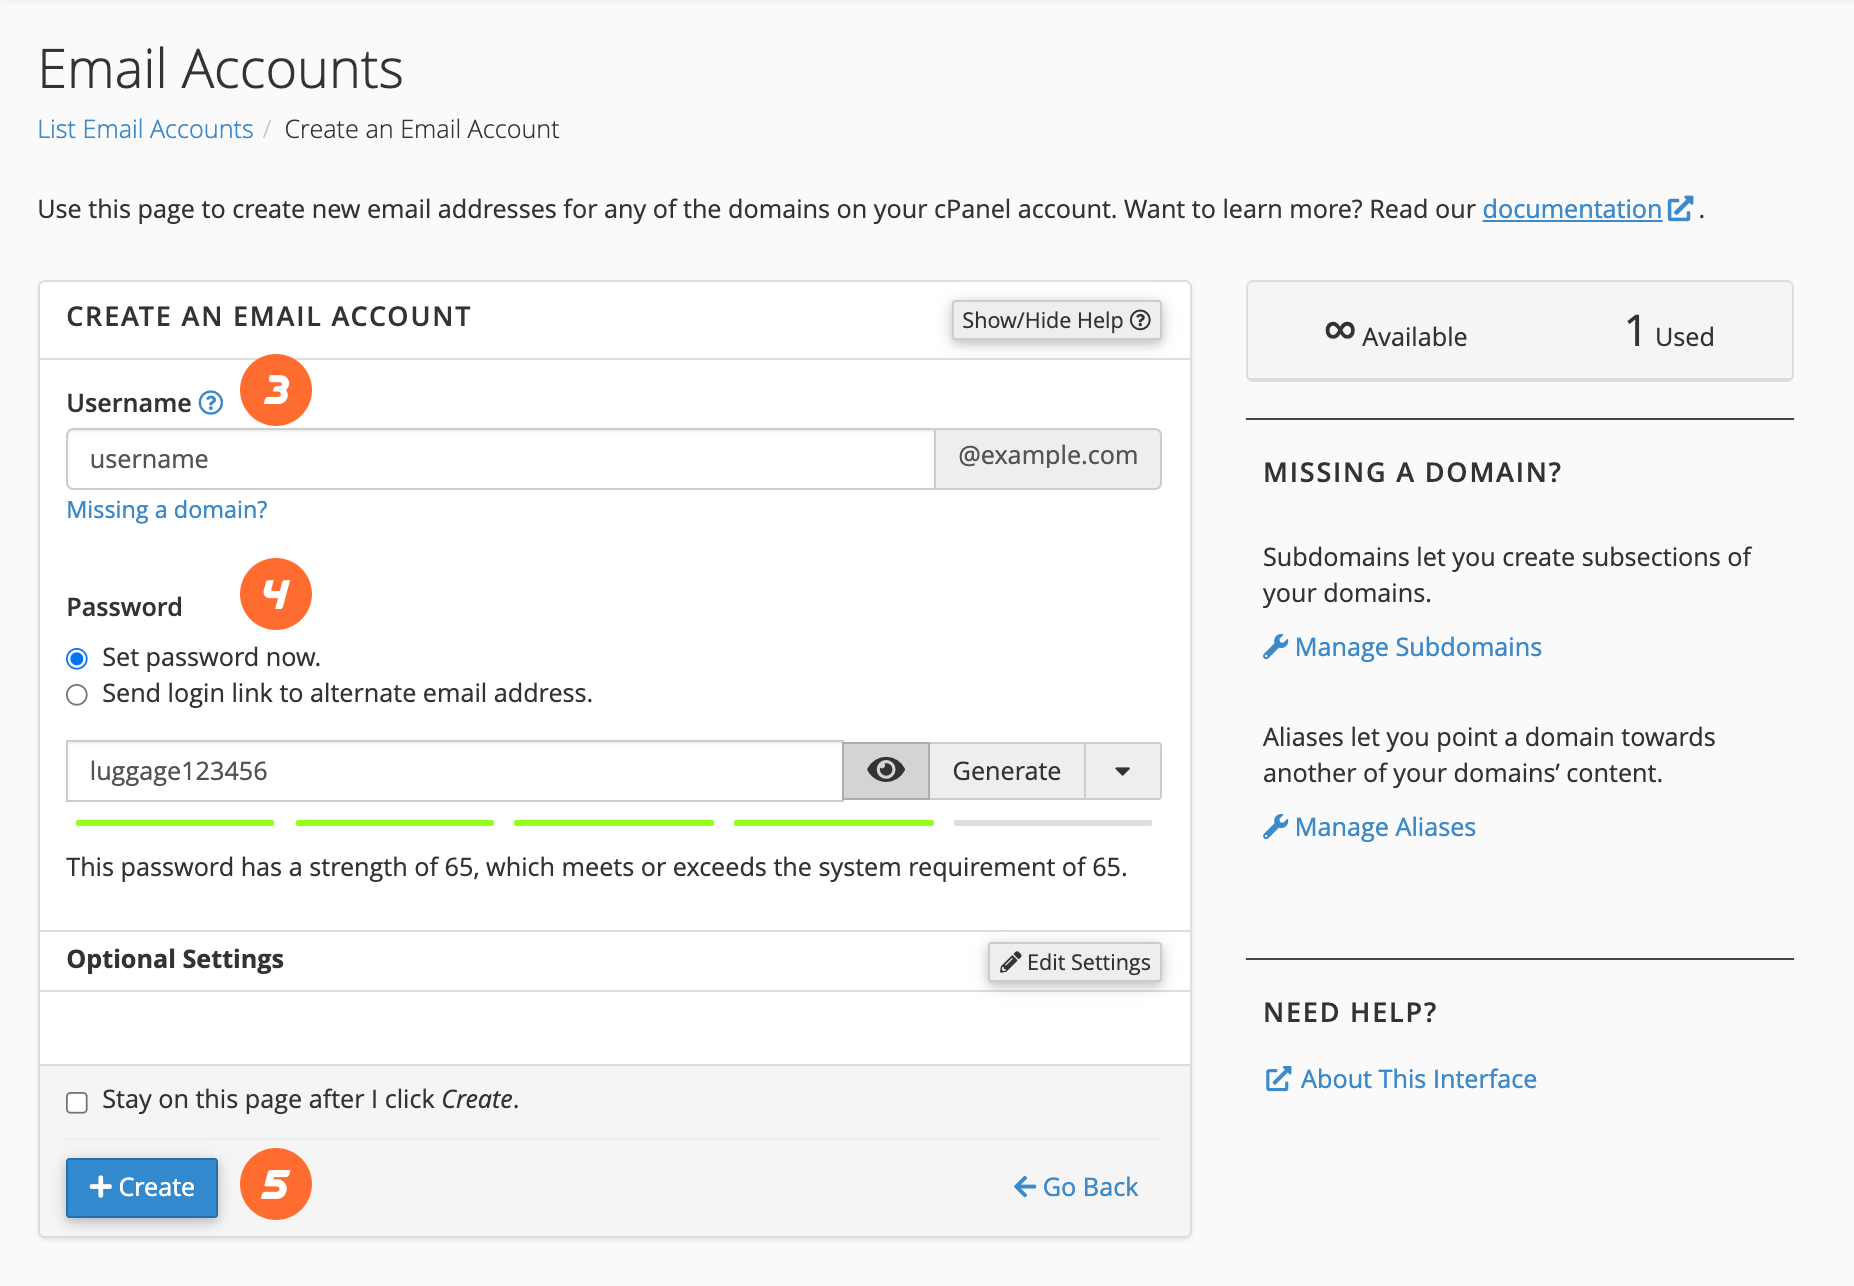
- In the 'Username' field, enter the desired prefix for your new email address (e.g., if you want
[email protected], enterinfo). - Proceed to the 'Password' section. Here, it is crucial to input a strong and unique password into the 'Password' text box to ensure the security of your new email account.
- Once all details are accurately entered, click 'Create' to finalize the account setup. Your new email account will now be active and ready for use.
For additional details and advanced settings related to email account creation, consult the comprehensive documentation available within your hosting provider's resources.
Accessing Your Email via Webmail
Webmail provides a convenient way to access your emails directly through a web browser, eliminating the need for a dedicated mail client. To check your email account using Webmail, follow these steps:
- Open your preferred web browser and navigate to the Webmail login page. This is typically found at a URL such as
https://yourdomain.com:2096orhttps://webmail.yourdomain.com, replacingyourdomain.comwith your actual domain name. - In the 'Email Address' field, input the full email address you just created (e.g.,
[email protected]). - Enter the secure password associated with your email account into the 'Password' text box.
- Click 'Log in' to access your Webmail interface. From here, you can manage your inbox, send new messages, and organize your emails.
For an in-depth understanding of the Webmail interface and its various features, refer to the detailed guides provided by your hosting service.
Configuring Email on Mobile Devices
To ensure you can access your email on the go, configuring your mobile device is essential. For detailed instructions on setting up your new email account on popular mobile platforms, including iOS® and Android™ devices, please consult the dedicated guides provided by your hosting provider. These resources often include helpful, step-by-step instructions accompanied by screenshots to seamlessly walk you through the entire setup process, ensuring your email is synchronized and ready for use.
Setting Up a Desktop Mail Client
Many users prefer to manage their email through a dedicated desktop mail client for enhanced functionality and integration with their workflow. Your hosting control panel typically offers automated configuration scripts for a wide array of popular mail clients, simplifying the setup process.
- Begin by navigating to the 'Email Accounts' interface within your hosting control panel.
- Locate and click on the 'Connect Devices' option, which will present you with client configuration tools.
- Within the 'Mail Client Automatic Configuration Scripts' section, identify the specific mail client you intend to use for your email account.
- Carefully review the provided instructions, then click 'Proceed' to initiate the download of the configuration script. If prompted by your browser, choose to 'Run' or 'Open' the script file to proceed with the installation.
- A security prompt may appear, asking for confirmation to install the script. Select 'Continue' or 'Yes' to authorize the installation.
- The system may prompt you to enter the password for your email account during the installation process. Provide the correct password and click 'Install'.
- Upon successful completion, your chosen mail client will automatically launch and log into your email account. Please note that if your account contains a significant volume of emails, the initial download and synchronization process may take some time.
Should your specific mail client not be listed among the automatic configuration options, or if you encounter any difficulties, detailed manual setup instructions are typically available within your hosting provider's documentation. These resources will provide the necessary server settings (IMAP/POP, SMTP) and port numbers for a successful manual configuration.
Additionally, if you wish to synchronize calendars and contacts on platforms such as MacOS® or iOS®, comprehensive guides are available to assist you with these advanced configurations, ensuring all your communication tools are seamlessly integrated.
Managing Email Access and Security
Maintaining the security of your email account and managing access is crucial. Should you need to revoke access to an email account from a particular device, the most direct method is to remove the account configuration directly from that device. However, if you no longer have access to the device or wish to enforce a more immediate security measure, you can change the email account's password. This action will immediately invalidate the old password across all devices, effectively preventing unauthorized access. To do this, navigate to the 'Manage Email Accounts' interface within your hosting control panel, and utilize the 'Security' section to update your email account's password. This proactive measure ensures that your communications remain secure.
