


Establishing a unique and recognizable online presence is crucial for any business. Through the personalization of your reseller hosting branding within the Plesk dashboard, you can cultivate a strong brand identity that distinguishes your services from competitors and significantly builds customer trust. Clients will undoubtedly value encountering your custom logo and corporate colors each time they access their dashboard. This thoughtful customization serves as a subtle yet highly effective method for enhancing brand recognition and fostering enduring customer loyalty. Such attention to detail can transform a single transaction into a long-term partnership. This comprehensive guide will walk you through the process of adjusting settings, implementing custom branding, and integrating personalized buttons into Plesk, which can, for example, direct users to specific pages on your own website.
Empower Your Brand
Prerequisites
- An active Whitelabel reseller hosting plan.
- Plesk Host Edition (typically included with reseller hosting plans).
How to Personalize Your Plesk Interface for Enhanced Brand Identity
Step 1: Accessing Your Client Area and Plesk Panel
- Begin by logging into your dedicated client area.
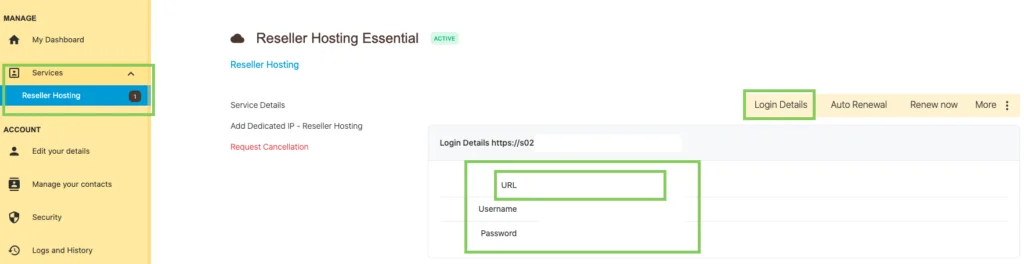
- Upon successful login, navigate to the Dashboard where your active services are listed, then select "Reseller Hosting."
- Within your specific package details, locate and click on "login details" in the top right corner to retrieve your Plesk login credentials.
- Proceed to log into your Plesk panel. This can be accomplished by clicking the provided URL under "login details," which will direct you to the Plesk login screen. Here, you will input your designated username and password.
Step 2: Customizing Interface Preferences
Once logged in, you can begin tailoring the Plesk interface to better suit your operational needs and personal preferences.
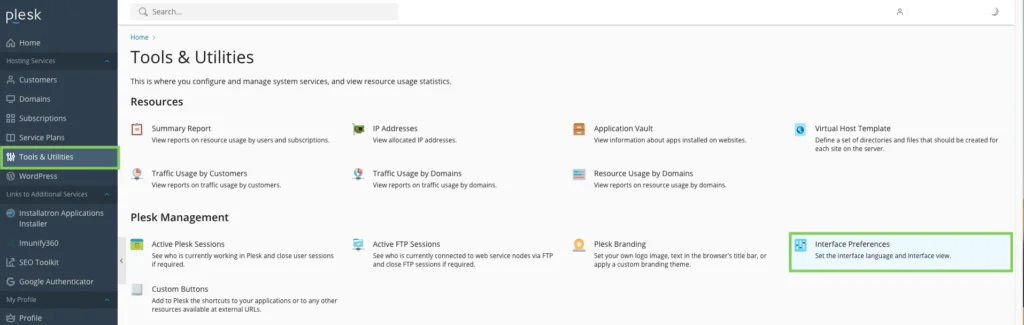
- In the left-hand navigation panel, locate and click on "Utilities."
- Subsequently, click on "Screen Preferences" to access the interface customization options.
- From here, you can modify the "interface language" for your Plesk environment to your preferred setting.
- Next, adjust the "interface view." The provider view is designed for managing all your reseller-specific configurations and settings. Conversely, the power user view is optimized for administrating individual websites on behalf of your customers. Choose the view that best aligns with your current task.
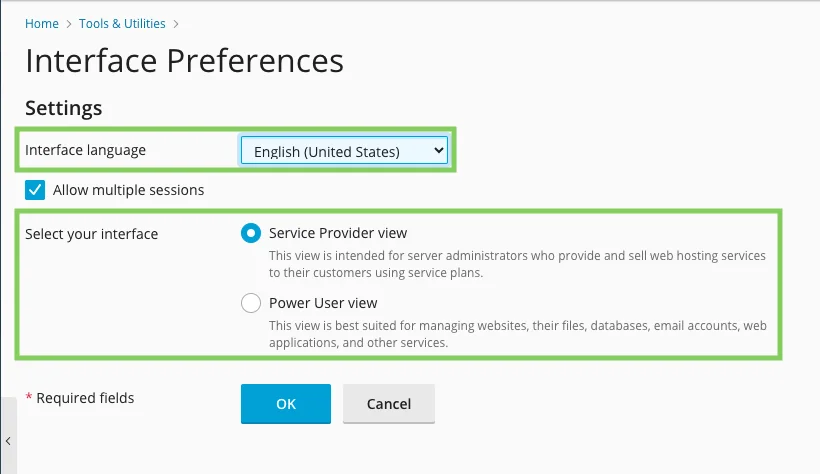
- To apply and save these personalized interface settings, click "OK."
Step 3: Implementing Custom Corporate Branding
Injecting your unique corporate identity into the Plesk panel is a critical step in reinforcing your brand. This ensures your clients experience a consistent visual representation of your business.
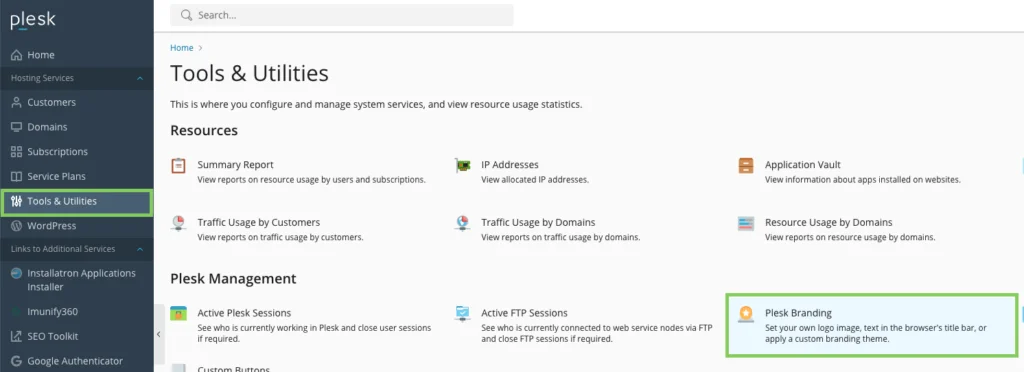
- Return to the left-hand navigation panel and click on "Utilities."
- From the "Utilities" section, select "Branding from Plesk."
- To display your company name or a catchy slogan prominently, tick the box next to "Enable custom title on Plesk pages." This will replace the default Plesk title with your chosen text.
- For a truly branded experience, activate "Enable custom panel logo." This feature allows you to replace the standard Plesk logo with your own. You can either upload a logo file directly from your computer or provide a URL to its location. This custom logo will be visible to your customers in the top-left corner of their Plesk interface.

- After making your selections and uploading your branding elements, click the "Save" button to apply these changes.
Step 4: Integrating Custom Navigation Buttons
Beyond visual branding, you can enhance user experience by adding custom navigation buttons directly to the Plesk home page, both for your own access and for your customers. These buttons can serve as direct links to essential resources such as your terms of service, support portals, company homepage, or any other important web pages.
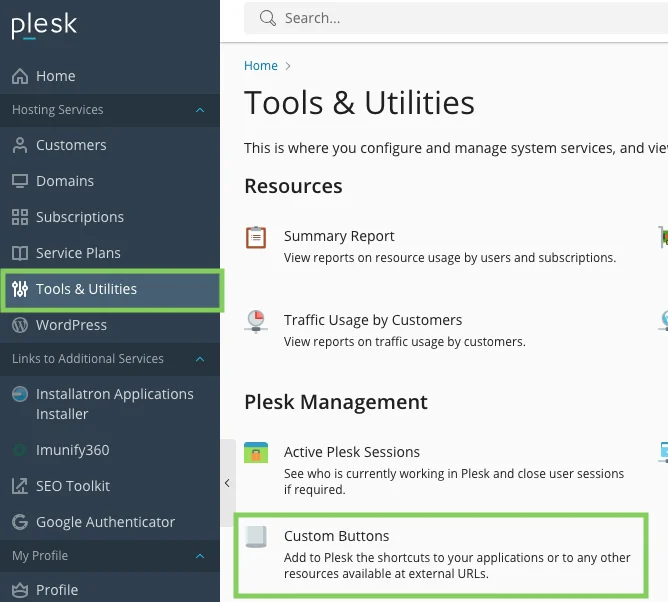
- In the left-hand panel, select "Tools & Utilities."
- Next, click on "Custom Buttons."
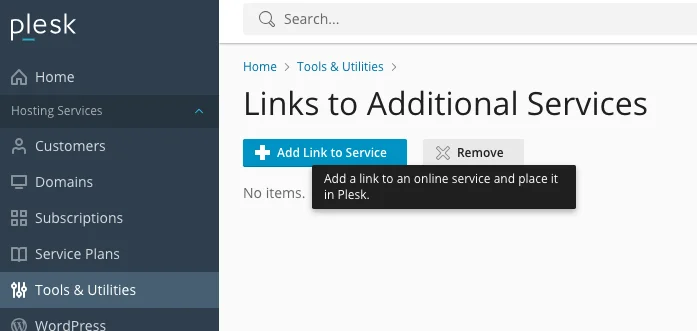
- To create a new custom button, click on "+Add link to service."
- Determine the visibility of the button:
- Check "show to me only" if the button is exclusively for your administrative view.
- Uncheck this option if you wish for the button to be visible within your customers' Plesk panels.
- Populate the required fields with the desired information for your new button, including its title and the target URL.
- Under "Location," specify where the button should appear, ensuring it is easily accessible to its intended audience.
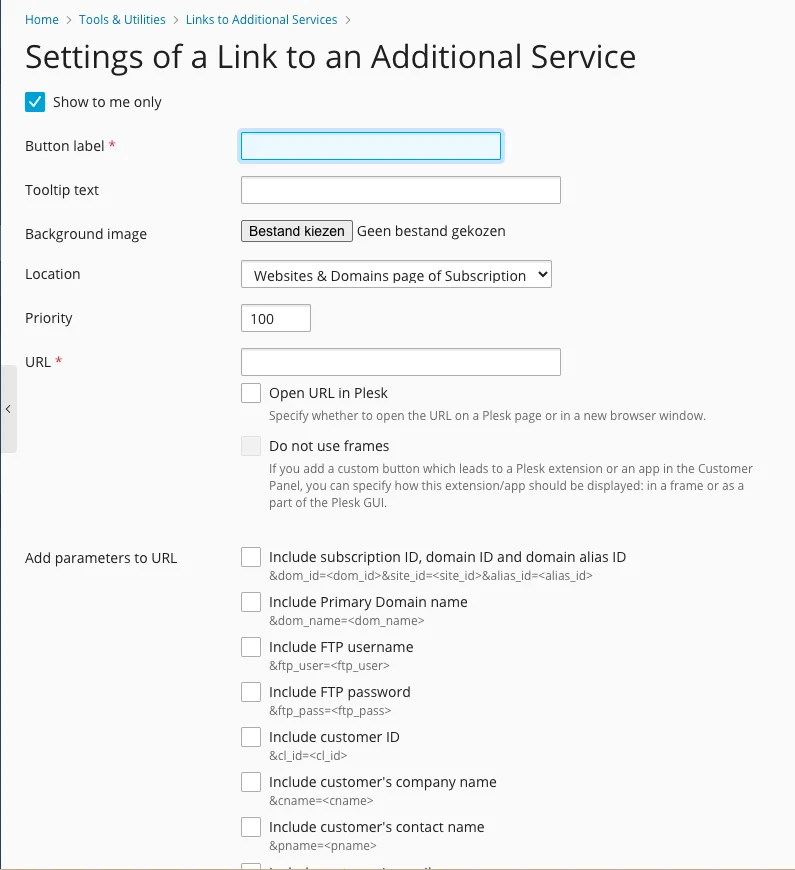
- Finally, click "OK" to save these new custom button settings.
Ready to Launch Your Branded Hosting Experience
Congratulations! You have successfully navigated the steps to fully personalize your Plesk dashboard, effectively embedding your unique brand identity within your reseller hosting environment. Through these straightforward yet impactful modifications, you have elevated your company's brand recognition and presented a more professional image to your clientele.
This level of attention to detail can significantly influence your customers' perception, fostering greater trust and loyalty, and ultimately contributing to the development of a more robust and sustainable brand. With your Plesk environment now beautifully branded, you are well-prepared to move forward with creating compelling hosting packages and onboarding new customers, offering them a truly branded experience from the outset.
