


Once you have successfully set up your WordPress installation, your next step might be to customize its appearance by installing a new theme. By default, every WordPress website comes equipped with a selection of core themes, with the most recent version typically activated upon creation.
While it is entirely possible to operate your WordPress site using its default theme, exploring various options is highly recommended. This ensures you select the perfect theme that aligns with your website's purpose and your aesthetic preferences.
Each WordPress theme applies a distinct style to your website's content. This encompasses everything from the choice of colors and typography to the layout of sidebars, and the design of the header and footer. These visual elements can differ significantly from one theme to another, offering a vast array of design possibilities.
Currently, there are thousands of themes freely available directly through WordPress, alongside an even greater number provided by independent developers, some free and others premium. This comprehensive guide will walk you through several methods for installing WordPress themes, covering approaches suitable for both beginners and advanced users.
Getting Started
It's important to note that free websites hosted on WordPress.com typically do not support custom theme installations. To unlock the full potential of custom themes on a WordPress.com site, an upgrade to a premium plan is generally required.
For complete control over theme customization, your website should be hosted on a personal WordPress hosting plan with your own domain name. Self-hosted WordPress installations offer immediate flexibility to add any theme after the initial setup. Understanding the distinctions between WordPress.com and self-hosted WordPress (WordPress.org) can be beneficial for making informed decisions regarding your site's capabilities.
Before proceeding with a theme installation, consider the following points. If you are launching a brand-new website, you can experiment with themes freely. WordPress typically provides a sample page and post, allowing you to preview the theme's general design. To get a truly accurate sense of how a theme will look, it can be helpful to add some of your own content.
If you are planning to change themes on an already established website with live content, several preparatory steps are strongly advised:
- Perform a Full Backup: Theme changes can occasionally lead to unforeseen issues. Creating a fresh backup of your entire site immediately before switching themes is highly recommended to safeguard your data.
- Activate a Maintenance Mode Plugin: To prevent visitors from seeing a partially configured site and to avoid making changes on a live platform, consider using a maintenance mode plugin. This informs users that your site is temporarily undergoing updates.
- Document Current Customizations: Custom code or specific configurations within your current theme's header, footer, or sidebar areas may not transfer to a new theme and could be lost. Make sure to record these details if they are critical to your site's functionality or appearance.
With these considerations in mind, you are now prepared to explore new themes! This guide will detail three primary methods for installing WordPress themes:
- Adding themes directly from the WordPress Admin Dashboard (the most straightforward approach).
- Uploading a theme as a zip file from your local computer.
- Manually installing a theme using an FTP client (recommended for more advanced users).
Install Themes from the WordPress Admin Dashboard
For novice users, the most straightforward and fastest method to add themes to a website is directly through the WordPress Admin Dashboard. All themes available here are complimentary and have undergone a rigorous code review process by the WordPress core development team, ensuring their quality and security.
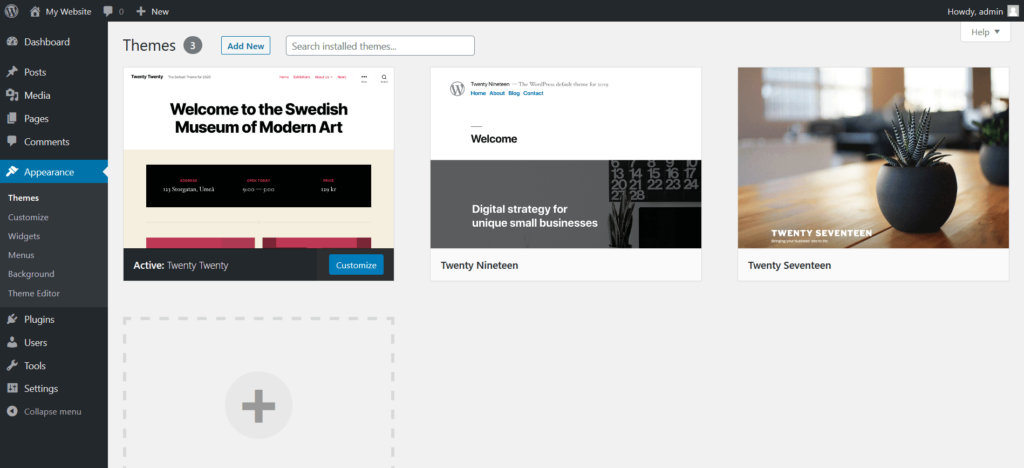
Begin by navigating to Appearance > Themes within your dashboard. Your screen will display a layout similar to the image below, showcasing all currently installed themes. The theme that is actively in use on your site will be prominently displayed first. To add a new theme, click either the Add New button located at the top of the page or the gray + icon within the outlined box.
On the subsequent page, you will find various options for discovering and adding themes.
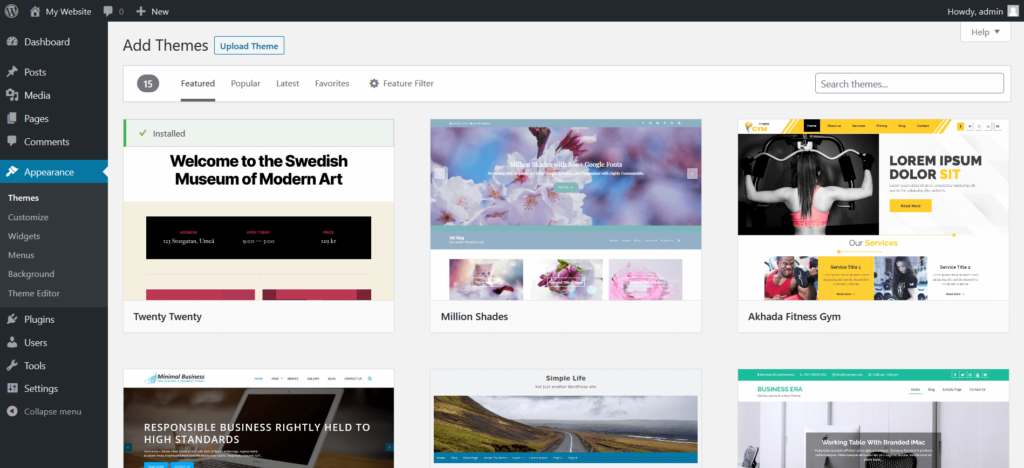
You can effortlessly switch between categories such as "Featured WordPress Themes," "Popular WordPress Themes," and "Latest WordPress Themes" using the links provided at the top of the interface. The "Favorites" section is typically for more experienced users, so beginners may opt to explore other categories first.
Given the extensive selection of thousands of free WordPress themes, the "Feature Filter" tool is incredibly useful. It allows you to refine your search to themes that precisely match your requirements. For example, you could filter for themes suitable for a "Blog" site with a "Three Columns" layout, and still have hundreds of options to choose from. Alternatively, use the search bar to locate a theme by its name or by specific features you desire.
When you hover your mouse cursor over a theme's preview image, a lightbox will appear, presenting you with options to either "Install" or "Preview" the theme. Click the blue Install button to initiate the download and installation of the theme onto your website.
Once the theme has successfully downloaded, the button text will change to Activate, and an "Installed" message will appear at the top of the panel.
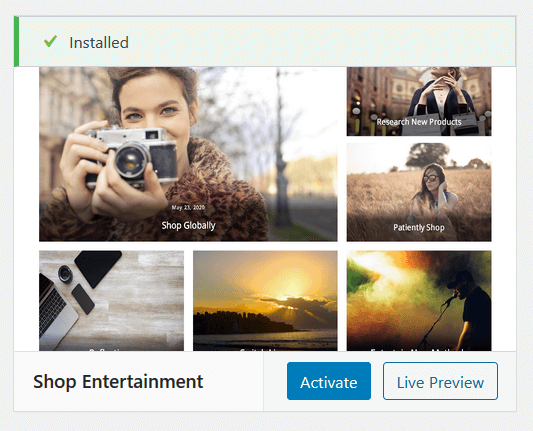
Click Activate to apply this theme as the primary design for your entire website. With these steps completed, you have successfully installed and activated a new WordPress theme!
Upload a Theme Zip File from Your Computer
Beyond the extensive collection available in the WordPress Admin Dashboard, a vast ecosystem of themes exists. If you acquire a theme from an external marketplace or developer, whether it's a free offering or a premium purchase, you will typically receive it as a compressed (zip) file. Installing such a theme yourself is a straightforward process.
Important: Always ensure that any theme you download originates from a reputable and trusted source to maintain your website's security.
To begin, navigate to Appearance > Themes in your WordPress dashboard, then click the Add New button at the top of the screen.
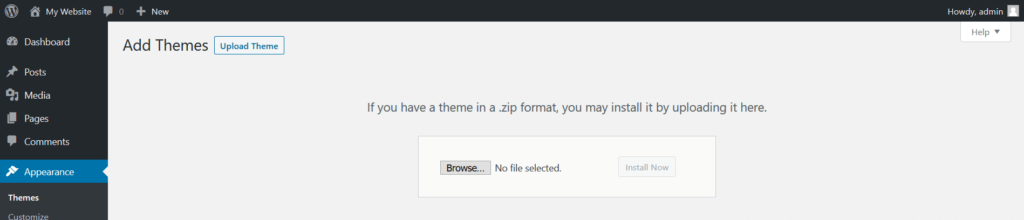
On the subsequent screen, the button will transform into Upload Theme. Clicking this will open a panel featuring a Browse button. Use this button to locate and select the theme's zip file from your computer, then proceed by clicking Install Now.
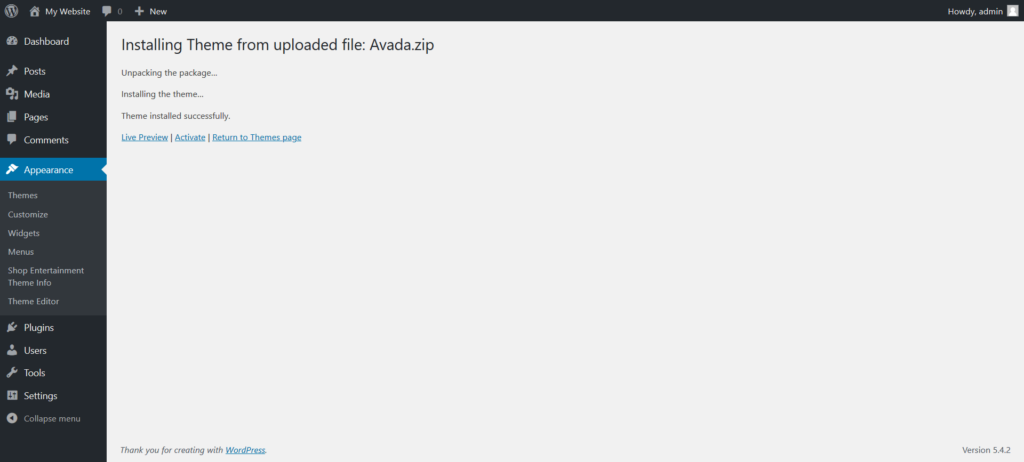
While WordPress processes the installation of your theme, a progress screen similar to the one depicted below will be visible. Upon successful installation, you will be presented with several options. If you wish for the theme to be immediately live on your site, click the Activate link. It's crucial to remember that a theme's features and design will only become active once it has been explicitly activated. If you prefer not to make the theme live immediately, simply click the Return to Themes page link.
Your new theme is now successfully installed and ready for activation and customization on your website!
Manually Install Themes Using FTP
For more advanced users, or in situations where direct dashboard uploads are not feasible, installing a WordPress theme manually via FTP (File Transfer Protocol) is an effective solution. FTP clients facilitate a connection between your local computer and your web hosting server, allowing for direct file transfers. If you require an FTP client, many reliable options are available for download.
It is highly advisable to create a complete backup of your WordPress site before performing any manual file transfers via FTP, as this process involves direct manipulation of server files.
Prior to starting, ensure you have your FTP username and password readily available. These credentials are distinct from your WordPress Admin Dashboard login information. Should you need assistance locating these details, your web host can provide the necessary support.
The first step involves extracting the contents of your theme's zip file on your local computer. This will create a new folder, which should ideally retain the same name as the original zip file. This is the folder you will be uploading to your server.
Next, open your FTP client and establish a connection to your website using the FTP username and password provided by your web host. Once connected, navigate to the /wp-content/themes/ directory on your remote server.
From the "Local Site" pane within your FTP client, locate the unzipped theme folder you prepared earlier. Upload this entire folder to the /wp-content/themes/ directory on the "Remote Site" pane. This process may take several minutes, depending on the theme's file size and your internet connection speed, so patience is key.
Once all files have been successfully transferred, you will observe a new folder on the remote server side of your FTP client that corresponds exactly to the folder you uploaded. The original folder on your local computer will remain. To conserve local storage, you may consider deleting the unzipped folder from your computer, while retaining the original zip file for future reference if needed.
Following the upload, you must log into your WordPress Admin Dashboard to activate the newly installed theme. Go to Appearance > Themes. Hover your mouse over the image thumbnail of your theme, and the Activate button will appear. Remember, a theme installed via FTP is not active by default and requires this final activation step to become live on your site.
What to Do After Installing a WordPress Theme
With your new theme successfully installed and activated, the next exciting step is to explore the array of customization options it provides. Many themes extend the WordPress interface by adding new links under the Appearance menu, or by integrating dedicated sections and links into the WordPress Admin Dashboard's side navigation.
It is also quite common for themes to suggest or even require specific plugins that are designed to complement their functionality and design. Additionally, you might find options to import demo data, which helps in quickly setting up your site to look like the theme's preview, or discover new settings within the WordPress Customizer to fine-tune your site's appearance.
Given the significant diversity among themes, we highly recommend consulting the specific documentation or setup guide provided by your chosen theme's developer. This documentation will offer detailed instructions tailored to your theme, as general setup guidance cannot cover the unique features and configurations of every single theme available.
Frequently Asked Questions About WordPress Theme Installation
What is the difference between an active and an inactive theme?
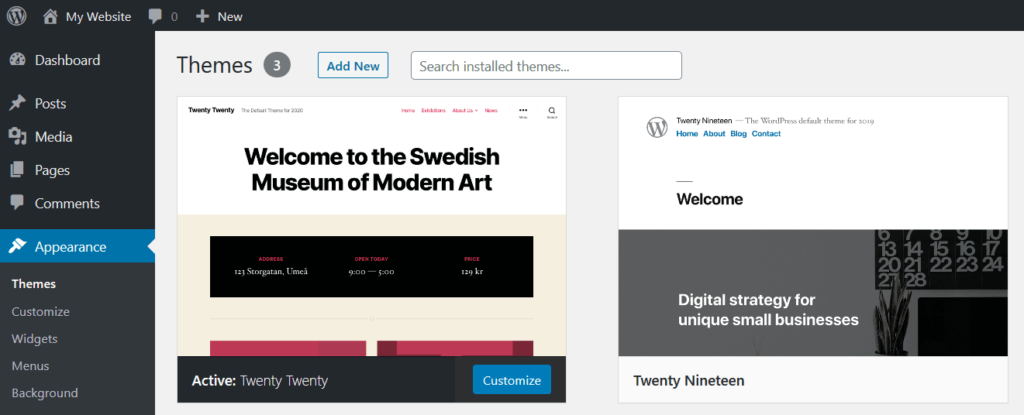
In your WordPress dashboard, under Appearance > Themes, the theme currently dictating your website's design and functionality is designated as the "active" theme and is typically displayed first. All other themes listed in this section are "installed" on your website but are "inactive." Only one theme can be active on a website at any given time. For instance, if you have a "Shop Entertainment" theme, it will be marked as active when in use.
How many WordPress themes can I install?
While WordPress technically allows you to install numerous inactive themes, it's generally best practice for security and performance reasons to keep the number of installed themes to a minimum. It is wise to retain one or two default core themes (such as Twenty Twenty-Two, Twenty Twenty-Three, or the latest default theme) as a fallback. This ensures that if your primary theme encounters an issue or becomes corrupted, your site can gracefully revert to a stable, functional design.
What should I do with themes I no longer want?
If you anticipate using a theme again in the future, you may simply leave it inactive on your site. However, for enhanced security and to reduce potential vulnerabilities, it is highly recommended to delete themes that you are permanently done with. To do this, navigate to Appearance > Themes in your dashboard to view all installed themes. Hover over the thumbnail of the theme you wish to remove, and click the Theme Details button that appears in the center.
On the Theme Details page, locate the red Delete text link, usually found in the lower-right corner. Click this link, confirm your decision in the subsequent pop-up window, and the theme will be permanently removed from your website.
What is a WordPress Child Theme?
A WordPress child theme is an advanced concept that enables extensive customization of your website while ensuring the preservation of the original functionality, styles, and features inherited from its "Parent Theme." For a child theme to function, its parent theme must also be installed on your site. Child themes are used to override specific templates or add new code, which helps prevent your customizations from being overwritten whenever the parent theme receives an update. Any code or styling defined in the child theme takes precedence over identical elements found in the parent theme.
For more in-depth technical details and best practices, it is advisable to consult the official WordPress developer documentation on child themes.
You have now gained a comprehensive understanding of how to install and manage WordPress themes, empowering you to effectively customize your website's appearance!
