cPanel offers two primary tools for database creation within its Database section: the MySQL Database interface and the convenient MySQL Database Wizard. This guide will walk you through the process of setting up a database using both methods. First, let's briefly understand the role and importance of databases in web development.
Understanding Databases
At its core, a database is an organized collection of data, typically structured in tables, allowing for efficient storage, retrieval, and management of information. MySQL stands out as one of the most widely adopted open-source relational database management systems, known for its robustness and performance.
Databases are essential for a multitude of web applications, ranging from custom PHP applications to the operational backbone of popular Content Management Systems (CMS) like WordPress, Joomla, or PrestaShop. For instance, if you're undertaking a manual installation of a CMS, creating a new database is a prerequisite. Conversely, when utilizing specialized hosting services, the necessary MySQL database for your CMS is often configured automatically upon account provisioning, simplifying the setup process.
Creating a Database in cPanel
The initial step for any database operation in cPanel is to log into your control panel. Once logged in, navigate to the "Databases" section. Here, you will find the "MySQL Databases" option. Click on it to proceed.

Initial Database Setup
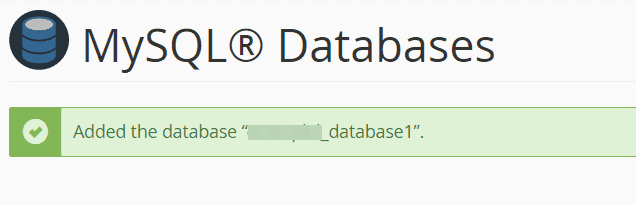
Within the "MySQL Databases" interface, locate the section titled "Create New Database." Simply enter your desired name for the database in the provided field and click the "Create Database" button. A confirmation message will then appear, indicating that your database has been successfully created.
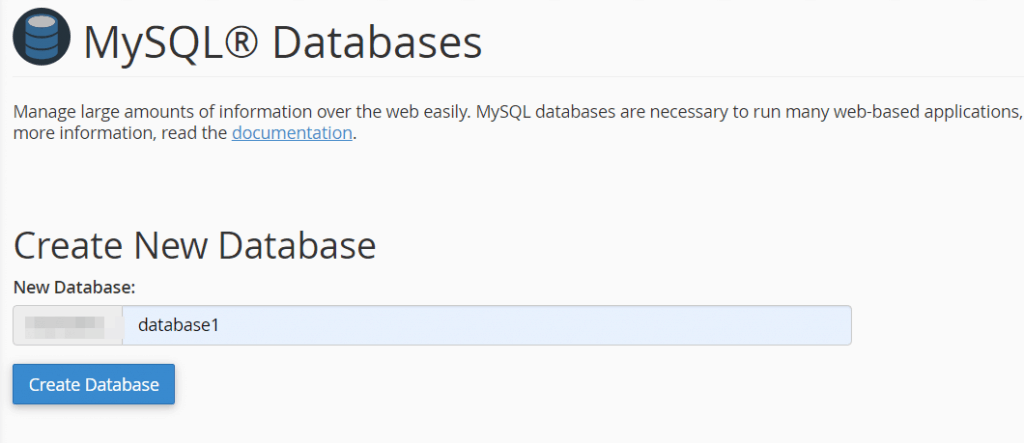
It's important to note that cPanel automatically assigns a prefix to your database name. This prefix is typically derived from your cPanel username. Therefore, if your cPanel username is "Mysite" and you name your database "database1," the full database name will be "Mysite_database1." When configuring applications to connect to this database, always use the complete, prefixed name.
However, simply creating a database isn't enough. To interact with it, you'll need to create a user and then grant that user appropriate permissions to the database. Let's explore how to create a new user and associate it with your newly established database.
Creating a New Database User
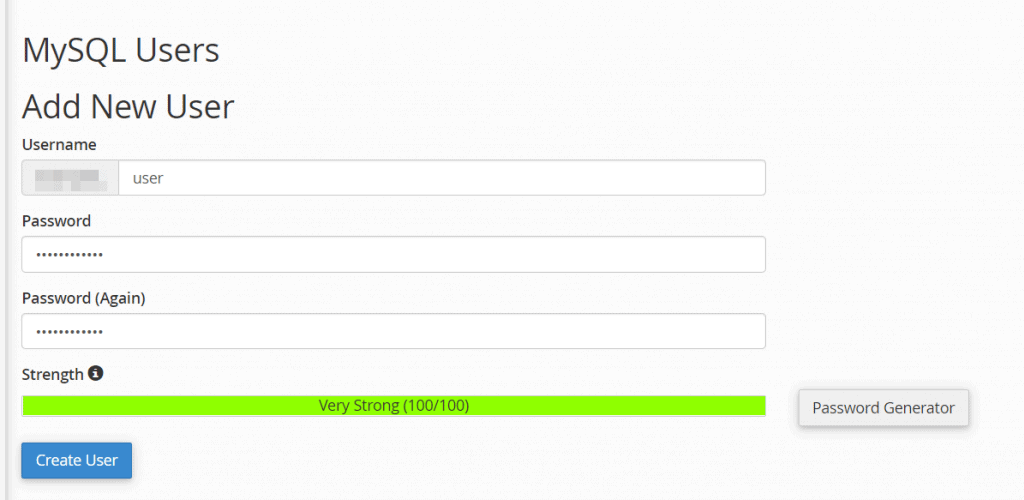
Return to the main "MySQL Databases" page in cPanel. Scroll down until you find the "MySQL Users – Add New User" section. Here, you will define a username and a strong password for this new database user. Enter the password twice for confirmation. After providing the necessary credentials, click on the "Create User" button to finalize the user creation.
Assigning User Privileges to the Database
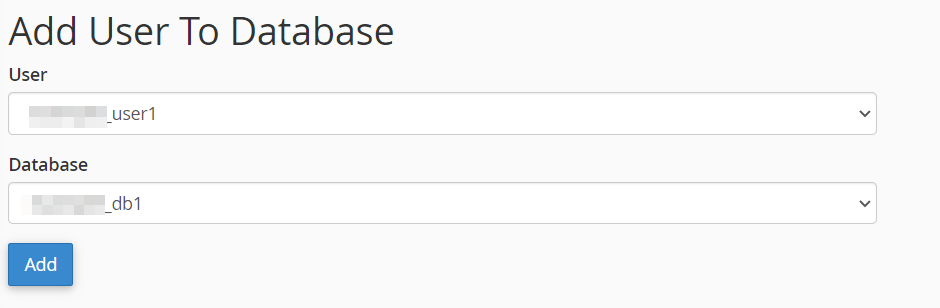
With both a database and a user created, the next crucial step is to link them by assigning the user the necessary privileges to manage the database. Navigate back to the "MySQL Databases" screen if you've left it. Scroll down to the "Add User to Database" section.
From the first drop-down menu, select the user you just created (e.g., "user1"). In the second drop-down menu, choose the database you wish to associate this user with (e.g., "db1"). Once both are selected, click the "Add" button.
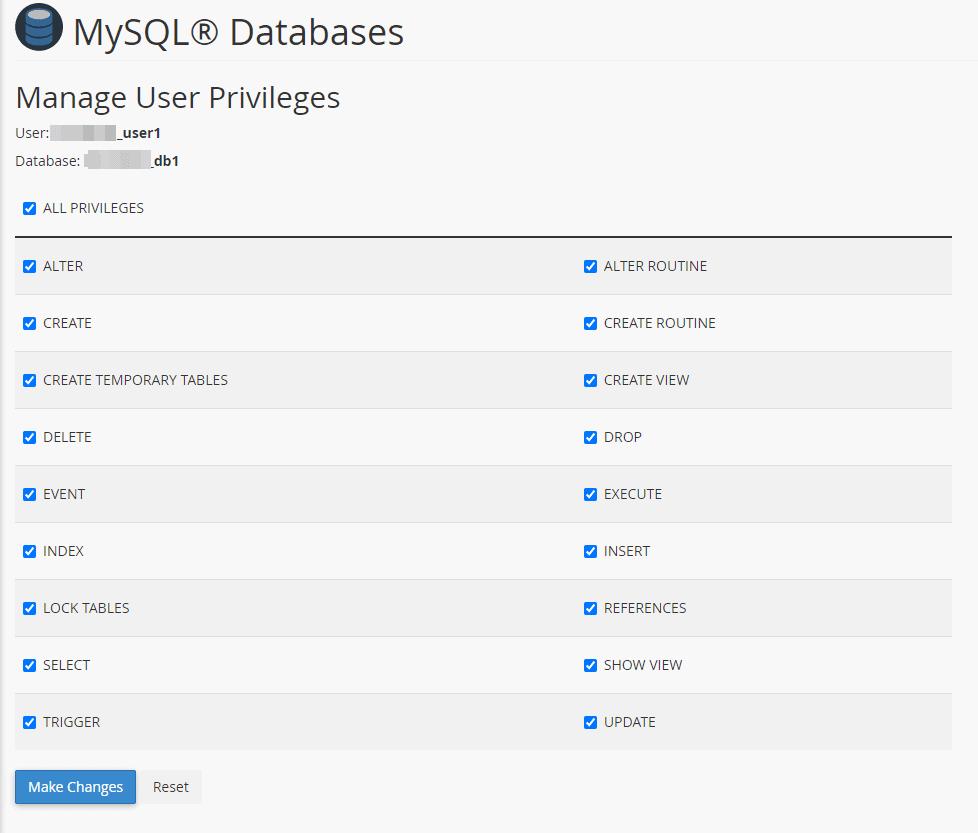
A new window will then appear, prompting you to specify the user's privileges. For most applications, selecting the "All Privileges" checkbox is appropriate to grant full control over the database. After selecting the desired privileges, click the "Make Changes" button at the bottom to save your settings.
Using the MySQL Database Wizard for Database Creation
For a more streamlined and automated approach to database creation, cPanel offers the MySQL Database Wizard. This tool guides you through all the necessary steps in a quick and efficient manner, consolidating the processes of database creation, user setup, and privilege assignment.
To begin, log into cPanel and navigate to the "Databases" section, then click on the "MySQL Database Wizard" option.

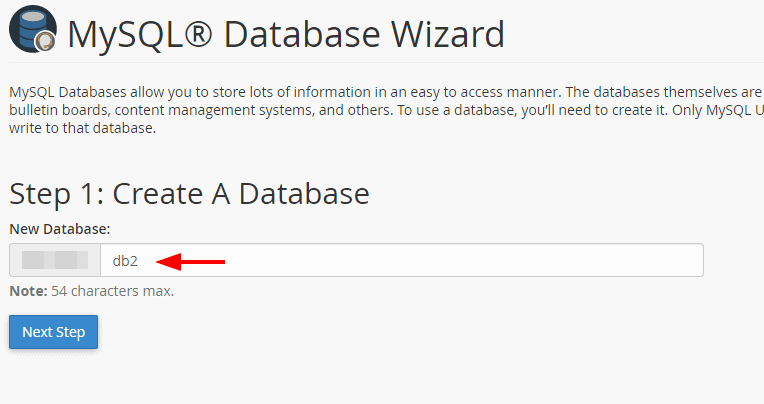
Step 1: Naming Your Database
The wizard's first step requires you to enter the desired name for your new database. Similar to the manual method, a prefix (shown in the gray box) will be automatically added to the name you choose. After entering your database name, click "Next Step" to continue.
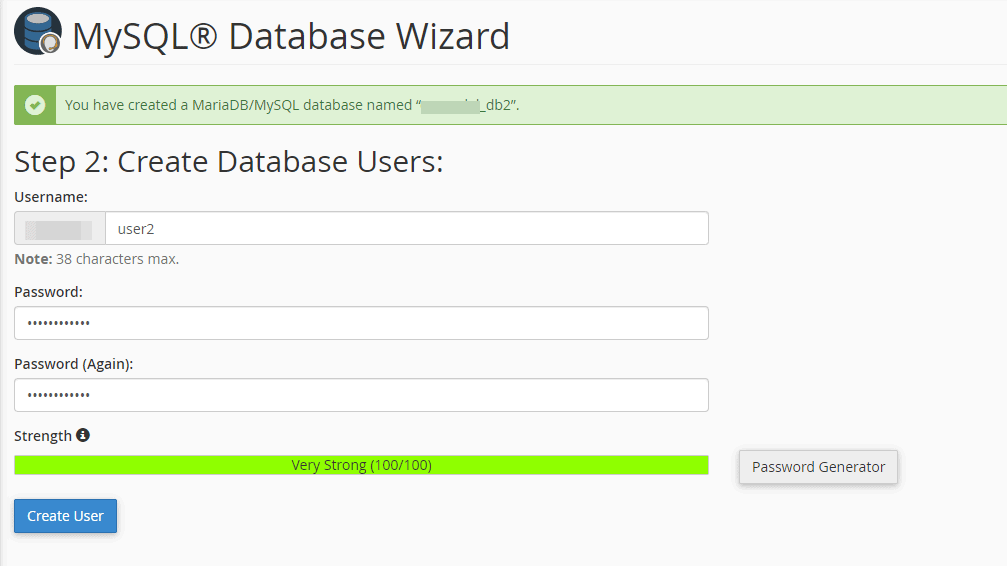
Step 2: Setting Up a New Database User
In this step, you will create a new user account specifically for your database. Provide a username for this user; again, a prefix will be automatically applied. Crucially, choose a strong and unique password for the user and enter it twice for confirmation. cPanel also provides a password generator to help create secure credentials. Remember to store this password in a secure location. Once the fields are completed, click "Create User."
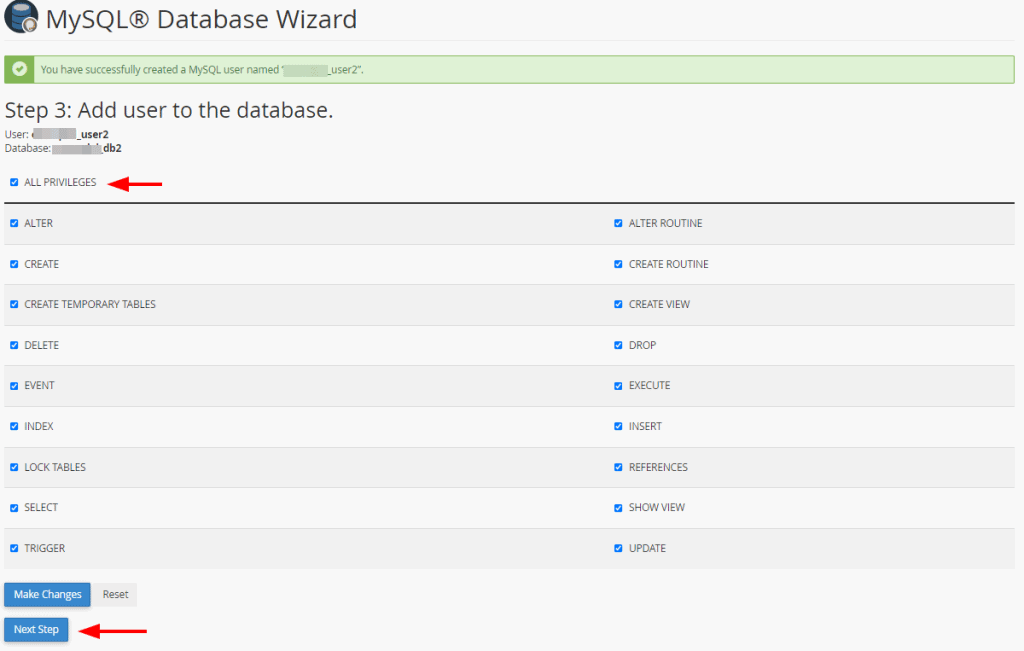
Step 3: Assigning User Privileges
Now, you'll define the permissions for the user you just created. To grant comprehensive control over the database, check the "All Privileges" box. This ensures the user has full access to perform operations like reading, writing, and modifying data within the database. After selecting the privileges, click on "Next Step."
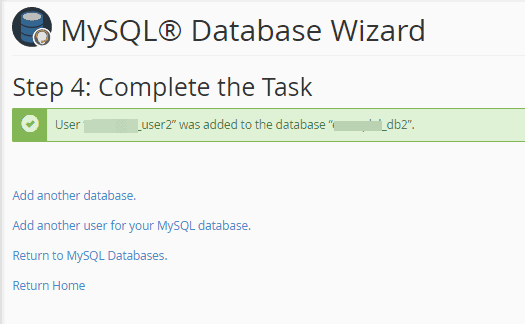
Step 4: Finalizing the Process
Congratulations! You have successfully completed the database creation process using the MySQL Database Wizard. At this stage, the database, its user, and the associated privileges have all been configured. You can now choose to return to the cPanel home page, create another database, set up another user, or navigate back to the MySQL databases screen to review your configurations.