


Adding a contact form to your WordPress website is an essential step for establishing clear communication with your audience. It provides a straightforward and efficient way for visitors to connect with you, whether they have questions, feedback, or inquiries. Beyond facilitating direct communication, a well-implemented contact form can also serve as a valuable tool for collecting email addresses and generating leads, thereby contributing to the growth of your email list and overall business outreach.
This tutorial will guide you through the process of creating a functional WordPress contact form with ease, requiring no coding knowledge. We'll explore a streamlined approach that empowers you to set up a professional contact form quickly and efficiently.
Step 1: Install a Form Builder Plugin
The first thing you’ll need to do is install and activate a reliable form builder plugin for WordPress. Such plugins are widely recognized as excellent solutions for constructing various types of forms, including contact forms.
For detailed instructions on how to install a plugin in WordPress, consult a comprehensive step-by-step guide on the topic. Once activated, the setup process will often guide you through the initial configuration, helping you to create your first form and prepare your contact page.
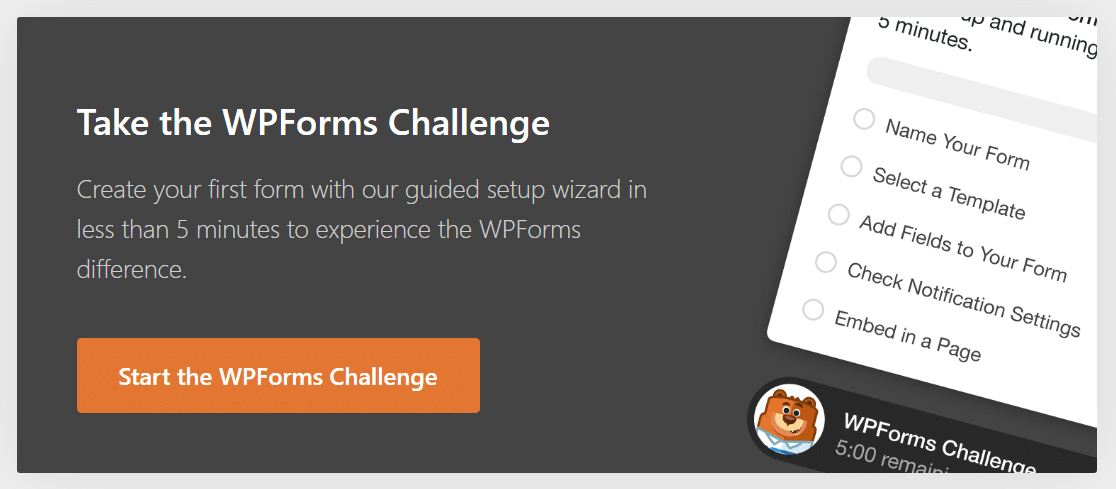
You may be presented with an option to start a guided setup process, which can simplify the creation of your first form. Clicking to begin this process will help you get started promptly.
Step 2: Select a Contact Form Template
After initiating the form setup, you will typically be directed to a screen where you can name your new form and choose from a wide array of available templates. These templates often cover various categories, including customer service, marketing, and different business or nonprofit functions.
Proceeding from this screen will take you to the next stage of form creation.
The initial part of this step usually involves assigning a name to your form. Once you've entered a suitable name, you can move to the subsequent step.
Next, you'll have the option to either select a pre-designed template or begin with a blank canvas if you prefer to build your form entirely from scratch. For creating a contact form, selecting a "Simple Contact Form" template is often the most efficient choice.
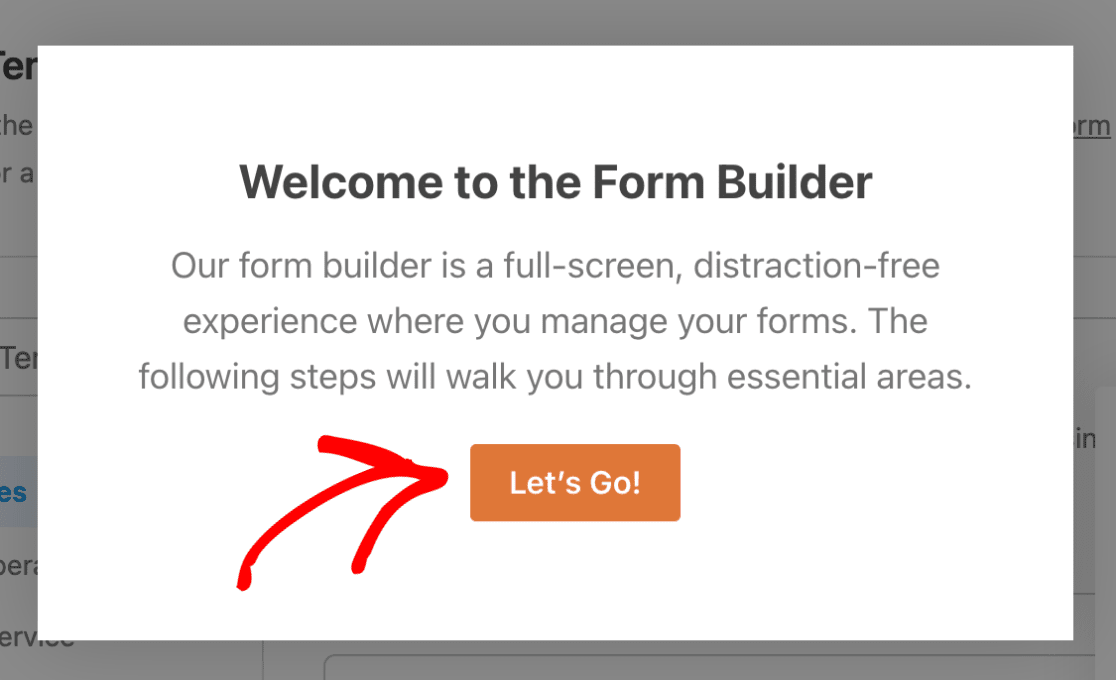
Upon selecting your desired template, the form builder interface will load a basic contact form, ready for customization. This is the central hub where you can personalize your contact form by adding new fields, removing unnecessary ones, or modifying the settings of existing fields.
Step 3: Customize Your Contact Form
Once you’re inside the form builder, an intuitive interface makes customizing form fields incredibly easy through a drag-and-drop mechanism.
To add new fields to your contact form, simply drag them from the available options panel and drop them into your form layout. To make changes to any field, click on it. You can also reorder fields on your form by dragging them to their desired positions.
When designing your contact form, it's generally advisable to keep it as simple and user-friendly as possible, focusing on essential information. However, you have the flexibility to include any additional fields as needed. For instance, you might consider adding advanced options such as conditional logic, file upload capabilities, or various input types like checkboxes, depending on the specific requirements of your form.
Once you have completed customizing your form to your satisfaction, save your changes to proceed.
Step 4: Configure Contact Form Notification Settings
The next important step involves configuring your form’s notification settings. Form notifications are typically enabled by default, ensuring that an email containing the full details of each submission is sent to the designated administrator's email address.
However, you might also want to send email notifications to the person who submitted the form as a confirmation. Many form builders allow you to create multiple form notifications, enabling you to send them to different team members or directly to your customers upon successful form submission.
Additionally, for consistent branding across your emails, you can explore options for adding a custom header image to your email templates.
Once your form’s notification settings are properly configured and tested, save your changes.
Step 5: Embed Your Contact Form on a WordPress Page
With your contact form now designed and configured, you are ready to integrate it into your WordPress website. The embedding functionality is typically very user-friendly, often eliminating the need to directly use shortcodes.
To begin, look for an "Embed" option or button within the form builder interface. You will usually be given choices such as selecting an existing page or creating a new page for your form. Opting to create a new page is a straightforward way to add your form to a dedicated "Contact" or "Reach Us" page.
You will then need to provide a name for your new page, such as "Contact Us."
The form builder will then place your form directly onto the selected page. Here, you might also find options to further style your form fields, labels, and submit buttons using simple color pickers and style settings to match your website's aesthetic.
It is crucial to remember to publish the page once you are satisfied with its appearance and the form's integration, so that your form becomes live and accessible to your site visitors.
Beyond embedding on a dedicated page, you can also consider adding your contact form to other areas of your site, such as a sidebar widget, to ensure it is easily accessible from multiple locations.
And there you have it! You have successfully learned how to create and embed a simple, professional contact form in WordPress.
FAQs on Simple Contact Forms
Explore the frequently asked questions below for more information regarding simple contact forms in WordPress.
What are the benefits of using a contact form in WordPress?
A contact form on your website offers an accessible and secure channel for visitors to submit queries, feedback, suggestions, or complaints. Beyond direct communication, incorporating a contact form into your WordPress site provides several key advantages:
- Efficient Communication: Contact forms streamline communication, allowing your audience to connect with you quickly and conveniently.
- Enhanced Security: By using a contact form, you safeguard your email address from spammers. Since your email address is not directly displayed, it reduces the risk of being harvested for junk mail lists.
- Improved Organization: Many form builders integrate with email marketing services or spreadsheet applications, simplifying lead management. This can enable automation of marketing tasks or the saving of entries directly into a spreadsheet for organized data tracking.
Does WordPress include a built-in contact form feature?
No, the core WordPress.org platform does not come with a native contact form feature. To create a contact form, you will need to utilize a dedicated form builder plugin. The installation of such a plugin is typically a quick and straightforward process, and many offer free versions that are sufficient for setting up a basic contact form.
What are the essential fields to include in a contact form?
A contact form should ideally be kept as concise as possible, focusing on only the most essential fields. Typically, these include "Name," "Email," and "Message." Many simple contact form templates are pre-designed with these core fields, providing a well-optimized and user-friendly experience without requiring manual modifications.
Is it possible to track and manage contact form submissions?
Absolutely! Most WordPress form plugins provide a dedicated dashboard or section within your WordPress site where you can view, track, and manage all submissions received through your contact forms. Even with free versions, you often receive email notifications for every new submission. For more advanced management, including storing all submissions directly on your website, upgrading to a professional version of a plugin is usually an option.
How can I backup and export contact form data for safekeeping?
An excellent method for maintaining an external backup of your contact form data is to integrate your form with a spreadsheet service. Many professional form builders offer native integrations that allow you to automatically connect your WordPress forms to services like Google Sheets. This ensures that all collected data is automatically added to your spreadsheet, providing continuous and updated records with every new submission.
While you can often manually export your contact form data from the plugin's interface, this method only captures information up to the point of export. For a consistently updated backup, integrating your form with a spreadsheet service is highly recommended.
Next Steps: Preventing Contact Form Spam
Once your contact form is live, a crucial consideration is implementing measures to prevent spam. Most form builder plugins come equipped with various spam protection tools, including CAPTCHA options like reCAPTCHA, even in their free versions. These tools are highly effective in filtering out unwanted submissions.
If you plan to create more extensive forms in the future, consider developing multi-step forms. This approach can help reduce "form fatigue" and encourage users to complete longer forms by breaking them down into manageable sections.
You might also be interested in exploring advanced web form functionalities, such as hidden fields, which can help gather additional, often implicit, customer data to enhance your understanding of user interactions.
