


For anyone managing a website, especially one rich in visual or auditory content, the WordPress Media Library is an indispensable tool. It serves as the central repository for all your uploaded media assets, including images, videos, audio files, and documents. Understanding its capabilities and how to effectively utilize them is crucial for streamlined content management and a well-organized website.
This comprehensive guide will delve into the intricacies of the WordPress Media Library. We will explore its fundamental operations, detail various methods for accessing and navigating its interface, and provide step-by-step instructions on adding and editing your digital media. Furthermore, we will highlight several powerful plugins designed to extend its functionality, enabling more sophisticated organization and management of your valuable media collection.
What is the WordPress Media Library?
The WordPress Media Library functions as a centralized hub within your WordPress dashboard, meticulously organizing all the media files you upload to your website. This includes a wide array of digital assets such as images, videos, audio files, and documents. It stands as an essential utility for efficiently managing and reusing multimedia content throughout all sections of your website.
While the Media Library provides a user-friendly interface for management, it's important to understand that it primarily acts as an organizer tool. The actual media files are stored on your web host's server, typically within a structured folder system based on their upload dates. This means that you can always access these raw files directly through your hosting control panel, such as cPanel, if needed for advanced management or backup purposes.
Accessing the WordPress Media Library
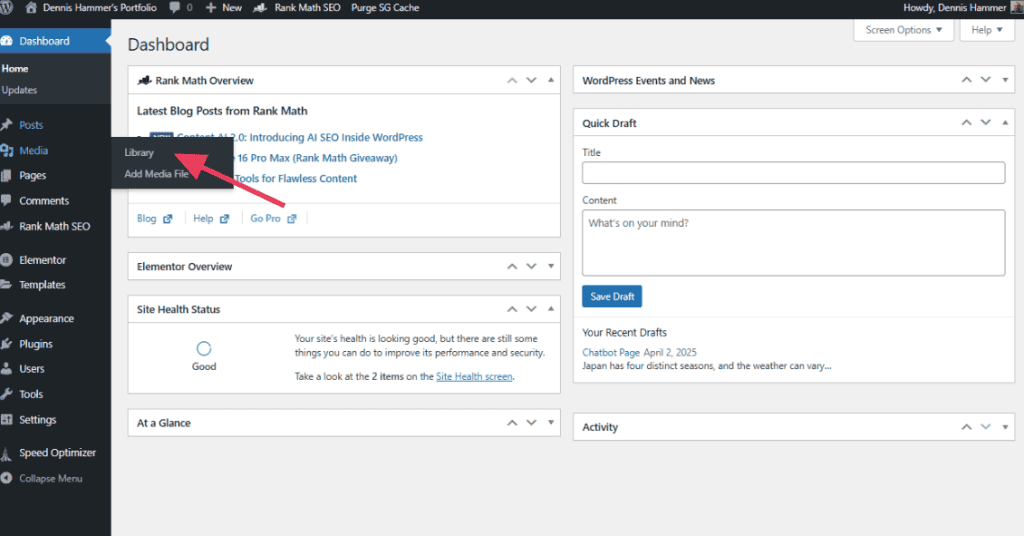
There are primary methods to access the WordPress Media Library, both offering convenient ways to manage your uploaded content. The most direct route is through the dedicated Media Library page within your WordPress administration area.
To access it, simply navigate to Media > Library in your WordPress dashboard. This will present you with the full collection of your website's media.
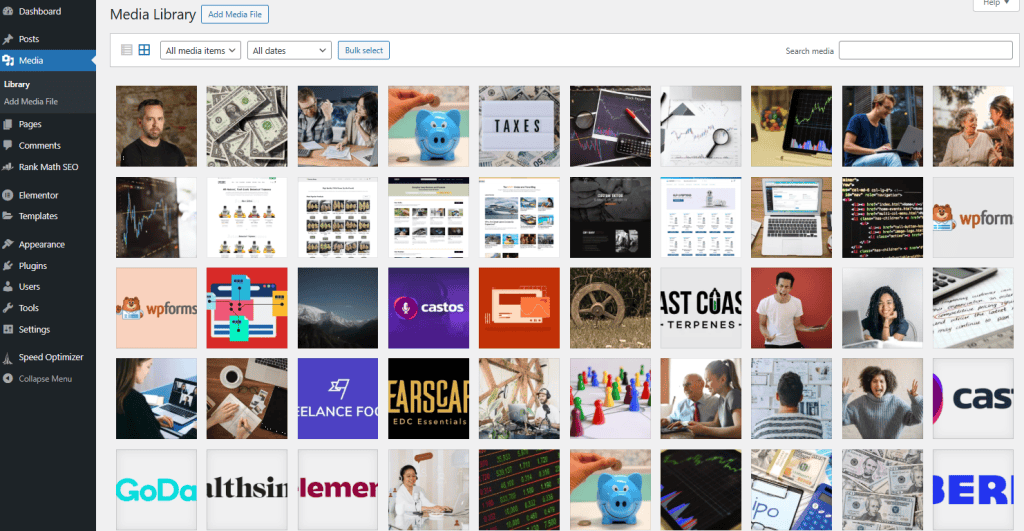
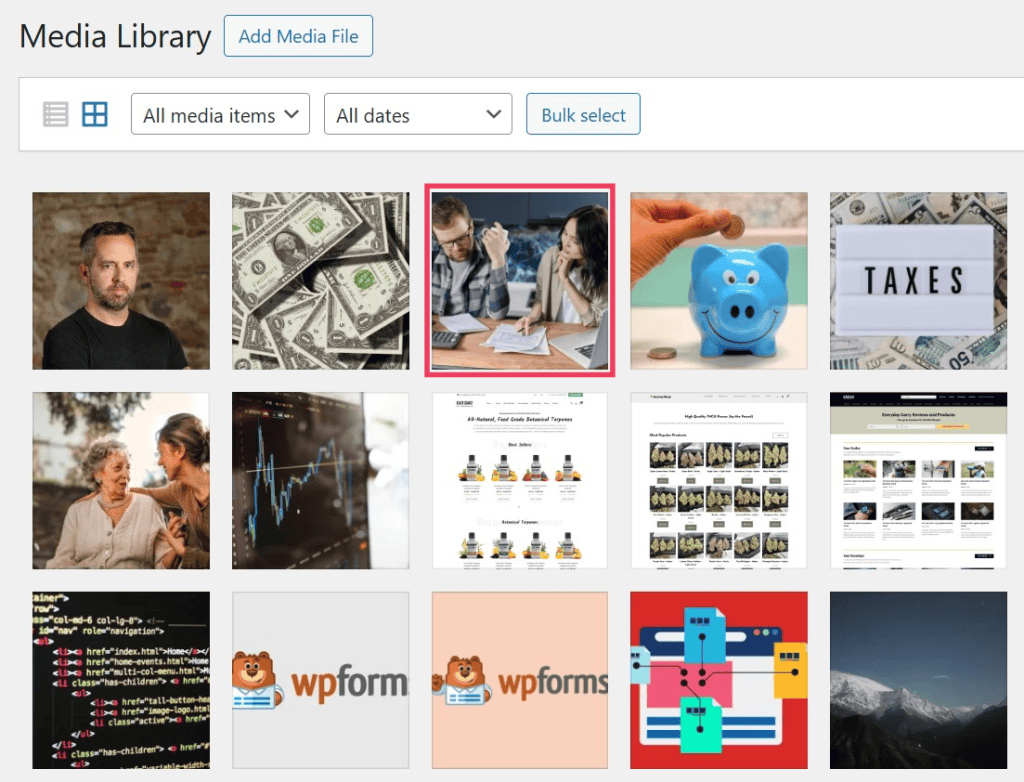
Once inside the Media Library, you'll find that your files can be displayed in two distinct views: a comprehensive list or a more visual grid of thumbnails. You can effortlessly switch between these two display modes with a single click, allowing you to choose the layout that best suits your organizational preferences at any given moment.
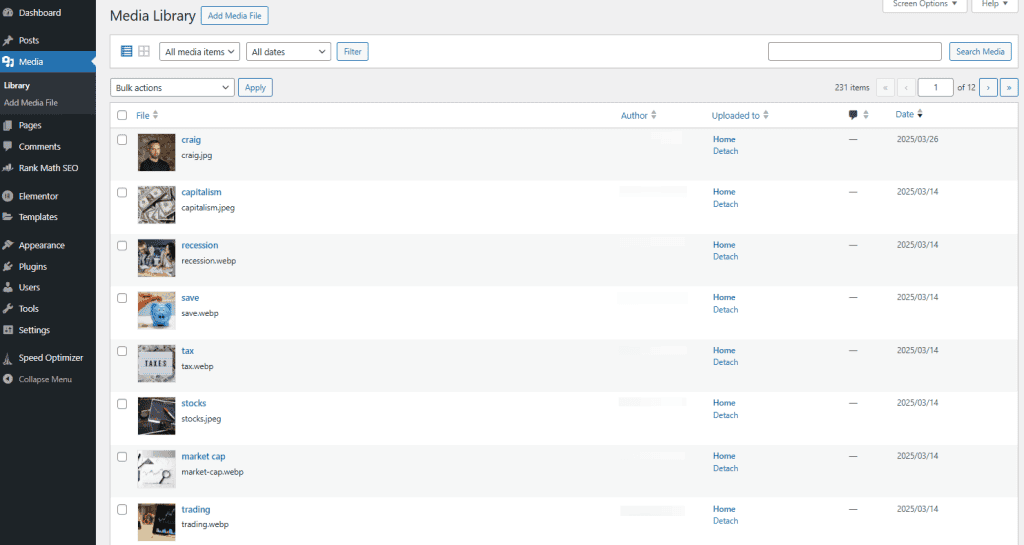
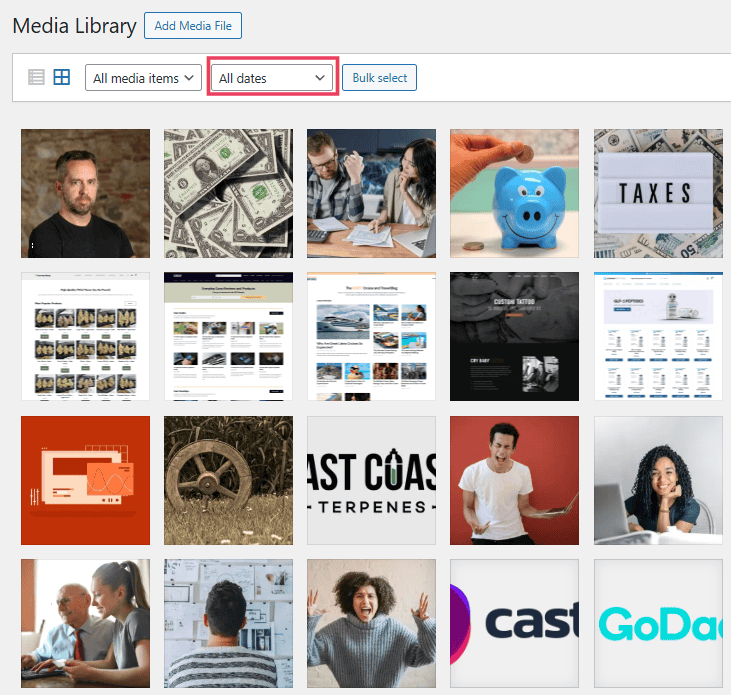
By default, WordPress arranges your media files chronologically, with the most recently uploaded items appearing at the top. To locate older files, you can simply scroll through the collection or utilize the efficient date filter option, which allows you to narrow down your search to specific months or years.
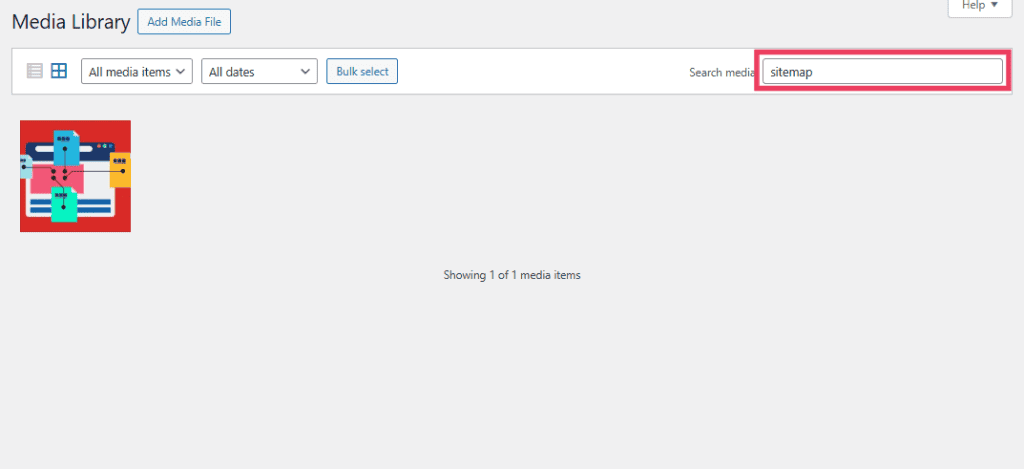
For more targeted searches, the Media Library provides a robust search bar. You can type in a file name or title, and WordPress will swiftly retrieve all matching items. For example, if you've uploaded an image titled “beach-day.jpg,” entering “beach” into the search bar will quickly bring it to your attention.
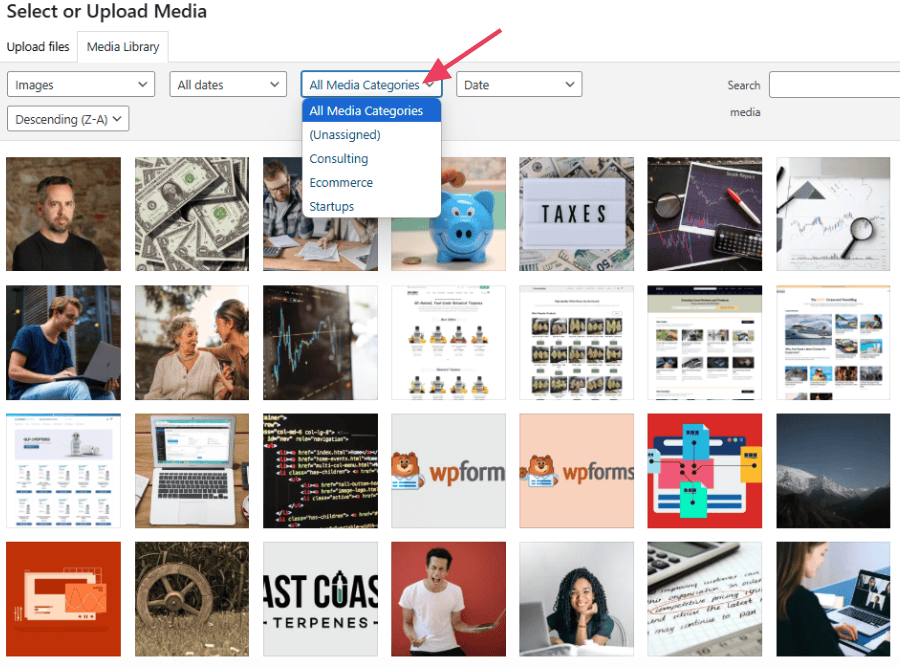
Additionally, a convenient dropdown menu allows you to filter by type. This means you can easily display only images, PDFs, videos, or any other specific media format, thereby hiding irrelevant files and streamlining your viewing experience.

It's worth noting that while the Media Library offers powerful sorting and filtering tools, it does not inherently use a traditional folder structure like the operating system on your computer. All files are stored together in a flat hierarchy within the WordPress interface. If you require a more advanced organizational system with nested folders or categories, you will need to implement a dedicated plugin, which we will discuss in detail later in this guide.
Supported File Types and Limitations
The WordPress Media Library is designed to accommodate a wide range of common file types typically used on modern websites, ensuring versatility for your content creation. The supported formats include:
- Images: Popular formats such as JPG, JPEG, PNG, GIF, and WebP are fully supported, allowing for high-quality visuals on your site.
- Videos: You can easily upload video files like MP4, M4V, MOV, WMV, MPG, AVI, and OGV to enrich your content with dynamic media.
- Audio: Common audio formats such as MP3, M4A, WAV, and OGG are compatible, enabling you to integrate podcasts, music, or sound effects.
- Documents: For sharing information, the library supports document types including PDF, DOC, PPT, and XLS.
However, it's important to be aware of certain limitations. By default, WordPress does not permit the upload of every possible file type. For instance, compressed archives like ZIP files or scalable vector graphics (SVGs) may not be allowed out-of-the-box. To enable the upload of these specific file types, you might need to adjust your WordPress settings or install a specialized plugin.
Furthermore, your web hosting plan often imposes limitations on the maximum size of individual files you can upload. Encountering an upload limit error typically indicates that your file exceeds the allowed threshold. In such cases, you may need to compress or resize the file before attempting to upload again, or contact your hosting provider to inquire about increasing your site's upload limit.
Storage Capacity in the WordPress Media Library
Within the WordPress platform itself, there isn't a strict, inherent limit on the number of files you can store in the Media Library. Essentially, you have the flexibility to upload and manage as many media assets as your website requires.
The actual constraint on your media storage capacity is primarily determined by your web hosting plan. Every hosting account is allocated a specific amount of storage space. Each image, video, audio file, and document you upload consumes a portion of this allocated space. While smaller files like images generally have a minimal impact on your storage, larger media types such as high-definition videos or extensive audio files can quickly deplete your available storage.
To monitor your current storage usage, you typically need to log into your hosting account's control panel or dashboard. Your hosting provider usually offers tools or statistics that display how much disk space your website is currently occupying.
Should you find yourself approaching or exceeding your storage limit, there are several effective strategies you can employ to manage your media and free up space:
- Compress large files before uploading: Optimizing images and videos for web use can significantly reduce their file size without compromising quality.
- Delete old or unused media: Regularly review your Media Library and remove any files that are no longer actively used on your website.
- Upgrade your hosting plan: If your content needs consistently demand more storage, upgrading to a higher-tier hosting plan that offers increased disk space is often the most straightforward solution.
Methods for Adding Files to the Media Library
WordPress is designed with media integration in mind, offering multiple intuitive methods for adding files to your Media Library. These options ensure flexibility, whether you're uploading a single image or managing a large batch of documents.
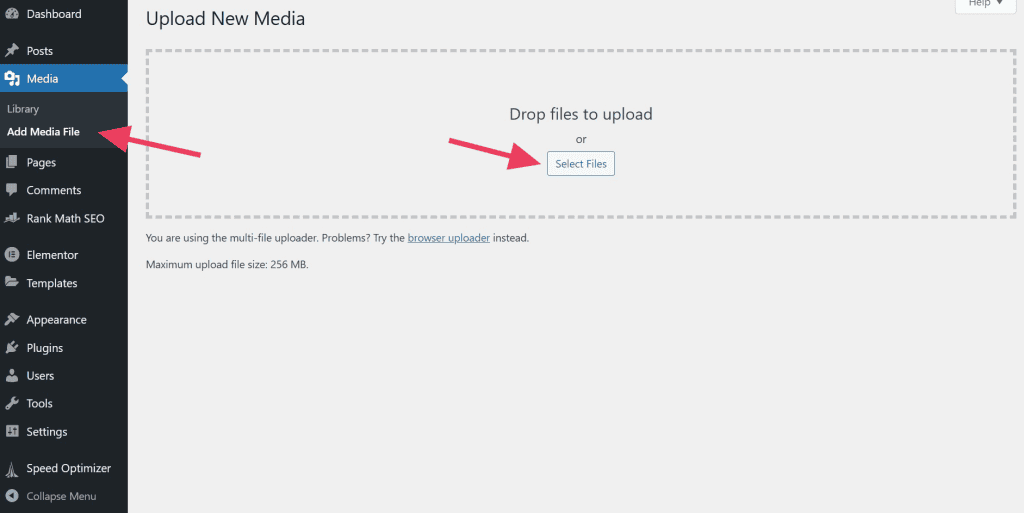
1. Upload Files From Your Device
The most common and straightforward method involves uploading files directly from your computer or mobile device. You can initiate this process by visiting Media > Add New within your WordPress dashboard. On this screen, you have two convenient options: either drag and drop your files directly into the designated upload area or click the Select Files button to browse and choose files from your device's storage.
Alternatively, and often more frequently, you can access the Media Library directly from the WordPress editor when creating or editing any page, post, product, or custom post type. This integrated approach allows for seamless media addition during the content creation workflow.
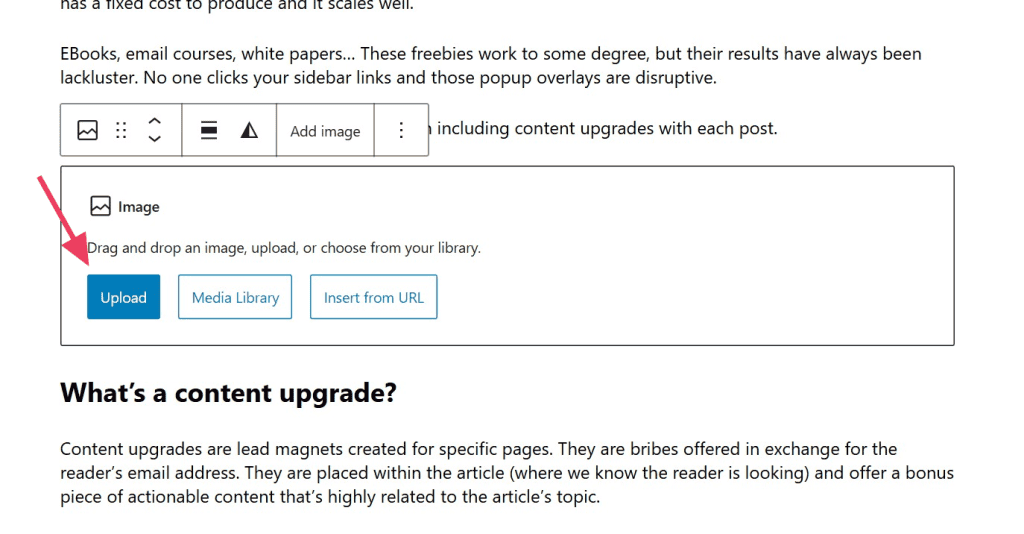
To insert an image or other media item, click the + icon within the editor to add a new block, and then select the Image block (or relevant media block for videos, audio, etc.).

Once the image block appears in your content area, you'll be presented with several options. Click the Upload button, which will then prompt you to select the desired file directly from your device.
2. Import Files From a URL
When a media file is hosted externally and not available on your local device, WordPress offers the capability to embed it directly into your content using its URL. It's crucial to understand that while this method displays the image or media on your page, the file itself is not uploaded to your Media Library or saved to your server. It remains hosted at its original location.
To use this feature, add an image block (or a block for other media types that support URL embedding) to your editor. Then, click the Insert from URL button. A dedicated field will appear where you can paste the exact web address of the image or media file.

A significant consideration when importing media via URL is copyright. Always verify that you possess the necessary rights or licenses to use the image for your intended purpose. Using copyrighted material without permission can lead to legal complications and penalties.
3. Bulk Upload Files
For situations where you need to upload a significant number of media files simultaneously, such as a large collection of photos for a gallery or a batch of documents, several efficient bulk upload methods are available. For a moderate number of items, directly using the Media Library page (Media > Library) is convenient; you can simply drag and drop groups of files into the upload area. The upload duration will, of course, depend on the total quantity and size of the files.
However, when dealing with hundreds or even thousands of files, more robust methods are recommended, primarily involving your hosting provider's file manager or an FTP client.
Upload via cPanel (or similar hosting control panel)
Most hosting providers offer a control panel, such as cPanel, to manage your website's files. The process is generally similar across different hosts.
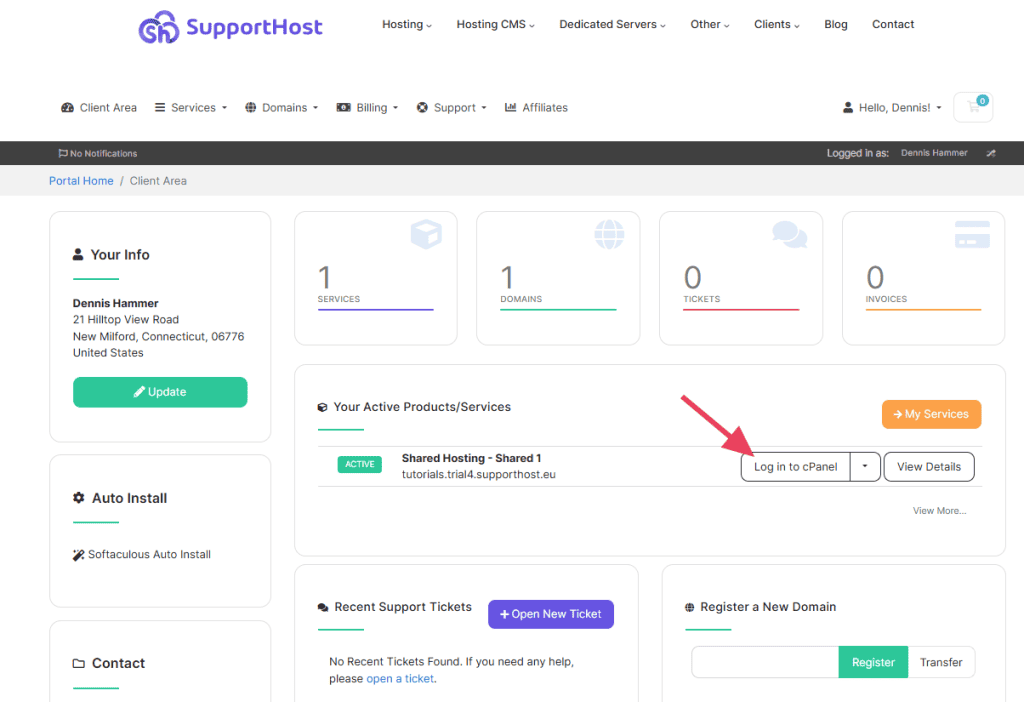
First, access your hosting account's client dashboard and locate the option to log into your control panel, often labeled as Log in to cPanel or similar.
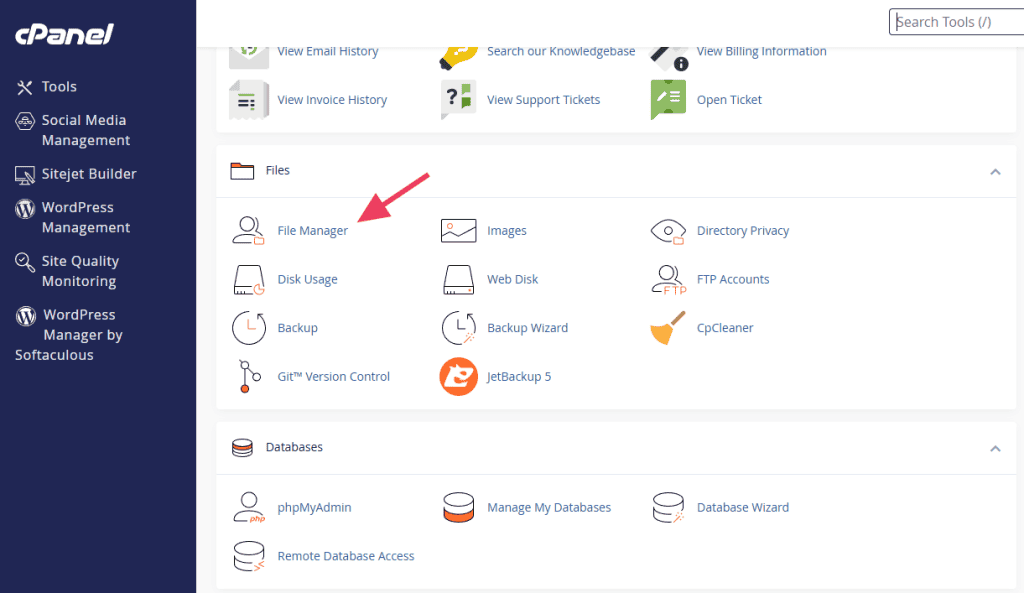
Once inside your hosting control panel, find and click the File Manager link or icon.
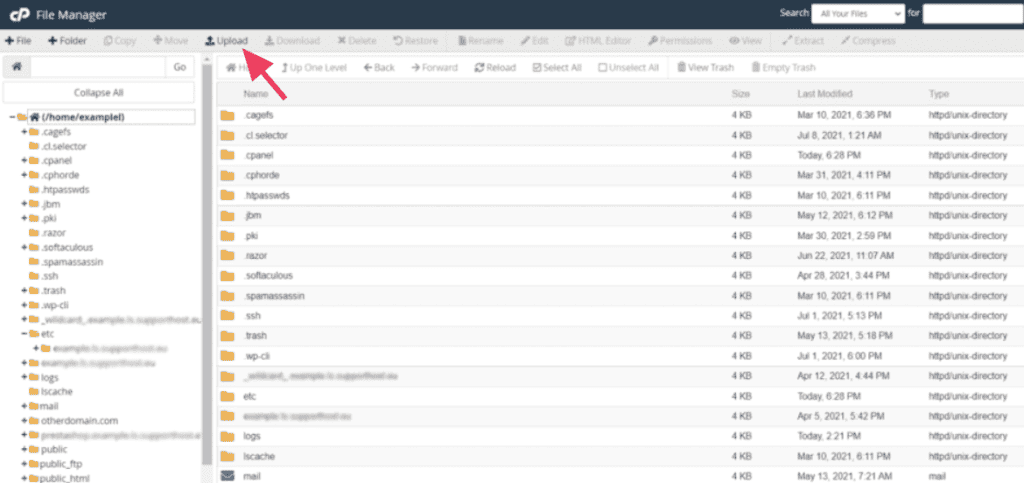
Within the File Manager, navigate to the specific directory where you wish to upload your media files (typically within the `wp-content/uploads` folder, organized by year and month). Then, click the Upload button, usually located at the top of the interface.
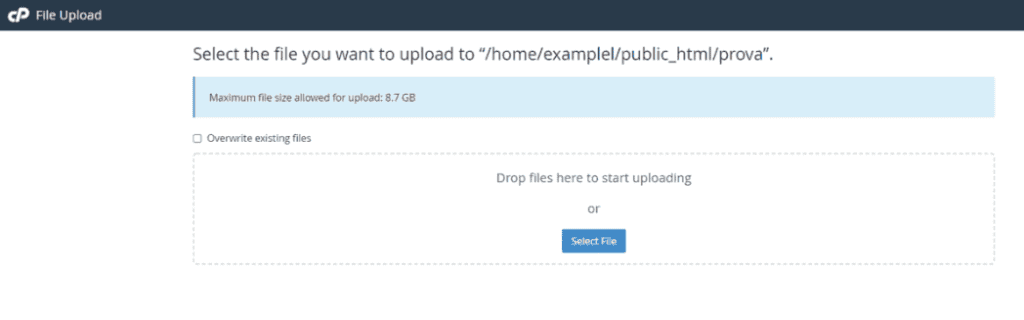
You can then either click Select File to browse and select multiple files from your computer, or simply drag and drop the desired files directly into the upload area provided.
Upload via FTP (File Transfer Protocol)
An FTP client is a dedicated software application that enables you to establish a connection with your website's server, granting you comprehensive access to its files. This powerful tool allows for efficient downloading, uploading, and even editing of server files directly from your local computer. For users who anticipate frequent and extensive interaction with their site's underlying file structure, FTP is often the most practical and efficient method.
To begin, you'll need to download and install a free FTP client, such as FileZilla. Following this, you'll need to set up an FTP account through your hosting provider and configure the client to connect to your server. While the initial setup requires a few steps, once established, future connections can be made quickly and effortlessly.
After successfully establishing your FTP connection, you will typically see two main windows: a local site window representing your computer's file system, and a remote site window displaying your server's file structure. To upload files, simply navigate to the files' location on your device in the local site window, then open the corresponding destination folder on your server in the remote site window. You can then transfer the files by either right-clicking the selection and choosing Upload, or by dragging and dropping them from the local site window to the remote site window.
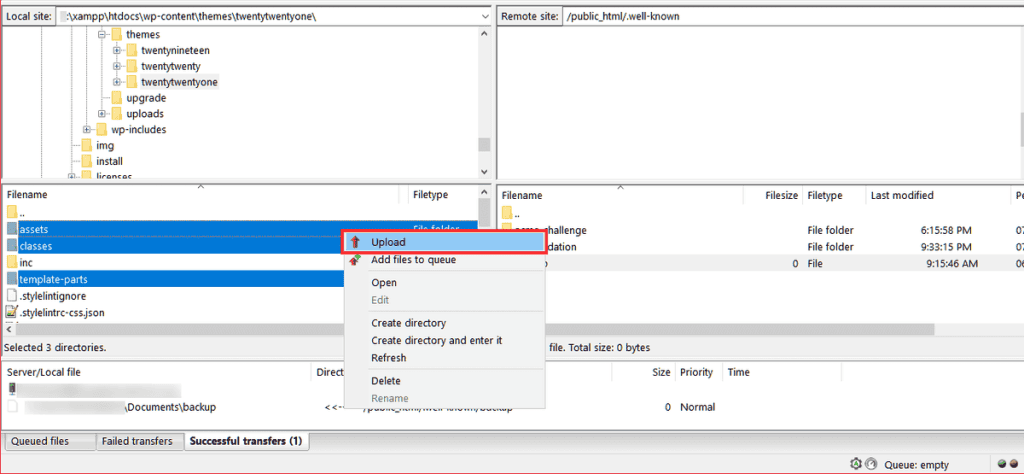
Once the file transfer process is complete, the newly uploaded files will be visible in their respective destination folders on your server.
It's important to note that when images or other media are uploaded directly via FTP, they do not automatically appear in the WordPress Media Library. To integrate these files into your WordPress database and make them visible and manageable within the Media Library, you will need to use a synchronization plugin. These plugins scan your server's upload directory and add entries for the newly discovered files to the WordPress database.
Important consideration: Since synchronization plugins make direct modifications to your WordPress database to display these images, it is highly advisable to create a complete backup of your WordPress site before proceeding with any synchronization process.
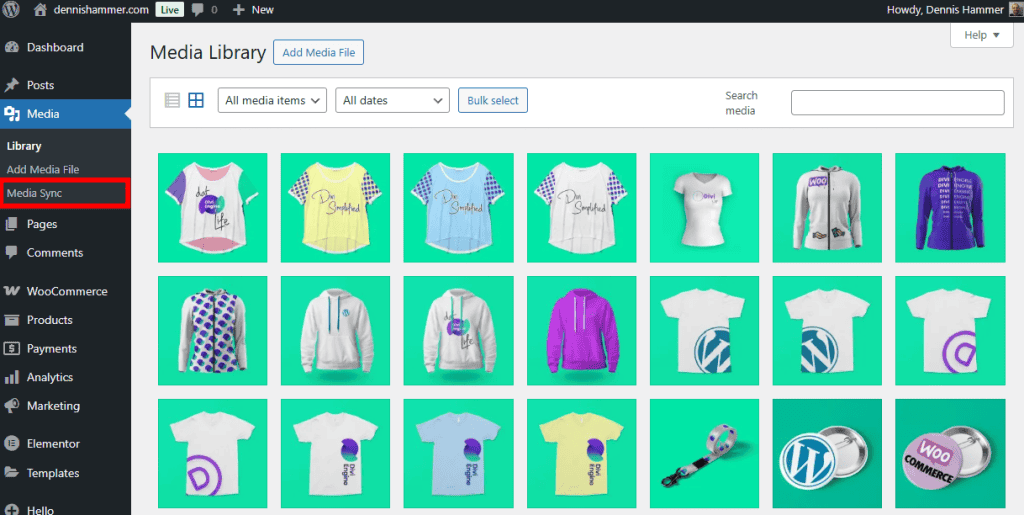
After activating a suitable synchronization plugin, navigate to its settings, often found under a "Media Sync" or similar menu within the Media section of your dashboard.
Within the plugin's interface, you will typically find an option to Scan Files, usually located under a section like "Sync – uploads directory."
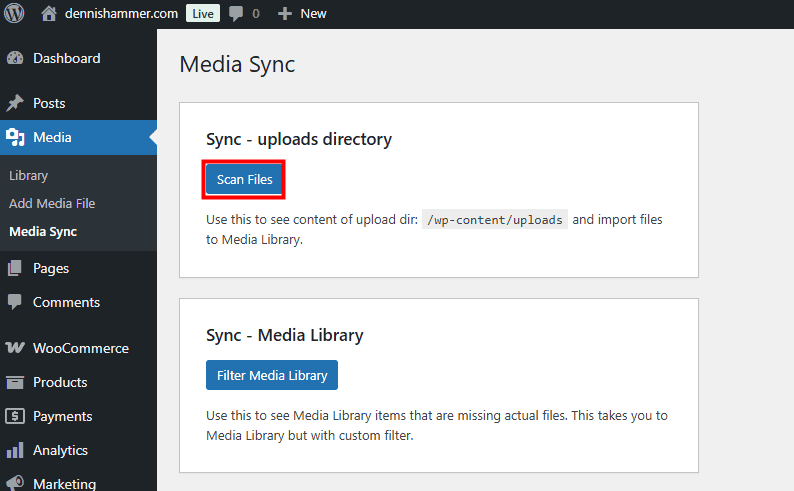
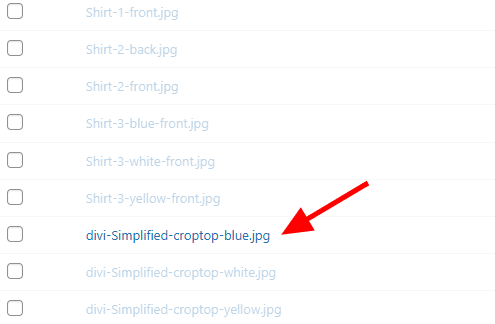
The plugin will then display a list of files that were recently uploaded via FTP but are not yet registered in the Media Library. You can select individual files or multiple files from the main upload folder or any subfolders, and then click the Import Selected button to initiate the database synchronization.
Upon successful completion of the import process, all the files you uploaded using FTP will be fully accessible and manageable within your WordPress Media Library.
Editing Media Files in the Library
The WordPress Media Library is equipped with a set of fundamental editing tools that allow you to make quick adjustments to your images directly within the dashboard, without the need for external software. These basic functionalities are designed to help you prepare your media for optimal display on your website.
To access these editing options, navigate to your Media Library and select the specific image file you wish to modify from either the list or grid view.
Once selected, the file will open in a detailed attachment display window. At the bottom of this window, you will find the Edit Image button; click it to proceed to the editing interface.
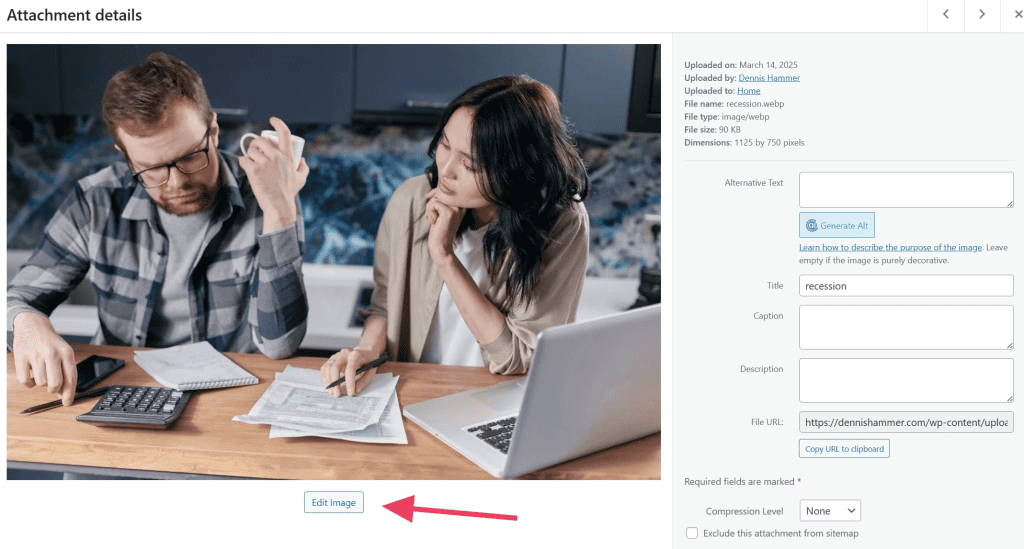
On the subsequent screen, you'll be presented with various tools to manipulate your image. You can crop the image to focus on a particular area, scale it to different dimensions, or rotate it to adjust its orientation as required. For more advanced image manipulation capabilities, beyond these basic functions, consider exploring a dedicated image editing plugin.

Common Media Library Issues and Troubleshooting
While the WordPress Media Library is generally robust, users may occasionally encounter issues that prevent it from functioning as expected. When problems arise, it's important to remain calm; most common issues have straightforward solutions, and your hosting provider can offer assistance if you find yourself unable to resolve them. Below are some frequently encountered errors and their typical resolutions.
1. File Type Not Allowed
When you attempt to upload a file and WordPress prevents the action, displaying a "File type not allowed" message, it typically indicates that the file format is not supported by default. For instance, WordPress does not natively allow the upload of SVG files for security reasons. To resolve this, you can either convert the file to a supported format (e.g., convert an SVG to a PNG) or install a plugin specifically designed to extend the range of allowed file types.
2. File Size Too Big
An error indicating that your "file is too large to upload" signifies that the file you're attempting to add exceeds your website's maximum upload limit. This limit is usually configured at the server level by your web host. Solutions include reducing the file size through compression or optimization, or contacting your hosting provider to request an increase in your site's upload limit.
3. HTTP Error During Upload
An "HTTP error" occurring during the file upload process can be frustrating but is often a transient issue. Potential causes include an unstable internet connection, a conflict with an active plugin, or a temporary server-side problem. To troubleshoot, try refreshing the page and attempting the upload again. If the issue persists, try deactivating plugins one by one to identify any conflicts, or contact your hosting provider for server-related assistance.
4. Media Library is Blank
If you navigate to your Media Library and find it completely empty, with no files displayed, this could point to a caching problem or a conflict with one of your installed plugins. A good first step is to clear your browser's cache, as stale cached data can sometimes interfere with proper display. If that doesn't resolve it, systematically disable your plugins to determine if one is causing the conflict.
5. Image Won’t Display Properly
There are instances where images might appear as broken placeholders or simply fail to load on your website. This issue can stem from several factors: the file path to the image might be incorrect or broken, the image file may not have fully uploaded or been corrupted during the upload process, or there could be a compatibility problem with your active theme or other website scripts.
Plugins for Enhancing Media Library Functionality
While the default WordPress Media Library offers essential capabilities, its functionality can be significantly expanded with the integration of specialized plugins. These tools provide advanced features for organization, management, and even replacement of media files, offering greater control over your digital assets. Fortunately, the WordPress ecosystem boasts a diverse array of excellent options to choose from.
If you are new to installing plugins, ensure you familiarize yourself with the process to seamlessly integrate these enhancements into your website.
1. Media Library Organizer
Media Library Organizer is an exceptionally useful plugin designed to bring a familiar organizational structure to your WordPress media files. It addresses the common challenge of a flat media library by enabling you to create virtual folders and sort your files intuitively, much like you would manage documents on your personal computer.
Key Features
- Allows the creation of hierarchical folders and subfolders for comprehensive media organization.
- Supports drag-and-drop functionality for effortlessly moving files between folders.
- Provides robust filtering options by folder, upload date, file type, or custom keywords.
- Ensures that file URLs remain unchanged during reorganization, preventing broken links across your site.
- Integrates seamlessly with posts, pages, and various custom post types.
- Maintains compatibility with the majority of WordPress themes and popular page builders.
- Eliminates the need to re-upload or re-assign existing media files after organization.
- Features an intuitive and user-friendly interface directly accessible within the Media Library.
This plugin is remarkably simple to implement. Upon activation, you will observe a new column within your Media Library displaying your created media categories. To establish a new category, simply click the Add button, assign a descriptive name, and it will promptly appear in your list.
To assign an image to a specific category, open the image in its detailed view and select the desired category from the available options in the image settings panel.

Alternatively, for a more visual approach, you can directly drag and drop images from the main Media Library display into one of your newly created categories.
When you are in the process of adding media to your page or post content, the plugin allows you to sort your files by category, significantly speeding up the process of locating and inserting the precise media you need.
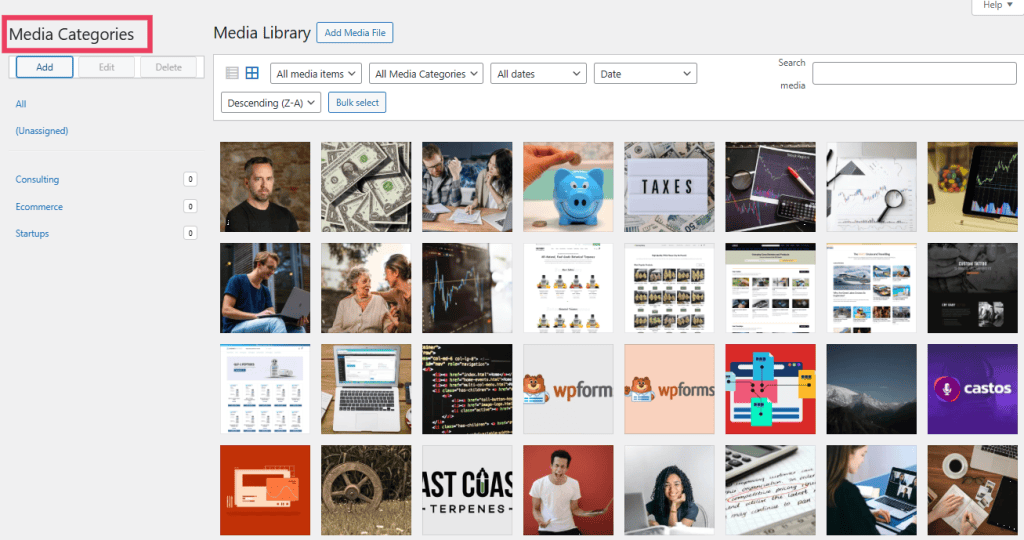
2. Enhanced Media Library
The Enhanced Media Library plugin provides a robust solution for more effectively managing extensive collections of media files. It introduces sophisticated sorting and filtering mechanisms, making it considerably easier to locate specific assets within a large library.
Key Features
- Allows the creation of custom categories and tags for improved media file classification.
- Enables filtering of files by media type, custom categories, or upload date.
- Offers bulk editing capabilities for efficiently assigning categories to multiple files.
- Fully compatible with various media types, including audio, video, images, and documents.
- Maintains media organization without altering the physical storage locations of files.
- Provides support for native WordPress galleries and shortcodes, ensuring broad compatibility.
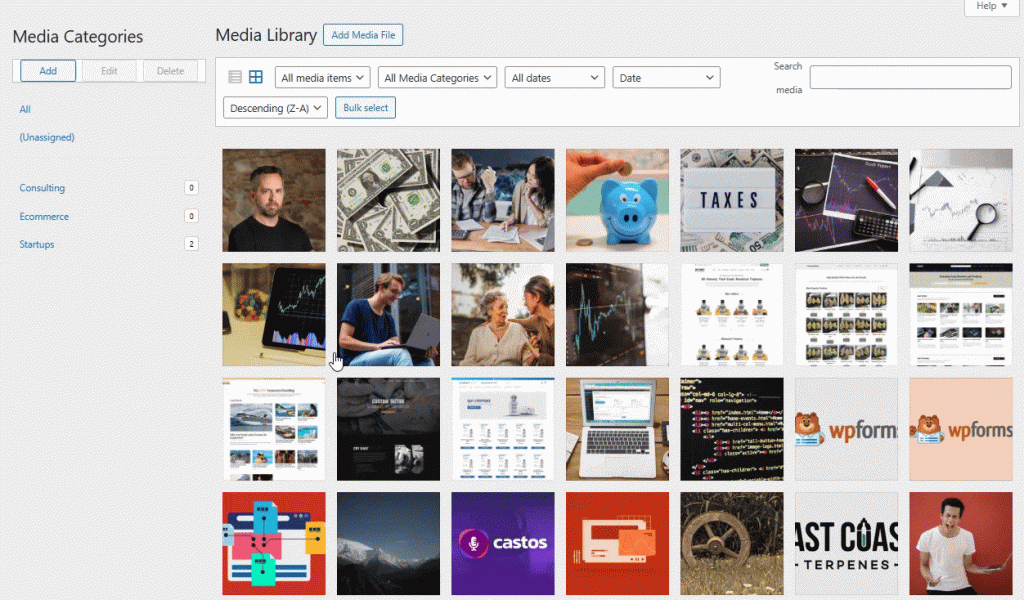
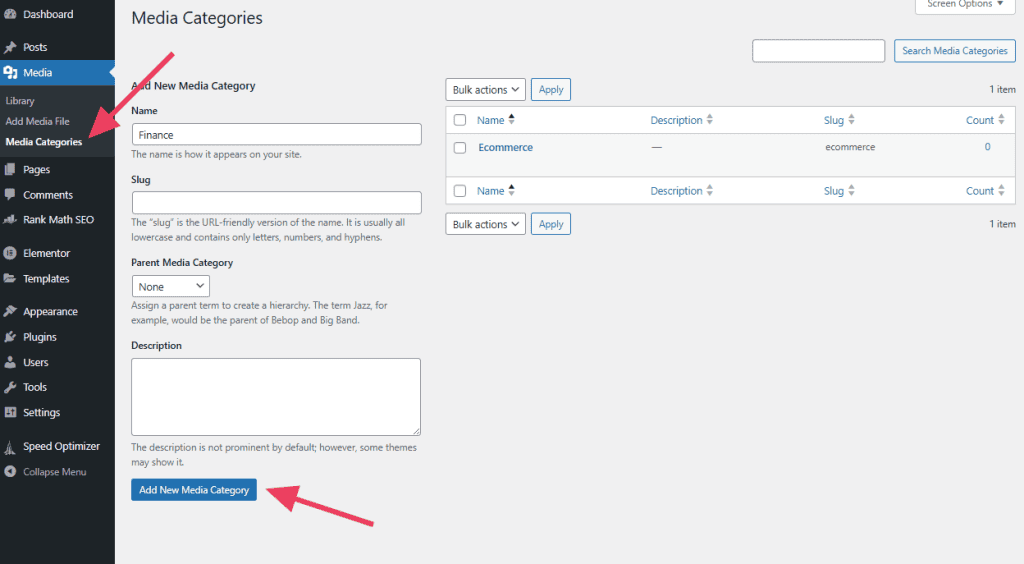
This plugin is another user-friendly option for organizing your WordPress media. To begin creating categories, navigate to Media > Media Categories. Here, you can define a name for your new category and then click Add New Media Category to save it.
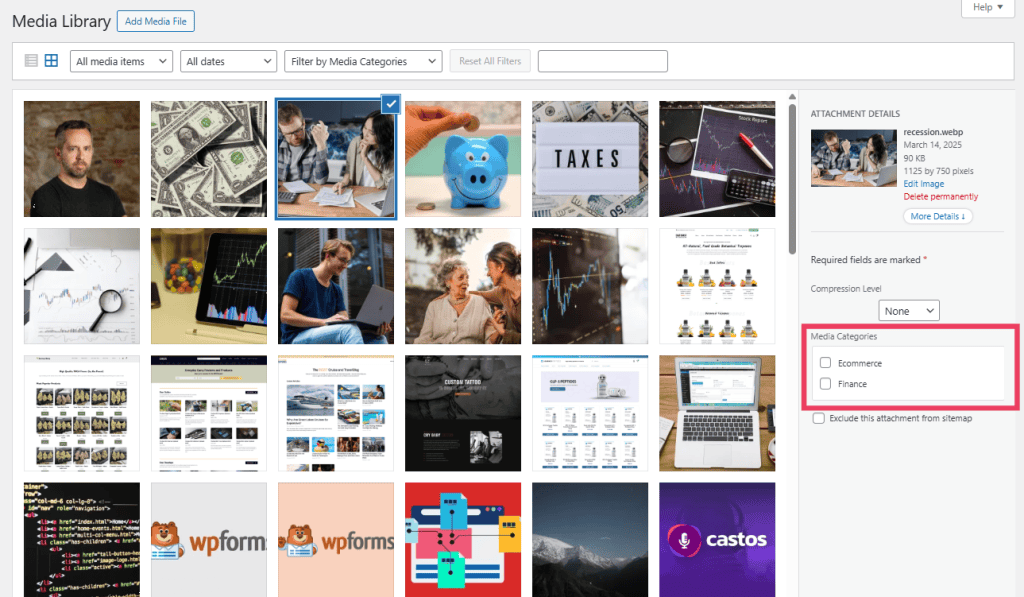
To assign an image to a category, simply open the desired image in your Media Library. On the right-hand side, you will find options to select the appropriate category from your predefined list.
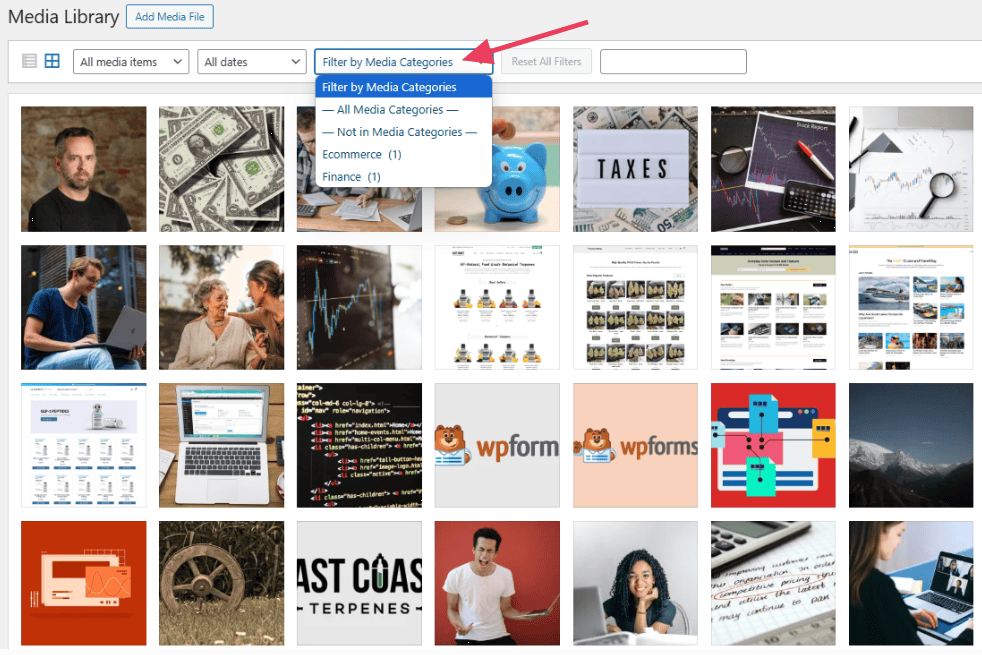
Once categories are assigned, you can then easily sort your images by category using the dedicated Filter by Media Categories dropdown menu, greatly improving your workflow.
3. Media Library Assistant
Media Library Assistant is a powerful plugin that provides advanced tools for comprehensive organization, precise sorting, and flexible display of your media files. While it offers extensive control, it is best suited for users who desire more granular options and are comfortable exploring detailed settings.
Key Features
- Enables the use of custom taxonomies and highly flexible filters for refined organization.
- Allows for the display of media galleries using customizable shortcodes.
- Offers powerful search capabilities based on nearly any file detail or metadata.
- Facilitates easy addition and management of media metadata.
- Supports bulk editing and updating of multiple files simultaneously.
Distinct from some other media library plugins, Media Library Assistant allows you to organize files using both categories and tags. Categories can be created on the Media > Att. Category page, while tags are managed on the Media > Att. Tag page. In both instances, you simply enter the name of your desired category or tag and click Add New at the bottom of the page.
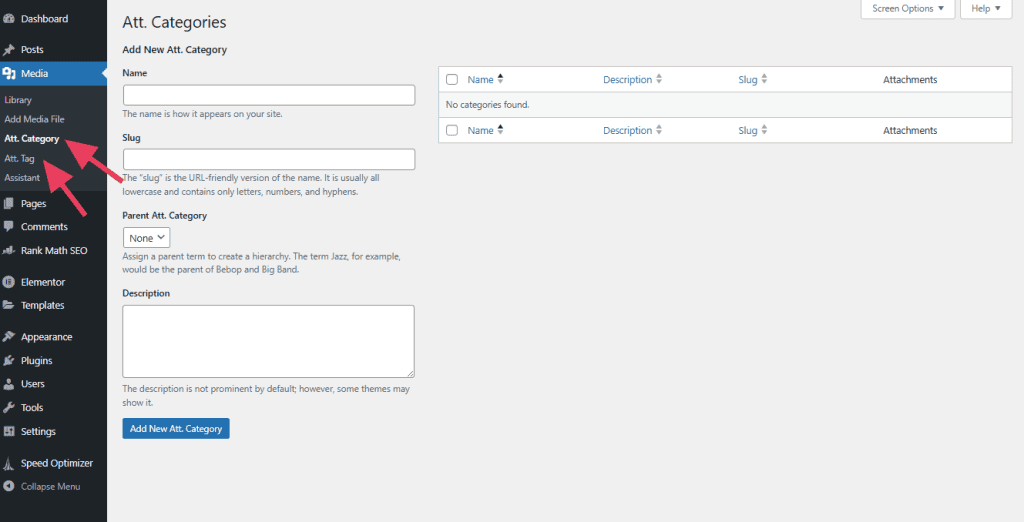
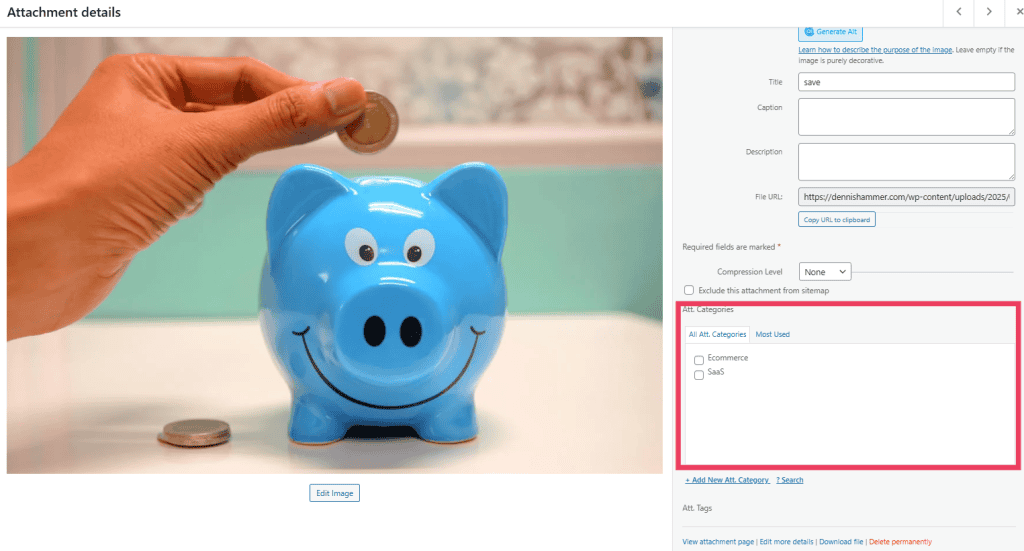
To categorize a file, open the image in the Media Library. You will find appropriate checkboxes under the Att. Categories section, allowing you to assign one or more categories.
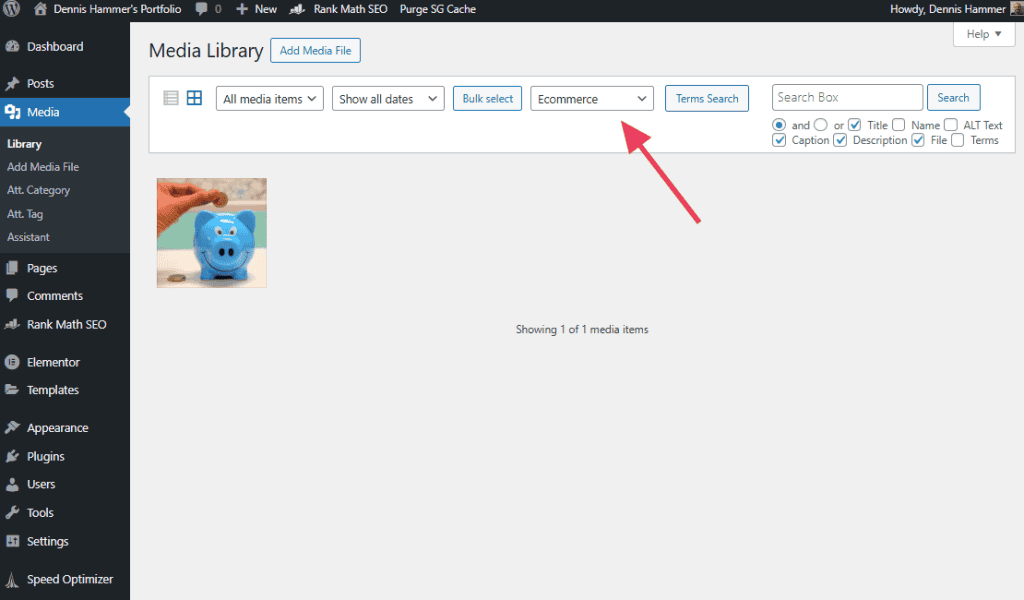
Once your files are categorized, you can utilize the dropdown selector located at the top of the Media Library interface to efficiently sort and filter your media collection.
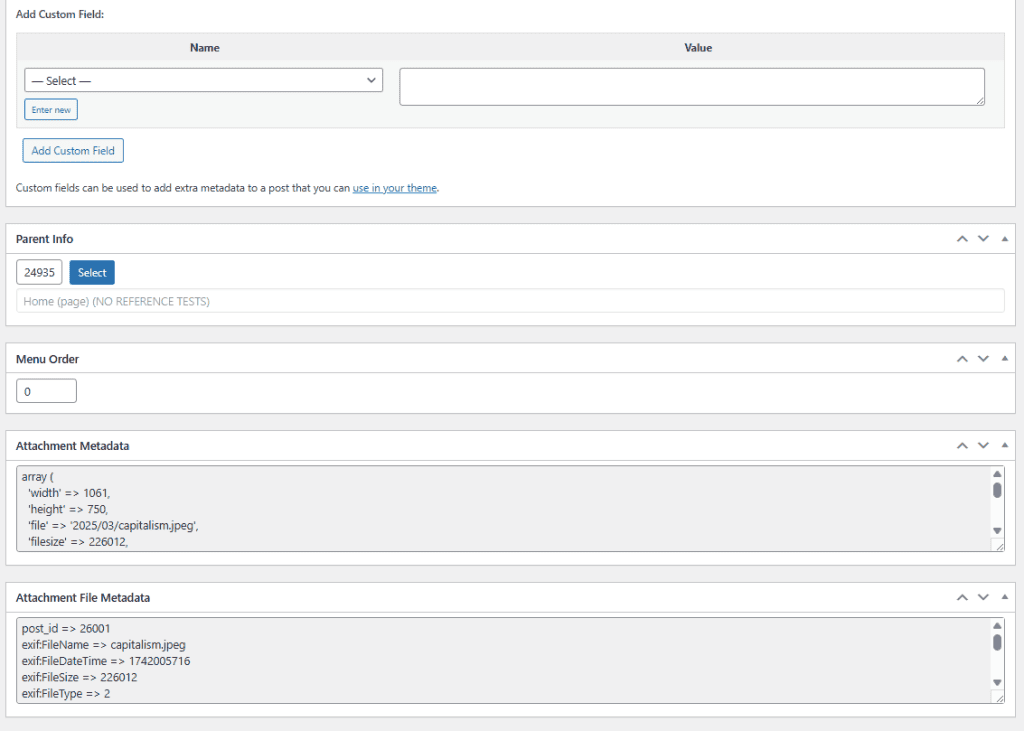
Under Media > Assistant, your files are displayed in a detailed list. Clicking into each individual file reveals an entire page of advanced controls and options. For example, you can apply custom fields, establish parent-child relationships between files (similar to page or post hierarchies), or directly edit the file's extensive metadata.
4. Enable Media Replace
The Enable Media Replace plugin excels at a single, yet critical, function: it allows you to replace an existing media file in your library without altering its URL or consequently breaking any links across your website. This functionality is immensely valuable, especially when an image or file is utilized in numerous locations throughout your site.
Key Features
- Provides a direct option to replace files from within the Media Library interface.
- Preserves the original URL of the file, ensuring that all existing links and embeds continue to function correctly.
- Offers a choice to either maintain the original upload date or update it to the current date.
- Supports a wide array of media types, including images, videos, PDFs, and more.
- Features a straightforward, no-code setup for immediate use.
To replace an image or any other file within your Media Library, simply open the file you wish to update and locate the Replace Media button, typically found in the details panel.
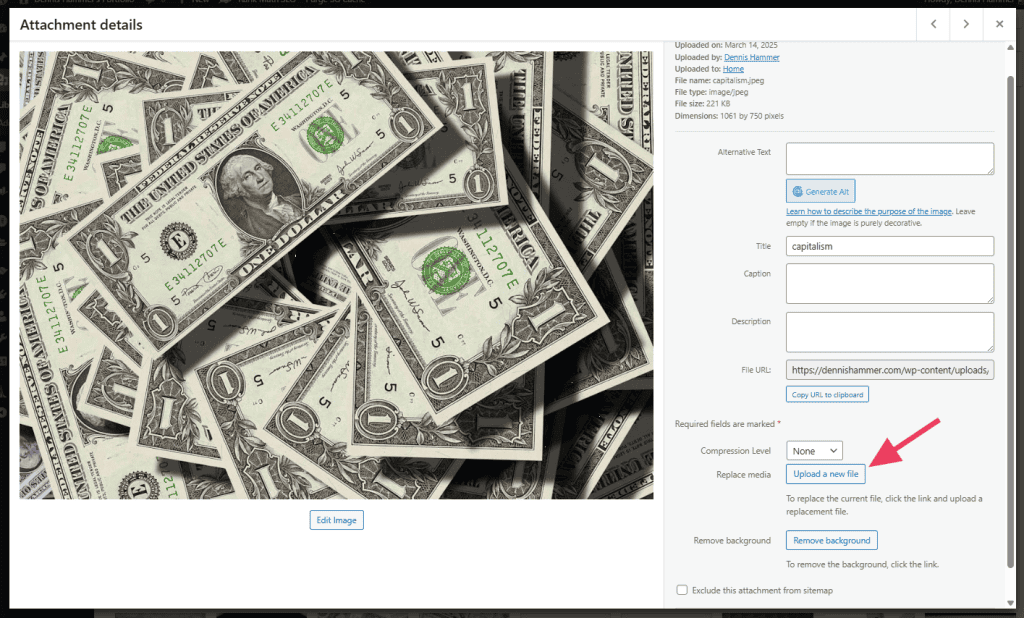
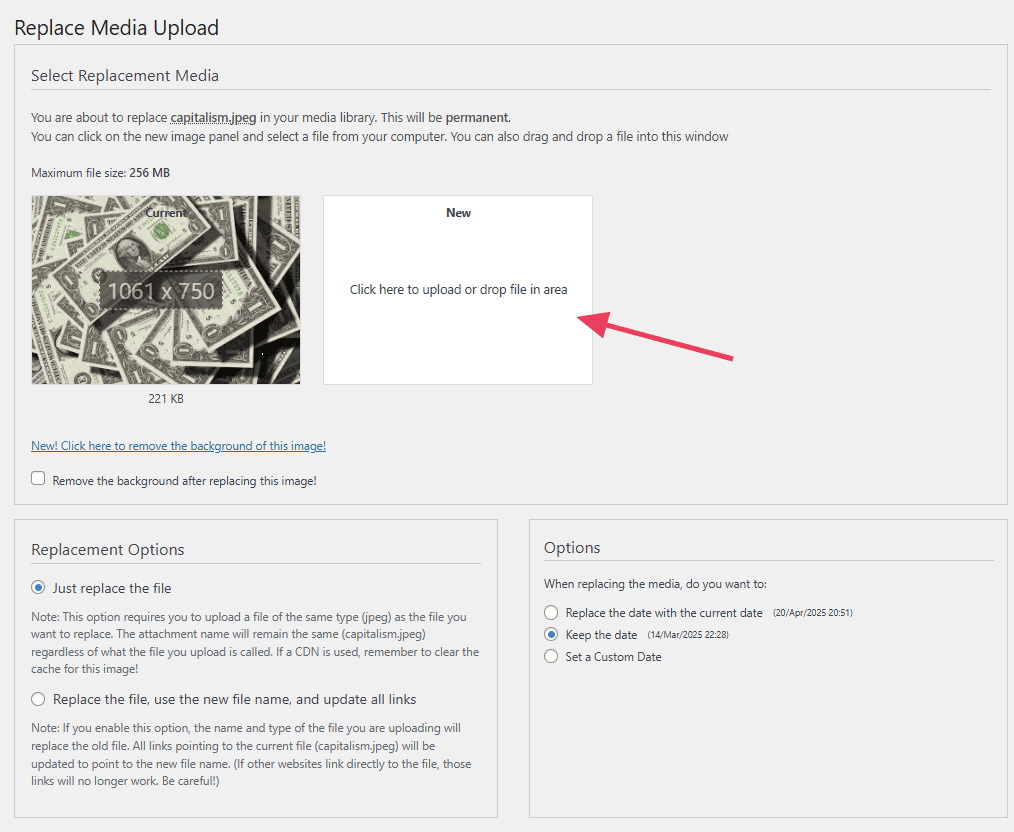
Upon clicking, you will be prompted to select the new file. Click the New button to browse your computer, or drag and drop the replacement file into the designated area. You will then be presented with two main replacement options:
- Replace just the file: This option requires you to upload a file of the exact same type. If you are using a content delivery network (CDN), you may also need to clear its cache for the updated image to propagate.
- Replace the file, use the new file name, and update all links: With this choice, the name and type of the newly uploaded file will supersede the old one. Critically, all existing links pointing to the original file will be automatically updated to reflect the new file name, maintaining link integrity.
You must also decide whether to retain the original upload date, apply the current date, or specify a custom date. This selection influences how the file is organized within your hosting server's folder structure.
Once all your preferences have been set, click Upload to finalize the replacement process.
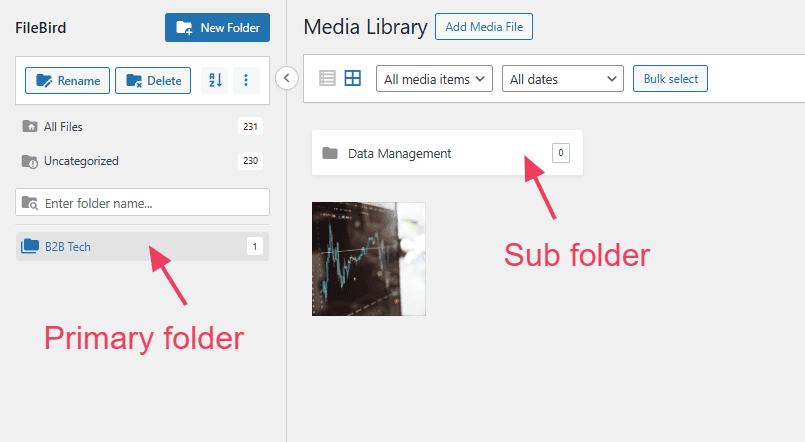
5. FileBird
FileBird introduces a highly intuitive folder system directly into your WordPress Media Library, allowing you to organize files in a manner that mirrors the structure you typically use on your personal computer. It stands out for its clean, modern interface and exceptional user-friendliness.
Key Features
- Enables the creation of unlimited folders and subfolders for meticulous organization.
- Offers seamless drag-and-drop functionality for moving files into folders.
- Presents a clean sidebar layout, facilitating quick and efficient navigation.
- Includes right-click context menu options for quick actions like renaming and deleting folders.
- Works effectively with media used in posts, pages, and WooCommerce products.
- Designed to maintain file links and URLs, preventing any disruption to your site.
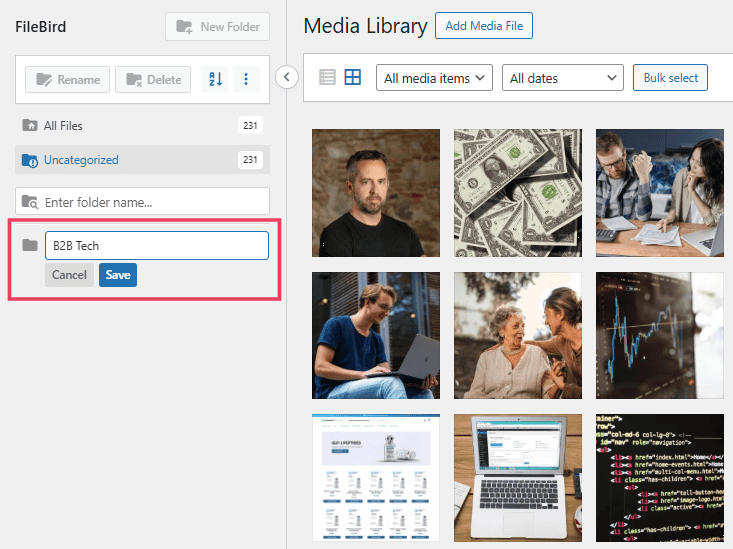
To add a new folder using FileBird, simply click the New Folder button located within your Media Library interface.
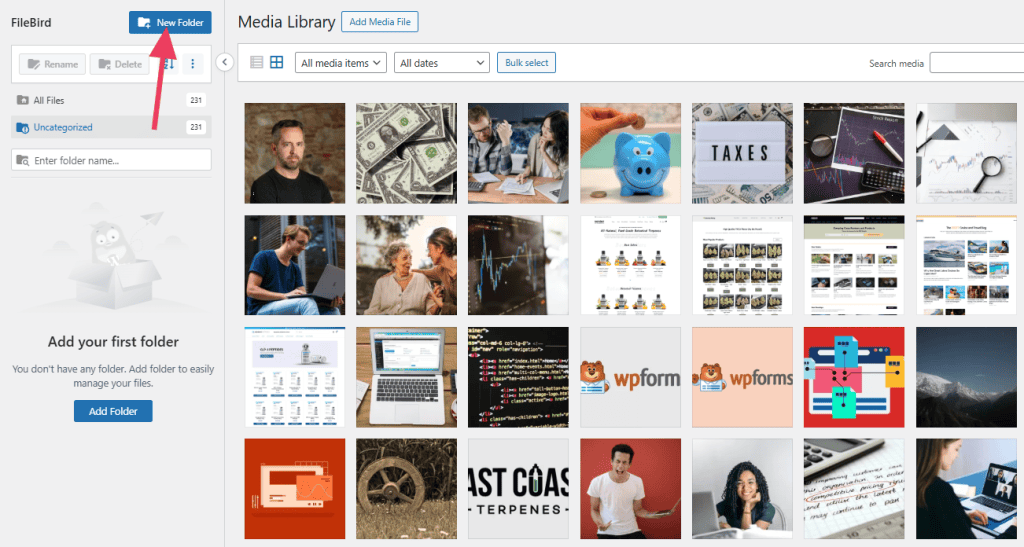
A prompt will appear, asking you to assign a name to your new folder; enter a descriptive name and then click Save.
You can then organize your files by either dragging them directly into the newly created folder, or by opening the file's details and selecting the appropriate category from the dropdown menu.
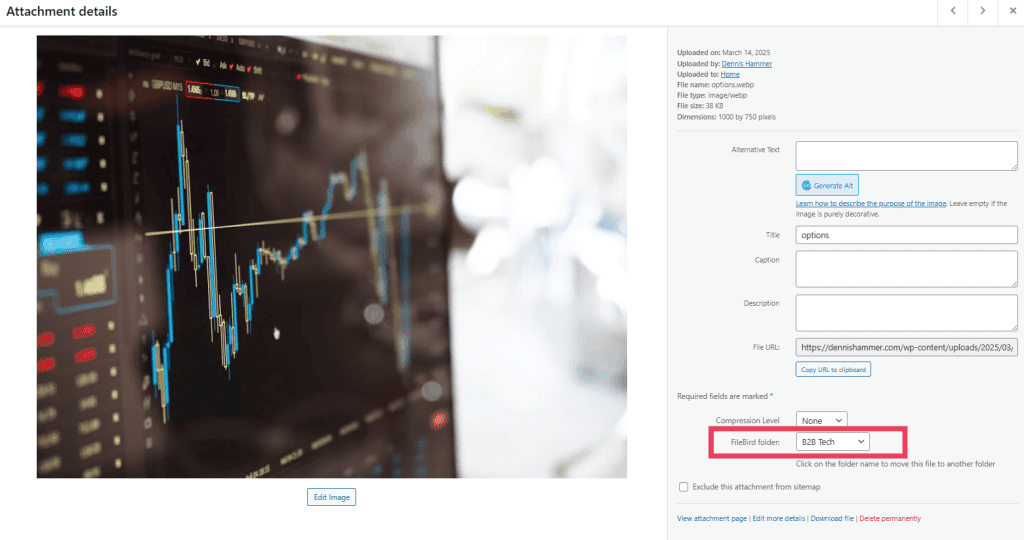
For highly detailed organization, FileBird also supports the creation of sub-folders, allowing for a deeply nested and precise categorization of your media assets.
Frequently Asked Questions
Can I create my own folders in the WordPress Media Library?
By default, WordPress does not provide a native folder system within its Media Library interface. To effectively organize your media files into hierarchical folders or categories, you will need to install a dedicated plugin designed for this purpose, as discussed earlier in this guide.
Can I download images from the Media Library?
Yes, you can easily download images directly from your Media Library. Simply click on the image to open its detailed view, then right-click on the image itself and select "Save image as..." (or a similar option depending on your browser) to download it to your local computer.
How do I delete a file from the Media Library?
To remove a file from your Media Library, open the library, click on the specific file you wish to delete to view its details, and then locate and click the "Delete permanently" button. Be cautious, as this action is irreversible.
Can I replace an image without breaking links on my site?
Not through the default WordPress functionality alone. To replace a media file while ensuring its URL remains unchanged and all existing links across your site continue to function, you will require a specialized plugin, such as "Enable Media Replace."
Does deleting a file from the Media Library remove it from my posts?
Yes, unequivocally. If you delete a file from your WordPress Media Library, it will no longer be available or display on any pages, posts, or other content areas where it was previously used. This will result in broken image placeholders or missing media on your live site.
Can I edit images in the Media Library?
Indeed. WordPress provides built-in, basic image editing capabilities within the Media Library. You can perform actions such as cropping, rotating, flipping, or resizing images directly, without the necessity of external image editing software.
Can I protect images on a WordPress site?
Yes, there are various methods and strategies you can employ to help protect images on your WordPress site from unauthorized use. These options can range from technical implementations to legal considerations, designed to prevent individuals from using your visual content without proper permission.
