


Understanding Website Staging in Plesk
Understanding the concept of website staging within Plesk is fundamental for any webmaster. Essentially, it involves creating an exact duplicate of your operational website. This duplicated environment serves as a sandbox where you can rigorously test any proposed changes—be it new features, design overhauls, or underlying code modifications—before they are ever exposed to your public audience. This isolated setup is invaluable, providing a safe space to experiment and innovate. Plesk significantly streamlines this critical process by offering intuitive tools that allow for effortless copying of all essential components: your website files, databases, and critical configuration settings, all into a designated staging area. This strategic approach establishes a controlled testing ground, empowering you to proactively identify, diagnose, and resolve any potential issues or bugs. By doing so, you can ensure a flawless transition, preventing any negative impact on your live website's performance and, crucially, on your visitors' experience. Consider it a dress rehearsal, ensuring every element is perfect before the grand premiere.
Setting Up the Website Staging Environment
To establish your staging environment, you will typically create it within your existing Plesk webspace. This can be achieved by setting up either a new domain or a subdomain specifically dedicated to staging. For example, if your primary website operates on 'example.com', you might designate a subdomain such as 'staging.example.com' for all your testing activities. This clear separation ensures that your testing processes do not interfere with your live production site. For guidance on setting up new domains or subdomains, consult your hosting provider's documentation or support resources.
Copying Your Website
With your staging environment successfully established, the next crucial step is to replicate your live production website into this new testing area. Adhering to the following detailed steps will ensure that all your website's files, databases, and critical configuration settings are accurately and completely transferred, forming a true replica of your live site.
- Log in to your Plesk panel using the credentials provided by your web hosting provider.
- Click Websites & Domains from the left sidebar.
- Next, you will see an interface as shown below. Locate the website you want to copy and click on Website Copying.
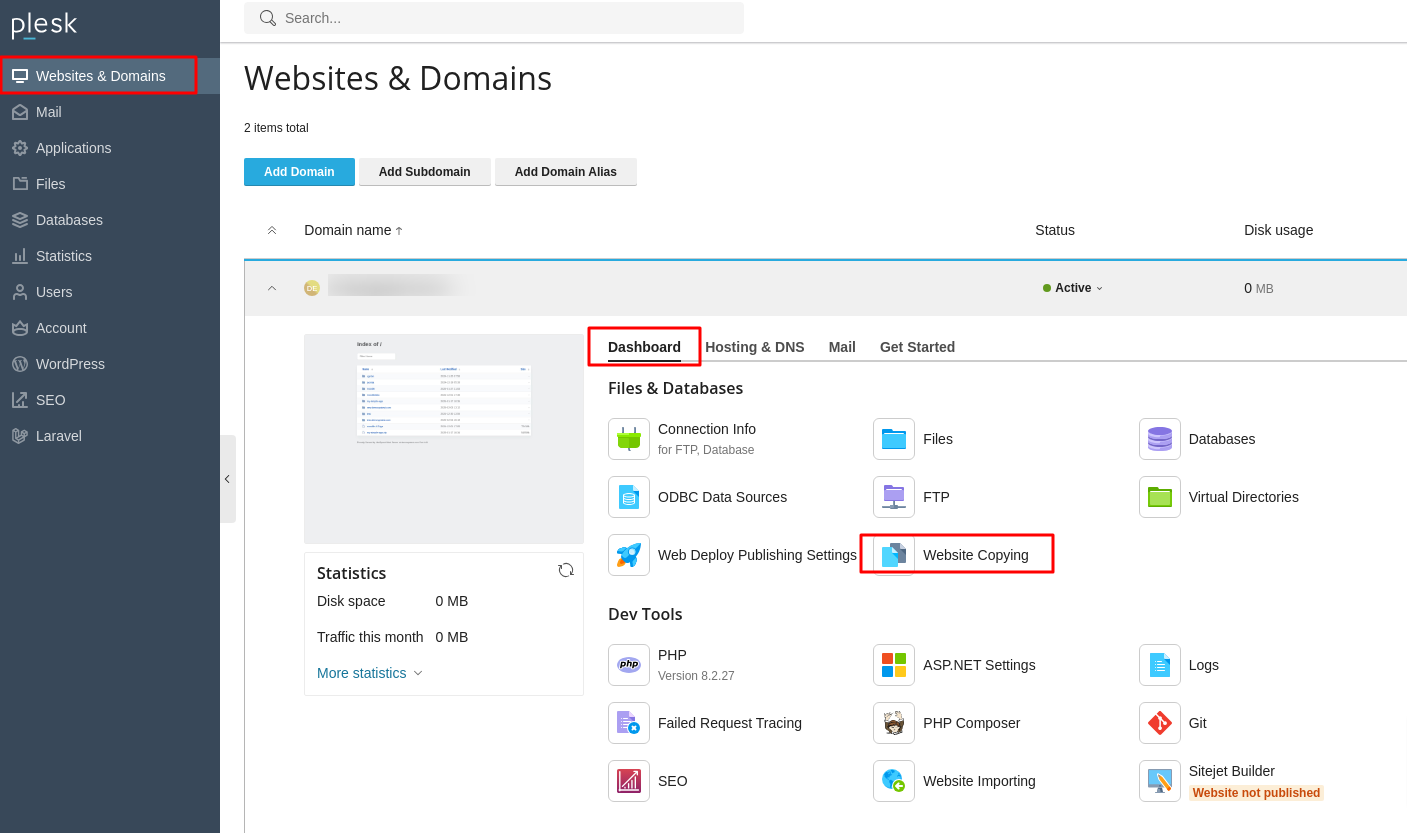
- The Copy Files page opens.
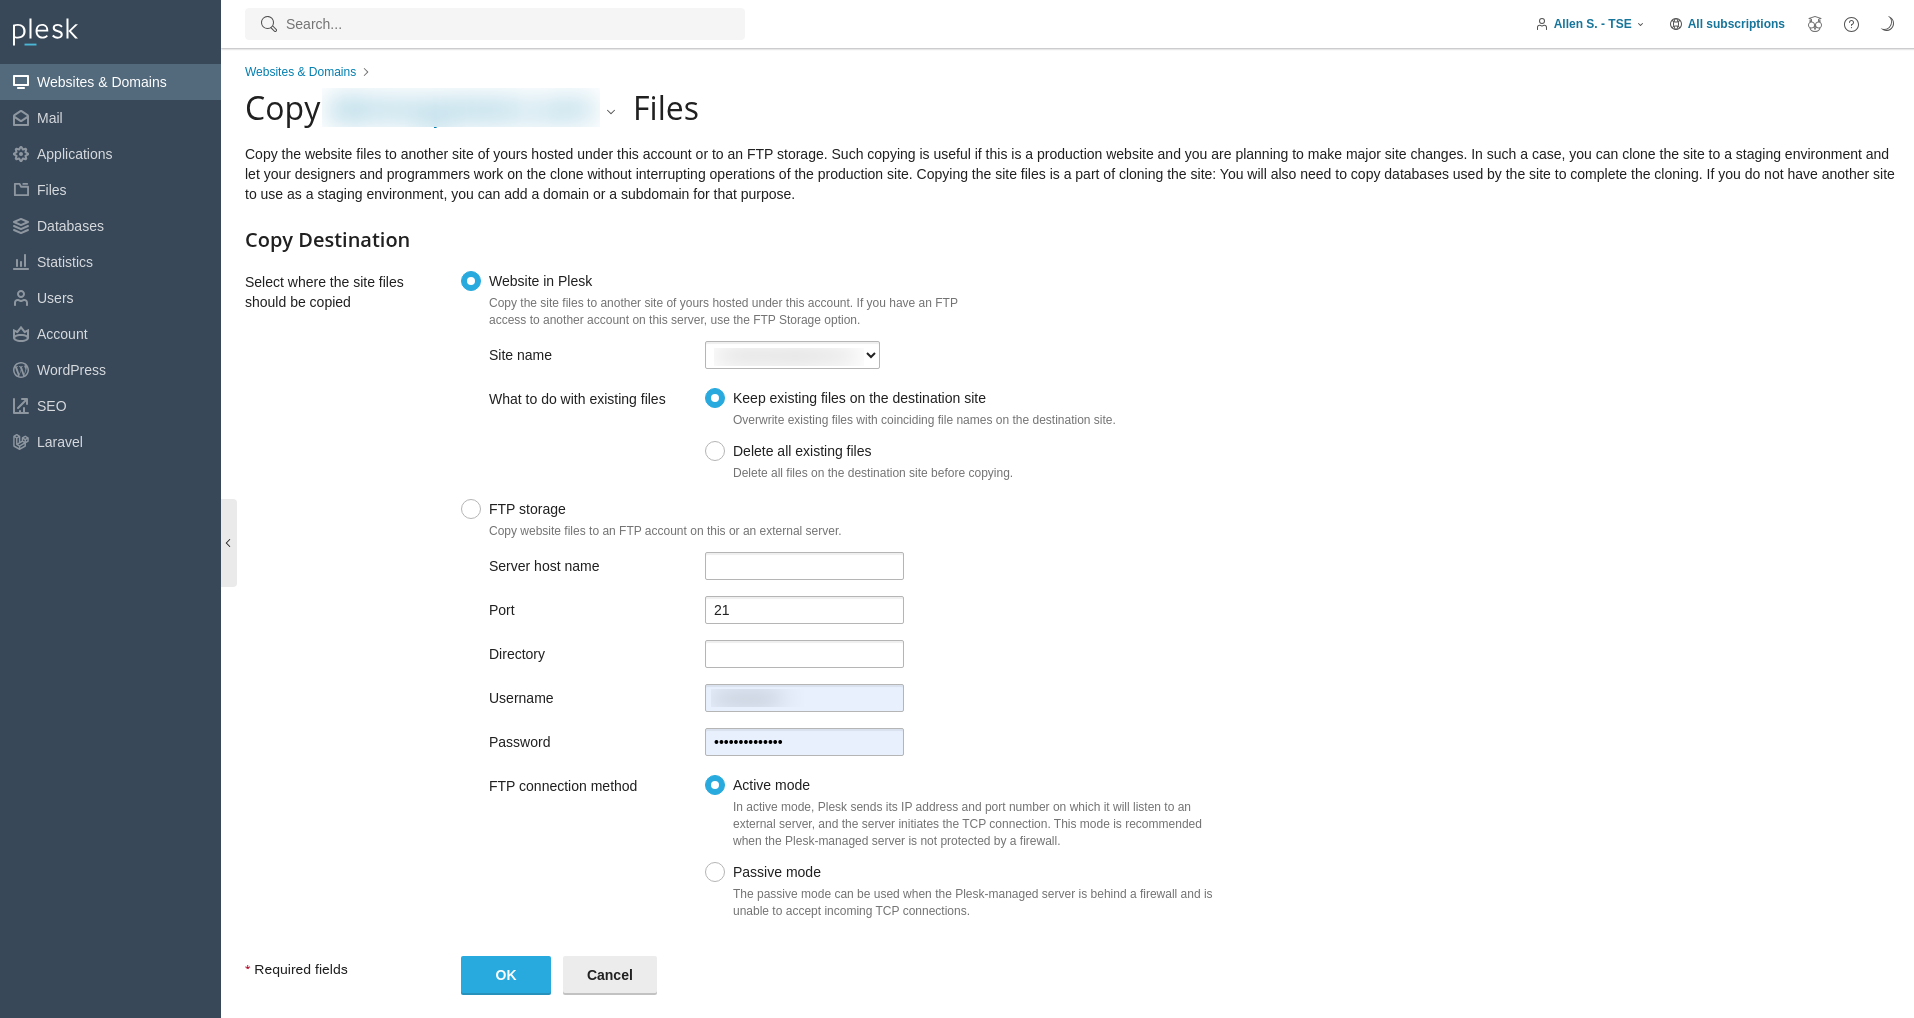
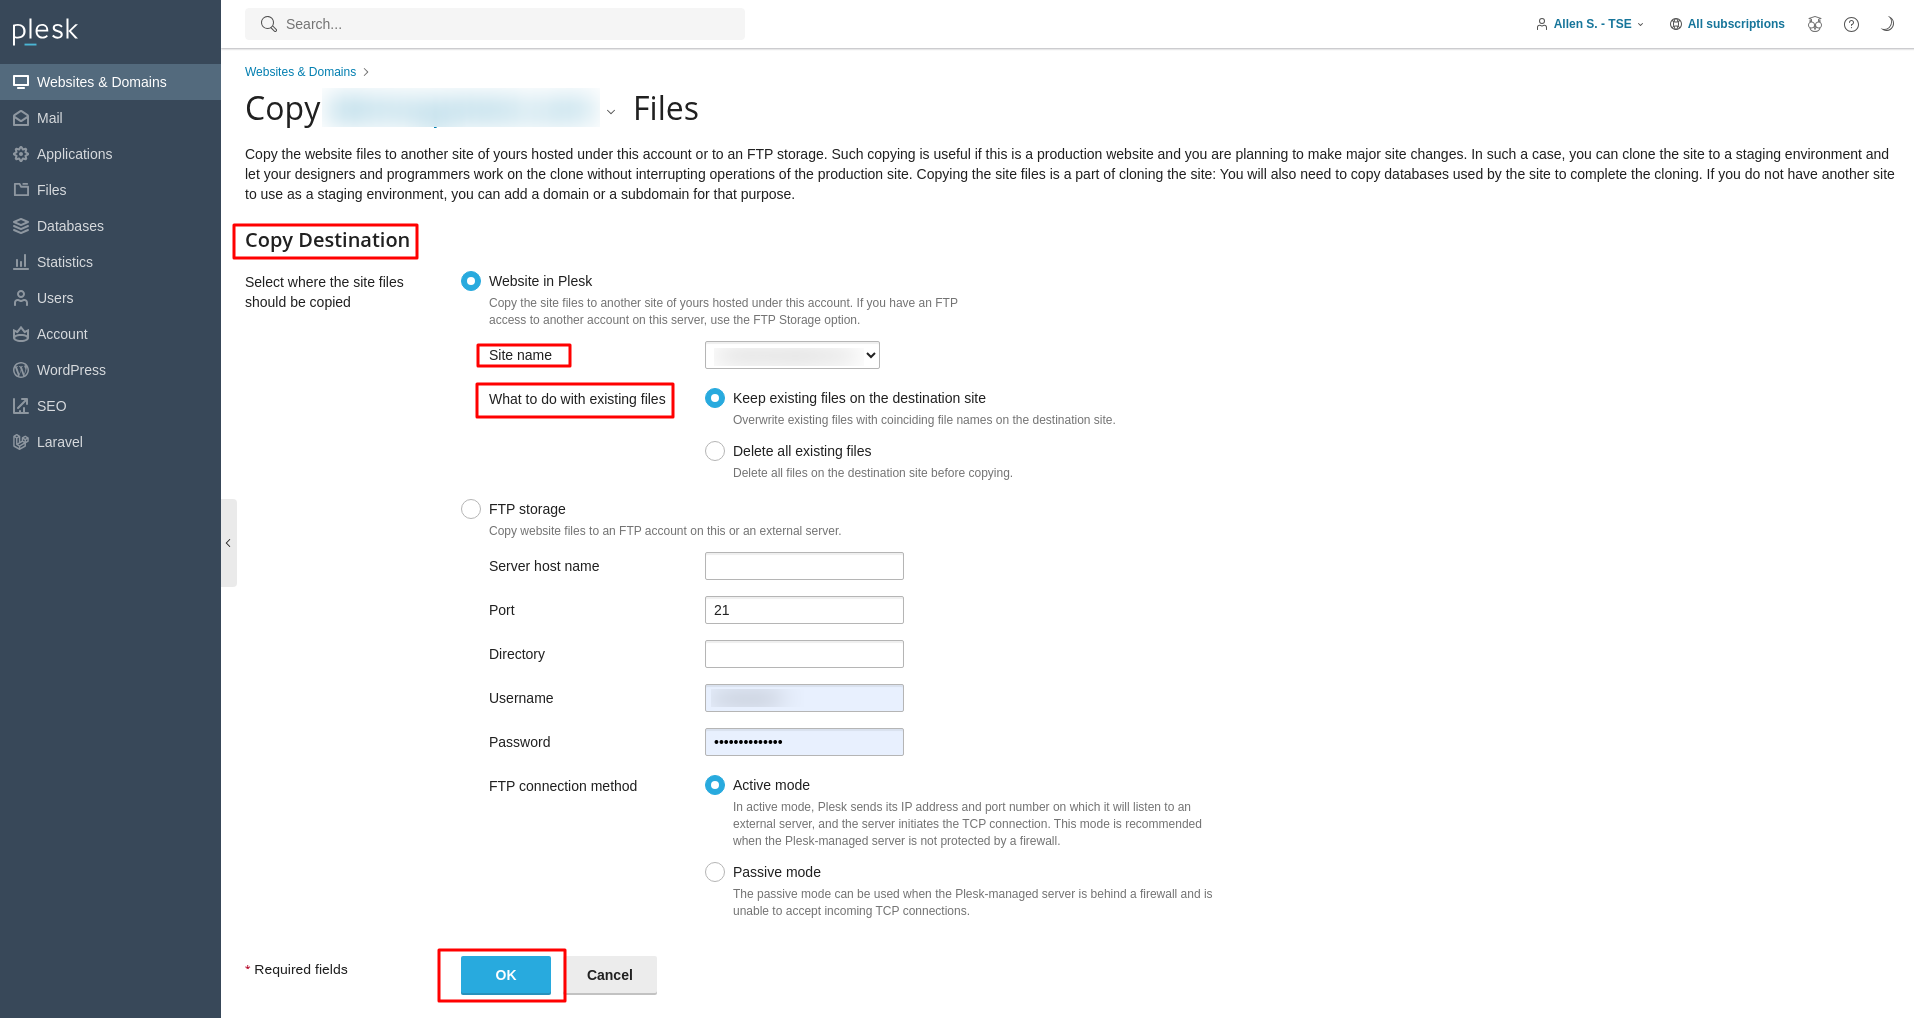
- Under Copy Destination, click Website in Plesk.
- In the Site Name dropdown, choose the destination domain.
- In the What to do with existing files section, select how to handle any existing files on the destination domain.
- Click OK to start copying the site to the destination domain.
Copying Databases
For websites that rely on one or more databases, it is equally important to copy these databases to your newly created staging environment. This ensures that your testing environment operates with the most current and relevant data, mirroring your live site's data structure and content. Follow these precise steps to perform the database replication.
- Log in to your Plesk panel using the credentials provided by your hosting provider.
- Click Databases from the left sidebar.
- Find the database you want to copy and click on Copy.
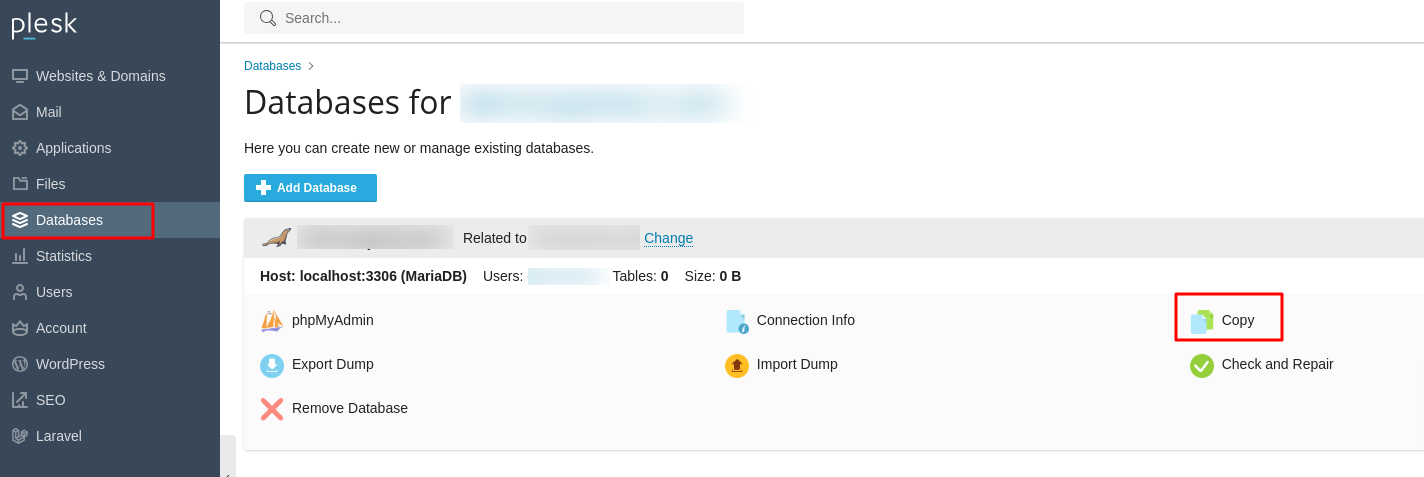
- The Copy Files page opens.
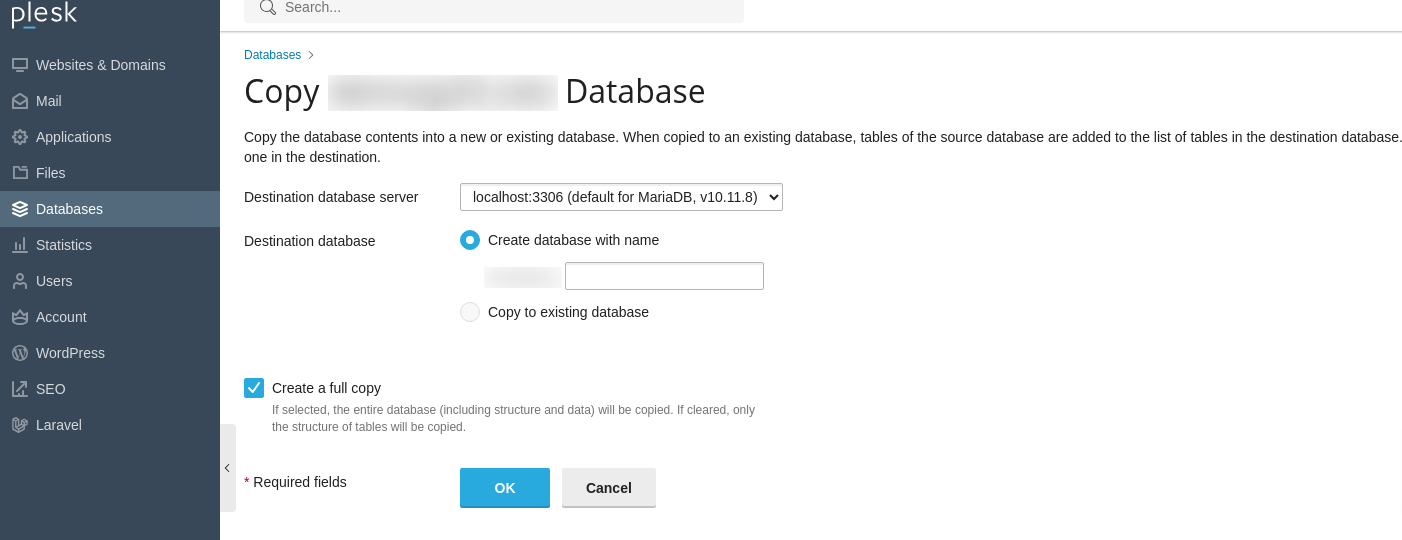
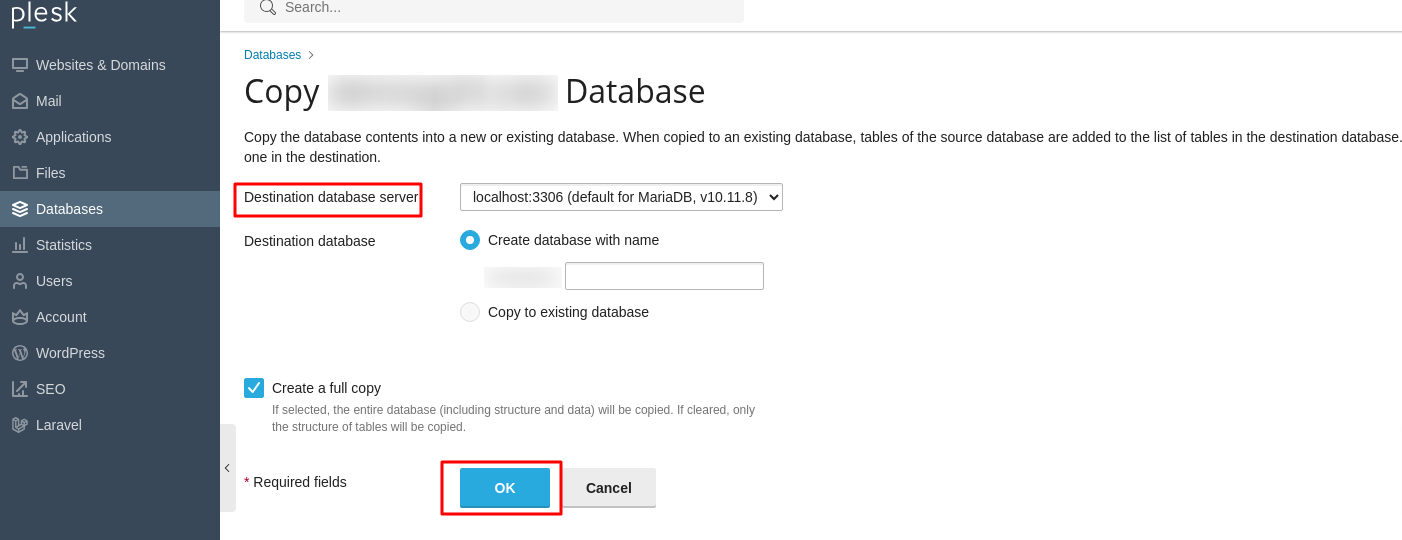
- In the Destination database server dropdown, select localhost:3306.
- In the Destination database section, choose Create database with name and enter a name for the new database.
- Check the Create a full copy box.
- Click OK to copy the database using Plesk.
Note: It is crucial to note that once the database copying process is finalized, you must update your website’s scripts or configuration files within the staging environment. These updates are necessary to ensure that your staging site correctly connects to the newly duplicated database, rather than attempting to connect to your live production database. This typically involves adjusting parameters such as the database name, username, and password within your application's connection string.
Testing Changes in Staging
With both your website files and databases successfully replicated in the staging environment, you are now free to implement and thoroughly test any desired changes without any risk to your live production website. This is the stage where you can confidently:
- Update core code, integrate new functionalities, or refine existing features.
- Experiment with design modifications, layout adjustments, or content revisions.
- Crucially, always verify that all database connection settings within your staging site's scripts are correctly configured to point exclusively to the staging database, preventing any accidental interaction with your live database.
Publishing the site
Once the rigorous testing phase is complete, and you are fully satisfied that all updates, new features, and modifications are functioning flawlessly and meet your quality standards, you can proceed with publishing these changes to your live website.
- Log back into Plesk.
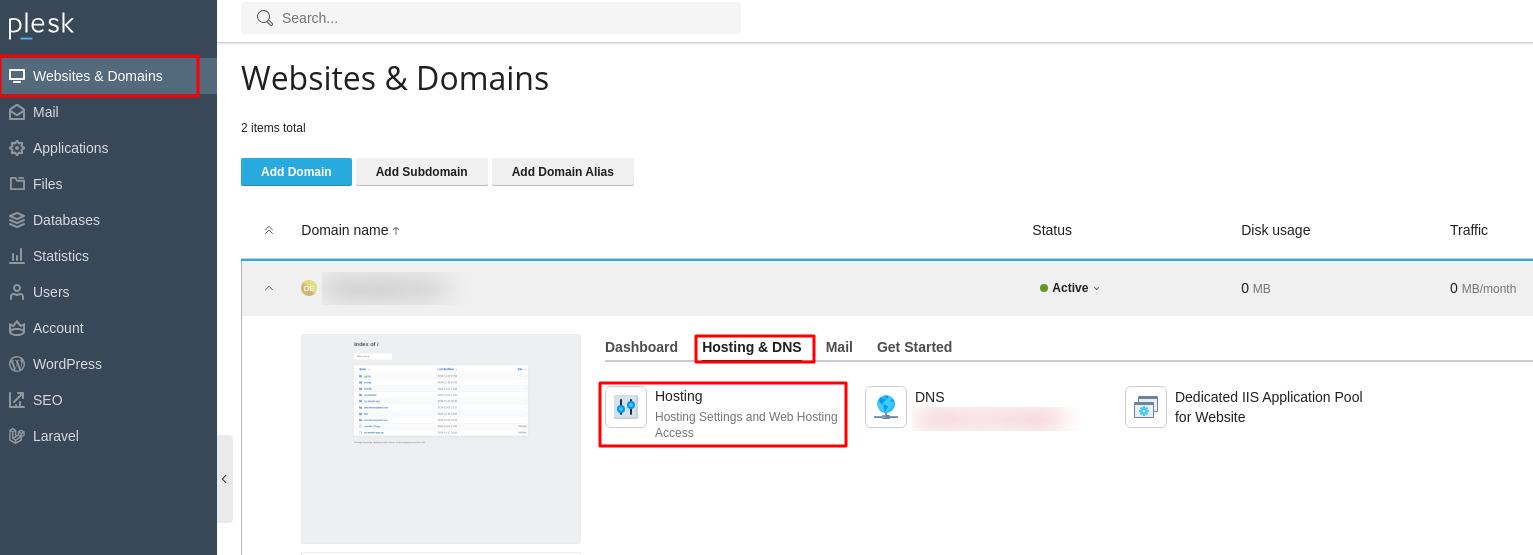
- Click Websites & Domains from the left sidebar.
- Click Hosting DNS, then click Hosting.
- In the Document Root field, enter the directory for the staging site environment.

- Click OK to publish your changes live.
Establishing a dedicated staging environment within Plesk, while a seemingly straightforward process, offers an invaluable advantage for any website owner or developer. By diligently following the comprehensive steps detailed throughout this guide, you gain the ability to construct a secure and isolated space. This environment empowers you to confidently experiment with significant updates, integrate innovative new features, and implement crucial design changes, all without ever jeopardizing the stability, performance, or the overall user experience of your active live website. In essence, a well-implemented staging environment in Plesk acts as a critical safeguard, dramatically minimizing the inherent risks associated with website modifications. It is an indispensable tool for ensuring continuous smooth operation, fostering innovation, and ultimately helping you maintain a robust, secure, and impeccably functioning online presence.
