


Maintaining a website involves continuous updates, feature additions, and design refinements. However, implementing these changes directly on a live site can introduce unexpected errors, downtime, or a degraded user experience. This is where website staging becomes indispensable. A staging environment provides a secure, isolated replica of your live website, allowing you to thoroughly test any modifications before they are deployed to your public-facing site. This comprehensive guide will walk you through the essential steps of setting up and utilizing a website staging environment within Plesk, ensuring a smooth and risk-free deployment process for all your website updates. You will learn how to duplicate your website, including all files, databases, and critical configurations, enabling you to conduct rigorous testing in a safe and controlled setting.
Understanding Website Staging in Plesk
Website staging within Plesk involves the creation of an exact duplicate of your live website. This duplicated environment serves as a sandbox for testing all proposed changes before they are officially deployed to your public audience. In essence, it's a completely separate and isolated area where you can freely experiment with new features, implement design overhauls, or integrate new code without any risk of disrupting your active website or impacting your visitors.
Plesk provides robust tools specifically designed to streamline this process. These tools facilitate the effortless copying of your entire website, including all associated files, databases, and critical configuration settings, directly into a designated staging area. This capability creates a highly controlled testing ground, allowing you to meticulously identify and resolve any potential issues or bugs in a non-production environment. By doing so, you can ensure that when changes are finally pushed to your live site, they are polished, functional, and deliver a seamless experience to your users. Consider it a dress rehearsal that guarantees a flawless main performance.
Setting Up the Website Staging Environment
To initiate your staging environment, you will typically create a new domain or subdomain within your existing Plesk webspace. This dedicated space will host the replica of your website. For example, if your primary website operates under 'yourwebsite.com', you might establish a subdomain such as 'staging.yourwebsite.com' specifically for testing. This approach keeps your staging site distinct from your live site, yet accessible within your Plesk control panel.
Copying Your Website
With your staging environment prepared, the next critical step is to accurately replicate your production website into this new space. This involves copying all essential files, databases, and configuration settings. Follow these detailed instructions to ensure a complete and accurate transfer:
- Access your Plesk panel by logging in with the credentials provided by your hosting service.
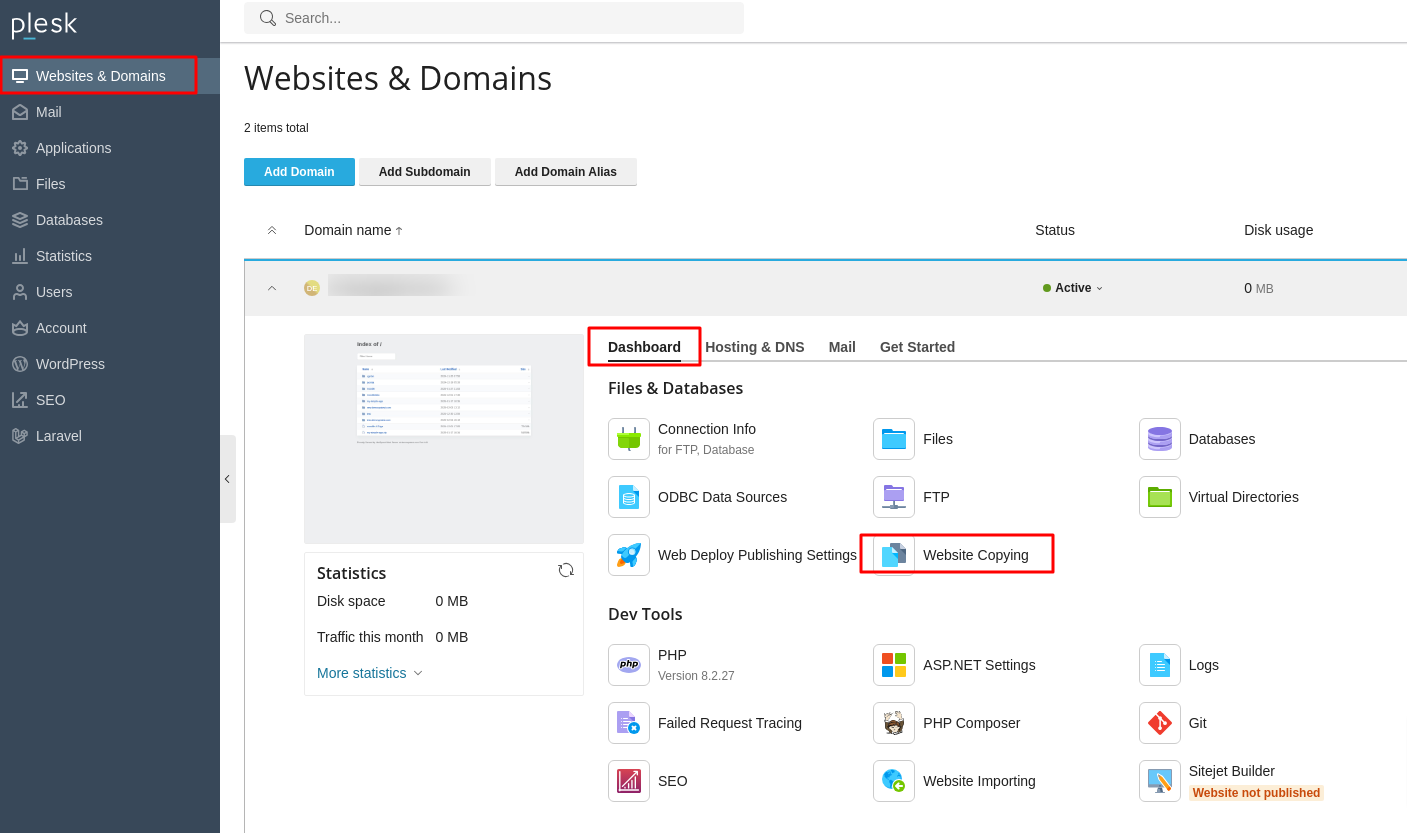
- From the left sidebar navigation, select Websites & Domains.
- On the subsequent interface, locate the specific website you intend to duplicate for staging purposes. Click on the Website Copying option associated with that site.
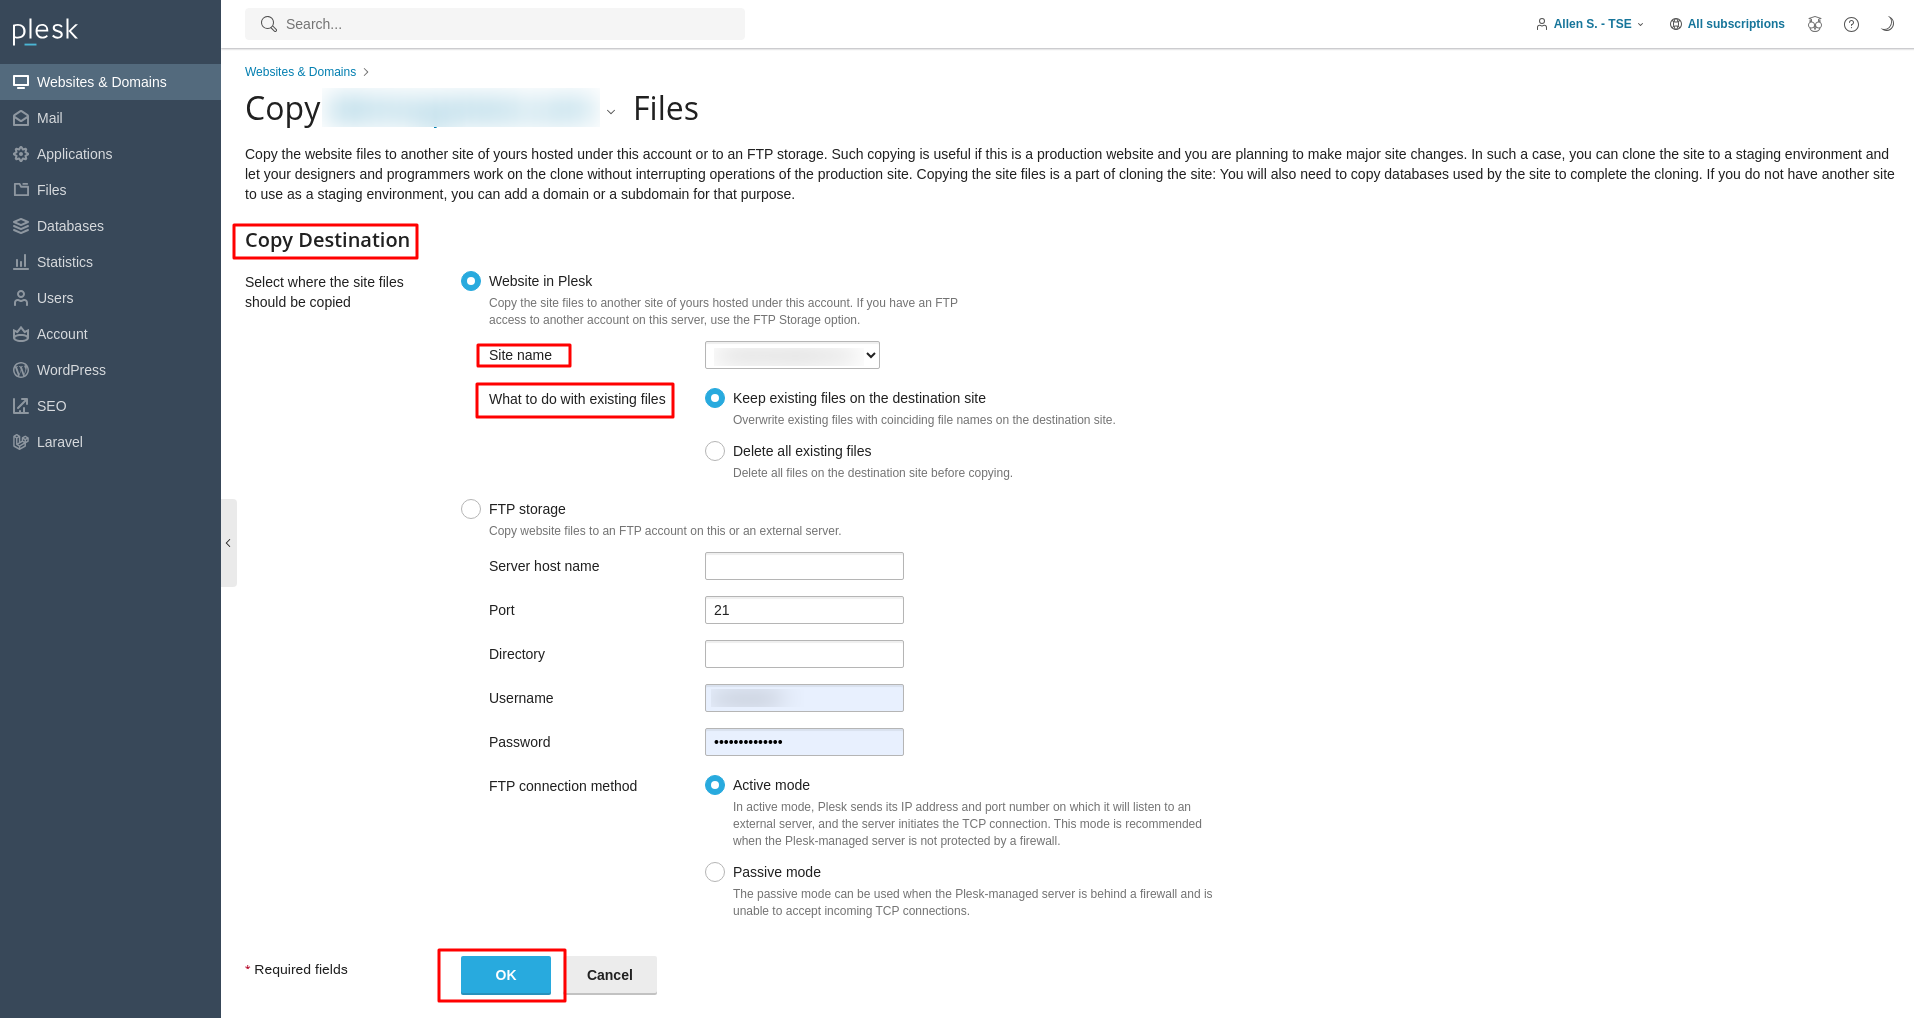
- The "Copy Files" configuration page will then appear, presenting various options for the copying process.
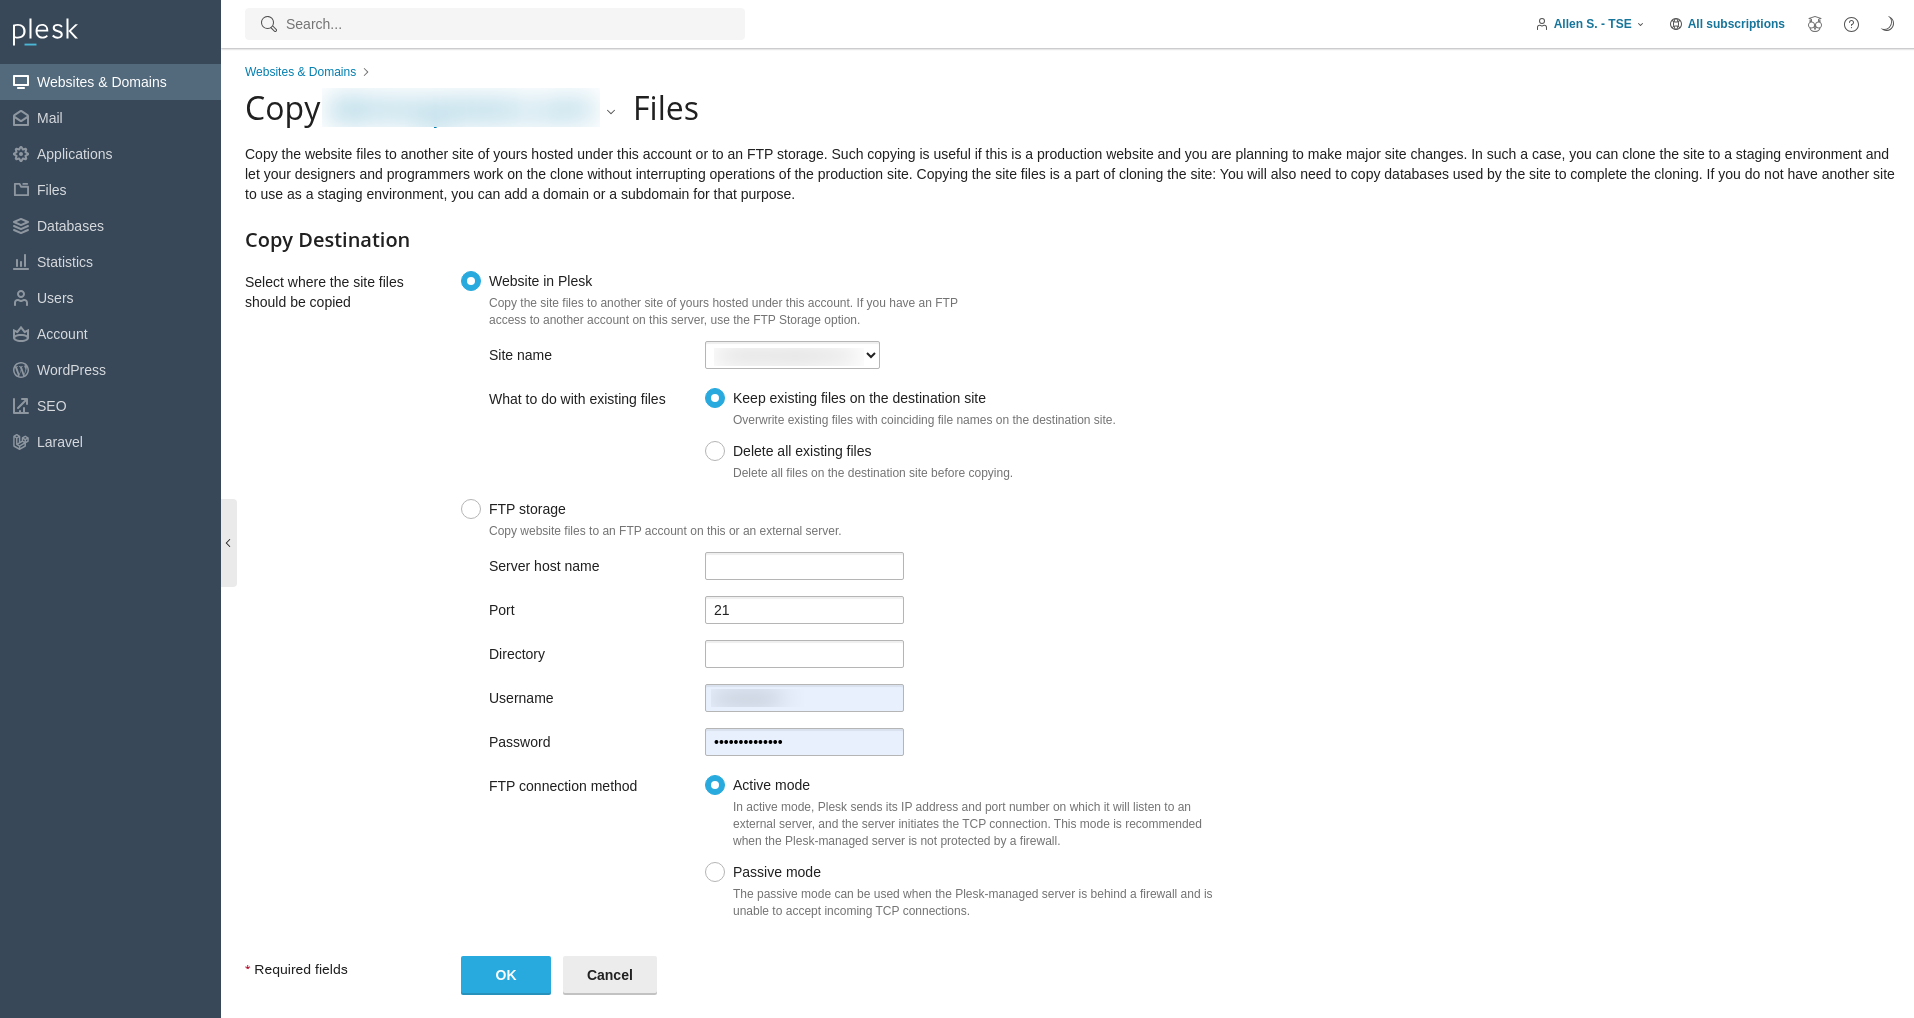
- Within the Copy Destination section, specify Website in Plesk as your target.
- Using the Site Name dropdown menu, carefully select the domain or subdomain you established for your staging environment.
- Review the What to do with existing files options and choose the appropriate action for any files that might already exist in the destination directory (e.g., overwrite, keep, etc.).
- To initiate the replication process and begin copying your website to the chosen destination domain, click OK.
 The system will then proceed to duplicate your website's files and basic structure into the staging area.
Copying Databases
For dynamic websites that rely on databases, it is equally important to replicate these databases into your staging environment. This ensures that your staging site operates with the same data and structure as your live site, providing an accurate testing ground. Follow these steps to copy your databases:
- Log into your Plesk panel using your administrative credentials.
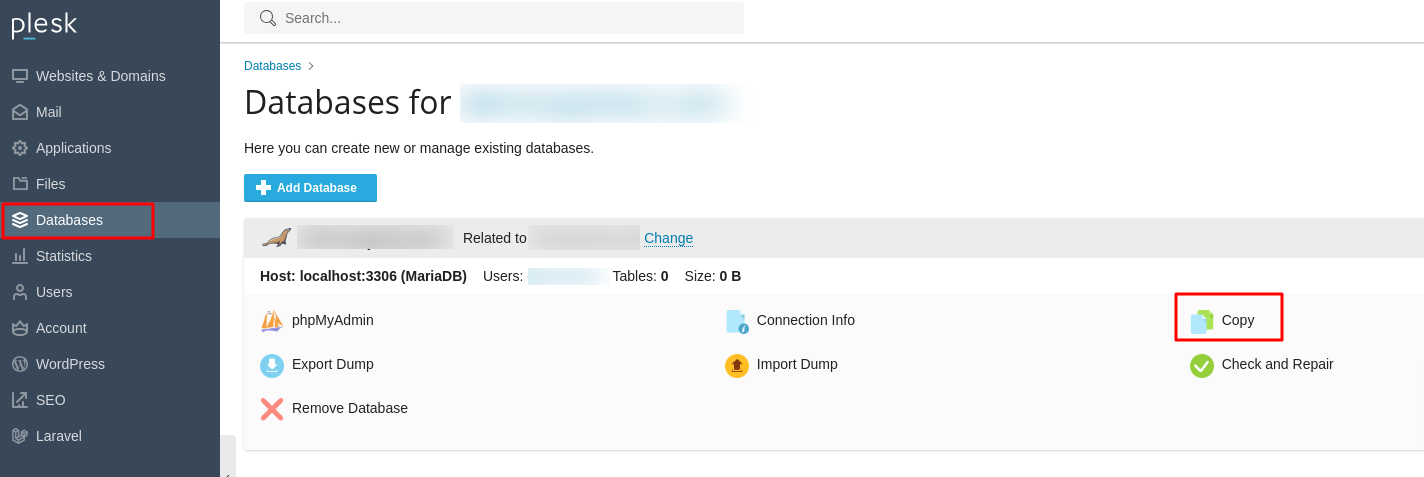
- Navigate to the Databases section located in the left sidebar menu.
- Identify the specific database you wish to copy. Click on the Copy option adjacent to its entry.
- A new interface will appear, prompting you to configure the database copy settings.
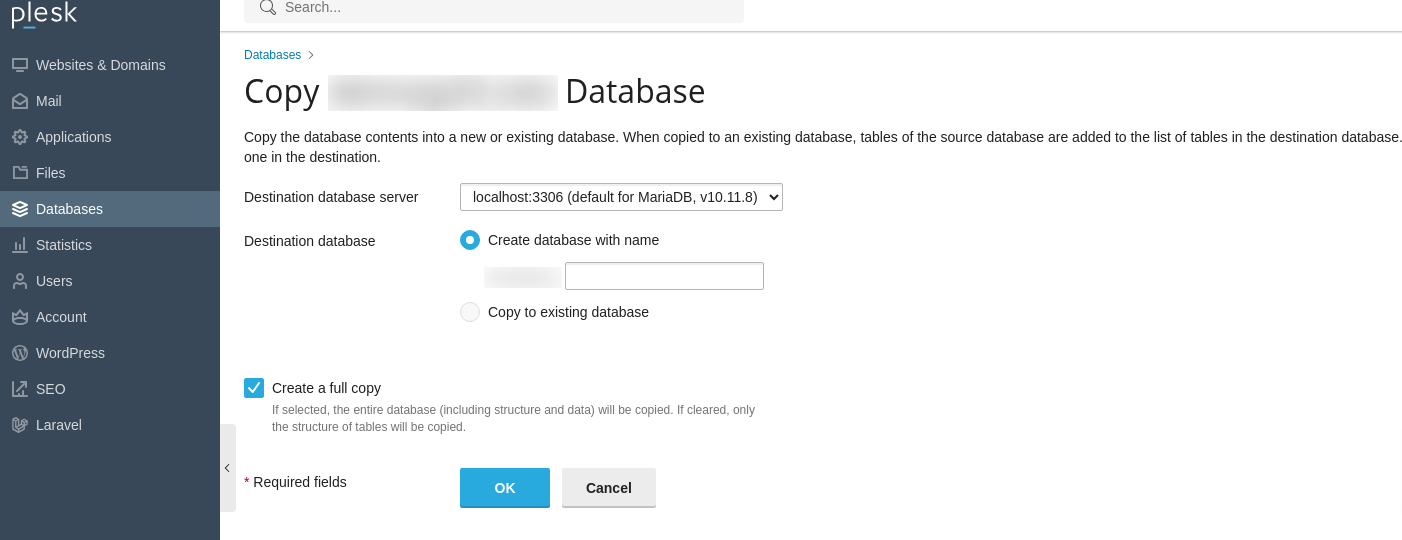
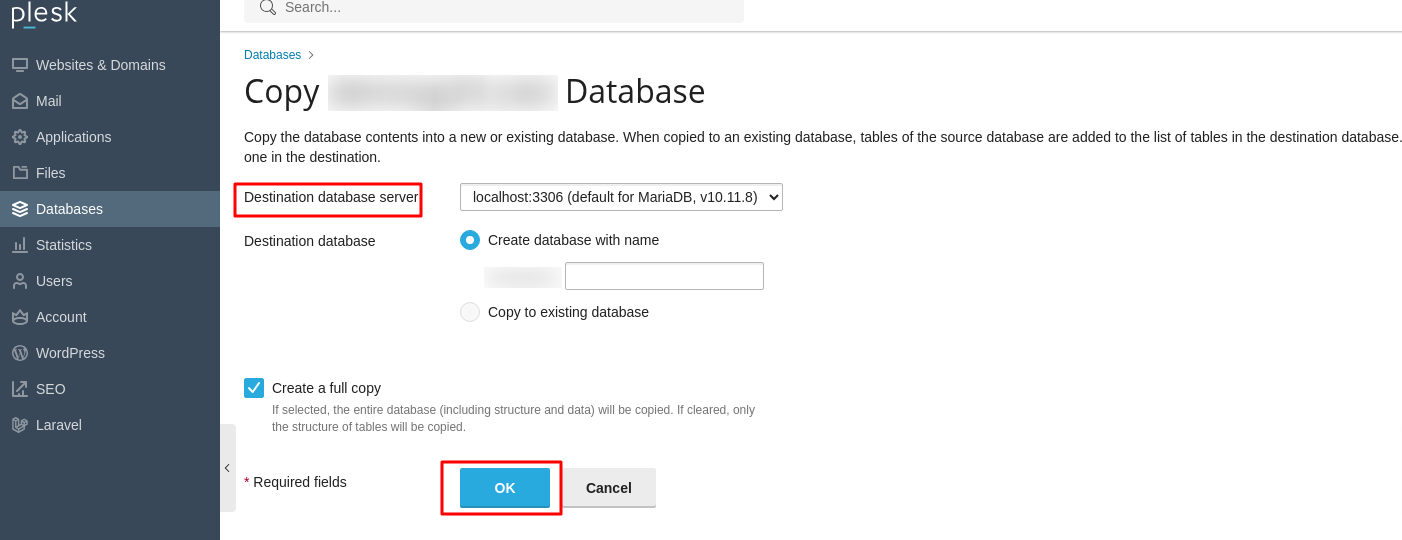
- From the Destination database server dropdown menu, select localhost:3306, which typically represents your local database server.
- In the Destination database section, opt to Create database with name and then input a unique and descriptive name for your new staging database.
- Crucially, ensure the Create a full copy checkbox is selected to guarantee all data and schema are transferred.
- To complete the process and copy the database to your staging environment, click OK.
Important Note: After the database replication is finalized, it is absolutely essential to update your website’s configuration files or scripts within the staging environment. These scripts must be modified to establish a connection with the newly copied staging database, rather than the live one. This typically involves adjusting parameters such as the database name, username, and password to reflect the staging database’s credentials. Failure to do so will result in your staging site still attempting to connect to your production database, negating the purpose of a separate staging environment.
Testing Changes in Staging
With all your website files and databases successfully transferred to the staging environment, you are now equipped to implement and rigorously test any desired changes. This isolated setup provides a safe space where you can experiment without any risk to your live production website.
- Apply updates to your website's codebase, integrate new functionalities, or make significant content modifications.
- Thoroughly test all new features, design alterations, and content revisions for functionality, responsiveness, and performance.
- Confirm that all database connection parameters within your website’s scripts and configuration files are correctly pointing to the staging database. This critical step prevents unintended interactions with your live production database.
Take your time during this phase to identify and rectify any bugs, ensure compatibility, and verify that all new elements function as intended before proceeding to deployment.
Publishing the Site
Once you have completed all necessary testing in your staging environment and are fully satisfied with the updates and their performance, the final step is to publish these changes to your live website. This process effectively swaps your live site with the thoroughly tested staging version.
- Return to your Plesk panel and log in.
- Navigate to the Websites & Domains section in the left sidebar.
- Locate your primary domain, then click on Hosting & DNS and subsequently select Hosting from the options.
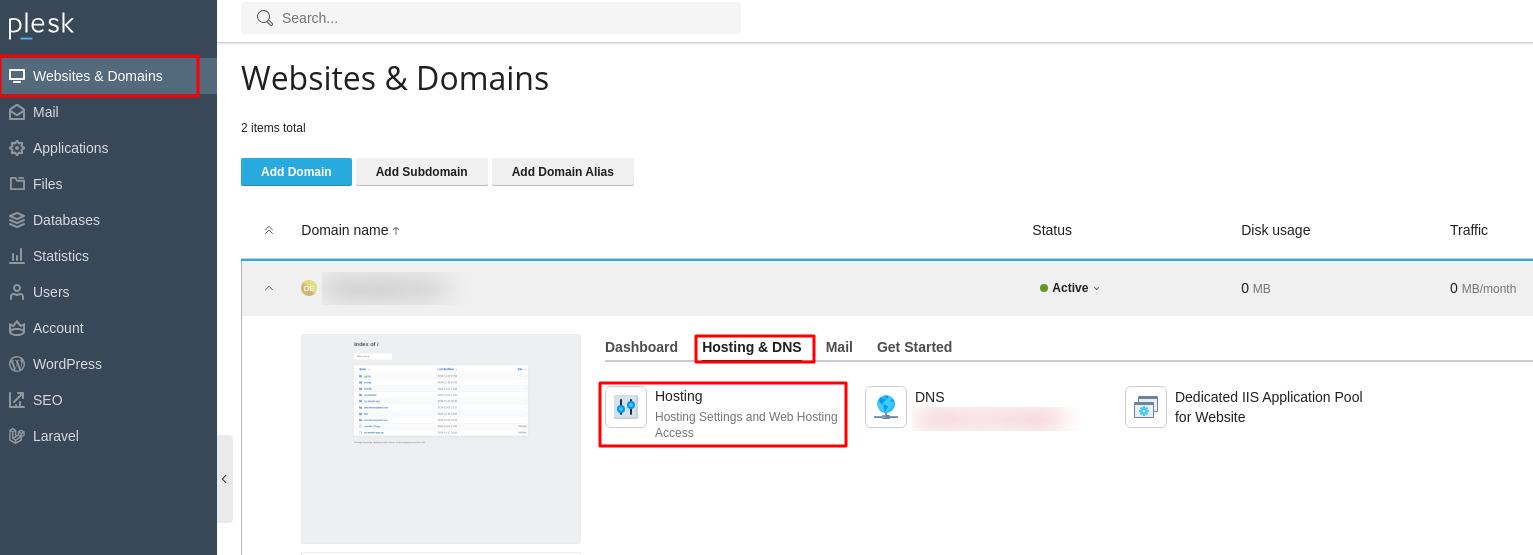
- In the Document Root field, you will need to specify the exact directory path where your refined staging site is located. This effectively tells Plesk to now serve the content from your staging environment as the main live site.
-

- To finalize the deployment and make your updated staging site live, click OK. Be aware that there might be a brief propagation period as the changes take effect across servers.
Establishing a dedicated staging environment in Plesk is an exceptionally straightforward process that offers immense value to any website owner or developer. By diligently following the comprehensive steps detailed in this guide, you gain the ability to construct a secure and isolated workspace. This invaluable space empowers you to confidently experiment with critical updates, introduce innovative new features, and implement significant design modifications without ever jeopardizing the stability, performance, or the overall user experience of your live production website. The proactive use of a staging environment in Plesk fundamentally minimizes the inherent risks associated with website development and change management. It serves as a crucial safeguard, enabling you to identify and resolve potential issues in a non-disruptive manner, thereby ensuring the continuous integrity, functionality, and security of your online presence. Embracing a staging workflow is a cornerstone of professional website management, leading to smoother deployments and a consistently high-quality online experience for your audience.
