


Website staging is an indispensable practice for developers and website administrators alike. It provides a secure, isolated environment to thoroughly test updates, new features, or design modifications before they are deployed to your live website. This comprehensive guide will walk you through the process of setting up and utilizing a staging environment within Plesk, ensuring your website remains stable and delivers an optimal user experience.
Understanding Website Staging in Plesk
Website staging within Plesk involves creating a precise duplicate of your active website. This duplicate functions as a dedicated testing ground where you can implement and evaluate changes without any risk to your production site. This separate environment is crucial for experimenting with new functionalities, refining designs, or validating code modifications. It safeguards your live site from potential errors or unexpected behaviors that might arise during development or updates.
Plesk offers intuitive tools that significantly streamline this process. It enables you to efficiently copy all necessary components, including website files, databases, and critical configuration settings, to a designated staging area. This capability ensures a meticulously controlled testing environment, allowing you to identify and resolve any issues proactively. By conducting a thorough 'practice run' in staging, you can guarantee a seamless transition when your changes are ready for public release, preventing any negative impact on your website and its visitors.
Setting Up Your Website Staging Environment
To establish your staging environment, you can utilize your existing Plesk webspace by either creating a new domain or a subdomain. For instance, if your primary domain is example.com, you might set up a subdomain such as staging.example.com or dev.example.com specifically for testing purposes. This clear separation helps in managing your development workflow.
Copying Your Website Files and Configuration
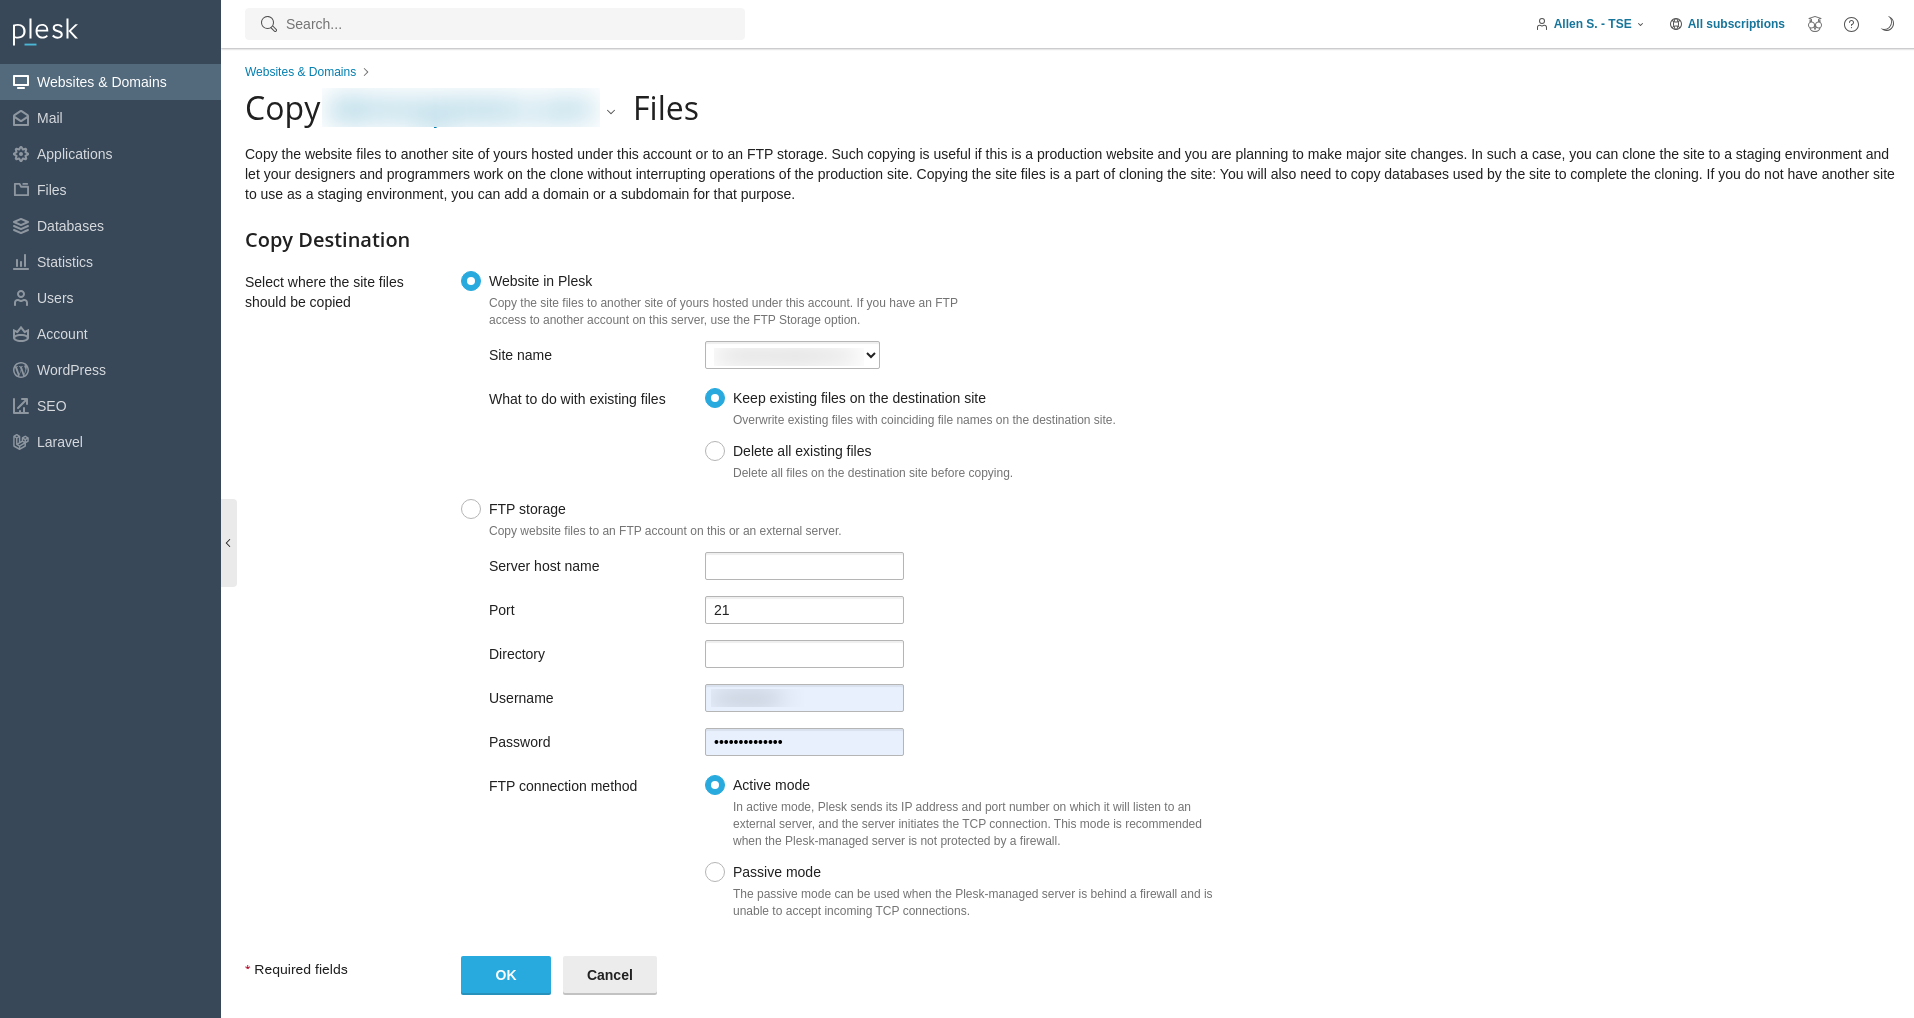
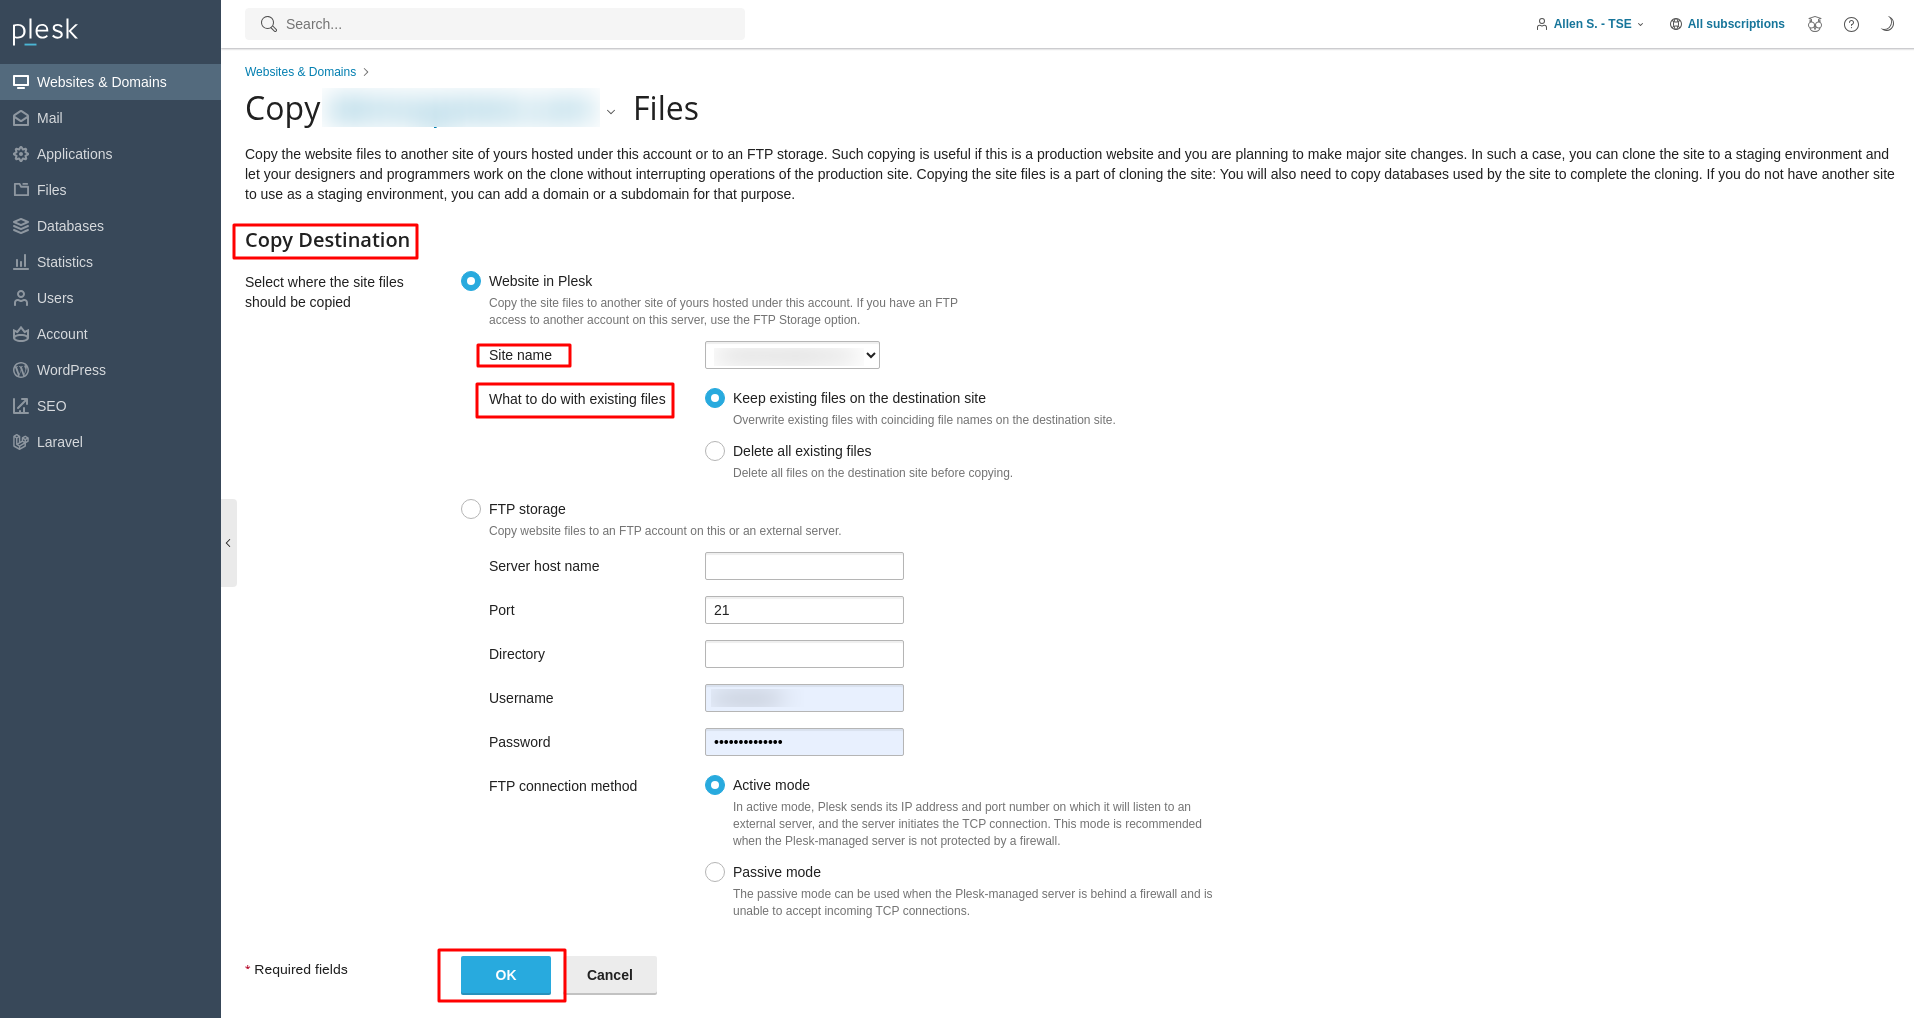
Once your staging domain or subdomain is ready, the next critical step is to replicate your production website into this new environment. This ensures that your staging site is an exact mirror of your live site, providing an accurate foundation for testing. Follow these instructions to copy all website files and configurations:
- Begin by logging into your Plesk panel using the administrative credentials provided by your web hosting provider.
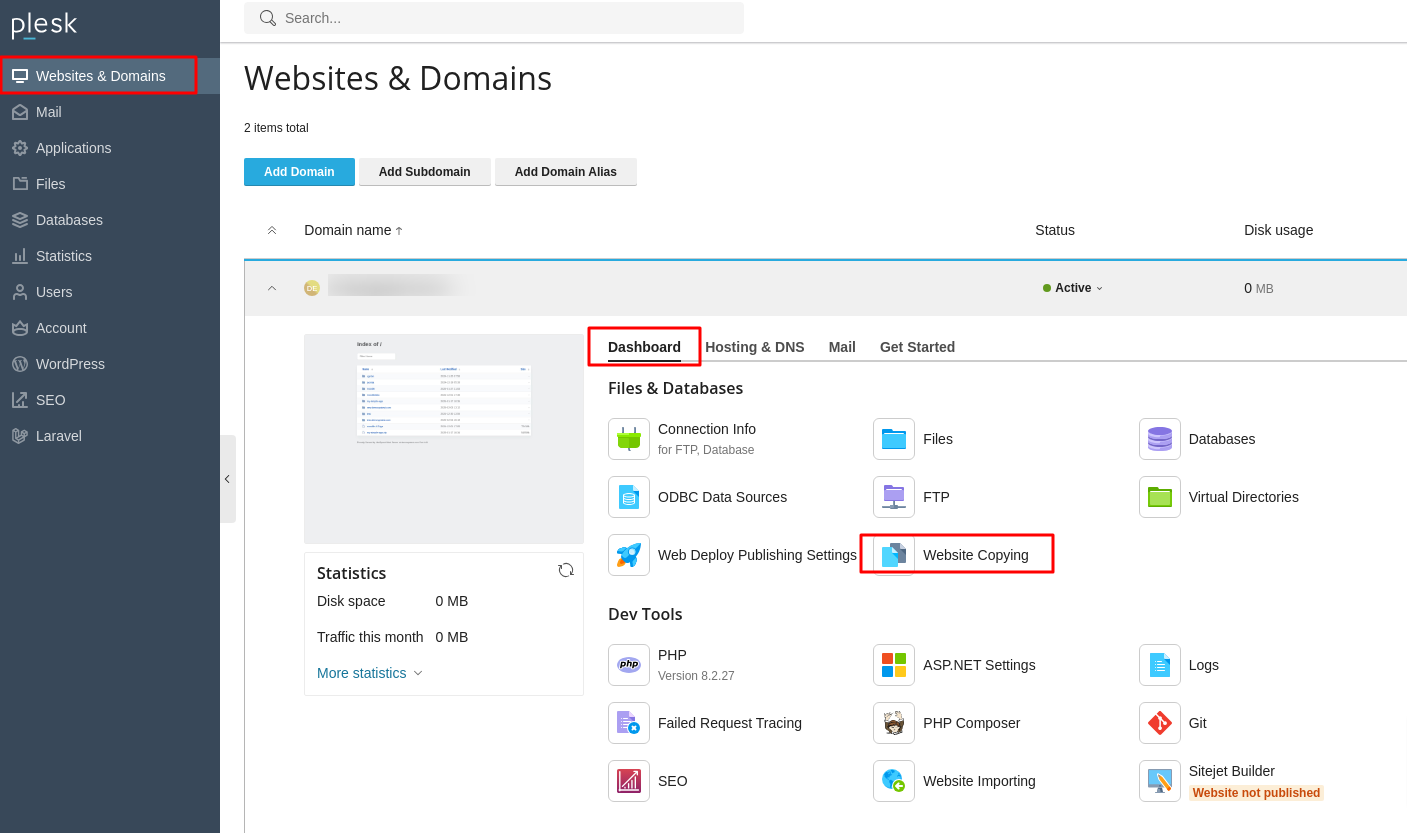
- Navigate to the left sidebar and click on Websites & Domains.
- On the subsequent interface, locate the specific website you intend to copy. Click on the Website Copying option associated with it.
Copying Your Website Databases
Many websites rely on one or more databases to store dynamic content, user information, and other crucial data. If your website utilizes databases, it is essential to also copy them to your staging environment to ensure a complete and functional replica. Follow these detailed steps to copy your database:
- Access your Plesk panel by logging in with your hosting credentials.
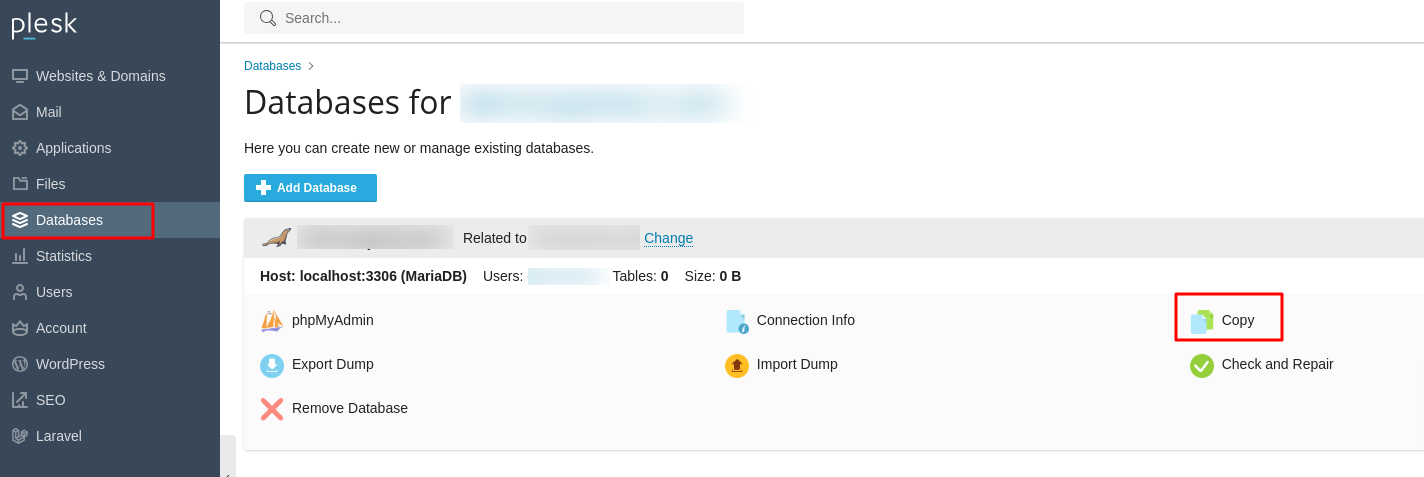
- From the left sidebar, click on Databases.
- Identify the database you need to copy from the list. Once found, click on the Copy option next to it.
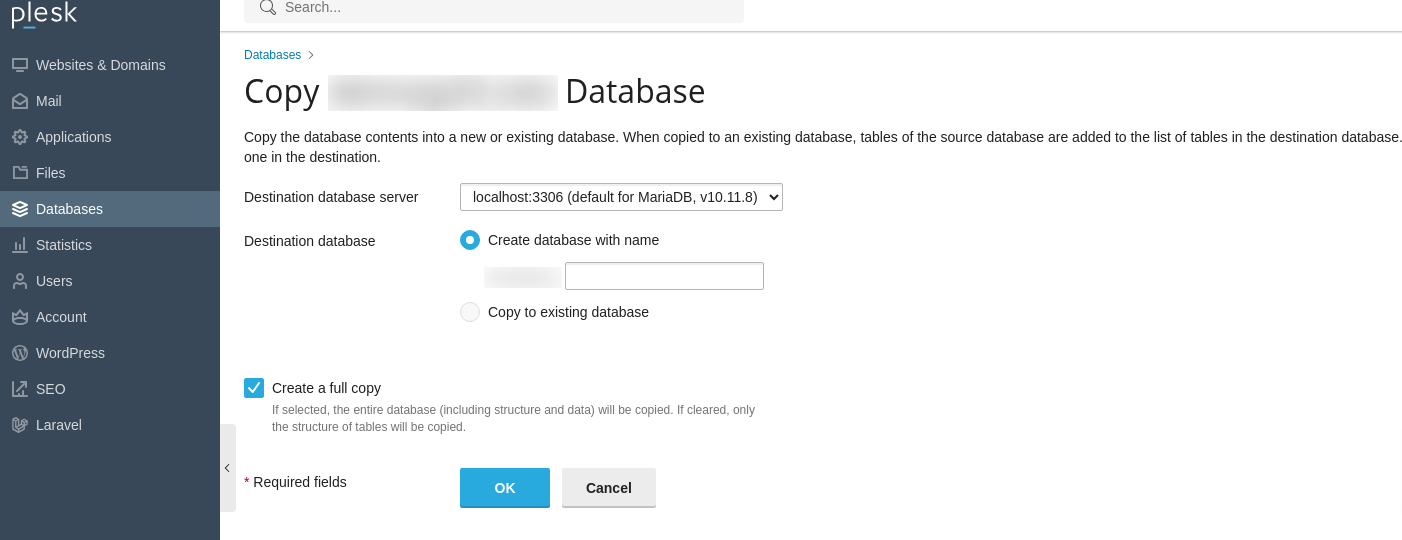
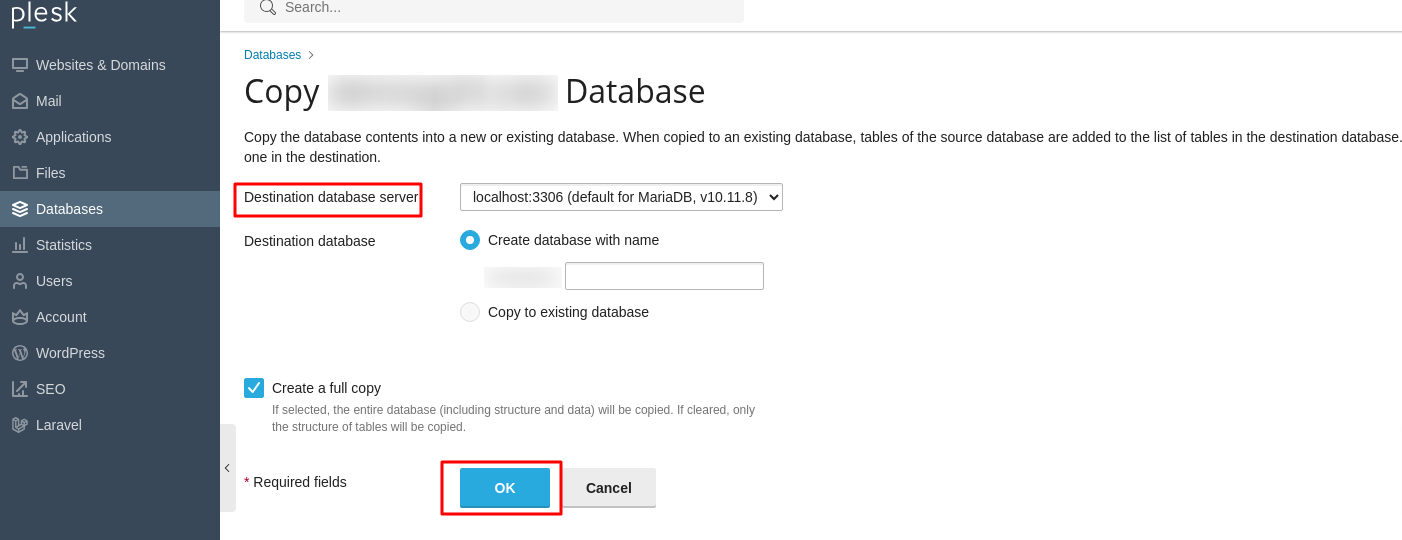
Important Note: After the database copy is successfully completed, it is crucial to update your website’s scripts and configuration files within the staging environment. These updates must direct the site to connect to the newly copied staging database, rather than the original live database. This typically involves adjusting connection strings, database names, usernames, and passwords in your application's configuration files (e.g.,
wp-config.phpfor WordPress).
Thoroughly Testing Changes in Your Staging Environment
With your website files and databases successfully duplicated, your staging environment is now fully prepared for testing. This is the stage where you can confidently implement and evaluate modifications without any impact on your live website. Here are key aspects to focus on during your testing phase:
- Proceed to update your website's code, introduce and test new features, or revise existing content as required.
- Verify meticulously that all database connection settings in your application scripts correctly point to the staging database. It is paramount that these settings do not reference the live production database to avoid unintended data modifications.
- Test all functionalities, including forms, user interactions, payment gateways (if applicable, using sandbox modes), and dynamic content rendering.
- Review the website's design and responsiveness across various devices and browsers to ensure visual integrity.
- Check for any broken links, missing images, or loading issues.
- If implementing security updates, ensure they function as expected without disrupting normal operations.
By thoroughly testing every aspect, you can identify and rectify potential problems before they reach your live audience.
Publishing Your Staging Site to Live
Once you have rigorously tested all changes in your staging environment and are completely satisfied with their functionality and appearance, the final step is to publish these updates to your live website. Follow these steps to transition your tested staging site to your production environment:
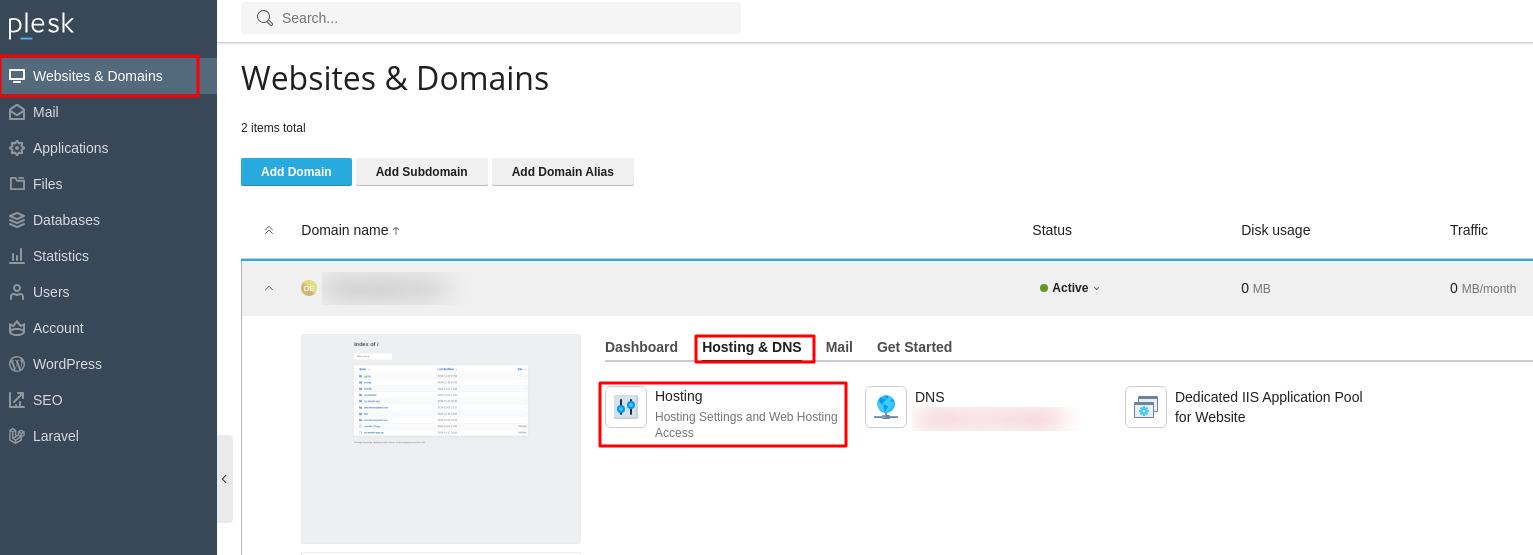
- Log back into your Plesk control panel.
- Navigate to Websites & Domains from the left sidebar.
- Locate your domain, then click on Hosting DNS, followed by clicking on Hosting.

Conclusion
Establishing and utilizing a staging environment in Plesk is not merely a convenience; it is a fundamental aspect of professional website management. This guide has provided a comprehensive walkthrough, enabling you to create a secure, isolated space for developing and testing updates, new features, and design revisions. By meticulously following these steps, you can confidently experiment with changes without jeopardizing the stability, performance, or user experience of your live website. A robust staging process within Plesk significantly mitigates the risks associated with website modifications, ultimately contributing to a more resilient, well-functioning, and secure online presence. Embrace staging as an integral part of your development workflow to ensure a smooth and error-free deployment every time.
