


Website staging is an indispensable practice for any web developer or administrator, offering a safe sandbox to test significant changes before they are deployed to a live production site. This guide provides a detailed, step-by-step walkthrough on leveraging Plesk to establish an effective staging environment. We will cover the essential processes of duplicating your entire website, including all files, databases, and critical configurations. This allows for rigorous testing of updates, new features, or design modifications in a secure and isolated setting, mitigating potential risks to your live website's stability and user experience.
Understanding Website Staging in Plesk
Website staging within Plesk involves the creation of an exact replica of your live website. This duplicate site serves as a dedicated testing ground, allowing you to thoroughly evaluate new features, design alterations, or underlying code changes before they are made publicly accessible. The primary benefit of this approach is the ability to experiment and innovate without the fear of impacting your current live site, ensuring continuous availability and a seamless experience for your visitors.
Plesk is equipped with integrated tools that significantly streamline the staging process. These tools facilitate the copying of all necessary website files, databases, and configuration settings from your production environment to a designated staging area. This controlled environment is crucial for identifying and rectifying any issues or bugs before they can potentially disrupt your live website. Essentially, a staging site acts as a rehearsal space, where you can perfect your website's performance before its grand unveiling.
Setting Up Your Website Staging Environment
To begin, you'll need to establish a dedicated space for your staging site within your existing Plesk webspace. This is typically achieved by creating a new domain or a subdomain specifically for testing purposes. For example, if your primary website resides at example.com, you might set up a subdomain such as staging.example.com or dev.example.com. This separation ensures that your development activities do not interfere with your live operations.
The creation of a new domain or subdomain is a fundamental first step in preparing your staging environment. Once this digital space is ready, you can proceed with populating it with a copy of your current website.
Copying Your Website Files
Once your staging environment is ready, the next critical step is to accurately replicate your production website within it. This process ensures that all files and essential settings are transferred correctly. Follow these instructions to perform the website file copy:
- Log in to your Plesk panel using the credentials provided by your hosting provider.
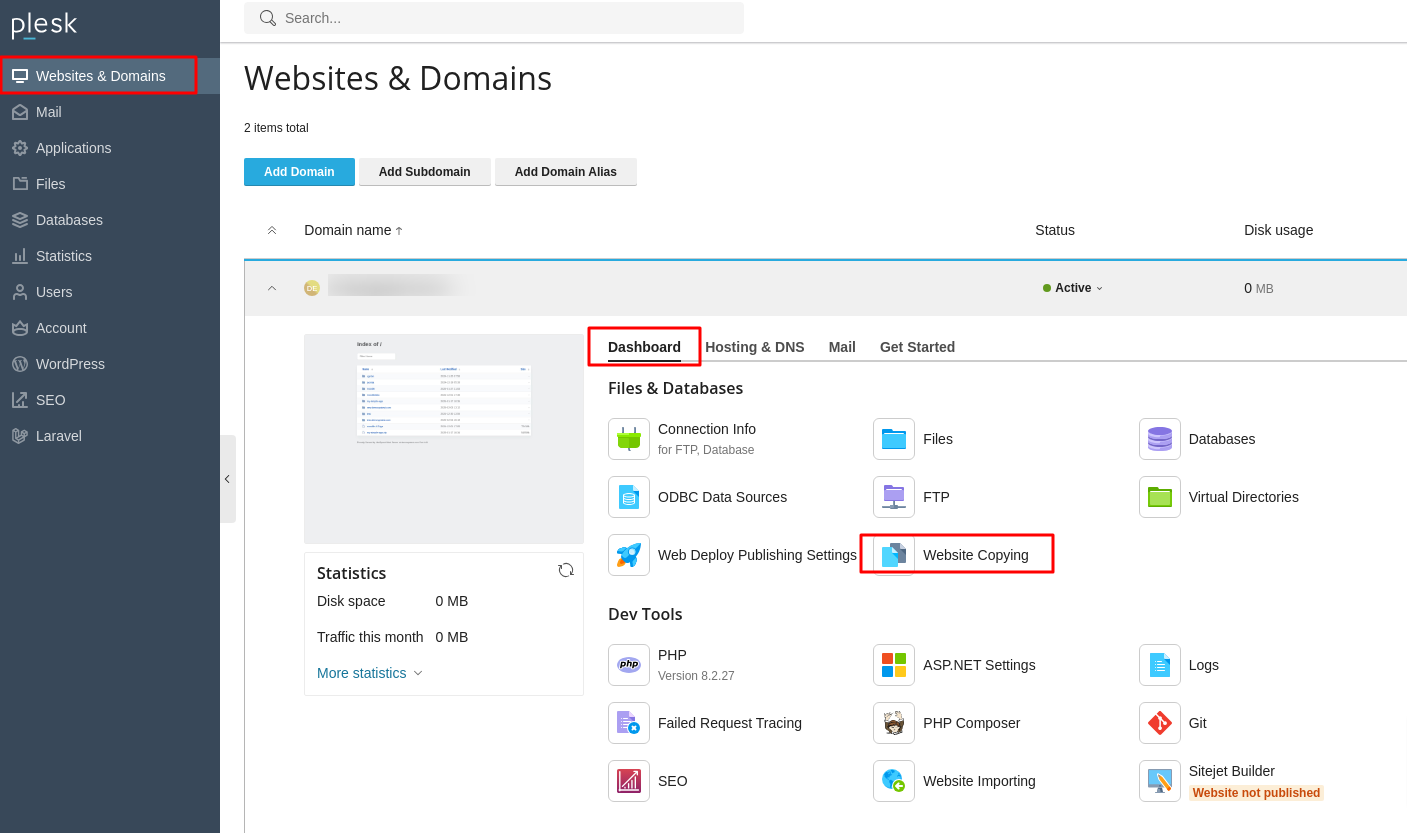
- From the left sidebar, navigate to and click on Websites & Domains.
- You will then see an interface displaying your websites. Locate the specific website you intend to copy and click on the Website Copying option associated with it.
- The "Copy Files" page will open, presenting options for the copying process.
- Under the Copy Destination section, select Website in Plesk to specify the staging environment.
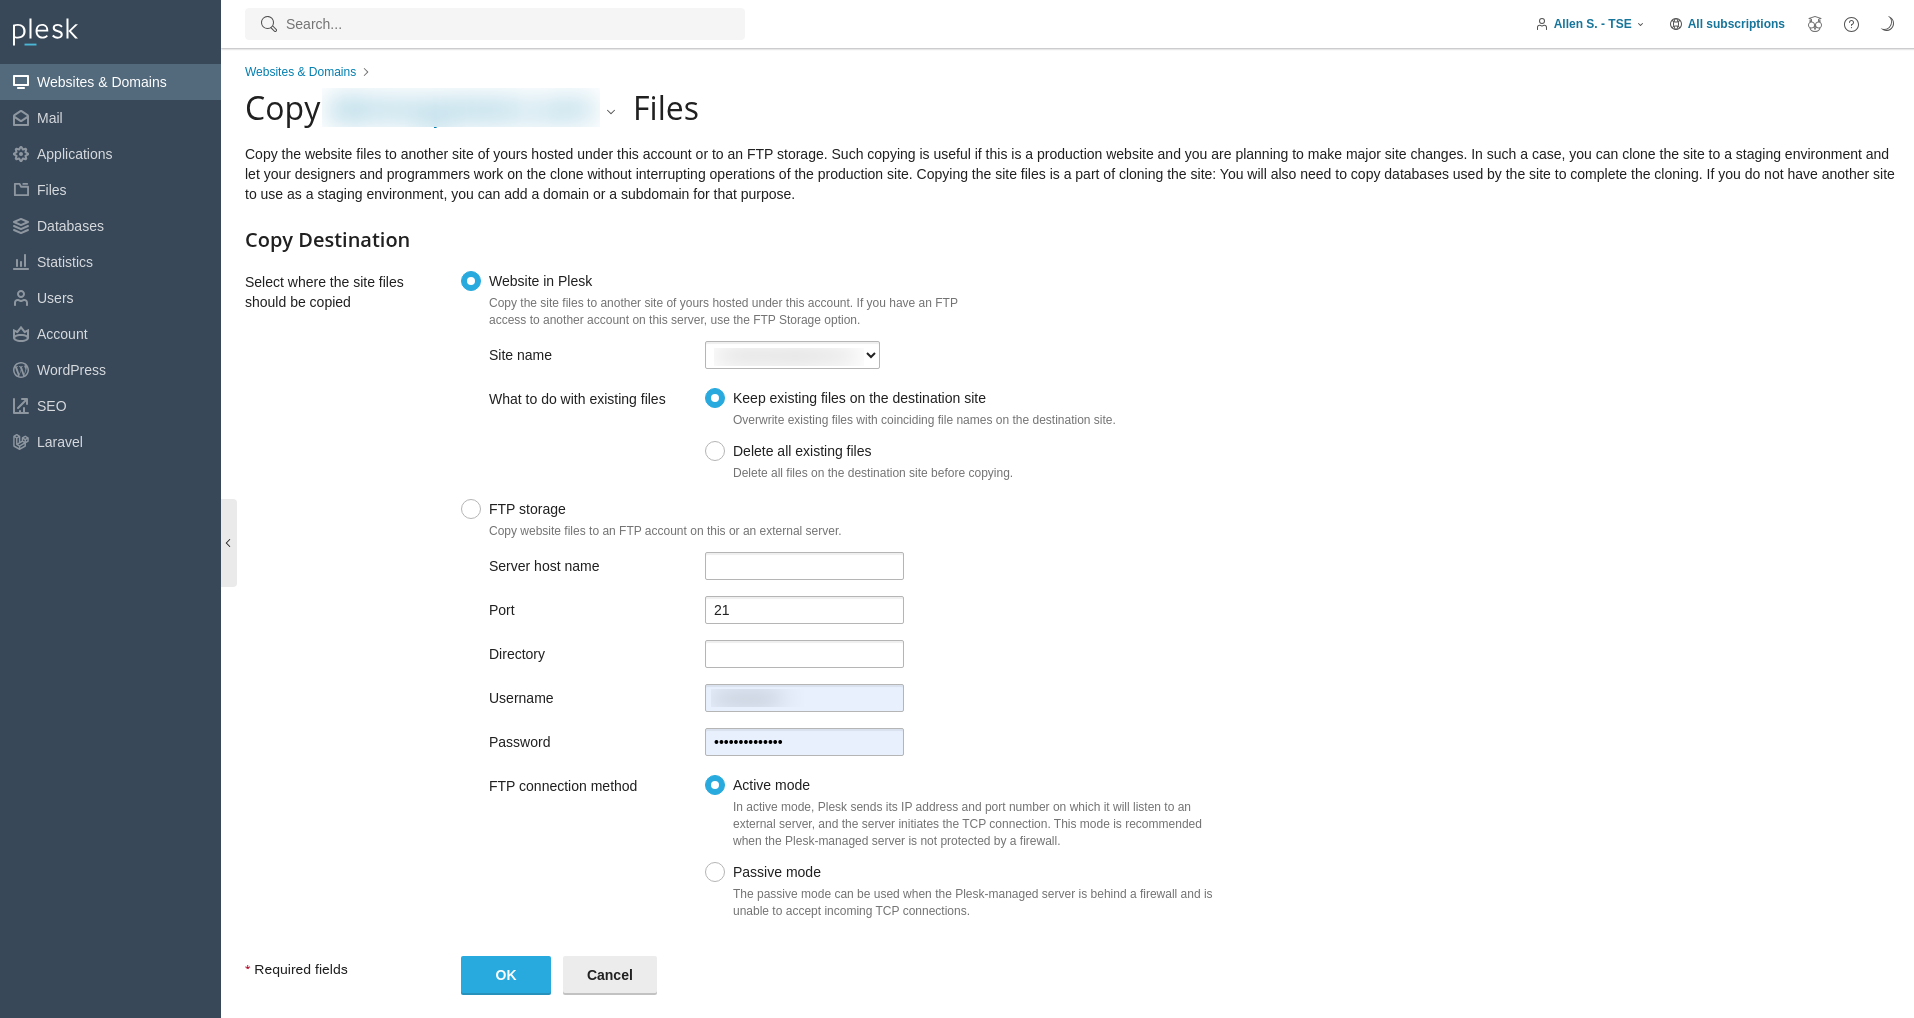
- In the Site Name dropdown menu, carefully choose the destination domain or subdomain you previously set up for staging.
- In the What to do with existing files section, decide how Plesk should handle any files that might already exist in the destination domain. It is often recommended to overwrite existing files to ensure a clean copy.
- Click OK to initiate the process of copying your website files to the designated staging domain.
Copying Databases for Staging
For most dynamic websites, copying the associated databases is just as important as copying the files. This ensures that all content, user data, and configurations are consistent between your live and staging environments. Follow these steps to duplicate your databases:
- Access your Plesk panel by logging in with your hosting provider's credentials.
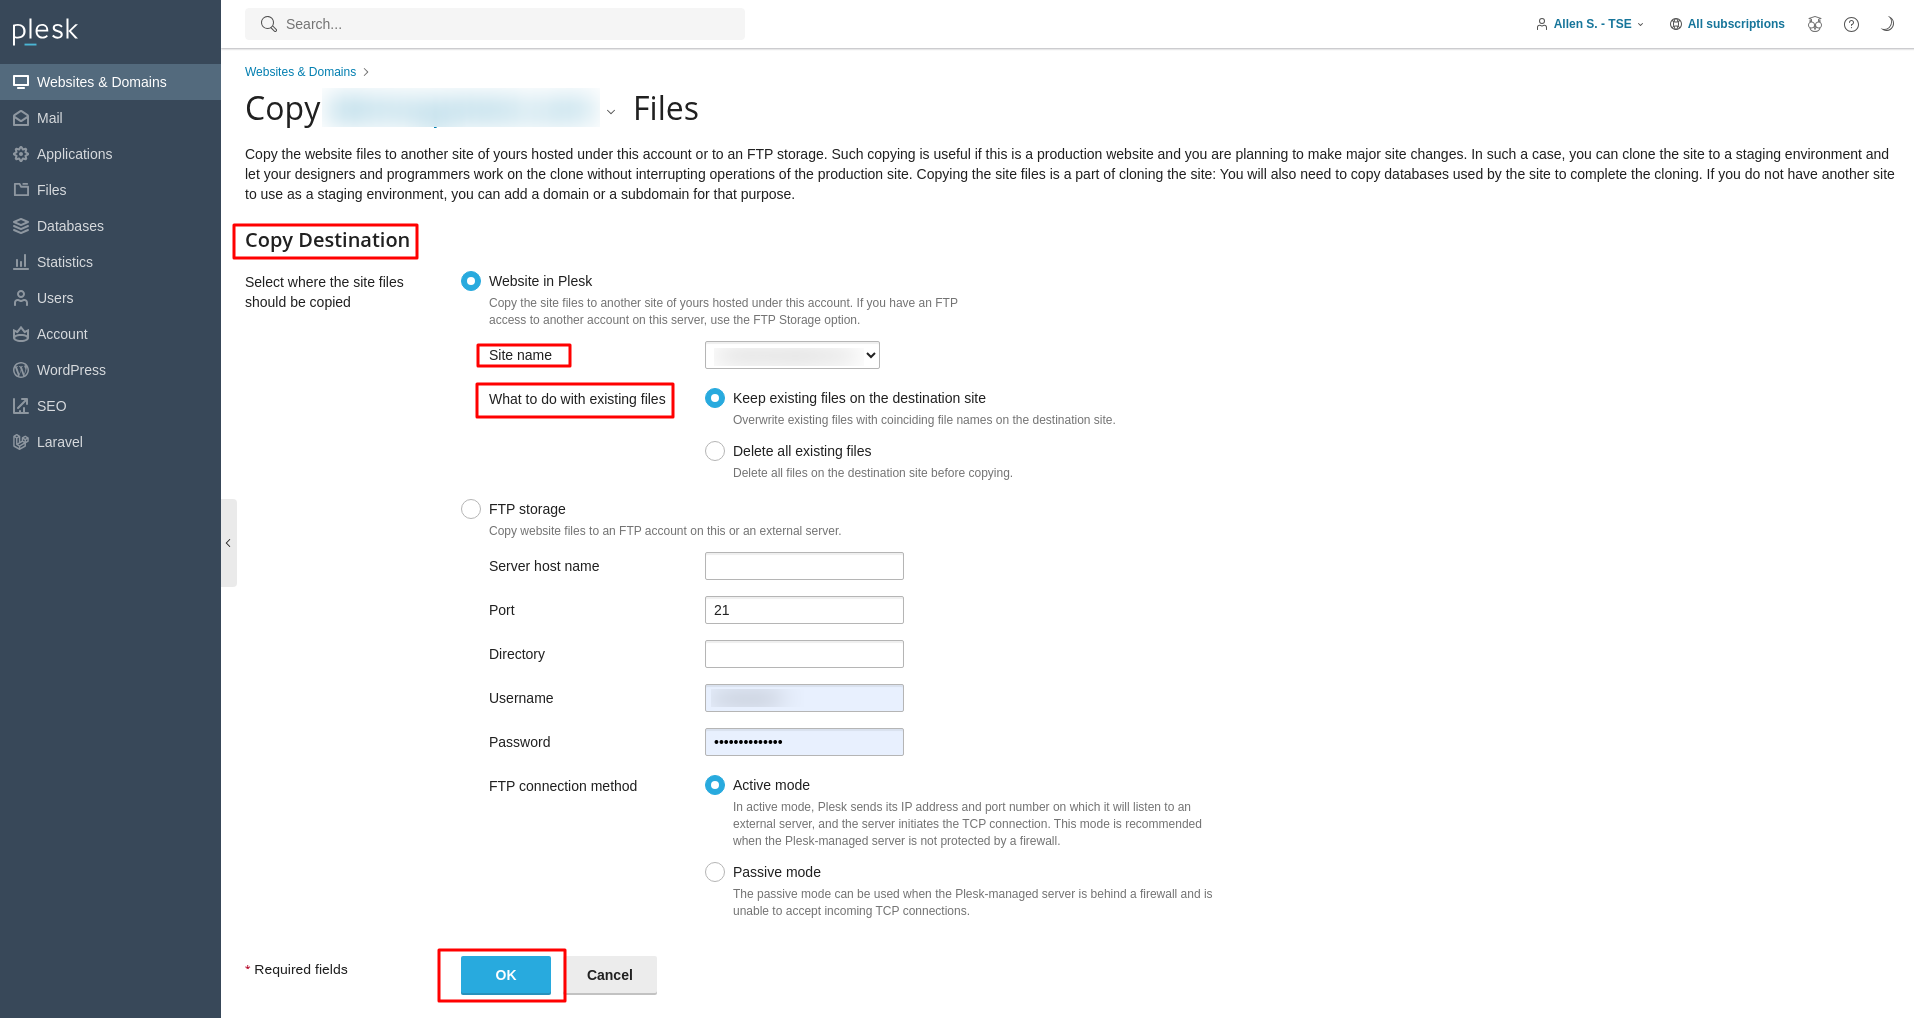
- On the left sidebar, click on Databases.
- Locate the specific database you wish to copy and click on the Copy option next to its name.
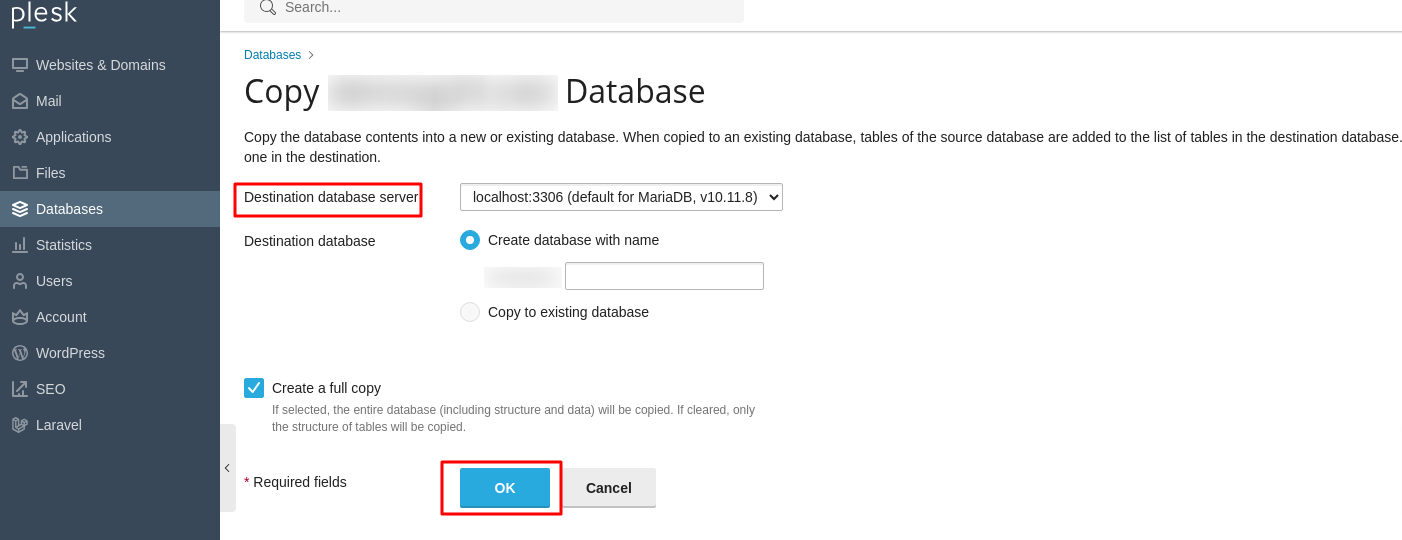
- The "Copy Files" page will appear, allowing you to configure the database copy.
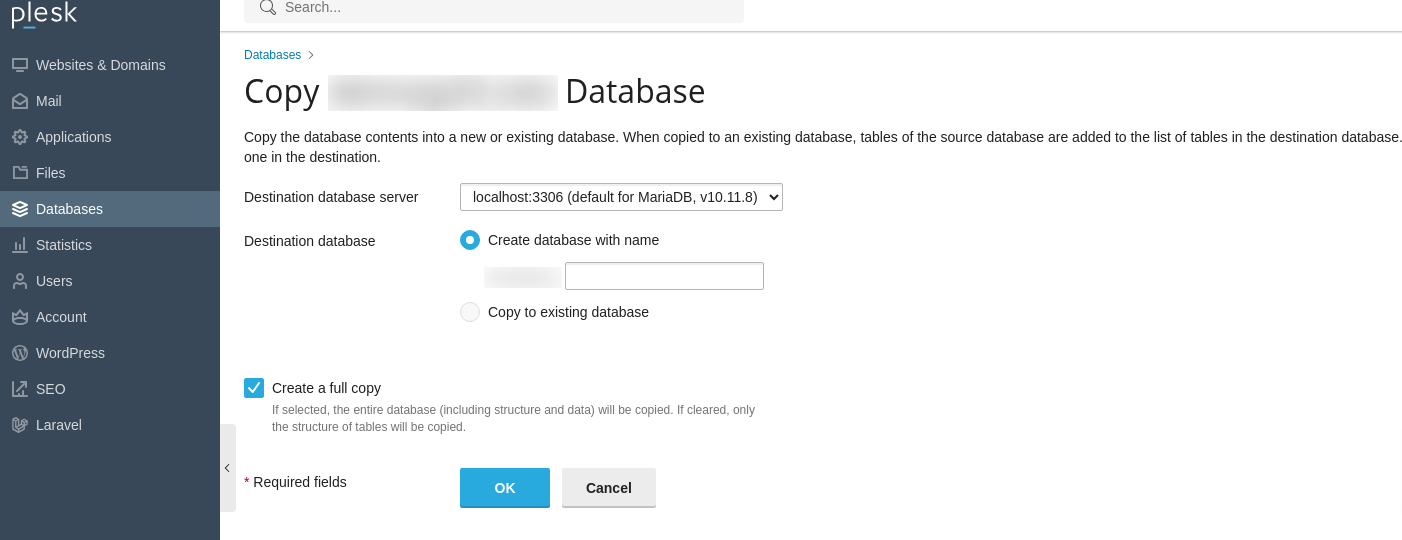
- In the Destination database server dropdown, select localhost:3306 or the appropriate database server for your staging environment.
- Under the Destination database section, select Create database with name and then enter a unique and descriptive name for your new staging database.
- Ensure the Create a full copy box is checked to transfer all data.
- Click OK to proceed with copying the database using Plesk.
Note: After the database copy is successfully completed, it is crucial to update your website's configuration files or scripts within the staging environment. These updates must direct your staging site to connect to the newly copied database rather than the live one. This typically involves modifying the database connection string to reflect the new database name, username, and password specific to your staging setup.
Testing Changes in the Staging Environment
With your website files and databases now replicated in the staging environment, you are free to implement and test any desired changes without any risk to your live site. This phase is critical for ensuring the quality and functionality of your updates.
- Proceed with updating your website's code, developing new features, or modifying existing content as required.
- Thoroughly test every aspect of your changes, including user workflows, forms, integrations, and responsiveness.
- Verify that all database connection settings in your website's scripts within the staging environment are correctly pointing to the staging database and not inadvertently to the live production database. This is a common pitfall that must be carefully avoided.
- Engage in comprehensive testing to identify and resolve any bugs, compatibility issues, or performance degradations before considering a move to production.
Publishing Your Staged Site to Live
Once you have meticulously tested your changes in the staging environment and are completely satisfied with their stability and functionality, you can proceed with publishing these updates to your live website. This process involves pointing your live domain to the directory of your staged site.
- Log back into your Plesk panel.
- From the left sidebar, click on Websites & Domains.
- Locate your live domain, then click on Hosting DNS, followed by clicking Hosting.
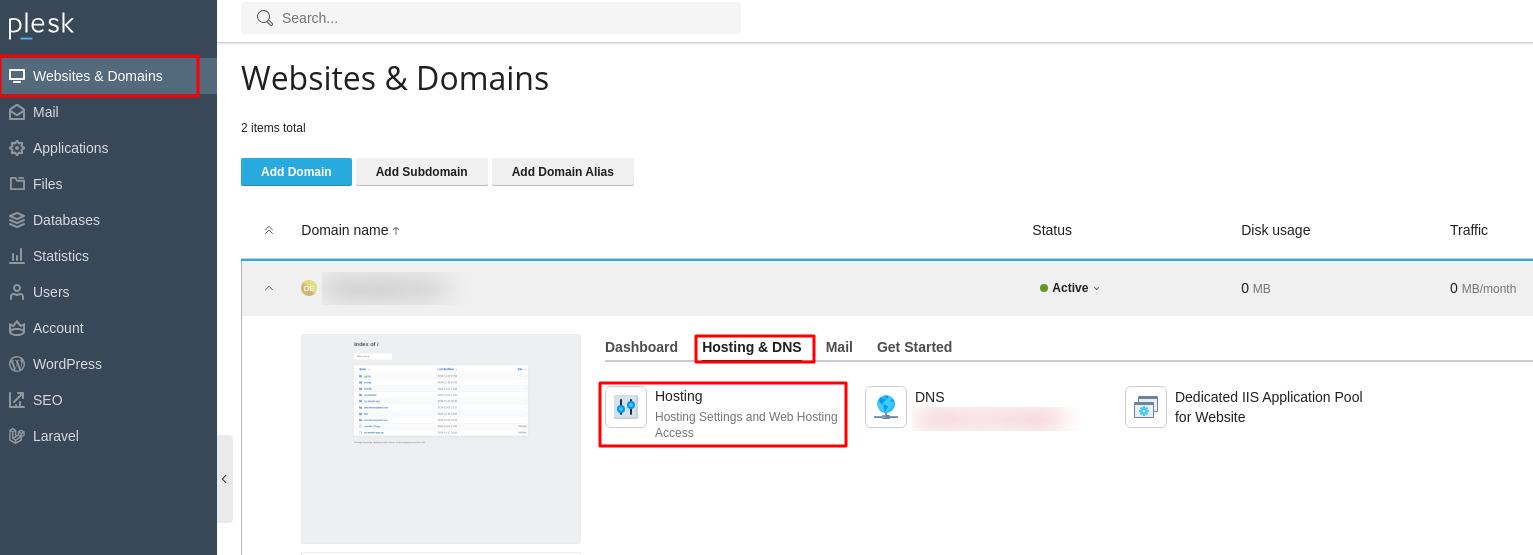
- In the Document Root field, precisely enter the directory path of your staging site environment. This action effectively redirects your live domain to load the content from your staged site.

- Click OK to save these changes and publish your updates live. It's advisable to clear any caching mechanisms after this step to ensure the new content is immediately visible.
Establishing a staging environment in Plesk is a straightforward yet profoundly valuable process for any website owner or administrator. By diligently following the steps outlined in this comprehensive guide, you can successfully create a secure and isolated space. This environment empowers you to confidently experiment with new updates, features, and design enhancements without compromising the stability, security, or overall user experience of your live website. Implementing a robust staging workflow in Plesk significantly minimizes the inherent risks associated with website modifications, ultimately contributing to the maintenance of a well-functioning, secure, and continuously improving online presence.
