


Effectively managing email is crucial for any domain owner. This comprehensive guide details how to leverage Plesk to set up, configure, and maintain your email services efficiently. Plesk utilizes industry-standard mail servers: Postfix for outgoing mail and Dovecot for incoming mail, ensuring reliable message delivery and reception. Furthermore, Plesk automatically enhances email security by employing Transport Layer Security (TLS 1.2) in its more recent versions (e.g., Plesk 17.5.3 and newer), providing robust encryption for your messages.
Key topics covered in this guide include:
- Configuring Reverse DNS for enhanced mail deliverability.
- Modifying email sending limits to prevent abuse.
- Establishing new email accounts within Plesk.
- Accessing your webmail interface.
- Enabling specific ports for mail submission.
- Understanding general settings for integrating with various email clients.
- Implementing advanced spam protection using SpamAssassin.
It is important to note that crucial security measures like SPF (Sender Policy Framework) and DKIM (DomainKeys Identified Mail) are enabled by default within Plesk, providing an initial layer of defense against email spoofing and phishing. For enhanced security, email ports on a newly provisioned Virtual Private Server (VPS) are initially closed. To enable these ports for sending and receiving email, reverse DNS must first be correctly configured for your VPS. Additionally, successful account verification may be required, which can sometimes involve a standard waiting period. Once reverse DNS is established, you may need to contact your service provider's support team to request manual port activation, who will then assess and potentially expedite the opening of these ports.
Configuring Reverse DNS
To significantly enhance your email deliverability and prevent messages from being flagged as spam, it is essential to configure Reverse DNS (rDNS) for your Virtual Private Server's (VPS) IP addresses. Reverse DNS essentially provides a lookup from an IP address back to a hostname, which is a common practice among mail servers to verify the sender's legitimacy. Follow these steps to set up Reverse DNS:
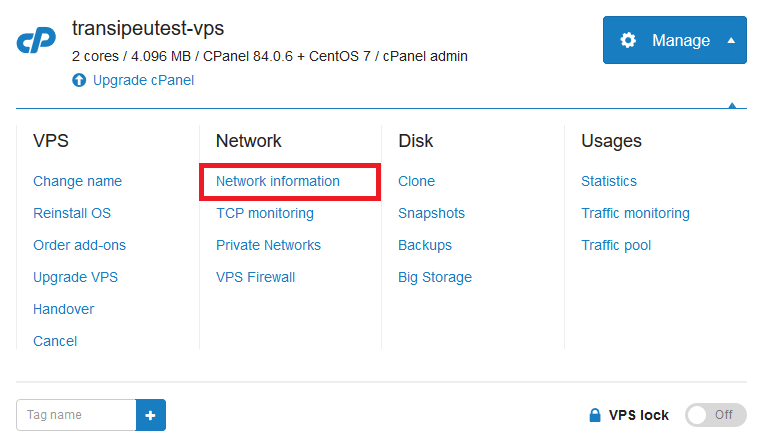
Step 1: Access your provider's control panel and navigate to the 'VPS Management' or 'Server Overview' section.
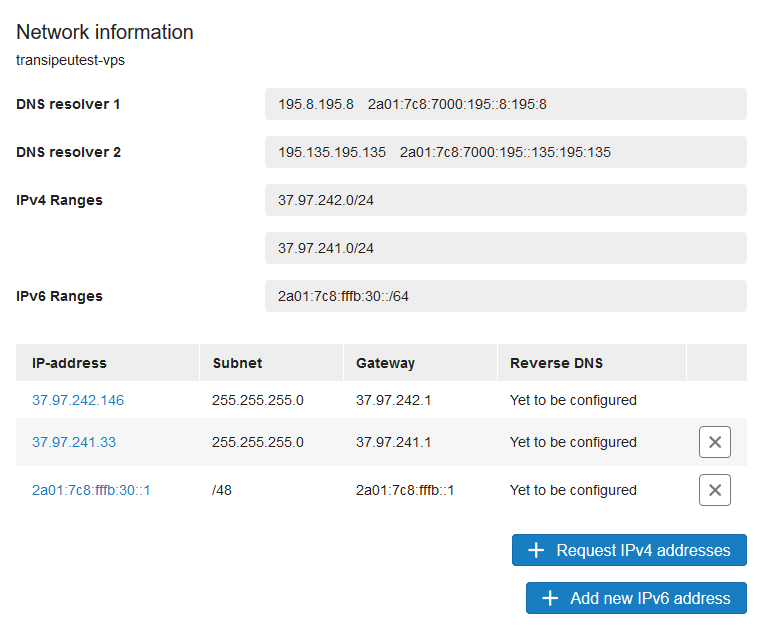
Step 2: Within your VPS management interface, locate and click on 'Manage' followed by 'Network Information' to view your server's IP details.
Step 3: Select the specific IP address for which you intend to configure the Reverse DNS setting.
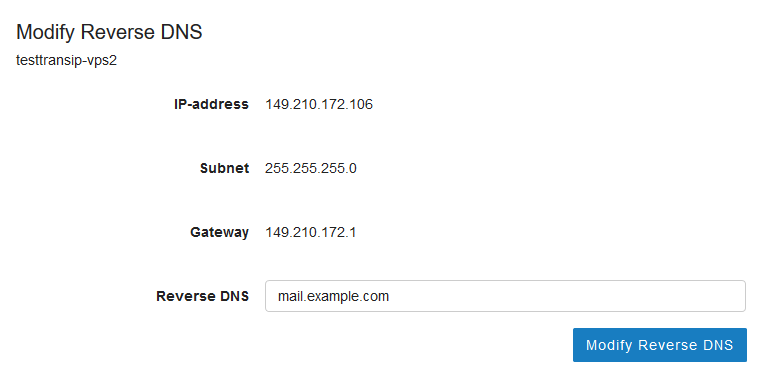
Step 4: Input your desired DNS name into the designated field. This name should correspond to your server's hostname or a mail subdomain. After entering the name, click on ‘Modify Reverse DNS’ to apply and save these changes.
Step 5: After configuring Reverse DNS in your control panel, it is crucial to set up corresponding DNS records within your domain's DNS settings. For instance, if you have multiple IP addresses, you would create A records (or CNAME records for aliases) that link back to the hostname you specified for Reverse DNS.
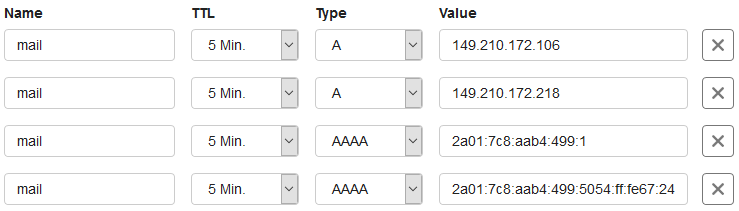
If the IP addresses for which you've configured Reverse DNS are also used for the root (@) of your domain, you can opt to use CNAME records, as demonstrated below, to point them to the designated hostname.

When selecting a name for your Reverse DNS, it is highly recommended to use the hostname of your VPS (e.g., server.yourdomainname.com) or a specific mail subdomain (e.g., mail.yourdomainname.com) that is used for sending emails. This consistency helps in maintaining a credible sending reputation.
Managing Outgoing Email Sending Limits
By default, a fresh Plesk installation typically does not impose specific limits on the number of emails that can be sent per hour or per day. However, implementing such restrictions is a crucial measure for server security and reputation management. Adjusting these limits can help prevent potential abuse, such as a compromised account sending excessive spam, which could severely impact your VPS's IP reputation and lead to blacklisting. Here’s how you can configure these vital settings:
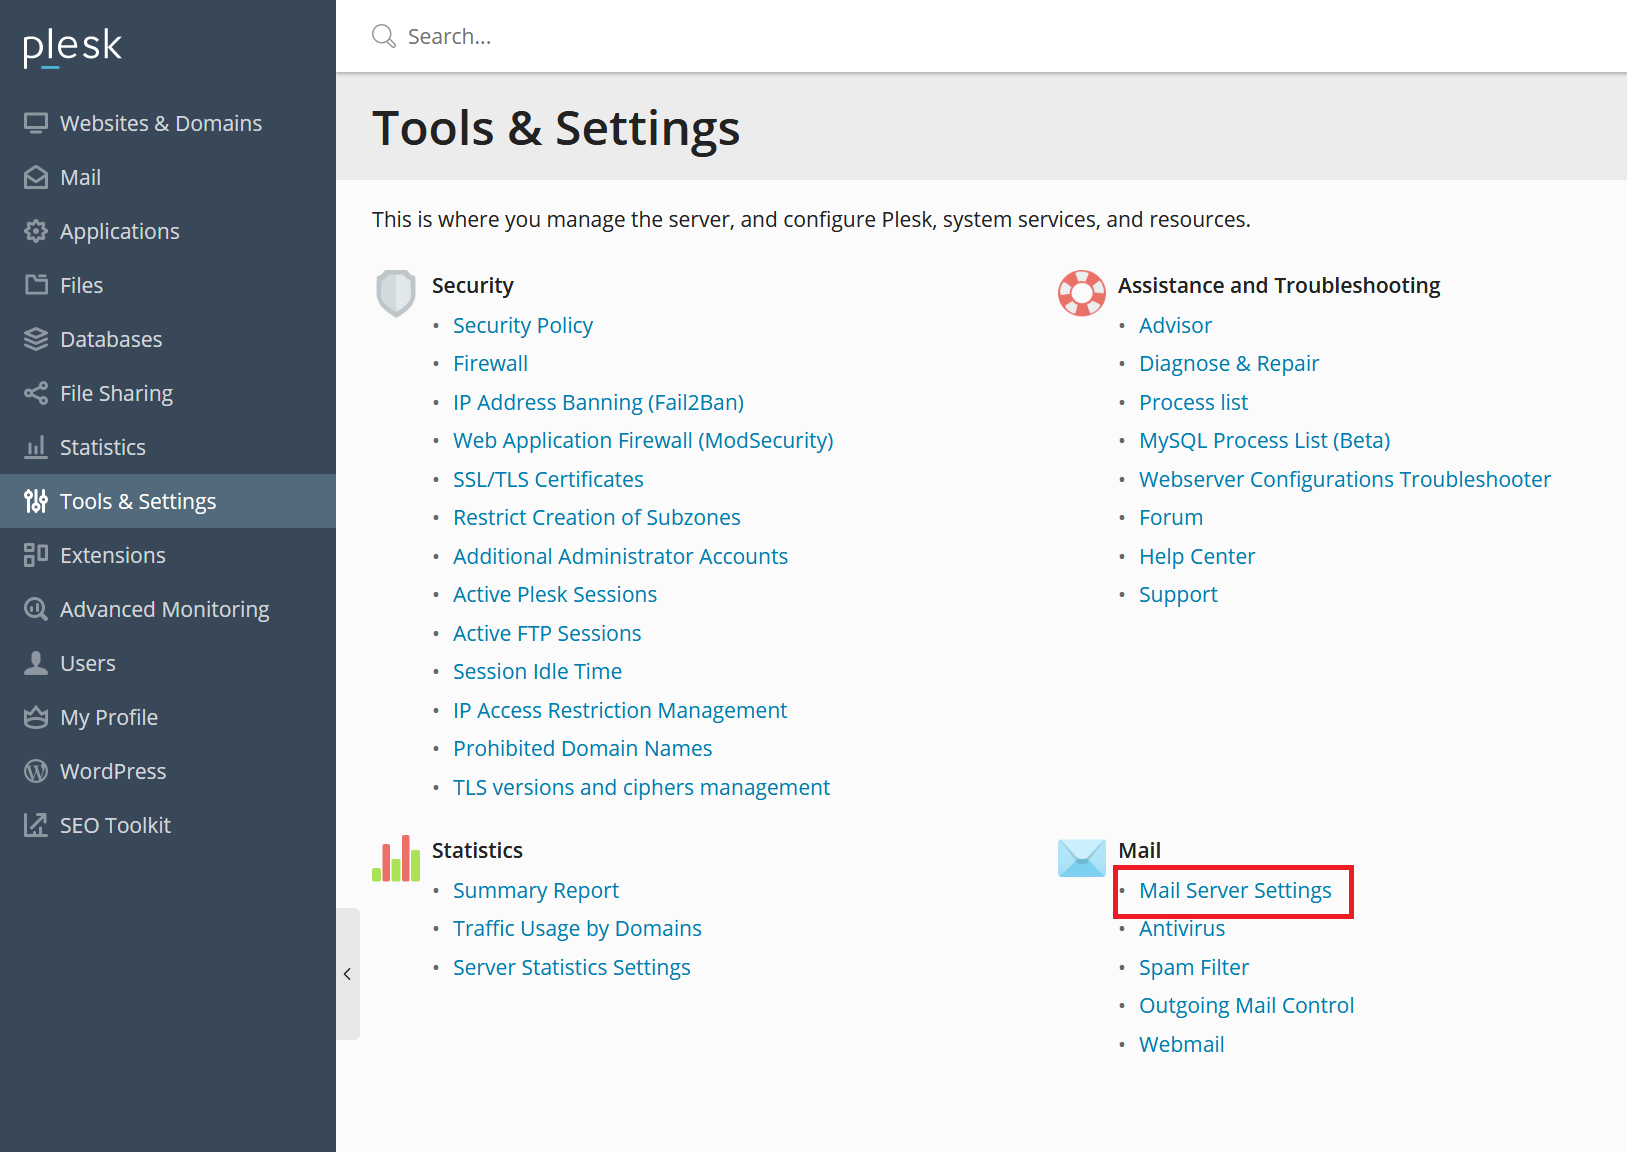
Step 1: Log in to your Plesk control panel. From the main interface, navigate to '**Tools & Settings**' and then select '**Mail Server Settings**'.
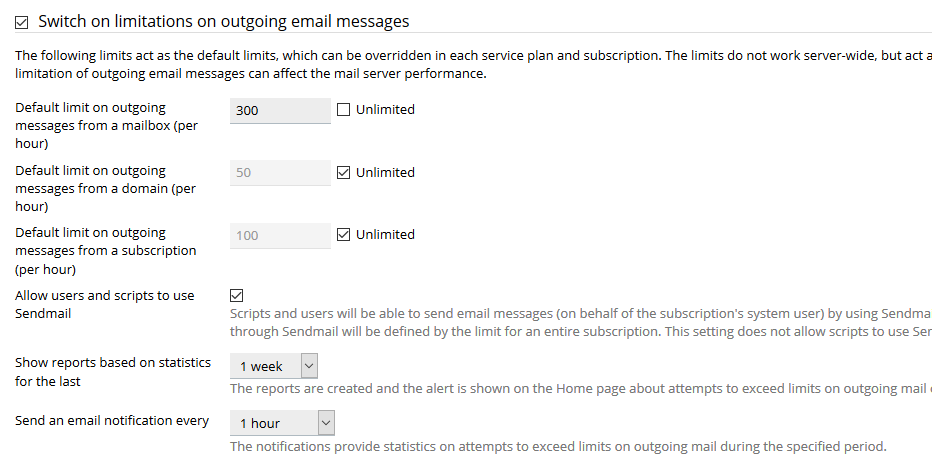
Step 2: On the Mail Server Settings page, scroll down to the section titled '**Switch on limitations on outgoing email messages**'. Enable this option by checking the corresponding box. You can then configure the limits according to your requirements. For instance, you might choose to impose a limit on the number of emails an individual address can send per hour, while leaving domain or subscription limits unrestricted, as illustrated in the example below.
Optional: Customizing Limits Per Domain, Email Address, or Subscription
While the previous steps establish a server-wide outgoing mail limit, Plesk also provides the flexibility to override or refine these settings for individual domains, specific email addresses, or particular subscriptions. To access these granular controls, go to '**Websites & Domains**' and then click on '**Outgoing Mail Control**'. This allows for tailored email policies to meet diverse user or domain needs.

Establishing a New Email Address
Plesk simplifies the process of creating new email addresses for any domain associated with your user account. This feature allows you to quickly set up professional email accounts for your website or business operations. Here’s how to create an email address:
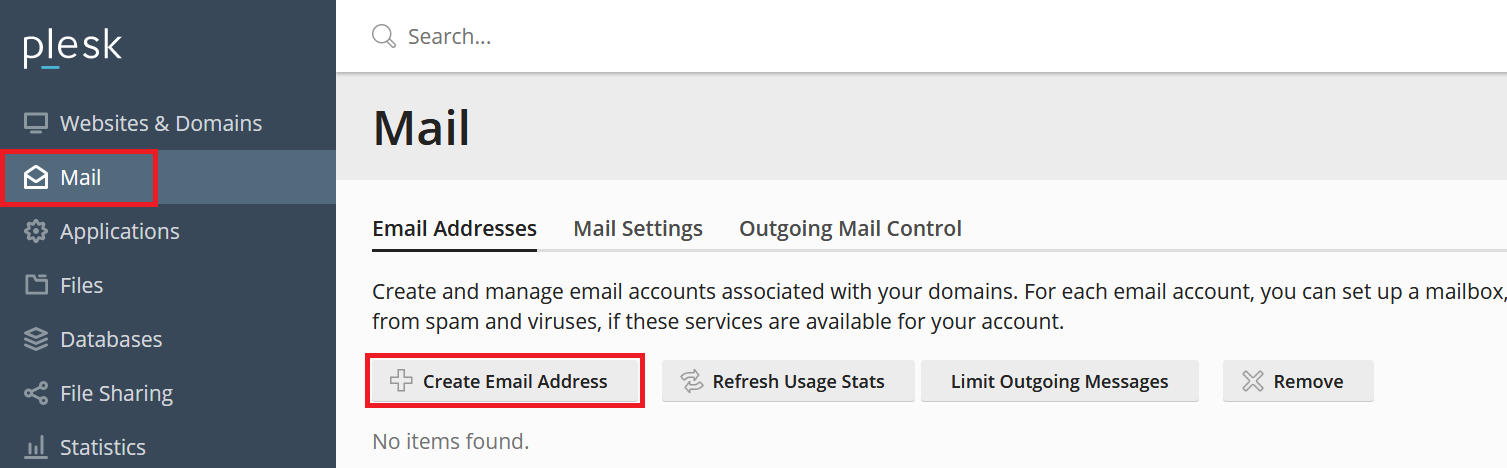
Step 1: Begin by logging into your Plesk control panel. In the left-hand navigation menu, click on '**Mail**', and then select the option to '**Create Email Address**'.
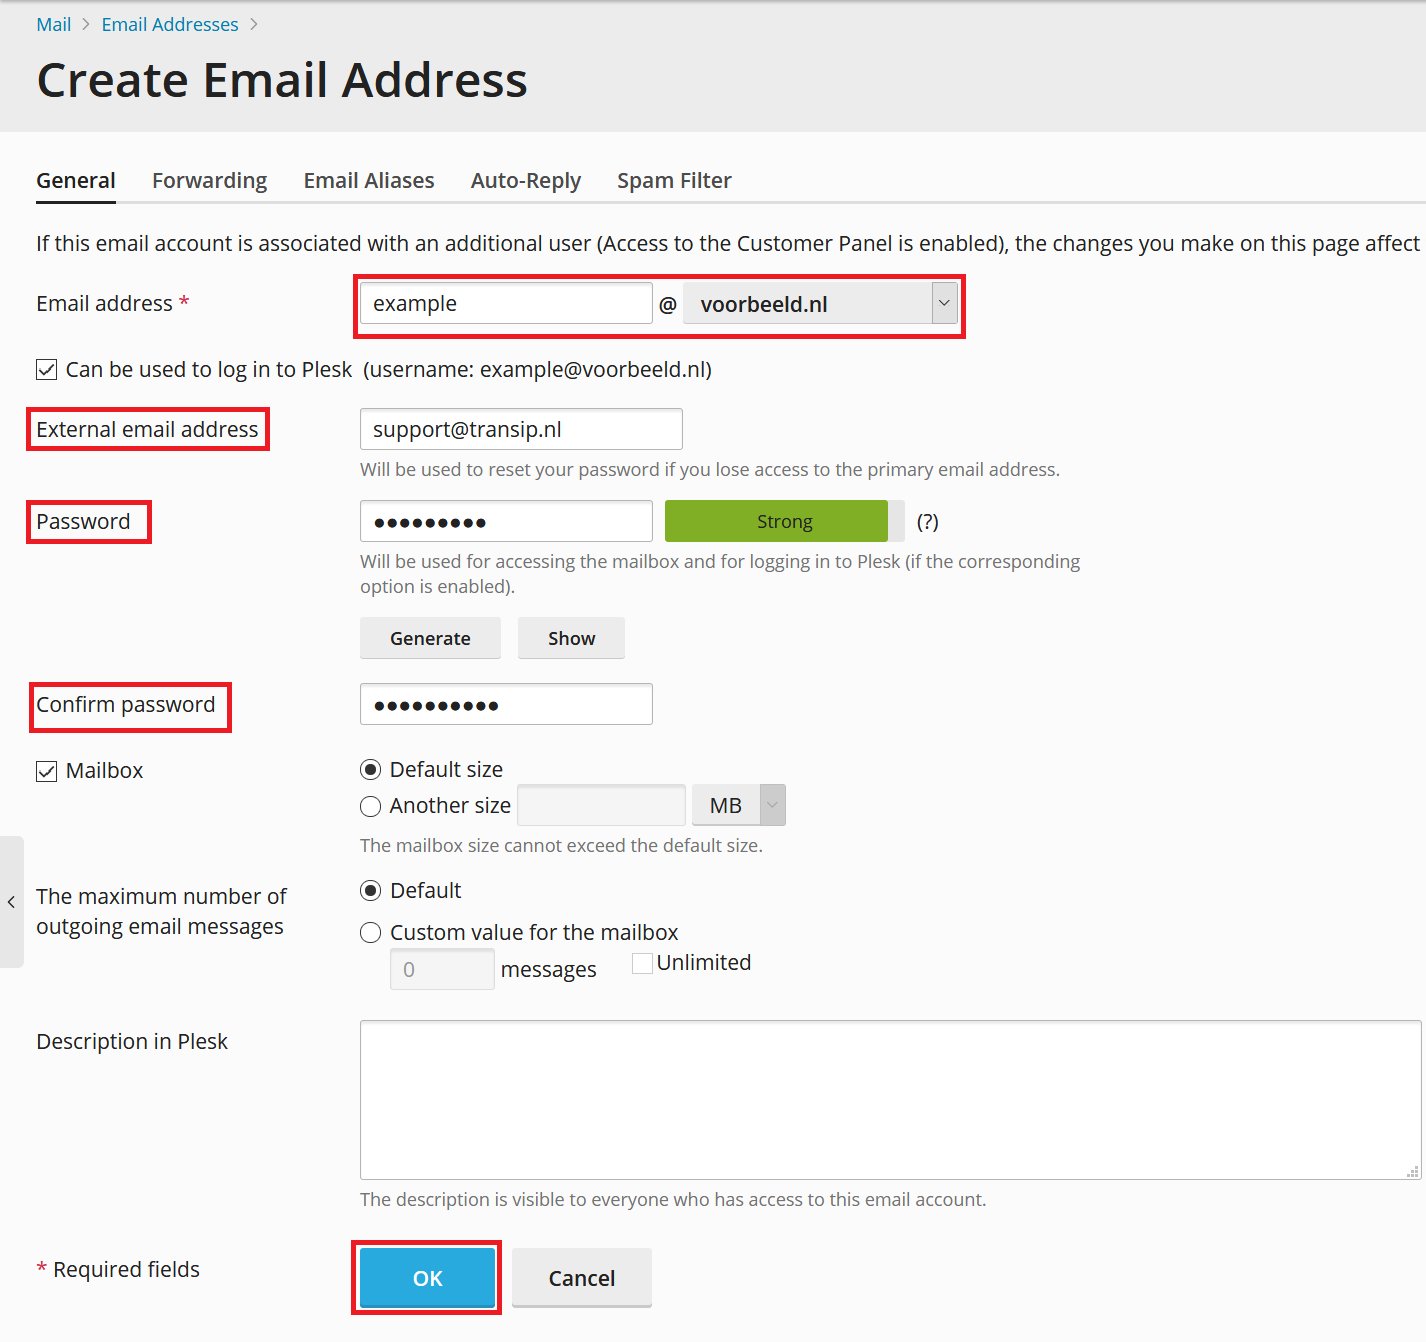
Step 2: Provide the desired name for the new email address (e.g., "info", "support", or a personal name). From the drop-down menu, select the specific domain to which this email address will be associated. It is paramount to choose a robust and complex password to secure the account. Additionally, you have the option to configure limits on the mailbox size and the amount of outgoing mail from this address, tailoring it to your needs.
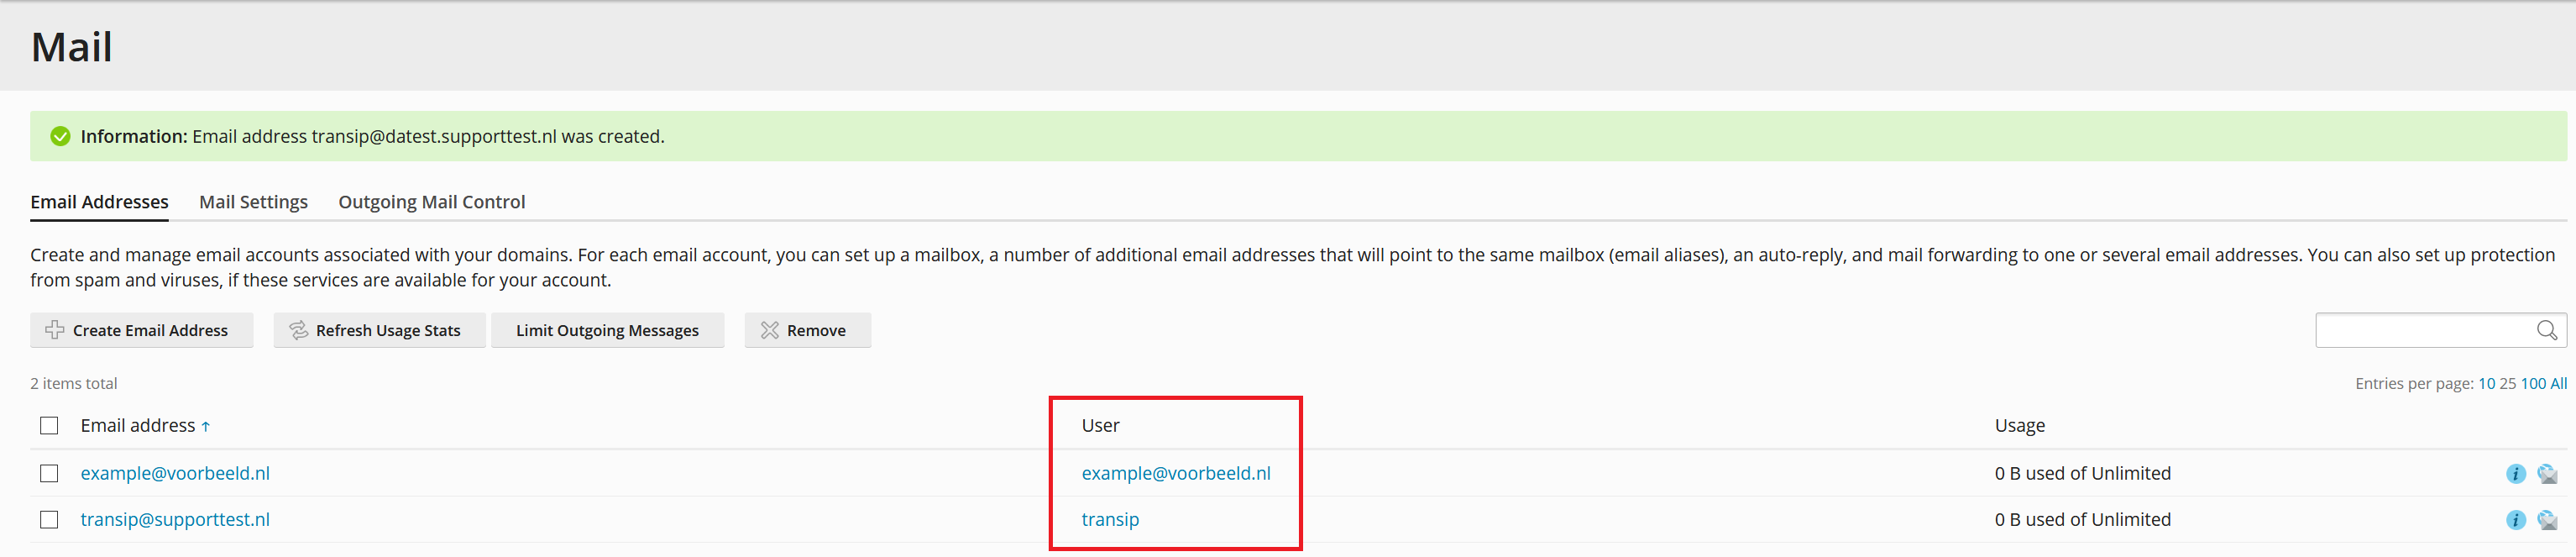
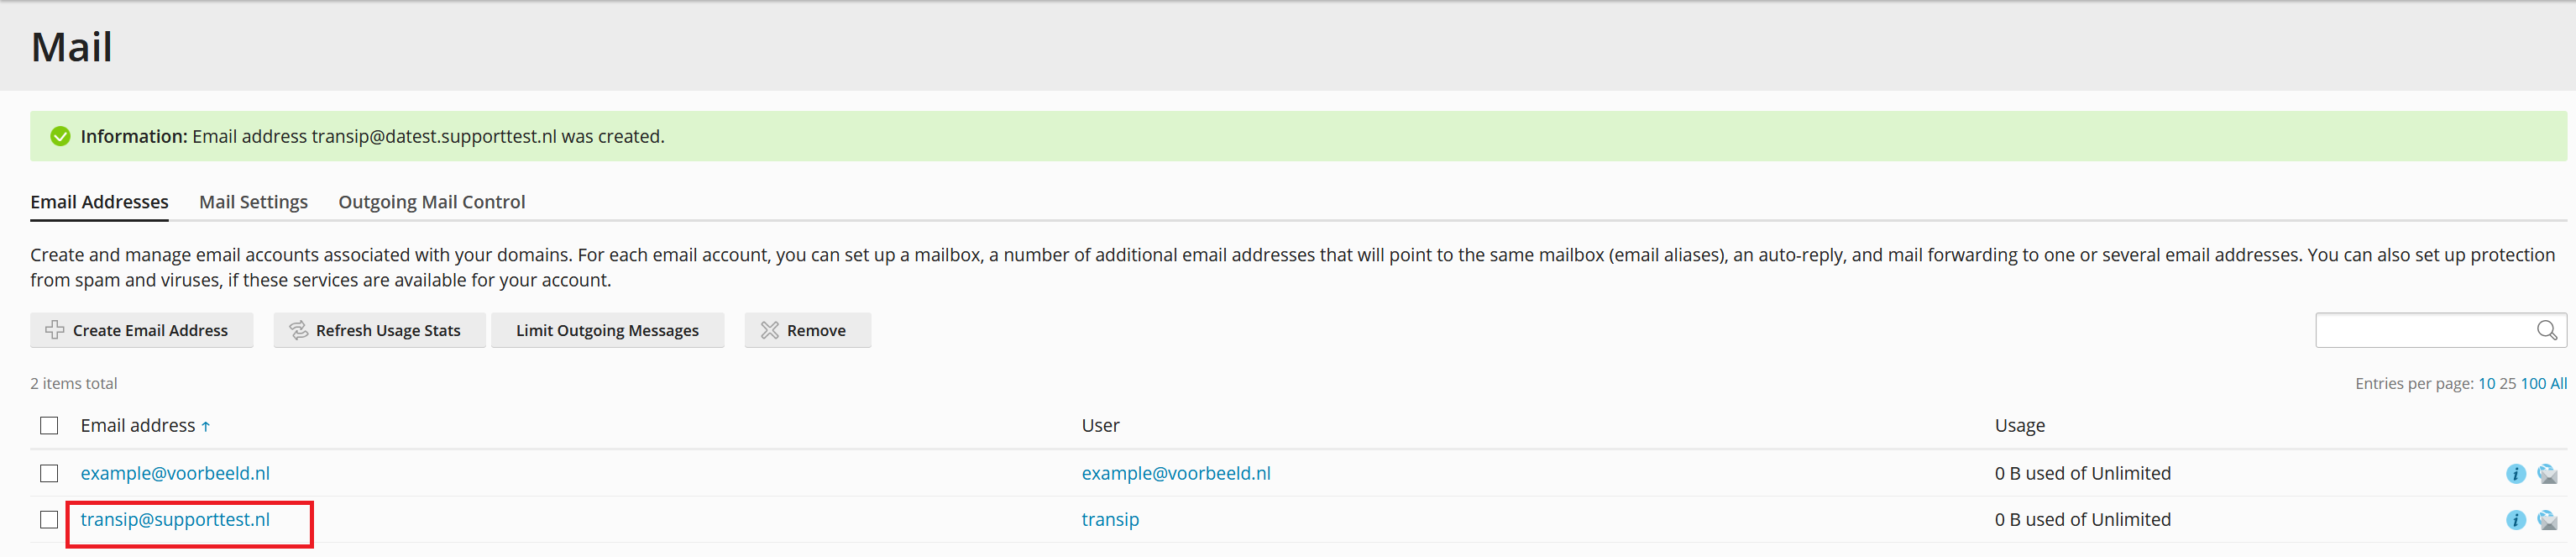
Important Consideration: If the email address you are creating is configured to be linked with an existing Plesk user account, be aware that setting the password here will also update the password for that associated user. You can verify if an email address is linked to a user by checking the '**User**' column in the '**Mail**' overview section of Plesk, as shown in the screenshot below.
Accessing Webmail Services
Plesk seamlessly integrates with Roundcube, a popular and user-friendly webmail client, allowing you to access your email directly through a web browser. Once you have successfully created your email address, you can immediately begin using webmail by navigating to 'webmail.yourdomain.com' (remember to replace 'yourdomain.com' with your actual domain name) in your browser. To log in, simply use the full email address you created and the corresponding password.
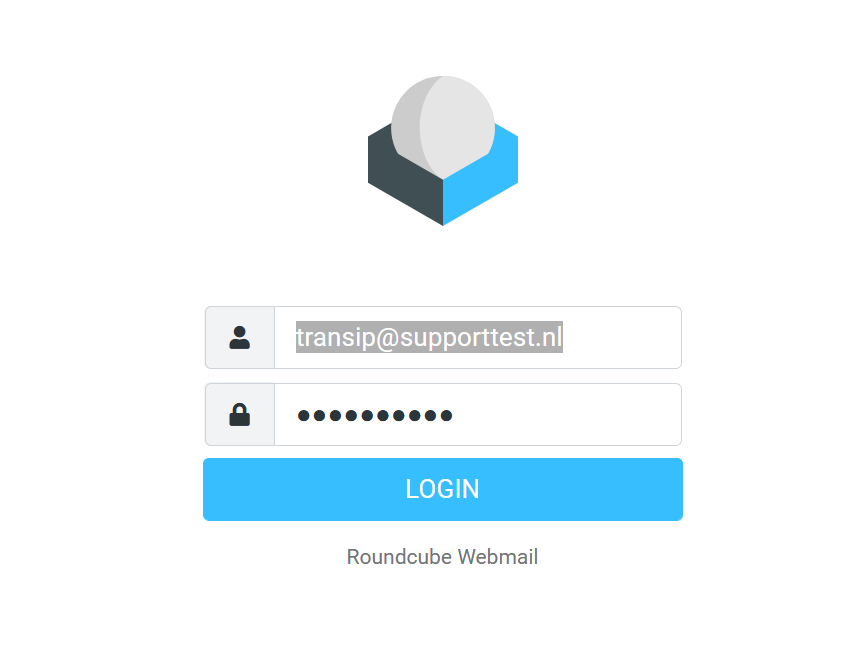
For added convenience, Plesk offers a direct login option to webmail from within its control panel. To utilize this feature, click on '**Mail**' in the left-hand navigation menu. Next to each email address listed, you will find a dedicated webmail icon; clicking this icon will log you directly into the Roundcube interface for that specific email account, streamlining your workflow.
![]()
Optional: Enabling Port 587 for SMTP Submission
While port 465 (SMTPS) is often used for secure outgoing mail, port 587 (Submission) is the recommended standard for email client-to-server communication, offering improved compatibility and reliability. By default, port 587 may not be active for email services in Plesk. If you wish to enable this port for your outgoing mail, follow these steps:
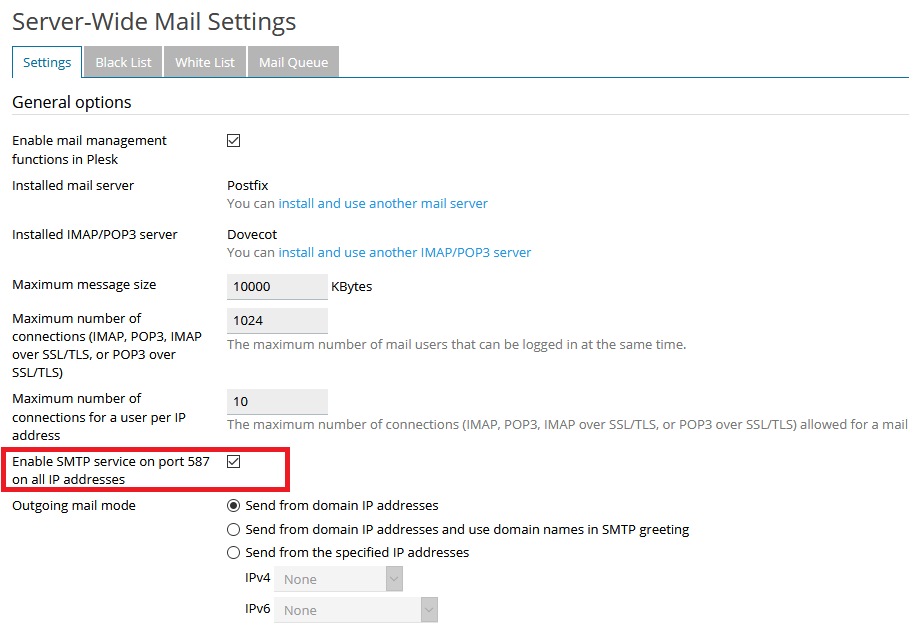
Step 1: Log in to your Plesk control panel. Navigate to '**Tools & Settings**' and then select '**Mail Server Settings**'.
Step 2: On the Mail Server Settings page, locate and tick the option labeled '**Enable SMTP service on port 587 on all IP addresses**'. After enabling this option, scroll to the bottom of the page and click '**OK**' to save your changes and activate port 587.
Configuring Email Clients and Software
Integrating your Plesk-managed email address with various applications, such as desktop email clients, mobile apps, or even website scripts for sending automated emails, requires specific configuration settings. These settings ensure that your mail software can properly connect to and communicate with your mail server. The fundamental parameters remain consistent across most platforms:
Incoming Mail Settings (IMAP)
IMAP (Internet Message Access Protocol) is recommended for users who access their email from multiple devices, as it synchronizes messages across all clients and stores them on the server.
- Server:
mail.yourdomain.com - Port: 993
- SSL/TLS: Enabled (or 'Always' / 'Required')
- Username: Your full email address (e.g.,
[email protected]) - Password: The password established when creating the email address
Incoming Mail Settings (POP3)
POP3 (Post Office Protocol 3) is suitable if you primarily access your email from a single device and prefer to download messages to your local machine, often removing them from the server.
- Server:
mail.yourdomain.com - Port: 995
- SSL/TLS: Enabled (or 'Always' / 'Required')
- Username: Your full email address (e.g.,
[email protected]) - Password: The password established when creating the email address
Outgoing Mail Settings (SMTP)
SMTP (Simple Mail Transfer Protocol) is used for sending emails from your client to the mail server.
- Server:
mail.yourdomain.com - Port: 465 (for SMTPS) or 587 (for Submission with STARTTLS, if enabled)
- SSL/TLS: Enabled (or 'Always' / 'Required' for port 465; 'STARTTLS' or 'TLS' for port 587)
- Username: Your full email address (e.g.,
[email protected]) - Password: The password established when creating the email address
Important Reminders:
- Always replace
yourdomain.comwith your actual domain name. - When configuring email on mobile devices, if you encounter issues with a specific app, consider trying an alternative, such as the Outlook mobile application, which often provides robust compatibility.
- For users configuring email in Windows Mail, select the 'Other account' option during the setup process to manually enter these server settings.
Robust Spam Protection with SpamAssassin, SPF, and DKIM
Unwanted email, or spam, can be a significant nuisance and a security risk. Fortunately, Plesk provides a comprehensive suite of tools to combat spam effectively, with SpamAssassin being a cornerstone of this defense. Along with SPF (Sender Policy Framework) and DKIM (DomainKeys Identified Mail) which are often enabled by default, SpamAssassin provides robust protection.
SpamAssassin operates by meticulously analyzing the content, headers, and characteristics of incoming messages. It assigns a numerical score to each email based on various criteria indicative of spam. When a message's score exceeds a predefined threshold, it is automatically classified as spam, and its subject line is typically modified to alert the recipient. You can fine-tune these critical settings to match your specific requirements:
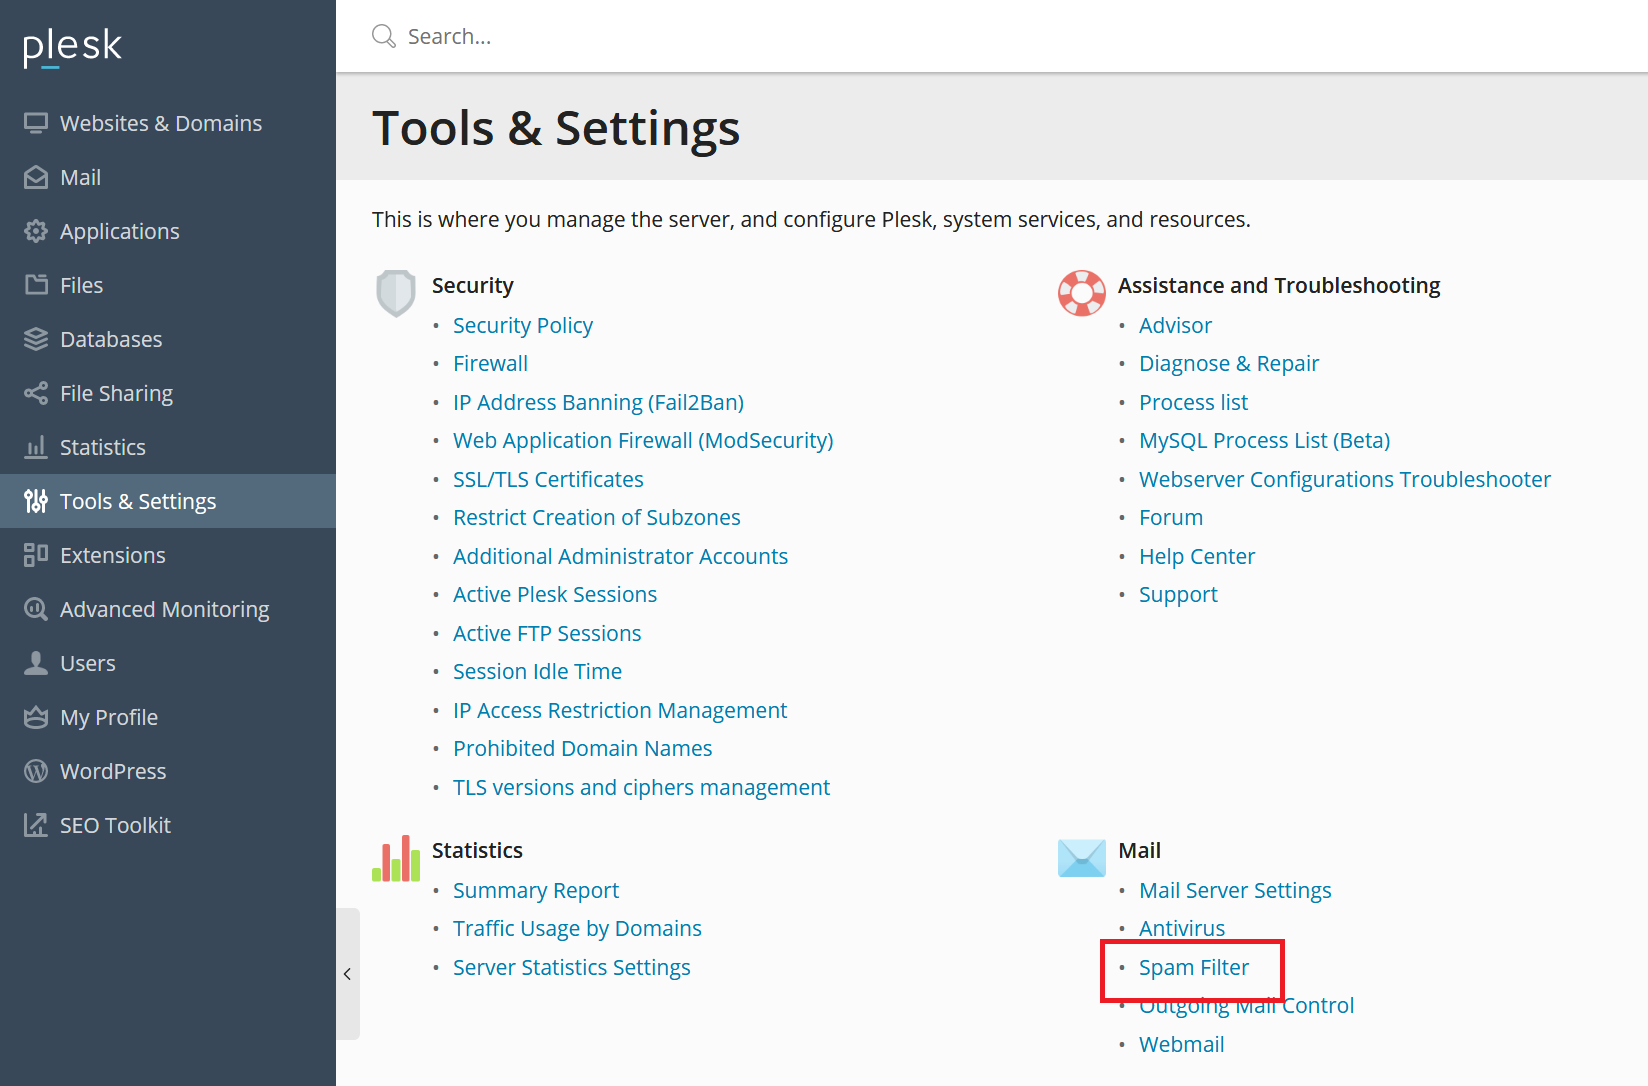
Step 1: Access your Plesk control panel. Navigate to '**Tools & Settings**' and then select '**Spam Filter**' from the options.
Step 2: On the Spam Filter settings page, you can customize various parameters. After making your desired adjustments, ensure you click ‘**OK**’ to save them. Below is an explanation of the key settings:
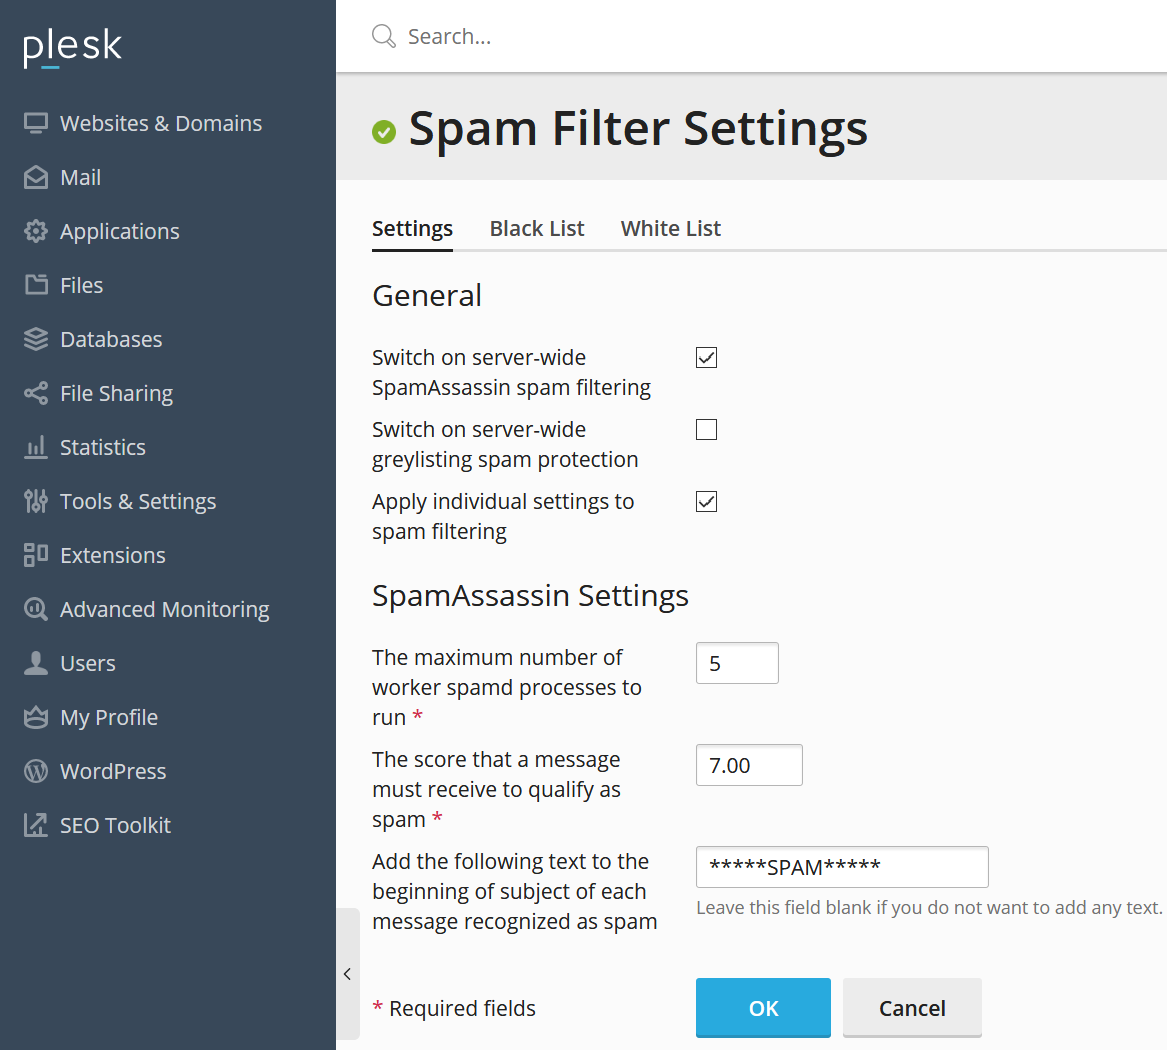
- Switch on server-wide SpamAssassin spam filtering: This is the master switch for SpamAssassin. Ensure this option is checked for the spam filter to be active across your entire server.
- Switch on server-wide greylisting spam protection: Greylisting is an additional anti-spam technique that temporarily rejects emails from unknown senders, requiring them to try again. This often deters spam bots. Enable this if you wish to apply greylisting across your server.
- Apply individual settings to spam filtering: If checked, this option allows individual email account users to configure their own SpamAssassin settings, offering flexibility, especially in multi-user environments. If unchecked, server-wide settings apply to all.
- The maximum number of worker spamd processes to run: This setting controls the number of concurrent SpamAssassin processes that can run (typically between 1 and 5). For optimal performance and effective spam processing, a setting of 5 is generally recommended.
- The score that a message must receive to qualify as spam: SpamAssassin evaluates emails for various spam characteristics, including header anomalies, suspicious keywords, and other indicators. A lower score indicates stricter filtering (e.g., 5 is strict), while a higher score is more lenient (e.g., 9). A score of 7 is often considered a good average starting point. When adjusting this score, it is advisable to make incremental changes (e.g., +1 or -1) and monitor the results.
- Add the following text to the beginning of subject etc: This field allows you to define a prefix that will be added to the subject line of emails identified as spam. It helps users quickly identify potentially unwanted messages.
It is highly recommended to include _SCORE_ within the subject prefix (e.g., ***** SPAM (_SCORE_) *****). This provides valuable insight into the specific spam score assigned to a message. Knowing the score can help you make informed decisions when adjusting the spam threshold, allowing you to fine-tune the filter's sensitivity if legitimate emails are being blocked too aggressively, or if too much spam is still getting through.
Optional: Advanced Spam Handling for All Domains via Command Line
While server-wide settings primarily mark spam by modifying the subject line, you might prefer a more aggressive approach, such as automatically moving identified spam to a junk folder or even deleting it for all domains on your server. This can be achieved through command-line execution (SSH or VPS console) using the following command:
mysql -uadmin -p`cat /etc/psa/.psa.shadow ` -Dpsa -Ne"SELECT CONCAT(mail_name,'@',name) FROM mail,domains WHERE dom_id=domains.id AND postbox='true';"|while read i;do /usr/local/psa/bin/spamassassin -u $i -status true -action move -hits 7;doneImportant Notes Regarding the Command:
- This is a single, extended command. When copying and pasting, ensure the entire string is accurately transferred to avoid syntax errors.
- The
-action moveparameter in the command instructs SpamAssassin to move detected spam messages to the user's spam folder. If you wish to automatically delete spam instead, replace-action movewith-action del. - Be vigilant when pasting the command into a VPS console, as the pipe character (
|) may sometimes be inadvertently changed to a greater-than symbol (>). Always double-check the command for accuracy if you encounter errors. - The number
7at the end of the command represents the spam score threshold. Messages exceeding this score will be actioned (moved or deleted). You are free to adjust this value to increase or decrease the sensitivity of the spam filter.
Optional: Tailoring Individual SpamAssassin Settings
If the 'Apply individual settings to spam filtering' option is enabled, Plesk allows for granular control over SpamAssassin settings on a per-email address basis. This functionality is particularly useful in environments where different users or domains require distinct spam filtering policies. For example, if you manage multiple client domains, this allows each client to customize their own anti-spam preferences. To adjust individual SpamAssassin settings:
Step 1: Log in to Plesk. Navigate to the '**Mail**' tab, and then click on the specific email address (e.g., [email protected]) for which you want to modify the anti-spam settings.
Step 2: Within the settings for that email address, click on the '**Spam Filter**' tab, typically located on the top right. An overview of the customizable spam filtering options for this specific account will be displayed, similar to the screenshot below.
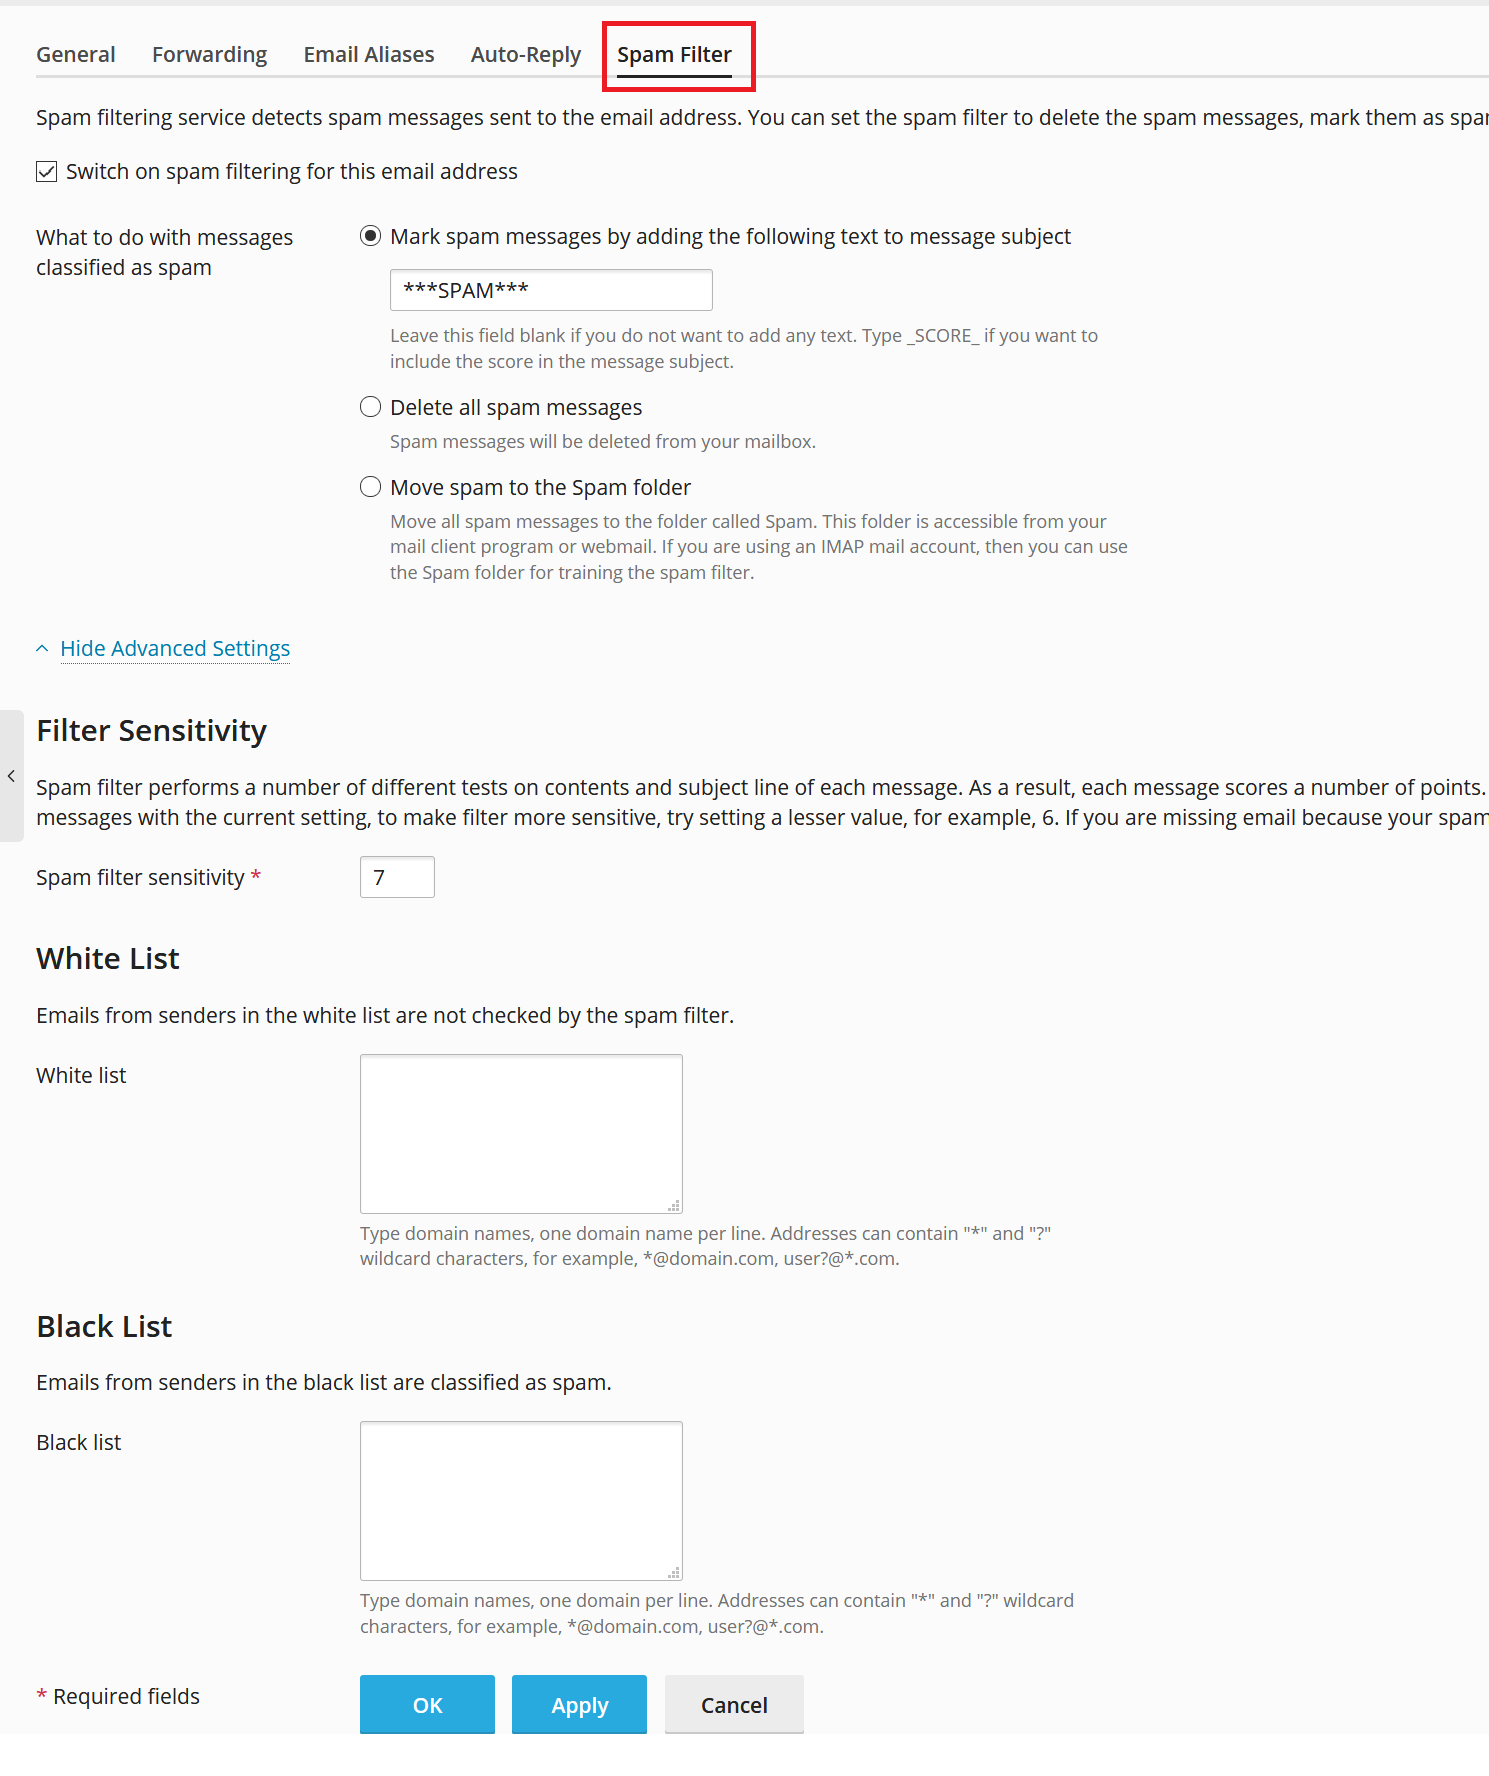
Adjust these settings as desired to suit the individual needs of the email address. Once satisfied, click on '**Apply**' and then '**OK**' to save the changes.
