


Enabling Spam Protection in Plesk
To enhance the security of your email communications and reduce unwanted messages, you can enable robust spam protection within your Plesk account. Follow these comprehensive steps to configure spam filtering for your email addresses:
- Begin by logging into your Plesk account.
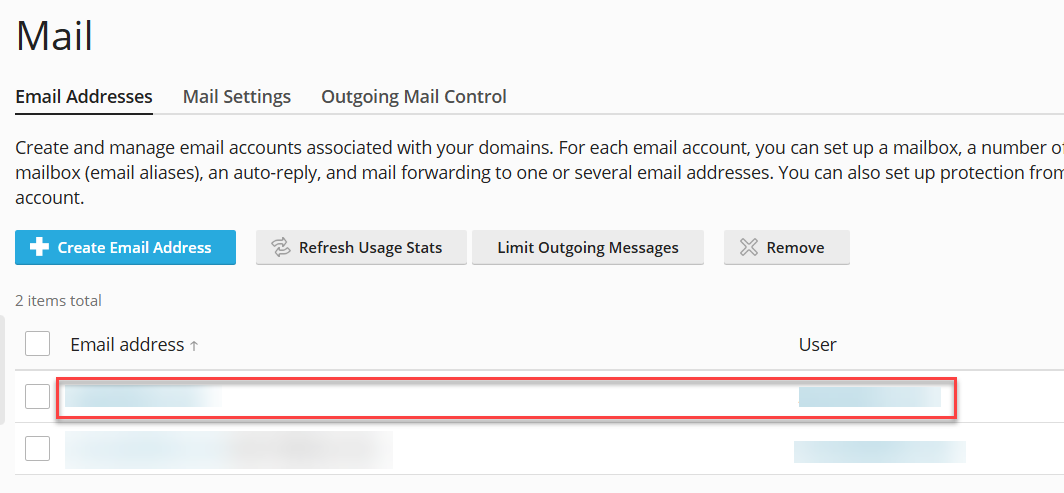
- From the main interface, navigate to the left sidebar and select the "Mail" option.

- Identify and select the specific email address for which you wish to activate spam protection.
- Proceed by clicking on the "Spam Filter" tab or option associated with the selected email address.
- To activate the spam filtering feature, check the box labeled "Switch on spam filtering for this email address". This action will enable the primary spam protection mechanisms.
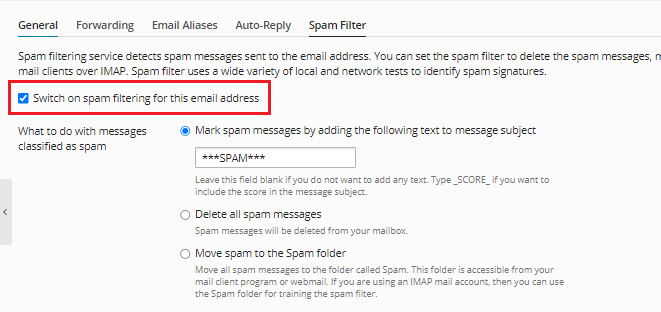
- Within this section, you will find various options to customize how spam is handled. Choose the settings that best suit your preferences for managing unwanted emails.
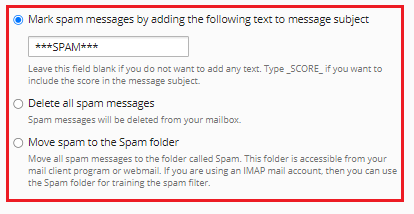
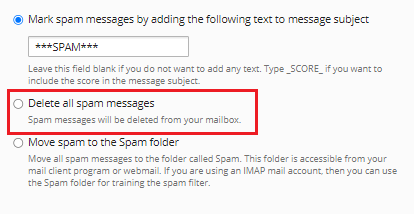
- One available option allows you to mark spam messages by prepending a specific text string to their "Subject line". This makes it easy to identify potential spam in your inbox without deleting it immediately.
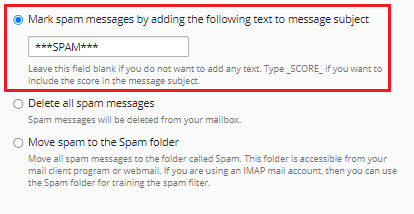
- Alternatively, you can choose to automatically "Delete" all messages identified as spam. This option ensures that such emails do not reach your inbox or any other folder.
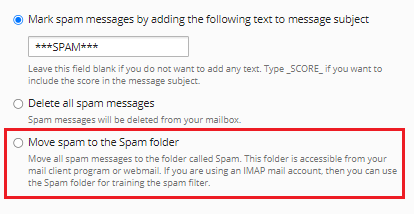
- For a less aggressive approach, select the option to move detected spam emails directly to your "Garbage email folder". This allows you to review them later if needed.
- To fine-tune your spam filter, expand the "Advanced Settings" menu. This section provides additional granular controls and configuration options.
- Within the "Spam filter sensitivity" field, you can adjust how aggressively the filter identifies spam. The default value is typically seven. A smaller numerical value will increase the filter's sensitivity, causing it to flag more emails as spam, while a larger number will decrease its sensitivity, allowing more emails to pass through.
- Utilize the "Whitelist" textbox to specify email accounts or entire domains from which you always want to receive mail. Emails originating from these trusted sources will bypass the spam filter entirely.
- Conversely, the "Blacklist" allows you to add specific websites or email addresses that you wish to block. Any mail from these sources will be automatically identified as spam.
- In the "Trusted languages" and "Trusted locales" sections, you can designate specific languages and geographical locations whose emails will always be permitted to pass through the spam filter without being flagged.
- If you need to ensure emails from certain servers are never blocked, enter their specific "IP addresses" into the corresponding textbox. Emails from these IP addresses will be allowed to bypass the filter.
- Once all desired settings have been configured, click "OK" or "Apply" to save your changes. You will receive a confirmation message indicating that spam protection has been successfully enabled and configured for your selected email address.
This comprehensive guide demonstrates how to effectively enable and configure spam protection within Plesk. By following these steps, you can significantly reduce the amount of unsolicited email you receive, enhancing your overall email experience and security.
