
A Beginner’s Guide to cPanel
- Monday, 8th September, 2025
- 15:05pm
If you have ever signed up for a new web server, it is highly likely you are familiar with cPanel. A significant majority of web hosting providers utilize cPanel, making it a widely adopted control panel for website management.
This comprehensive guide aims to simplify the complexities of cPanel, making it accessible even for beginners. We will walk you through the fundamental aspects of using cPanel, including how to configure your domain name and efficiently set up a website.
Throughout this guide, we will also share valuable tips and tricks to streamline your website management tasks. Let's begin.
The Basics of cPanel
cPanel serves as a centralized control panel where you can efficiently manage every component of your web hosting account.
Hosting providers often choose cPanel for its user-friendly dashboard, consistent updates, continuous improvements, and robust security features.
What Can You Do in cPanel?
cPanel offers a wide array of functionalities for managing your website and hosting environment. Here are some of the key tasks you can accomplish:
- Connect domain names to your hosting service.
- Establish email accounts for your website.
- Install popular content management systems such as WordPress.
- Create comprehensive backups of your website data.
- Upload and manage files on your server.
- Monitor bandwidth and other resource usage statistics.
- Adjust various security settings.
- Install add-on applications on your server.
- Create new databases and manage existing ones.
- Configure various website optimizations.
While cPanel provides an extensive range of features and customization options, it is not necessary to master every single one to effectively manage your website. This guide will cover all the essential aspects you need to know.
A Quick Introduction to the cPanel Interface
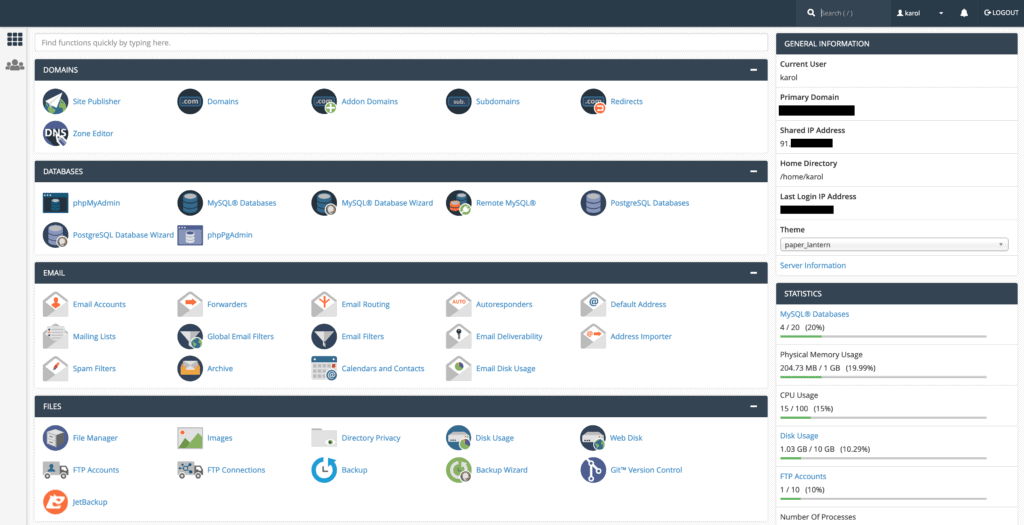
Once you have successfully logged in, you will typically see a screen similar to the one below, which utilizes the “Paper Lantern” theme.
My cPanel Interface Looks Different! What Should I Do?
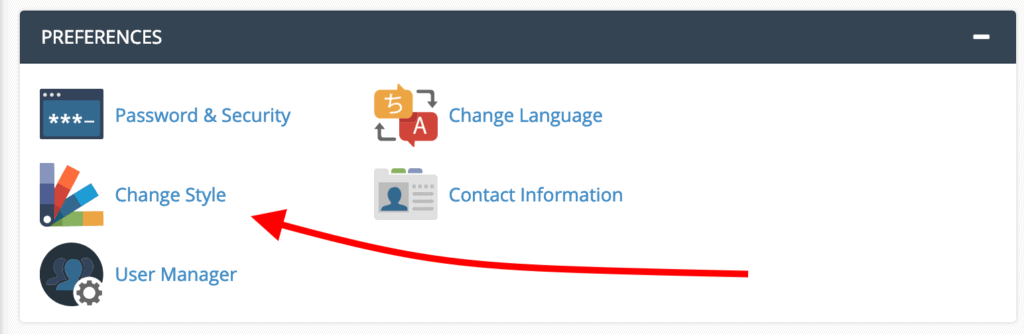
There is no need to worry if your cPanel interface appears different. To adjust the style of your cPanel, navigate to the “PREFERENCES” section, usually located near the bottom of the page, and click on “Change Style.”
You will be presented with various theme choices, depending on what your hosting provider makes available. Common options include Basic, Dark, Light, and Retro styles. To follow along with the theme used in this guide, select “Basic” by clicking the “Apply” button. cPanel will then reload with the newly applied style.
Navigating the cPanel Interface
Understanding how to navigate the cPanel interface is crucial for efficient website management. Here’s a breakdown of its main components:
Navigation Bar
The navigation bar is situated in the top right corner of the screen. It features a convenient search field, a link to your user preferences, a notifications bell, and the logout link.

The search field provides a quick way to locate specific options within cPanel. As you type, results will appear instantly, making navigation much faster than manually browsing. By clicking on the user preferences link, you can modify your password, language settings, update contact information, and reset page settings.
The notifications bell serves as an alert system for important updates regarding your hosting setup or cPanel itself, including news, critical updates, and security concerns. The logout link ensures a secure exit from your cPanel session and should be used every time you finish working.
Search Bar
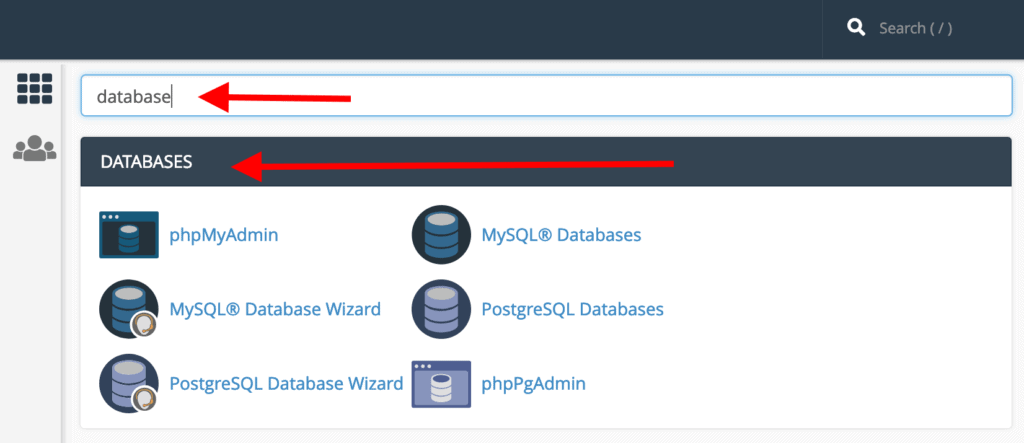
An additional search field is prominently displayed at the very top of the page, directly below the navigation bar. This search bar functions similarly to the one in the navigation bar, but instead of showing results in a dropdown, it filters the central content area of cPanel. Simply enter your query, and cPanel will present the relevant functions.
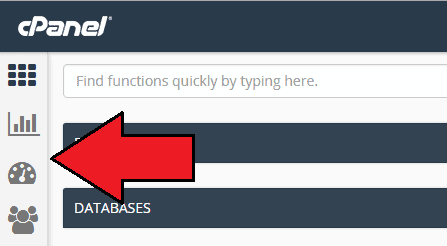
Sidebar
On the left side of your screen, you will find a sidebar containing several icons; the exact number may vary based on your host’s configuration. Typically, these icons represent Home, Statistics, Dashboard, and User Management.
- Home is the primary page of cPanel, providing access to most functions.
- Statistics displays crucial metrics such as the number of email accounts, FTP accounts, domain names, and your current bandwidth and disk space usage.
- The Dashboard offers a quick reference page with links to frequently used functions and an at-a-glance view of your resource usage.
- User Management allows you to add or remove users from your cPanel account. Here, you can also review configured email accounts and determine who has access to your FTP and web disk services.
Reorganizing cPanel’s Homepage
For a more personalized workspace, you can reorganize cPanel’s homepage. Sections can be collapsed by clicking the “-” sign in the top right corner of each section.
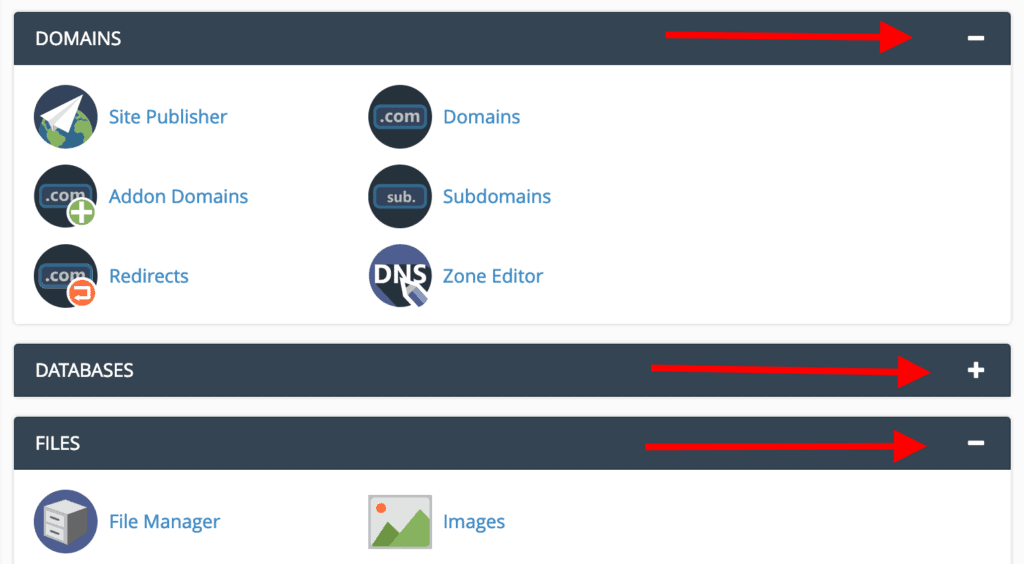
Additionally, you have the flexibility to drag and drop entire sections to rearrange them, placing your most frequently used tools at the top for quick access.
Updating Your Preferences
When you first log in to cPanel, it is highly recommended to visit the “PREFERENCES” section to update your contact information and change your password.

Here’s a step-by-step guide to these crucial updates:
Changing Your Password
For enhanced security, we strongly advise changing your password immediately after your first cPanel login. Click on “Password & Security” to access the password management screen.

You will need to enter your current password before creating a new one. To ensure a strong and secure password, it is best to utilize the Password Generator feature. Simply click the button, and the generator will create a robust password for you.

The most secure method for saving your new password is to use a reputable password manager, such as LastPass, which eliminates the need to memorize complex passwords. Avoid saving your password in easily accessible local files, such as Word documents, where it could be vulnerable to discovery.
Updating Your Contact Information
Providing an accurate email address for critical updates is one of the most vital actions in cPanel. This step is crucial for two main reasons:
- Without a functional email address in this section, cPanel will be unable to notify you of significant changes or issues with your configuration.
- The email address you provide should not be associated with any domain name hosted within this cPanel. This precaution ensures that if your domain configuration is compromised, cPanel can still communicate with you.
To access these settings, click on “Contact Information,” which will lead you to the following screen:

We recommend enabling all options under “Contact Preferences.” These alerts can notify you of suspicious activities, such as unauthorized password changes, or potential hosting problems, like disk space depletion.
Adding a New User
If you collaborate with others on website management or have a trusted business partner who requires access to the hosting setup, you will need to create a dedicated user profile for them in cPanel. To do this, click on the “User Manager” icon within the “PREFERENCES” section.

You will then be directed to a screen displaying all currently configured accounts in your cPanel.

Next to each account, you will observe three icons:
- The envelope icon indicates whether an email account is set up for the user (colored for active, grayed out for inactive).
- The truck icon signifies an active FTP account (colored for active, grayed out for inactive).
- The disk icon indicates if the user has access to web disk services.
Below each account name, you will find options to edit user details, change passwords, or delete users. To add a new user, click the “Add User” button in the top right corner.
This will take you to a new screen where you can input the user’s full name, username, the domain they should be associated with, and an optional alternative email address. You will also create a password for the new user.

Below these fields, you’ll find the “Services” section, where you can configure key permissions, corresponding to the icons mentioned earlier:

- Email allows you to enable or disable email accounts for the user and set storage limits.
- FTP grants or revokes access to your hosting setup via FTP. You can specify the directory the user can access and limit their disk space usage.
- Web Disk permissions should generally be reserved for top-level administrative accounts. “Read-Write” access grants full control within the specified directory, including file deletion. “Read-Only” access allows reading, downloading, and listing files only.
Once you have configured these settings, click “Create” or “Create and Add Another User” at the bottom of the page to finalize the new user setup.
Managing Domain Names
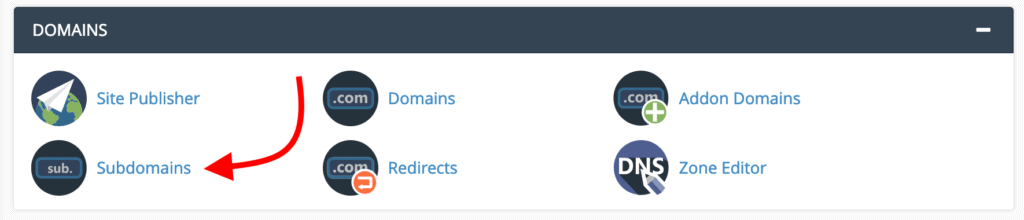
The “DOMAINS” section in cPanel is your central hub for adding new domain names to your hosting account, managing existing domains, and setting up subdomains.
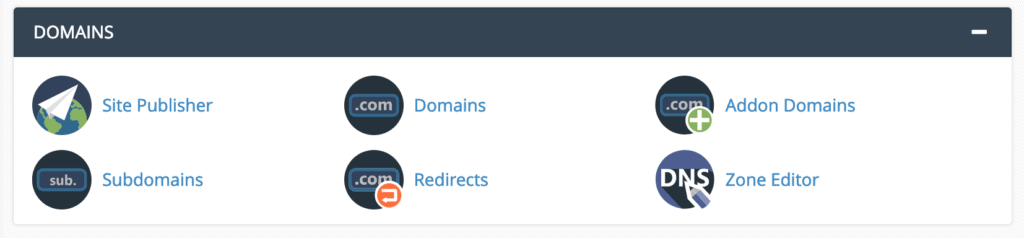
Adding a New Domain Name
To incorporate a new domain name into your cPanel account, click on “Addon Domains” within the “DOMAINS” section. An addon domain essentially allows you to host multiple fully functional websites from a single control panel.
On the “Addon Domains” screen, you will need to enter your new domain name along with a few other parameters:
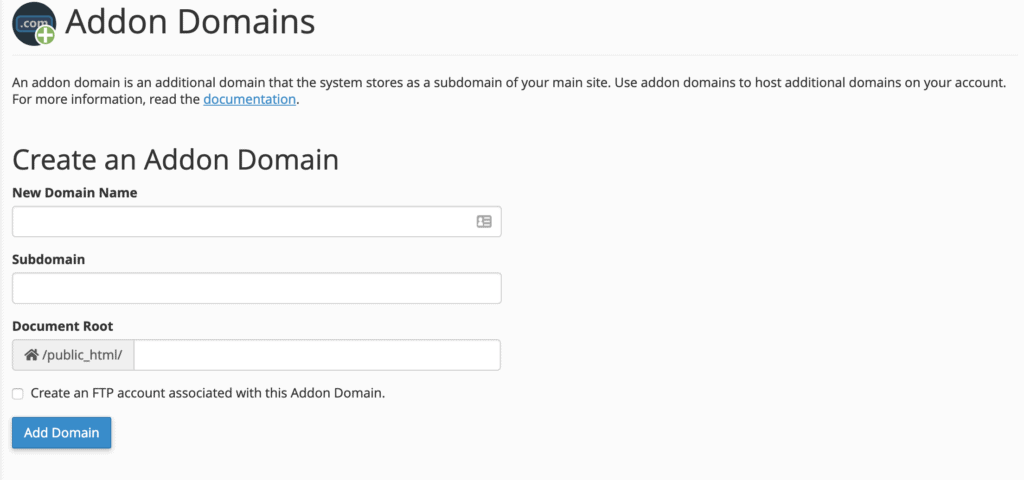
- New Domain Name – Enter the exact domain name you have registered, excluding the
www.prefix. - Subdomain – This field will automatically populate once you enter your new domain name. It is generally advisable to leave this as is, as cPanel uses it for internal routing.
- Document Root – This specifies the server location where your new domain’s files will reside. This field is also automatically filled, and adhering to the recommended settings is best.
Click “Add Domain” to complete the process.
Editing or Removing a Domain Name
On the same “Addon Domains” screen, the “Modify Addon Domain” section provides tools to manage any domains currently assigned to your account. This includes editing their settings, configuring redirections, or completely removing domains.
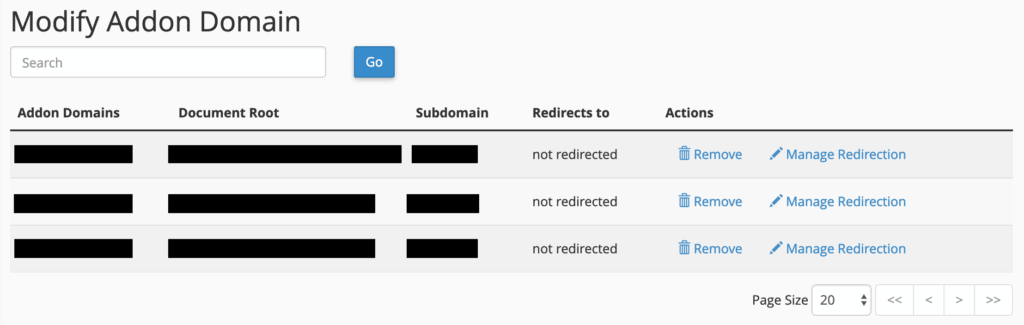
The functionality here is straightforward. Links for removing domains and managing redirections are located on the right. Clicking these will present a confirmation panel for deletion or a field to enter the desired redirection destination.
Managing Subdomains
Every time you add a new domain to your account, cPanel automatically generates a corresponding subdomain. For example, if your cPanel account is john and the host is greathost.com, your primary server domain might be john.greathost.com. If you then add johnsworld.com as an addon domain, cPanel will create a subdomain like johnsworld.john.greathost.com.
This setup can sometimes result in the same website being accessible via two different addresses (johnsworld.com and johnsworld.greathost.com), which is not ideal for search engine optimization (SEO). To address this, it is recommended to redirect the automatically created subdomain to your standard domain. This ensures that anyone attempting to access johnsworld.greathost.com is automatically directed to johnsworld.com.
Here’s how to configure this redirection:
First, click on “Subdomains” from the “DOMAINS” section:
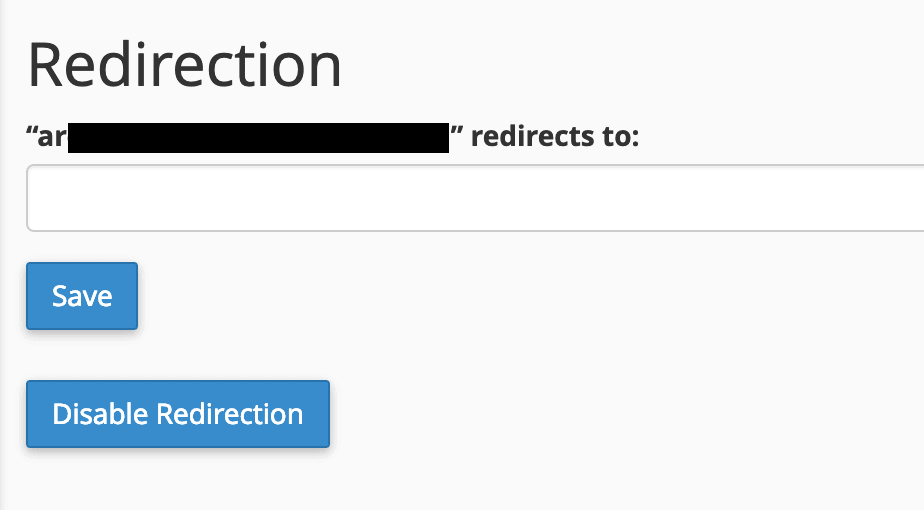
You will be taken to a panel that displays all your current subdomains. Initially, the “Redirection” column for these subdomains may be blank.

To configure a redirection, click the “Manage Redirection” link next to the desired subdomain. On the subsequent screen, enter the full domain name to which you want to redirect. In our example, this would be johnsworld.com. Click “Save” to apply the changes.
Creating Custom Subdomains
Beyond managing automatically generated subdomains, you can also leverage subdomains to expand specific areas of your website creatively. For instance, if your main website is at johnsworld.com, you might consider launching a new blog under blog.johnsworld.com.
You have the flexibility to choose any subdomain name that suits your needs. Custom subdomains can be created on the same screen where you manage existing ones, by filling out the form at the top:
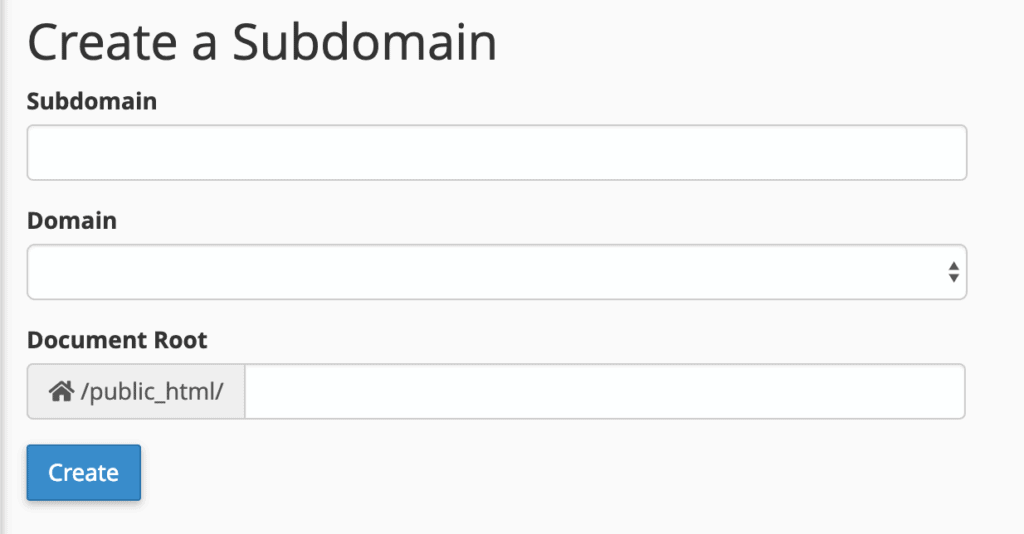
- Subdomain – Enter the desired name for your subdomain. Keep it concise, using only letters, dashes, and numbers.
- Domain – Select the parent domain for this new subdomain.
- Document Root – This specifies the directory on the server where the new subdomain’s files will be stored. A good practice is to input your full subdomain here, for example,
blog.johnsworld.com.
Click “Create” to finalize the subdomain setup.
Email Accounts and Settings
One of the significant advantages of hosting your domain name with a cPanel-enabled web host is the ability to create customized email accounts for that domain. All email-related management occurs within the “EMAIL” section of cPanel.

As you can see, this section provides a comprehensive suite of tools, from creating new email addresses and setting up forwarders and autoresponders to managing spam and more.
Setting Up an Email Account
Creating a new email account is typically the first step. To add an email account to your domain, click on “Email Accounts” and navigate to the “Add Email Account” tab.
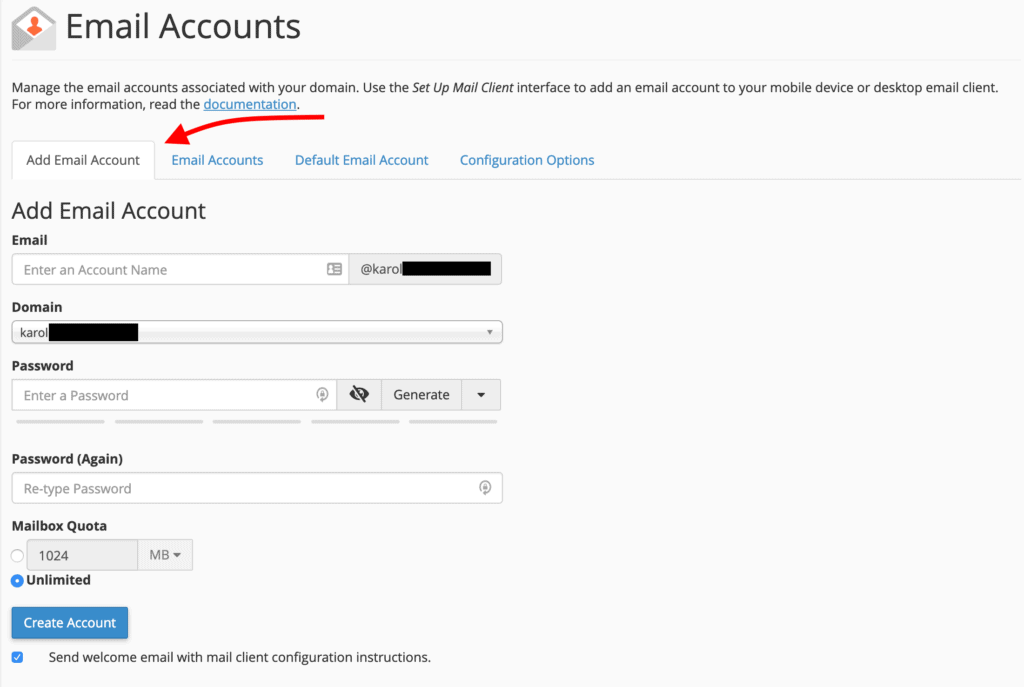
Follow these steps to configure your new account:
- In the Email field, enter the desired prefix for your email address, such as
hellooryourname. - From the Domain drop-down menu, select the appropriate domain name. If your domain name has not yet been added to cPanel, you will need to do so first.
- Create a strong and secure Password for the account.
- Adjust the Mailbox Quota to ensure sufficient storage. Email accounts consume server space, so while you may not grant unlimited access to all users, 1GB (1024MB) is a reasonable minimum.
- Click “Create Account.”
Once completed, the newly created email address will appear in the list of existing email accounts under the “Email Accounts” tab.
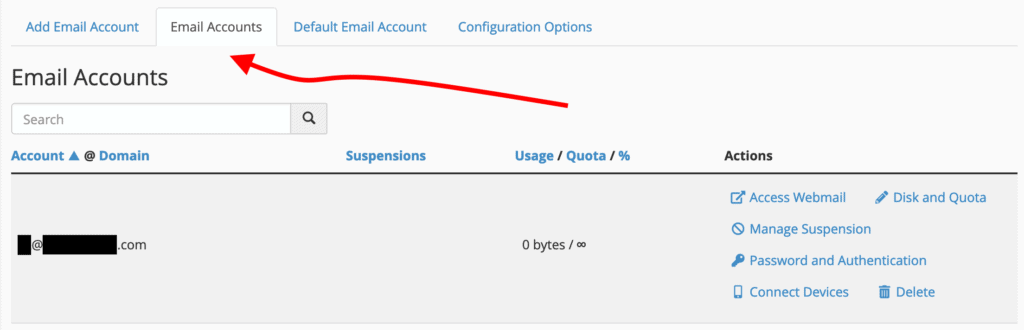
You can manage all aspects of this account later, including its password, quota, and other details.
Using Your Email
After setting up an email account, you have two primary methods for using it:
- Configuring the email in a desktop or mobile email client (e.g., Gmail, Apple Mail, Outlook).
- Accessing it directly via webmail.
Let's explore the first option:
How to Configure Your Email Locally
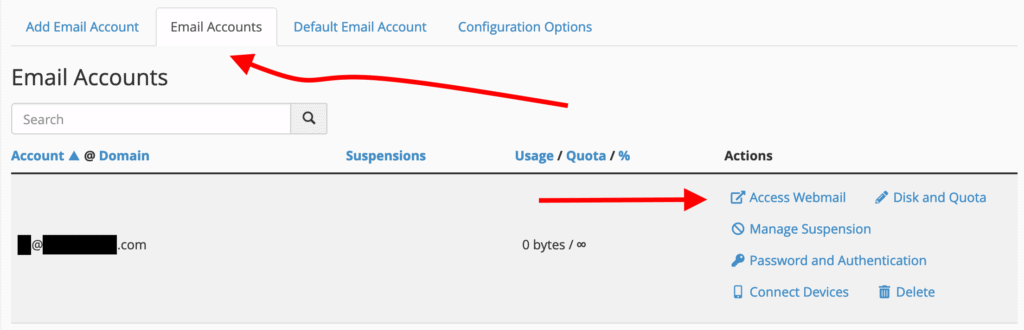
To configure your email in a local client, you first need to click on the “Access Webmail” link located next to your email address in the “Email Accounts” tab.
This will direct you to a new panel. Scroll down to the “Mail Client Automatic Configuration Scripts” section, where you will find options like this:
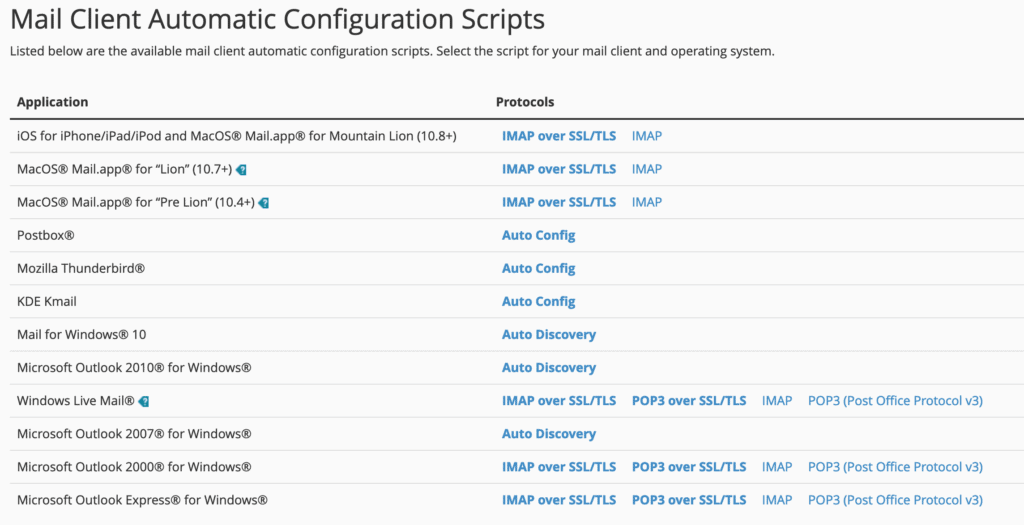
This section provides useful links, including instructions or ready-made configuration scripts for many popular email clients. If your client is listed, simply click the corresponding link and follow the provided guidance to complete the setup.
If your client is not listed, or if you prefer manual configuration, refer to the “Mail Client Manual Settings” section located below the automatic configuration options.
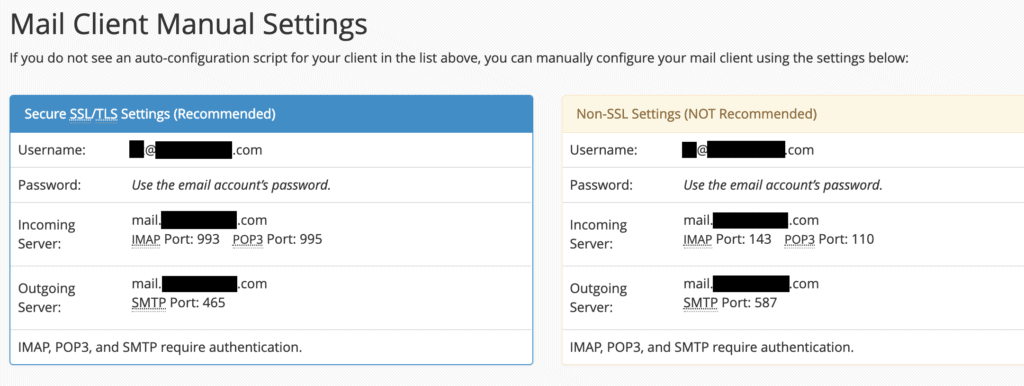
All the necessary information for manual setup will be available there.
Accessing Your Webmail
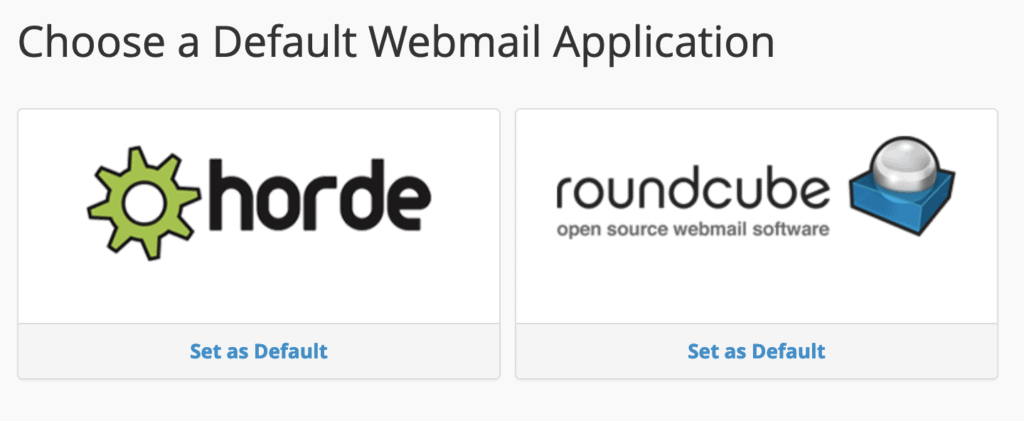
Accessing your webmail is straightforward. Click on the “Access Webmail” link next to your email address in the “Email Accounts” tab.
Once there, select one of the available webmail clients to be instantly directed to your email inbox.
Alternatively, you can access your webmail directly from any web browser by navigating to https://YOURDOMAIN.com/webmail. You will be presented with a login screen.

Enter your email address and password to log in.
Forwarding Your Email to Another Address
You can configure your cPanel email accounts to forward incoming messages to another existing email address, such as [email protected]. To set this up, click on “Forwarders” to reach the following screen:
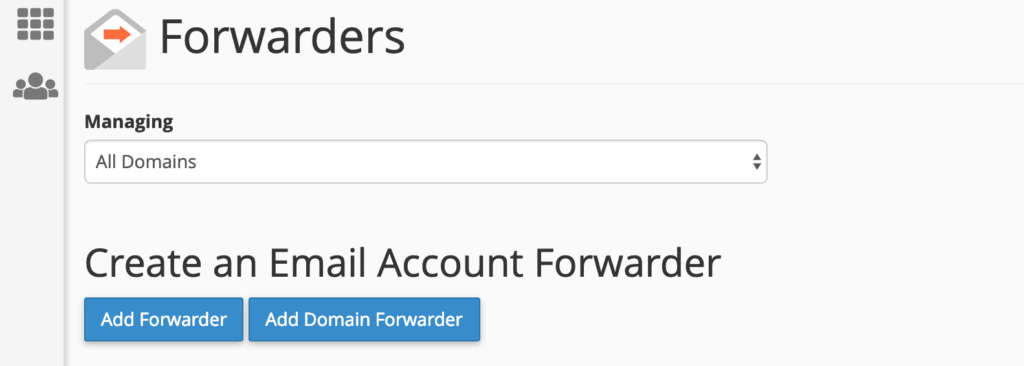
From here, you can create either a simple email forwarder or a domain-wide forwarder. For individual email forwarding, click the “Add Forwarder” button. You will see this:
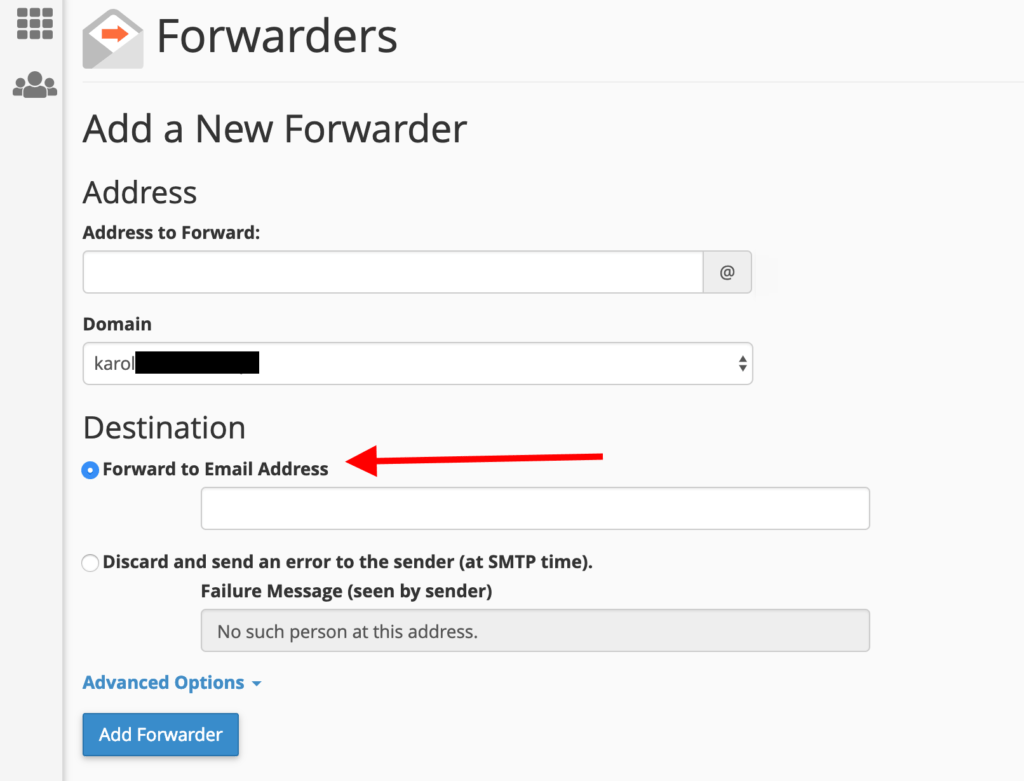
Here’s a breakdown of the fields:
- Address to Forward – Enter only the user portion of the email address you wish to forward. For example, if your email is
[email protected], enterjohn. - Domain – This is the domain part of the email address you want to forward (e.g.,
domain.com). - Destination – Select “Forward to Email Address” and enter the full email address where you want messages to be redirected.
Click “Add Forwarder” to finalize the setup.
Setting Up a Default Address
Default email addresses are a convenient feature of cPanel hosting, allowing you to catch any incoming emails sent to invalid addresses under your domain name. This means you can use unique, nonexistent email addresses for various online registrations and still receive those messages without issues.
For example, if your primary email is [email protected], but you prefer not to use it for a service like Netflix due to privacy concerns, you could use [email protected]. With a default address configured, emails sent to [email protected] will still reach your main inbox.
Here’s how to set this up:
Click on “Default Address” from the “EMAIL” section in cPanel:
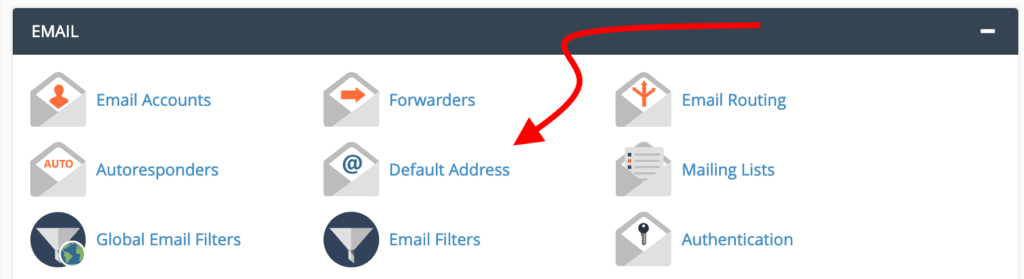
You will see this configuration form:
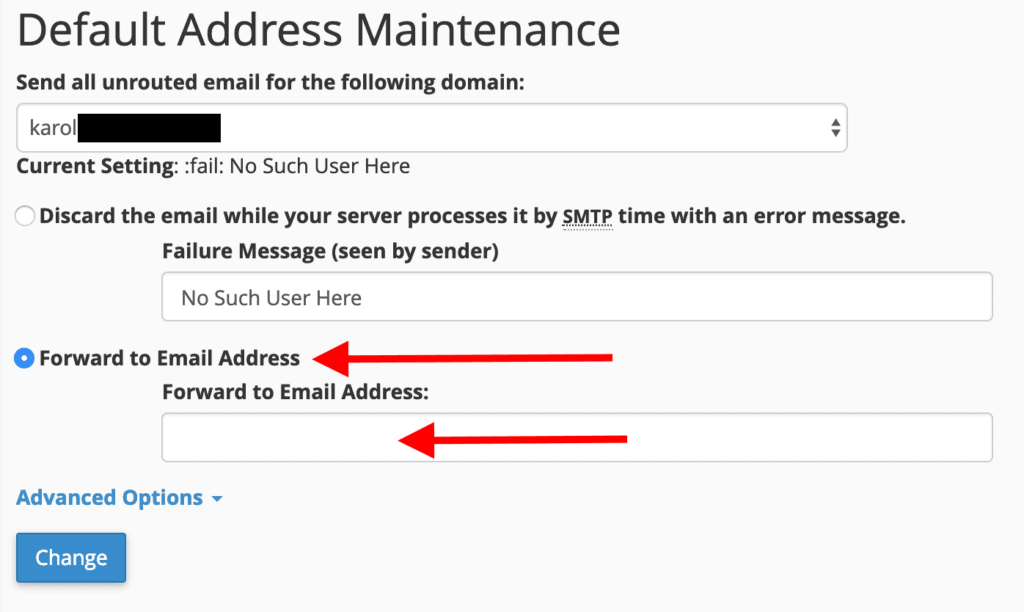
- Select your domain name from the drop-down menu.
- Tick the box labeled “Forward to Email Address.”
- Enter your existing email address into the field below.
- Click the “Change” button.
Your default address is now configured.
Setting Up Spam Filters
Spam is a persistent annoyance, but cPanel provides tools to prevent it from reaching your inbox. Click on “Spam Filters” to review the available options.
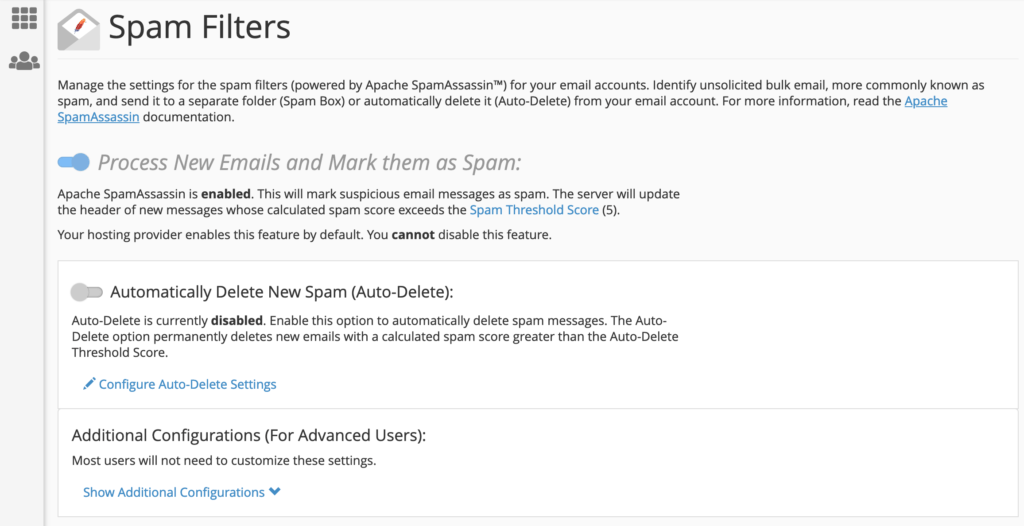
Depending on your web host’s settings, you may find that spam filters are enabled by default and cannot be disabled. However, you can often fine-tune how these filters operate. It's generally advisable to avoid enabling “Automatically Delete New Spam.” While seemingly convenient, spam filters can sometimes produce false positives, mistakenly categorizing legitimate emails as spam. By not auto-deleting, you retain the ability to periodically check your spam folder for any important messages that might have been misidentified.
Under “Additional Configurations,” you’ll find a link to reveal more options. Clicking this will display additional settings:
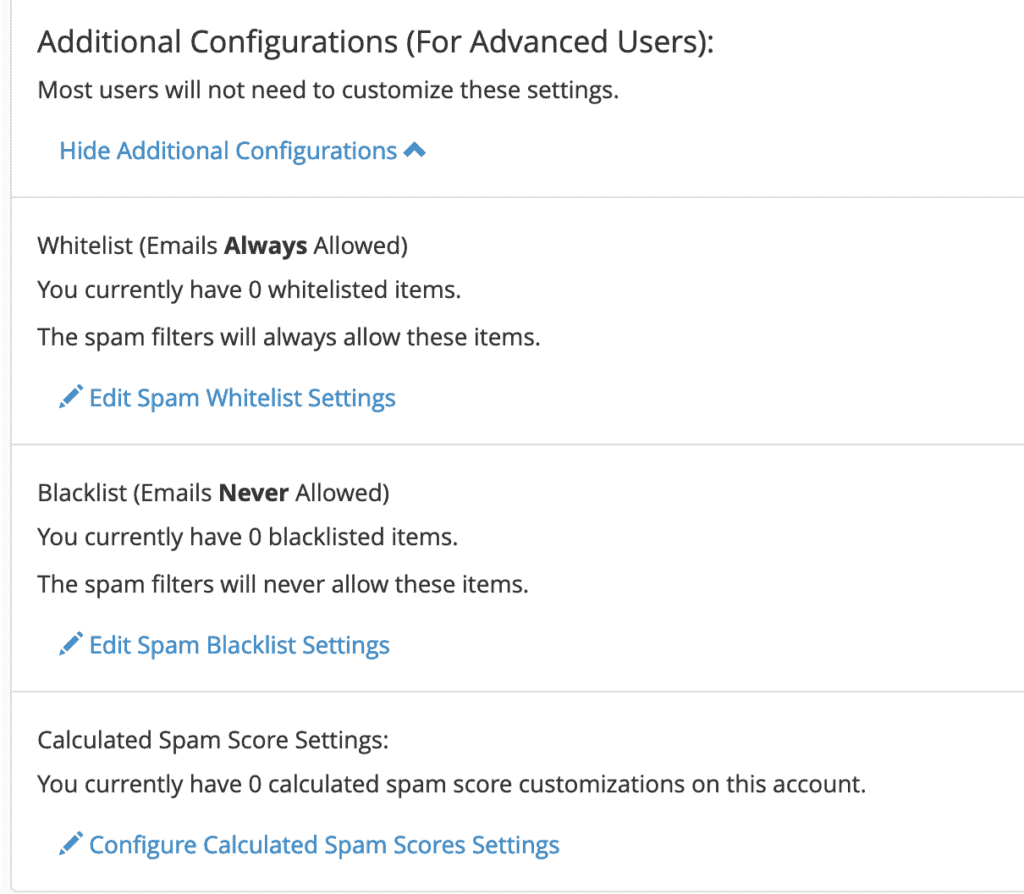
You can experiment with these settings to manually whitelist or blacklist specific email addresses. It’s a good practice to whitelist all email addresses from your company or other critical contacts within your network to ensure their messages always reach you.
Managing Your Files
The “FILES” section of cPanel is your dedicated area for uploading files, performing website backups, and managing your files via FTP (File Transfer Protocol).
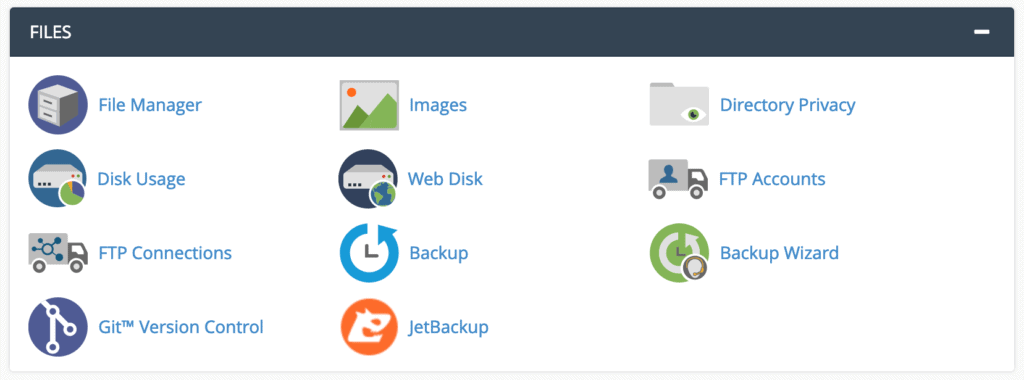
FTP allows you to manage your website's files, including uploading, reading, and retrieving them, using a client application such as FileZilla. Alternatively, cPanel also offers built-in tools for file management, which we will cover next.
Using the File Manager
The “File Manager” is a key tool within the “FILES” section, allowing you to manage all your website’s files directly from the cPanel interface, eliminating the need for a third-party FTP tool. Click on the “File Manager” icon to begin. You will see a central panel similar to this:

This is where all the files on your server are located, so it is essential to exercise extreme caution when making any modifications. On the left, you will find your root (main) folder and its sub-folders. The middle of the screen displays the contents of the currently selected folder.
Here are some common tasks you might perform:
Create a New Folder
To create a new folder, simply click the “+ Folder” button in the top menu.

You will then be prompted to name your new folder and specify its creation destination.
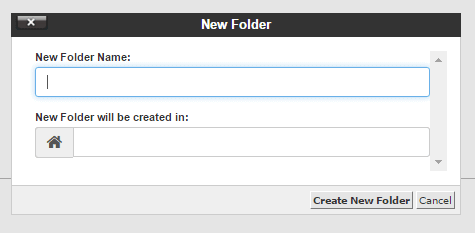
Once done, click “Create New Folder.”
Uploading a File Using File Manager
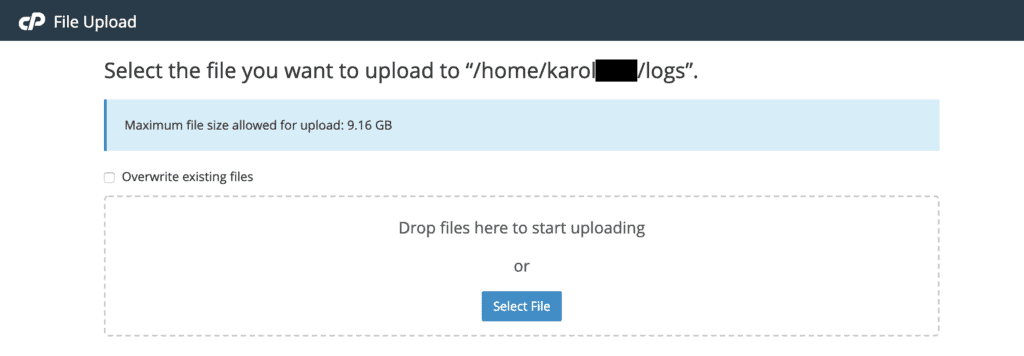
To upload a file, such as a large video or a high-resolution photo for your website, first select the target folder. Then, click the “Upload” button in the top menu.

You will be given the option to drag and drop the file or select it from your local drive.
Note: If your website software (e.g., WordPress) allows file uploads directly through its user interface, it is generally easier to use that method. This ensures the file is immediately recognized by your website. Uploading files via File Manager or FTP may require additional steps for your website software to detect them.
Accessing Your Main FTP Account
Depending on your web host’s cPanel configuration, you might be able to log in to your main FTP account using the same cPanel username and password. To verify this, navigate to “FTP Accounts” from the “FILES” section and scroll down to “Special FTP Accounts.” Your main FTP account should be listed there.

By default, the main FTP account typically has access to the root folder of your hosting space.
Adding a New FTP Account
Creating separate FTP accounts for different projects or websites is a recommended security practice. This allows you to grant each individual account access only to the specific folders it needs, rather than the entire web server. To create new FTP accounts, click on “FTP Accounts” from the “FILES” section.
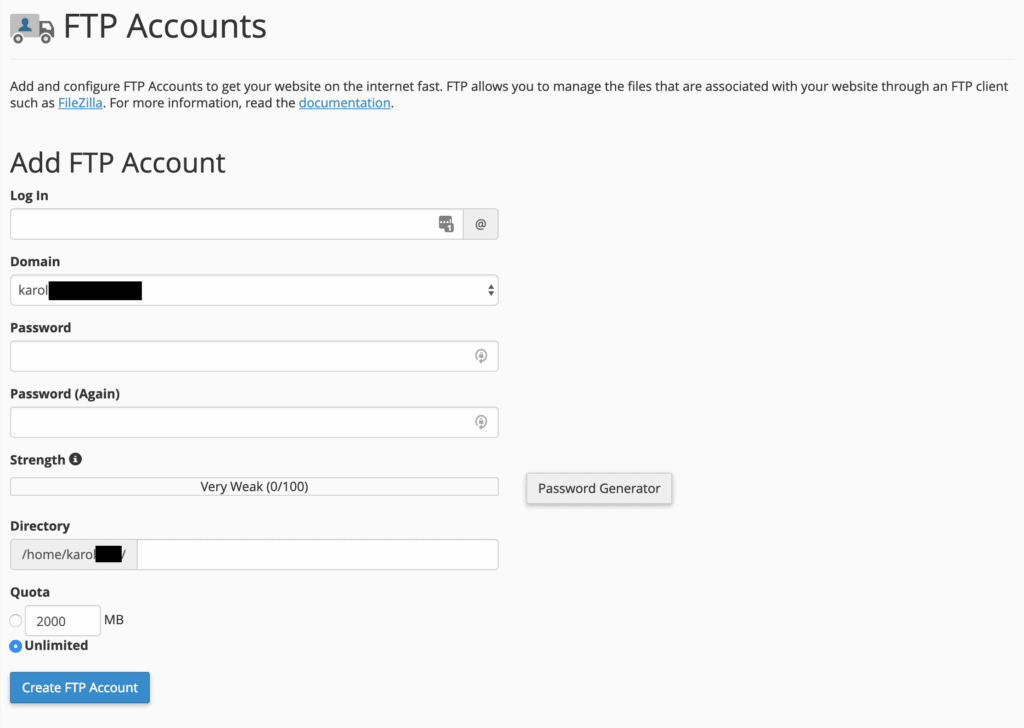
Here’s how to complete the form and set up a new account:
- Log In – This will be the username for the new FTP account.
- Domain – Select the domain name to which the new user account will be assigned from the drop-down menu.
- Directory – This defines the highest level of directory access for the new FTP account. If left blank, the user will have access to the root. It is best to specify the directory associated with the particular project or website the account is for.
- Quota – Set the maximum disk space the new user can occupy. It is often advisable to leave this at “Unlimited.”
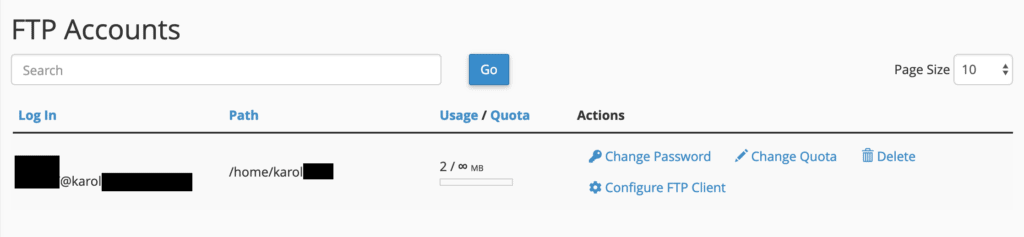
After clicking “Create FTP Account,” the new user will be added. You can manage your existing FTP accounts on the same page, located below the new user form.
Databases
Most modern websites rely on a database operating in the background to manage and store their data. Essentially, all your website’s content, including pages, posts, and user information, is housed within a database.
As expected, cPanel provides an extensive module for creating and managing these databases.
Creating a Database
If you plan to set up any contemporary website using a Content Management System (CMS), you will first need to create a database for it. The “DATABASES” section of cPanel offers several options.
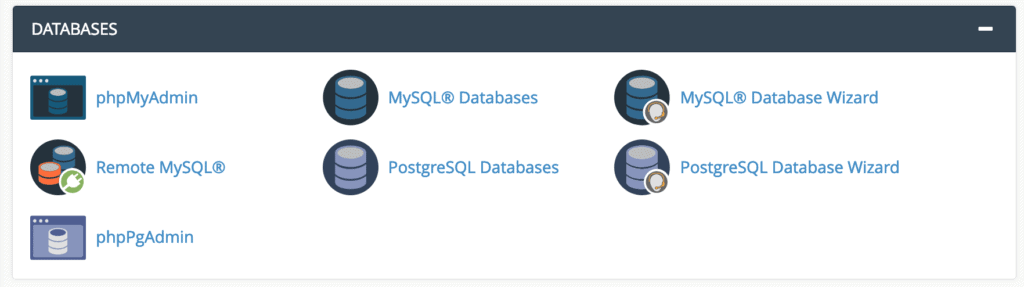
Notably, cPanel supports both MySQL and PostgreSQL databases. For this guide, we will focus on MySQL, as the process for PostgreSQL is very similar. To create a new database, click on “MySQL Database Wizard” within the “DATABASES” section.
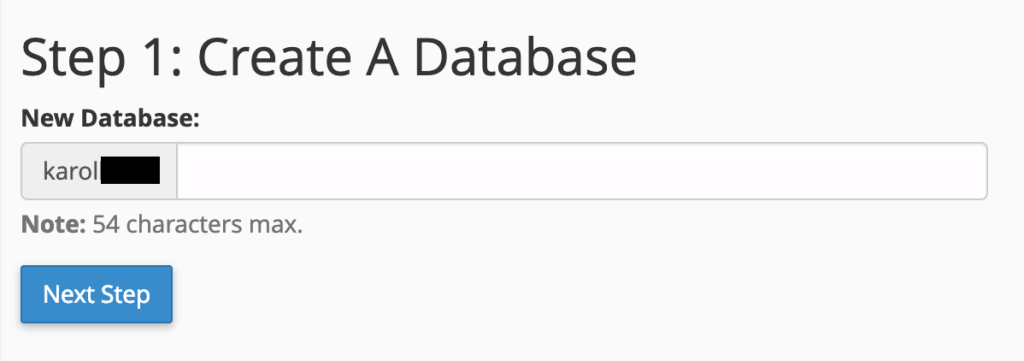
You can then proceed with setting up your new database:
Step 1: Assign a name for your database.
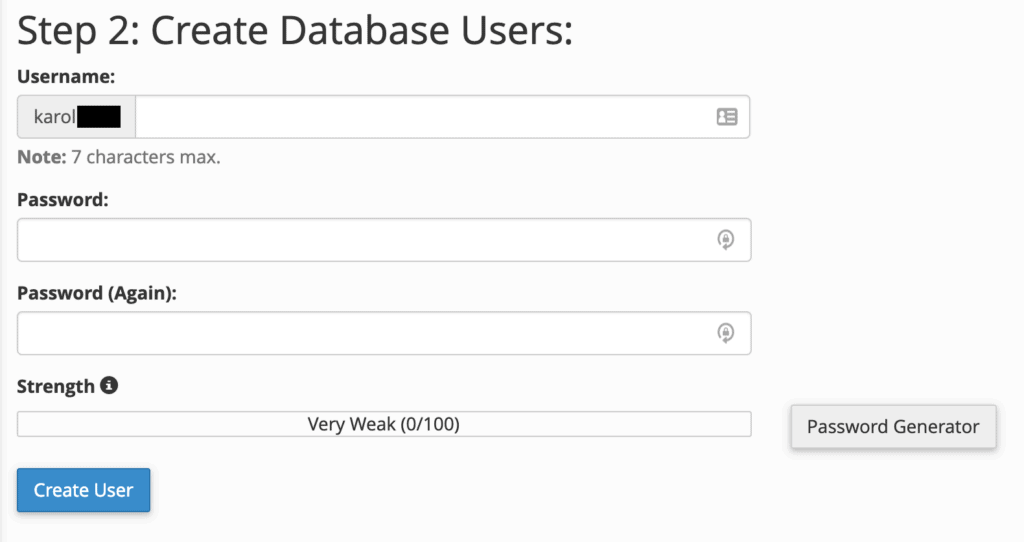
Step 2: Create a database user who will be responsible for accessing the database. This step is mandatory for future interaction with the database.
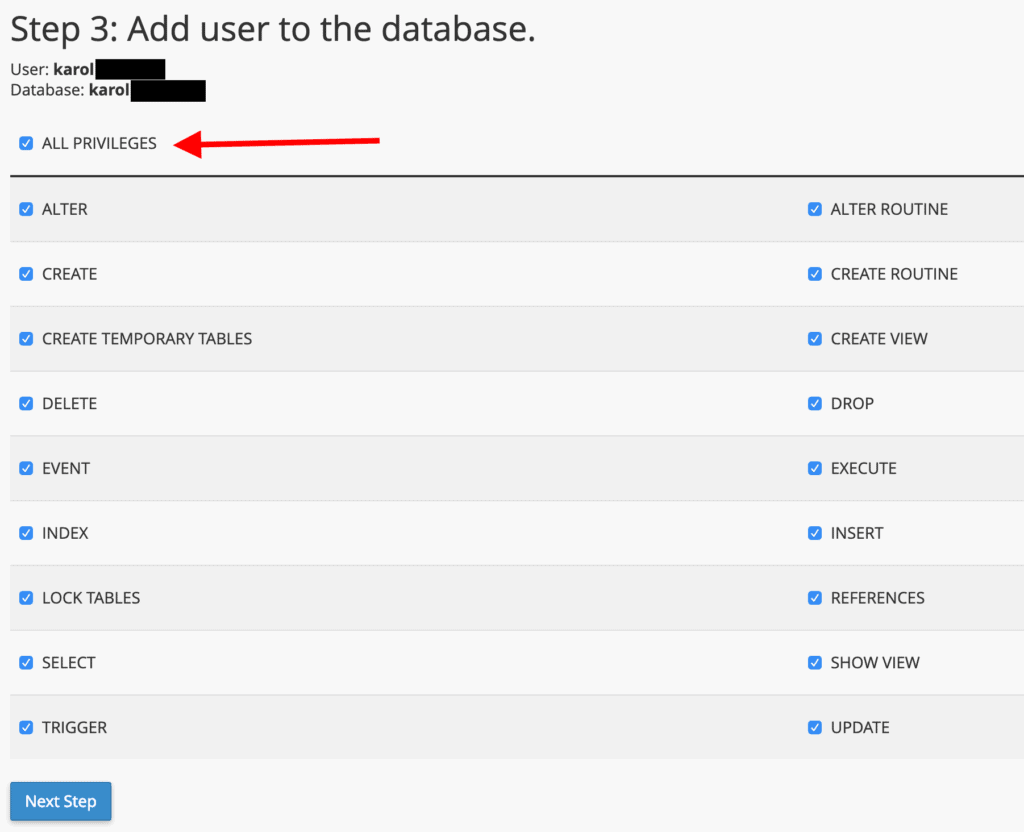
Step 3: Grant the necessary privileges to the new database user. It is generally recommended to select “ALL PRIVILEGES.”
Step 4: Completion. Your new database has now been successfully configured.
To view it, return to the main cPanel page and click on “MySQL Databases.”
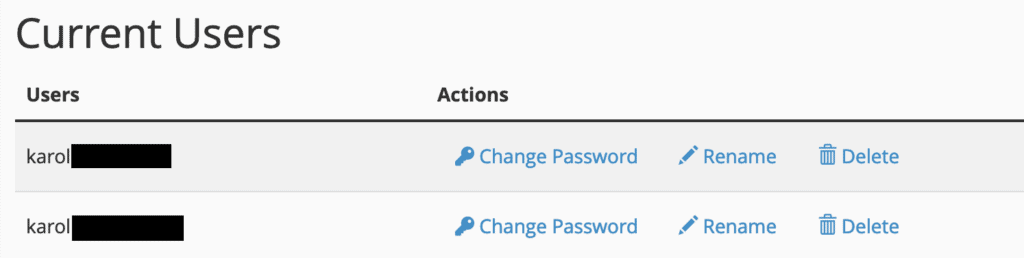
Managing Databases
To view all your existing databases, go to “MySQL Databases” from the “DATABASES” section of cPanel.
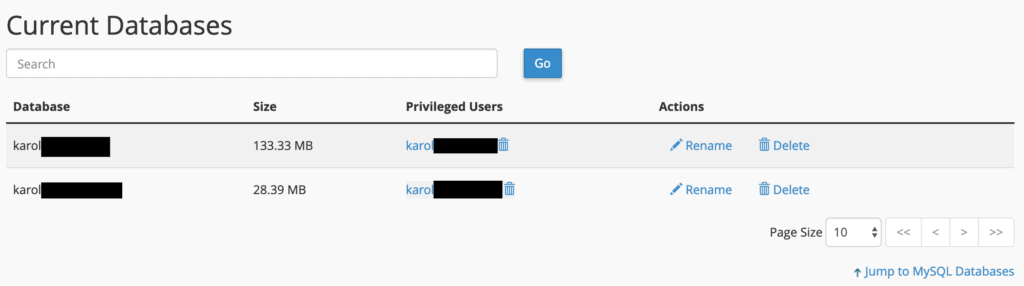
Each database can be renamed or deleted using the links provided on the right. Additionally, you can manage your database users further down the page.
One-Click Installs (WordPress and Other Applications)
This section of the cPanel guide will demonstrate how to easily install WordPress and other valuable server applications, significantly accelerating the process of getting your website operational. First, locate the “SOFTWARE” section in your cPanel, then click on “Softaculous Apps Installer.”

The name of this tool can be a bit misleading, as it facilitates the installation of not just applications but also a wide range of content management systems. You will encounter a screen similar to the following, showcasing numerous applications available for installation, accompanied by a convenient menu on the left.

Softaculous features a vast library of web applications, including installers for blogs, microblogs, forums, wikis, e-commerce platforms, and much more. While you are welcome to explore the diverse offerings, this guide will focus on installing WordPress, the most popular and widely used website platform.
Installing WordPress
Installing WordPress via Softaculous is a remarkably simple process. The WordPress logo will typically appear as the first option in the central part of the screen. Hover your mouse cursor over this icon, and an “Install” button will become visible. Click it.

Click the blue “Install Now” button to commence the installation. Softaculous will then present you with the following form:

Here’s a detailed explanation of the fields Softaculous requires before performing a WordPress installation:
The “Software Setup” section:
- Choose the version you want to install. It is always recommended to select the latest available version (the highest number).
- Choose Protocol. Ideally, select
https://if it is available, as this enables integration with an SSL certificate for secure browsing. If not,http://will suffice. - Choose Domain. Select the domain name where you wish to install WordPress from the drop-down list.
- In Directory. Leave this field empty if you are installing WordPress to the root of your domain (e.g.,
YOURDOMAIN.com). If you are adding WordPress as a blog to an existing site, you might set the directory to something likeblogornews.
The “Site Settings” section:
- Site Name. Enter a name that accurately reflects your website. You can easily modify this later within WordPress.
- Site Description. This can be left blank for now and adjusted later within WordPress.
- Enable Multisite. Leave this unchecked. This feature is primarily for advanced users planning to run multiple WordPress installations on the same domain in a multi-site configuration.
The “Admin Account” section:
- Admin Username. This field is crucial for security. While
adminis a common default, it is highly recommended to choose a more complex and unique username (e.g.,my-dog-likes-cuddles). A less predictable username significantly enhances your site's security against unauthorized access. - Admin Password. Create a very strong password using a combination of letters, numbers, special characters, and both uppercase and lowercase letters. The installer will often suggest a secure password; using it and saving it to a password manager like LastPass is an excellent practice to avoid memorization while maintaining high security.
- Admin Email. Double-check that this email address is correct, as it will be used for important notifications.
The “Choose Language” section:
This is straightforward. Select the language that aligns with your website’s target audience. For example, if you are targeting a Spanish-speaking audience, choose Spanish as the WordPress language.
The “Select Plugins(s)” section:
This section is optional. While you can install some useful plugins directly through Softaculous, it is often easier to install and manage plugins later on, once WordPress is fully operational.
The “Advanced Options” section:
For most users, there is no need to interact with any of the advanced options at this stage.
The “Select Theme” section:
Depending on your host’s Softaculous configuration, you might have the option to select a WordPress theme to be installed immediately. However, it is generally recommended to bypass this for now. Choosing a theme is an important decision, and it is often easier to do so after your WordPress installation is complete, as Softaculous offers a limited selection compared to the vast options available directly within WordPress.
Once you have reviewed all these options, click “Install” to finalize the installation.
After a brief period, Softaculous will confirm that WordPress has been successfully installed. You will also be provided with direct links to log in to your new WordPress installation. Typically, you can access your WordPress admin panel by navigating to YOURDOMAIN.com/wp-admin/.
Backing Up Your Website
Anyone who has experienced data loss on a phone or computer understands its devastating impact, especially when it concerns your website, which is often integral to your business. Fortunately, cPanel simplifies the process of preventing such tragedies by allowing you to manually back up your site at any time.
Note: Some WordPress hosting providers offer automatic backups. It is advisable to confirm this with your hosting provider. Nevertheless, understanding how to perform manual backups remains a valuable skill.
To initiate a backup, click the “Backup Wizard” icon within the “FILES” section of cPanel.

You will then see the following screen:

Click the “Back Up” button to commence the backup process. You will be presented with the option to choose between a full backup (encompassing all files and configurations on your websites) or partial backups (home directory, MySQL databases, email forwarders & filters).
For simplicity and comprehensive protection, it is often best to back up your entire account and save it to an external hard drive or another secure location.

Once the backup is complete, you will be able to download the backup file.
Checking Your Disk Space
While some hosting setups offer unlimited disk space, others impose specific limits. You can monitor your disk space usage directly through cPanel.
Note: Regularly checking your disk space is important for identifying which parts of your website are consuming the most room. This allows you to compress or delete unnecessary files if you are approaching your storage limit.
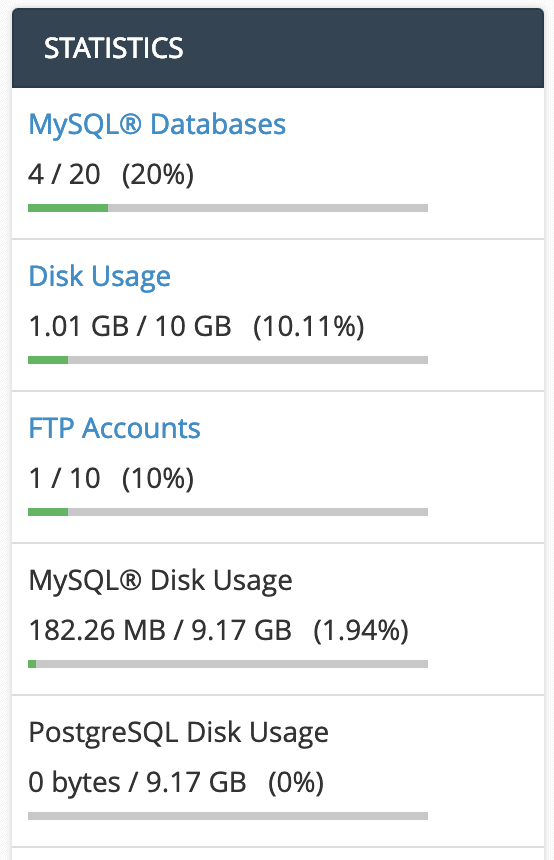
For a general overview of your usage, refer to the right sidebar of cPanel, where you will find information on disk space consumption, the total number of databases configured, and more.
For a more detailed analysis, click on the “Disk Usage” icon from the “FILES” section.

This will provide a clear summary of how much space each of your different folders is occupying.

Your quota or limit is also displayed at the bottom of the first table, for example, 10,240MB (or 10GB). It is important to remember that a full blue bar does not necessarily mean you have exhausted all your space; all presented figures are relative to the largest directory.
Checking Your Website Statistics
The “METRICS” section within cPanel provides valuable insights into your website's performance and server status.

Here, you can find a wealth of interesting details that inform you about the current state of your server, visitor traffic, and the overall health of your hosting setup.
Each statistics sub-section offers a slightly different perspective on your website’s data:
- Visitors, Raw Access, Awstats, and Webalizer all focus on the number of visitors your websites have received, with varying presentation styles.
- Errors displays the most recent entries in your website’s error logs, which can be crucial for troubleshooting.
- Bandwidth allows you to monitor the bandwidth usage of your hosting setup.
- Webalizer FTP provides data on all visits conducted through the FTP protocol.
- CPU and Concurrent Connection Usage shows the volume of machine resources consumed by your hosting setup, helping you understand server load.
This guide has provided a comprehensive overview of cPanel and its essential functionalities for managing your hosting environment. With the knowledge gained, you should now be proficient in navigating cPanel to set up and maintain your website effectively.
As your website is now likely operational, the next steps involve customizing its appearance with themes and enhancing its functionality with plugins, followed by creating compelling content to engage your audience.
