
How to Easily Create a Staging Site for WordPress (Step by Step)
- Wednesday, 10th September, 2025
- 16:01pm
When it comes to implementing updates or making significant modifications to your WordPress website, performing these directly on the live site can introduce considerable risk. This is precisely where the utility of a staging site becomes indispensable.
A staging site serves as a perfect, exact replica of your live website. It provides a secure and isolated environment where you can thoroughly test new features, troubleshoot potential issues, and refine design or content updates without any impact on your live audience. Many experienced website owners consistently utilize staging sites to evaluate website updates before publishing them to their production environments. This proactive approach significantly mitigates the risk of downtime, broken functionalities, and other unforeseen complications that could arise from direct changes.
This comprehensive, step-by-step guide will walk you through the process of easily establishing a staging environment for your WordPress site. We will explore several distinct methods, many of which can be implemented with just a few clicks, making the process accessible even for users without extensive technical expertise.
What Is a Staging Site?
A staging site is essentially a duplicate of your live website specifically designed for testing purposes. Its primary function is to allow you to preview and validate any changes, updates, or new functionalities in an environment identical to your live site before those modifications are made publicly accessible. By doing so, staging sites play a crucial role in helping you identify and rectify errors, thereby preventing potential issues and ensuring the stability of your production website.
In the past, setting up a WordPress staging site was often a complex and challenging task, typically requiring advanced technical skills. However, the landscape has evolved significantly, and modern solutions have made this process much more straightforward, enabling even non-technical users to create and manage staging environments with relative ease.
While some users might choose to install WordPress locally on their computers (either Windows or Mac) to test changes, and then later upload those changes to their live server, this approach presents a significant drawback. A local testing environment may not precisely mirror the configuration of your live web hosting server. This discrepancy can lead to situations where something that functions perfectly on your local machine might encounter issues or entirely fail once deployed to the live server.
Since a staging site resides on your actual web hosting server, it inherently operates within the same server configuration as your live site. This eliminates the environmental inconsistencies often found with local setups, allowing you to prevent many common errors and ensuring a more reliable testing process.
With a clear understanding of what a staging site offers, let's now delve into the various methods for setting up a staging site for WordPress.
How to Easily Create a WordPress Staging Site
There are multiple effective ways to establish a staging site for your WordPress installation. The most straightforward and often recommended method involves utilizing the built-in staging site feature provided by your hosting provider.
Many leading WordPress hosting companies now offer convenient one-click staging website solutions as part of their services. If your website is hosted with one of these providers, you can typically create a staging site quickly and effortlessly, streamlining your development workflow.
However, if your current hosting solution does not include a dedicated staging feature, don't worry. This guide also provides alternatives, including how to create a WordPress staging site using a specialized plugin and even a manual method for advanced users.
For quicker navigation, you can refer to the sections below to jump directly to the method most relevant to your situation:
- Creating a Staging Site Using a Hosting Provider's Feature
- Creating a Staging Site Using a WordPress Plugin
- Creating a Staging Site for WordPress Manually
Creating a Staging Site Using a Hosting Provider's Feature
Many top WordPress hosting companies offer intuitive one-click staging site solutions, simplifying the process of creating a test environment. The steps below illustrate a common workflow, using examples from popular hosting dashboards. The exact menu names and button labels may vary slightly depending on your specific hosting provider, but the underlying process remains similar.
Example: Using a Popular Hosting Provider's Dashboard
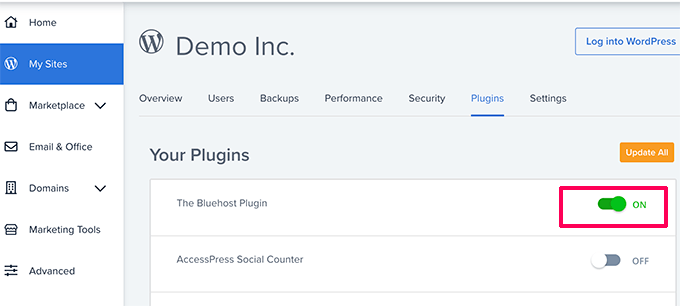
First, access your hosting dashboard and navigate to the ‘My Sites’ or ‘WordPress’ section, which typically lists all your installed WordPress websites. Look for an option related to managing WordPress installations or plugins. Some providers integrate their staging functionality through a proprietary plugin that needs to be active.
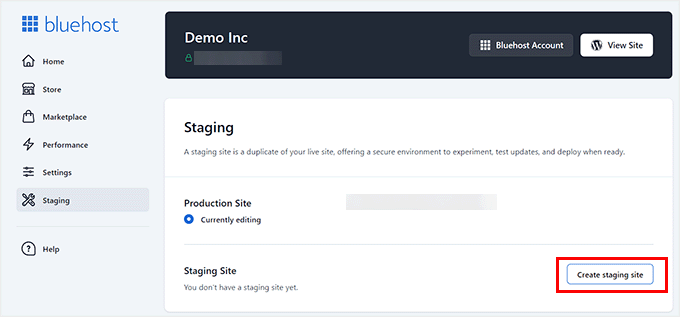
Once you are in the relevant section, such as a 'Staging' or 'Tools' tab within your WordPress admin area (often accessible via a custom hosting menu item), you will usually find an option to 'Create Staging Site'.
The hosting provider will then initiate the process of preparing the staging environment for your website. This typically involves copying your live site's files and database to a new, isolated location.
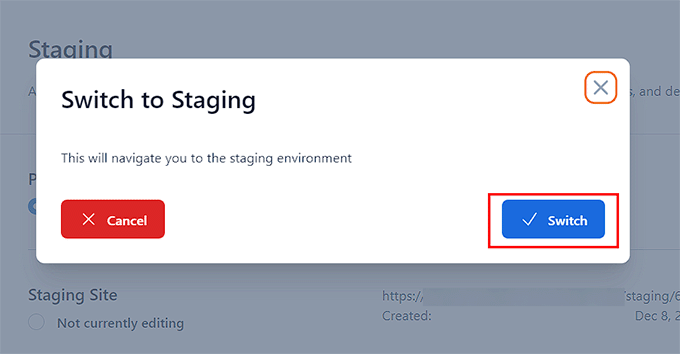
Upon completion, the dashboard will often display a 'Staging Site' section. You might need to confirm that you wish to switch your current working view to the staging environment, usually by clicking a 'Switch' or 'Edit Staging' button.
A confirmation prompt will appear, asking you to proceed with switching to the staging site. Confirm this action.
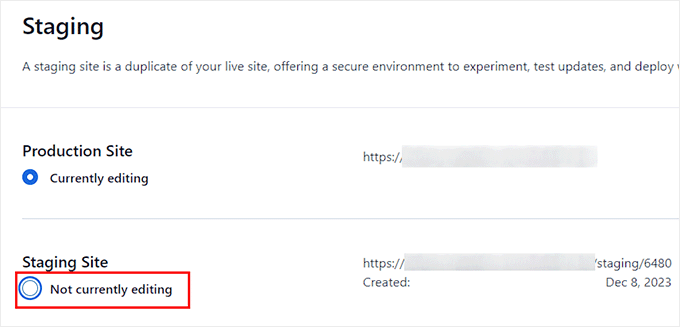
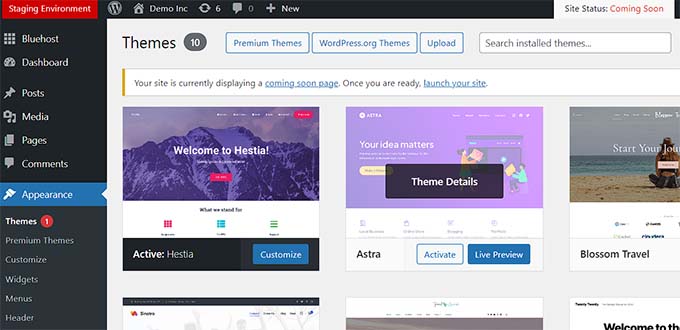
Once successfully switched, you will typically see a prominent notification or button indicating that you are currently working on the staging website. This visual cue helps ensure you distinguish between your live and staging environments. You can now proceed to make changes and conduct tests on your website without any concern about affecting your live, production site.
Deploying Changes From Staging to Live Site
After you have thoroughly tested your changes on the staging site and are confident in their stability and functionality, you can deploy them to your live website. This process is usually managed from the same staging interface within your WordPress admin or hosting dashboard.
Navigate back to the staging section of your hosting settings. Here, you will typically find deployment options presented as a drop-down menu or a set of buttons next to your staging website. Common deployment choices include deploying only the files, only the database, or deploying all changes (both files and database). If you are uncertain, selecting 'Deploy All Changes' is often the safest option to ensure a complete transfer of your modifications.
After selecting your deployment preference, click the 'Deploy Site' or 'Push to Live' button. A confirmation popup will usually appear, asking you to verify that you wish to deploy the staging site to your production environment. Confirm this action.
The hosting provider will then begin the process of deploying your staging site to the live site. The duration of this process can vary, depending on the size and complexity of your website. Once completed, you can typically switch back to your live website view to observe your changes in action.
Cloning Production Site to Staging
It's important to note that any changes you make directly on your live website after creating a staging environment are not automatically synchronized with your staging site. Therefore, if you plan to conduct further tests on your staging website in the future, you will need to refresh or duplicate your live site to the staging environment.
To perform this, return to the staging management section of your hosting dashboard. Look for an option such as 'Clone to Staging' or 'Sync Live to Staging'. Activating this feature will prompt your hosting provider to copy the latest version of your live website to your staging environment. Once this process is complete, you can then switch to the updated staging website for continued testing and development, ensuring your staging environment is always current with your production site.
Creating a Staging Site Using a WordPress Plugin
If your WordPress hosting provider does not offer a built-in staging site feature, an alternative solution is to create a staging website using a dedicated WordPress plugin. While effective, it's important to be aware of some potential considerations with this method.
Firstly, a plugin operates within the confines of WordPress and typically has more limited control over your hosting server's environment compared to a hosting provider's native staging tool. This can sometimes lead to varying results or require more manual intervention for specific configurations.
Secondly, some plugins might store your staging site on their own external servers. If data privacy and protection are significant concerns for your website, it's crucial to review the plugin's documentation regarding data storage and compliance.
Lastly, certain plugins may have known incompatibilities with specific themes, plugins, or server environments. Always check the plugin's compatibility information to ensure it will function correctly with your website setup.
With these points in mind, let's explore how to create a staging WordPress site using a reputable WordPress plugin.
The first step is to install and activate the chosen staging plugin. Once activated, the plugin will typically add a new menu item to your WordPress admin bar or sidebar. Clicking on this will lead you to the plugin’s settings page, where you may need to enter an API key or account credentials, usually obtained from the plugin's website after registration.
Next, navigate to the plugin's dedicated staging page within your WordPress admin area. Here, you will usually be prompted to provide a name for your staging site. This name often forms a part of the staging website's subdomain (e.g., staging.yourdomain.com).
It is highly recommended to enable the 'Password protect the staging site' option, if available. This feature is crucial for protecting your staging website from public view and preventing search engines from indexing it, ensuring your development work remains private.
After configuring these settings, initiate the staging creation process (e.g., by clicking a 'Create Staging Site' or similar button). The plugin will then proceed to create a backup of your WordPress files and database, and subsequently export them to establish your staging site. This process can take some time, depending on the overall size and complexity of your WordPress website.
Once the process is complete, the plugin will provide you with a link to your staging site and its administrative area. You can click this link to access your newly created staging environment and begin working on your updates.
While working on the staging site, you will typically observe a distinct visual indicator, such as a brightly colored message or bar in the admin area, confirming that you are currently operating within the staging environment. This helps prevent accidental modifications to your live site.
Deploying Staging Site to Live Using a Plugin
When you are ready to apply the changes made on your staging site to your live website, navigate to the plugin's 'Import Changes' or 'Push to Live' section within your WordPress admin dashboard. Click on the button to 'Check for Changes' or 'Scan Staging Site'.
The plugin will analyze the differences between your staging and live sites and present you with options for importing these changes. You can usually choose to import all changes, only file changes, or only database changes. Carefully review these options and select the most appropriate one for your deployment.
The plugin will then display the progress of the import process and notify you once it has successfully completed. After deployment, it is advisable to thoroughly test your live site to ensure all changes were imported correctly and that the website is functioning as expected.
Create a Staging Site for WordPress Manually
This method outlines the process of manually creating a staging site for your WordPress installation. It is generally intended for advanced users and typically requires more effort and technical understanding compared to the automated methods provided by hosting providers or plugins. A key disadvantage of the manual approach is that your live website may experience temporary unavailability when you deploy changes back from the staging environment to the production server.
That being said, let's explore how to manually set up a staging environment for your WordPress site.
Step 1: Create a Subdomain for Your Staging Website
First, you need to create a subdomain that will host your staging website. Access your hosting account's control panel (often referred to as cPanel or a similar dashboard). Navigate to the ‘Domains’ or ‘Subdomains’ section.
Here, you will find an option to 'Create a New Domain' or 'Add Subdomain'. You will need to specify your desired subdomain (e.g., `staging`) which will then be appended to your primary domain name, resulting in a URL like `staging.example.com`. After entering the subdomain, save your settings.
Your hosting control panel will then provision your new subdomain, which will serve as the location for importing your live WordPress site.
Step 2: Duplicate Your Live WordPress Site
Next, you will need to duplicate your live WordPress site. A common method for this involves using a reputable WordPress migration and backup plugin. Install and activate a robust plugin designed for this purpose on your live site.
Upon activation, access the plugin's menu in your WordPress admin sidebar and initiate the creation of a new backup or package. You can typically assign a name to this backup. The plugin will then run a wizard, performing checks to ensure everything is in order for the duplication process. If all prerequisites are met, proceed to build the package.
The plugin will then begin creating a complete backup package of your WordPress site, which includes all files and the database. This process can take several minutes, depending on the size of your website. Once finished, you will be provided with download options for the 'Installer' file and the 'Archive' package. Download both of these files to your computer.
You will then need to upload both of these downloaded files (the Installer and the Archive) to the file directory of the subdomain you created earlier. This usually involves using an FTP client or your hosting provider's File Manager tool to access the subdomain's root folder and place the files there.
Step 3: Create a New Database for Your Staging Site
Your new staging WordPress site will require its own separate database. Return to your WordPress hosting account’s control panel. Navigate to the ‘Databases’ section, typically labeled 'MySQL Databases' or similar.
Start by providing a unique name for your new database and then click the 'Create Database' button. Following this, you will need to create a MySQL user for this database. Scroll to the 'MySQL Users' section and enter a desired username and a strong password for your new database user.
Now, it's crucial to grant this user the necessary permissions to access and modify the database you just created. Locate the 'Add user to database' section, select the database and the user you just created from the respective dropdown menus, and then click the 'Add' button.
You will be prompted to select privileges for the user. Select the 'All Privileges' checkbox to grant full access, and then click 'Make changes' or 'Apply' to save your settings. Your new database is now ready for use with your staging website.
Step 4: Run the Installer for Your Staging Site
Open a new browser tab and enter the URL of your staging subdomain followed by `/installer.php` (e.g., `https://yoursubdomain.example.com/installer.php`). Remember to replace `yoursubdomain` with your actual subdomain and `example.com` with your own domain name.
This action will launch the plugin's installer wizard. In the 'Setup' section, the installer will request your WordPress database information. Your database host will typically be `localhost`. You will then enter the details (database name, username, and password) of the database you created in the previous step.
Click on the 'Validate' button to confirm that the installer can successfully connect to your database. Once validated, click the 'Next' button to proceed.
The installer will then unpack your WordPress database and files, importing them into your staging site's new database and file system. Upon completion, you will see a success message. You can then click on the 'Admin Login' button to access the WordPress admin area of your newly created staging site.
Your staging site is now set up. For security, it is highly recommended to protect it with a password.
Step 5: Password Protect Your Staging Subdomain
To secure your staging site, you should add password protection to its subdomain. Return to your hosting account's control panel (cPanel). Navigate to the ‘Files’ section and click on the ‘Directory Privacy’ icon.
Locate and select your subdomain's folder. Then, choose the option to 'password protect this directory'. You will be asked to provide a name for this protection and set a username and password. After configuring these credentials, click the 'Save' button.
Your staging site will now be hidden behind password protection, keeping it inaccessible to the public and preventing search engines from indexing its content. You can now safely work on your staging site and implement any desired changes.
Manually Deploy Staging Site to Live
When you are prepared to deploy the changes from your staging site to your live server using the manual method, you will essentially follow a similar set of steps in reverse, with critical considerations.
First, create a new backup package of your *staging* site using the same duplication plugin and download both the Installer and Archive files to your computer. Crucially, before proceeding, create a complete backup of your *live* WordPress site. This step is non-negotiable, as the following actions will involve overwriting your live site's data.
Once your live site is securely backed up, you will need to delete all WordPress files and folders from your live website's root directory. **Be extremely cautious during this step, as it will render your live WordPress site temporarily unavailable.**
Finally, upload the Installer and Archive files from your staging site's backup to your live site's empty directory. Then, navigate to your live domain followed by `/installer.php` (e.g., `https://yourdomain.com/installer.php`) in your browser to run the installer wizard. You will provide your live site's database details, and the installer will import your staging site's content and files, effectively replacing your live site with the staging version.
As evident, this manual deployment method carries inherent risks and is significantly more involved than automated solutions. Mistakes during this process can potentially lead to data loss or a broken live site. It is strongly advised to avoid this method unless absolutely no other alternative is available. For most users, relying on a reputable hosting provider's built-in staging features or a well-supported plugin offers a far more secure, efficient, and user-friendly approach to managing a staging environment.
