
How to Install n8n: A Comprehensive Step-by-Step Guide
- Saturday, 13th September, 2025
- 00:01am
Are you seeking an efficient solution to automate repetitive IT tasks that involve numerous applications and advanced technical requirements? n8n emerges as an ideal choice. It is a robust workflow automation tool designed to streamline operations by scheduling tasks and facilitating seamless data migration across the diverse array of applications, tools, platforms, and solutions essential to your team's daily activities.
This comprehensive guide aims to demystify n8n, providing a detailed walkthrough of its installation process and highlighting the compelling reasons why it is a preferred option among various AI automation tools available today. We will explore its core functionalities, delve into the practical steps for deployment, and outline the significant advantages it offers.
What is n8n?
n8n stands out as an exceptionally versatile automation tool, empowering users to design and implement highly customized workflows. Functioning much like a sophisticated digital assistant, it expertly manages repetitive tasks through scheduled execution. A key differentiator for n8n compared to many other automation tools is its diverse array of self-hosting options. This capability significantly enhances flexibility and effectively mitigates the risk of vendor lock-in, granting users greater control over their data and infrastructure. Furthermore, as a no-code/low-code platform, n8n is remarkably accessible, enabling individuals without extensive coding experience to construct powerful and automated pipelines with ease, eliminating the need to write complex code.
Key Features of n8n
n8n offers a comprehensive suite of features meticulously designed to optimize integration capabilities and streamline workflow management:
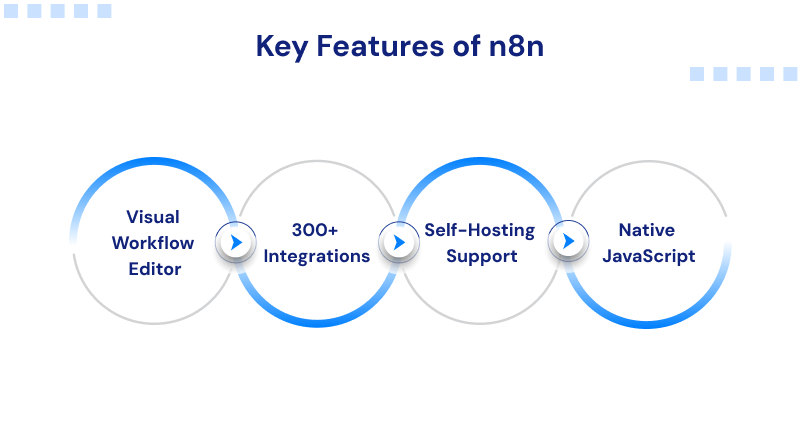
- Visual Workflow Editor: This intuitive drag-and-drop designer allows users to visualize, construct, and meticulously configure even the most complex automation sequences. Within the editor, you can effortlessly edit nodes, establish sophisticated conditional logic, and monitor the real-time execution flow of your workflows, ensuring complete control and clarity.
- Extensive Integrations: Boasting compatibility with over 300 applications and services, n8n facilitates smooth and efficient integration. Its vast library includes popular platforms such as GitHub, Google Sheets, Slack, MySQL, AWS, Discord, and numerous other essential tools, enabling a wide range of interconnected workflows.
- Robust Self-Hosting Support: n8n provides unparalleled flexibility through its robust self-hosting options. Users can deploy and manage n8n on their own infrastructure using technologies like Docker, Docker Compose, or directly on bare-metal servers. This grants complete autonomy over data, security protocols, and scaling strategies, allowing for bespoke configurations that precisely align with an organization's specific operational requirements.
- Native JavaScript Integration: For advanced users, n8n supports fine-tuning and extended functionality via its built-in Function and Function Item nodes. This feature allows the direct insertion of custom JavaScript code into workflows, providing the power to manipulate data, apply intricate business logic, or integrate with bespoke APIs in ways that transcend the limitations of traditional, pre-built integrations.
Before proceeding with the n8n installation, it is crucial to prepare your server environment. Begin by connecting to your server (e.g., via SSH or a web-based console) to install the necessary dependencies.
How to Install n8n: A Step-by-Step Guide
Preparing Your System for n8n Installation
First, update and upgrade your system's package lists to ensure all existing software is current and secure. This is a vital preparatory step for any new software installation.
sudo apt-get update && sudo apt-get upgrade -y
Once your system is up to date, you can proceed with installing n8n. One common method is to install it within a Node.js environment.
Installing Node.js and npm
To begin, install curl and execute the Node.js setup script. This script configures your system to download Node.js from its official repository.
curl -fsSL https://deb.nodesource.com/setup_18.x | sudo -E bash –
Next, install Node.js and npm (Node Package Manager) using the system's package manager.
sudo apt-get install -y nodejs
After the installation completes, verify that both Node.js and npm have been successfully installed and are accessible by checking their versions.
node -v

npm –v
With Node.js and npm in place, you can now consider how you wish to run n8n, whether directly or within a containerized environment like Docker.
Containerized Installation with Docker
For those preferring a containerized environment, installing n8n with Docker is an excellent option. First, you'll need to install Docker itself.
Installing Docker Dependencies
Begin by installing the necessary packages that allow apt to use repositories over HTTPS.
sudo apt-get install -y apt-transport-https ca-certificates curl software-properties-common
Adding Docker's GPG Key
Next, integrate Docker’s official GPG key. This key verifies the authenticity of Docker packages.
curl -fsSL https://download.docker.com/linux/ubuntu/gpg | sudo gpg --dearmor -o /usr/share/keyrings/docker-archive-keyring.gpg
Installing Docker Engine
Now, add the Docker repository to your system's sources and proceed with installing the Docker Engine, Docker CLI, and Containerd.
echo "deb [arch=amd64 signed-by=/usr/share/keyrings/docker-archive-keyring.gpg] https://download.docker.com/linux/ubuntu $(lsb_release -cs) stable" | sudo tee /etc/apt/sources.list.d/docker.list > /dev/null

sudo apt-get update

sudo apt-get install -y docker-ce docker-ce-cli containerd.io
Verifying Docker Installation
Confirm that Docker has been successfully installed by checking its version.
docker –version
Setting Up n8n
Once all prerequisites are met, you can proceed with the n8n setup. The installation method will vary slightly depending on whether you chose a direct Node.js installation or a Docker-based deployment.
Installing n8n with npm (Node.js Environment)
If you have Node.js and npm already installed, you can effortlessly install n8n globally using npm.
npm install -g n8n
To run n8n and keep it active even after disconnecting from your SSH session, it's recommended to use a screen session. Start a new screen session named 'n8n':
screen -S n8n
Within this newly created screen session, launch n8n:
n8n
To detach from the screen session while keeping n8n running in the background, press CTRL+A followed by D. If you need to re-attach to your n8n session later, simply run:
screen -R n8n
By default, n8n operates on port 5678. You can now access your n8n instance by navigating to http://your-server-ip:5678 in your web browser. Please note that at this stage, you might encounter a secure cookie error, which is often resolved by setting up an SSL certificate – a topic for advanced configuration.
Running n8n with Docker for Persistent Data
When running n8n within a Docker container, it's crucial to ensure data persistence. By default, data inside a Docker container is ephemeral. To prevent data loss and save your workflows and settings, you should run n8n with a mounted volume. This command creates a named Docker container, maps the necessary port, and links a local directory to the container's data directory.
docker run -d --name n8n -p 5678:5678 -v ~/.n8n:/home/node/.n8n --restart always n8nio/n8n
This command effectively links your local ~/.n8n directory to the dedicated data directory of n8n within the Docker container, ensuring all your work is securely stored.
Occasionally, Docker containers may fail to start due to insufficient file permissions. To rectify this, execute the following commands to assign the appropriate ownership and permissions to your n8n data directory.
sudo chown -R 1000:1000 ~/.n8n
sudo chmod -R 755 ~/.n8n
After adjusting permissions, you can then start your n8n Docker container.
docker start n8n
Once the container is running, you can access your n8n interface via http://your-server-ip:5678 in your web browser.
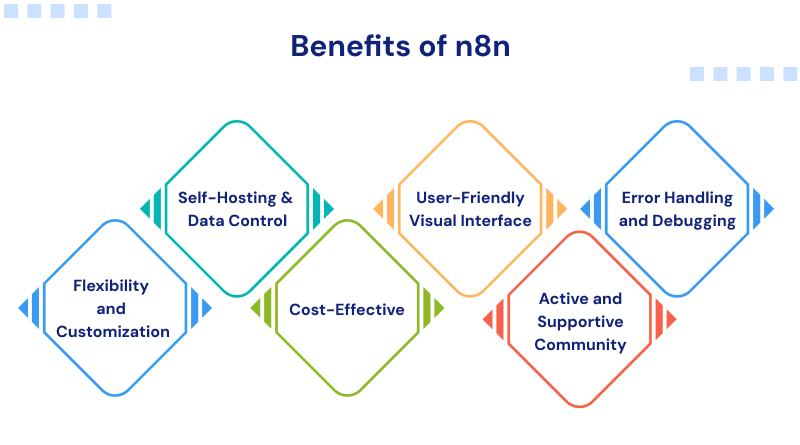
Benefits of Utilizing n8n
n8n offers a compelling array of advantages that make it a standout choice for automation.
1. Unmatched Flexibility and Customization
n8n empowers users with a remarkable degree of flexibility and extensive customization options. It adeptly combines the rapid development capabilities of no-code platforms with the profound adaptability of traditional coding. This unique blend allows you to construct bespoke extensions and seamlessly integrate JavaScript snippets directly into your workflows whenever advanced or specific logic is required.
2. Superior Self-Hosting and Data Control
One of n8n's most significant advantages is the option for self-hosting. This capability provides users with complete control over their data, ensuring enhanced privacy and absolute deployment autonomy. Unlike many cloud-based alternatives, self-hosting with n8n ensures your sensitive data remains entirely within your infrastructure.
3. Inherently Cost-Effective
As an open-source tool, n8n involves no licensing fees. The self-hosting model often proves to be a more economical choice compared to recurring subscription-based services, particularly as your automation requirements expand. This allows organizations to scale their automation solutions without incurring prohibitive costs.
4. Intuitive User-Friendly Visual Interface
n8n boasts an intuitive and highly visual interface, significantly enhancing usability and simplifying the creation of complex workflows. This design philosophy enables users to automate intricate processes with minimal coding knowledge, making powerful automation accessible to a broader audience.
5. Vibrant and Supportive Community
The n8n ecosystem is supported by a dynamic and highly proactive community. Members actively contribute to documentation, develop templates, create plugins, and share innovative workflows. This vibrant community makes it significantly easier for users to find assistance, discover best practices, and collaborate on solutions.
6. Advanced Error Handling and Debugging Capabilities
n8n is equipped with powerful debugging features that provide invaluable insights. Users can meticulously examine the raw JSON data as it traverses through their workflows, enabling precise and intuitive troubleshooting at any point in the automation process. This capability ensures robust and reliable workflow operation.
Conclusion: Unleashing Automation Potential with n8n
In summary, deploying n8n to your chosen server environment is a straightforward process, provided the necessary dependencies are correctly established. Whether you opt for a direct setup using Node.js or a containerized deployment with Docker, n8n consistently grants you complete autonomy and control over all your automation processes and underlying data. With just a few commands, you can establish your personalized automation server and begin seamlessly integrating applications, services, and custom logic to suit your specific needs.
Choosing to host n8n independently offers multifaceted advantages. Beyond being more flexible, cost-effective, and inherently secure than relying on third-party services, it also provides the invaluable ability to precisely tailor workflows to your unique business requirements. n8n empowers you to harness the agility of no-code development alongside the profound capabilities of custom code, all within a secure, fully self-managed operational framework. Whether your objective is to automate a simple, repetitive task or to engineer a sophisticated data pipeline, n8n equips you to operate with unparalleled efficiency and control. With the insights gained from this guide, you are now well-prepared to unlock the full transformative potential of automation.
Frequently Asked Questions (FAQs)
1. How is n8n installed using npm?
To install n8n globally via npm, first ensure that Node.js and npm are properly set up on your system. Then, simply execute the command npm install -g n8n in your terminal.
2. What are the methods for installing n8n on Windows?
On a Windows operating system, n8n can be installed by utilizing npm after a successful Node.js installation. Alternatively, you can opt for Docker Desktop, which provides a convenient and isolated containerized environment for running n8n.
3. Is n8n available at no cost?
Yes, n8n is an open-source platform, allowing you to host it freely under its fair-code license. It also offers a subscription-based cloud service for those who prefer a managed solution.
4. How can n8n be installed on Linux?
For Linux users, n8n can be installed using npm by running sudo npm install -g n8n. Another popular method involves deploying n8n within a Docker container, offering a consistent environment.
5. Is it possible to use n8n locally on my machine?
Absolutely. As an open-source tool, n8n is designed to be self-hosted and can be operated directly on your local machine. This gives you complete and direct control over your data and the execution of your workflows.
6. What is the process for creating a custom n8n node?
To develop your own n8n node, the general process involves initializing a new project, meticulously configuring the node's properties, writing the necessary code to define its operational logic, and then installing it to make it available for use within your n8n instance.
