


Introduction to JetBackup 5 Setup
Once you have successfully completed the JetBackup 5 Installation, the next crucial step is to configure the software for its initial use.
To begin, log in to your Admin Panel and navigate to the JetBackup section. Instructions for accessing JetBackup vary depending on your specific setup, and these are detailed below. If you are already familiar with how to access JetBackup, you may skip directly to the Initial Setup section.
Accessing JetBackup 5
JetBackup 5 offers straightforward access methods tailored to various control panel environments and standalone Linux systems. Understanding these access points is key to managing your backups effectively.
cPanel/WHM
For cPanel/WHM users, after a successful installation, you can access JetBackup 5 by navigating to WHM Home > Plugins > JetBackup 5. This path ensures direct access to the management interface.
DirectAdmin
If you are using DirectAdmin, access to JetBackup 5 is readily available through DirectAdmin (Admin Level) > Extra Features > JetBackup, providing a consistent entry point for administrators.
Interworx
Interworx users can find JetBackup 5 by going to NodeWorx Home > SiteWorx > JetBackup 5, integrating seamlessly into the existing control panel structure.
Please Note: JetBackup v5.3.16 is the latest version available for Interworx environments, ensuring you have access to the most recent features and stability improvements.
Plesk
Accessing JetBackup 5 in Plesk depends on your user interface view:
- Power User view: Navigate to Plesk Home > JetBackup 5 for a simplified access route.
- Service Provider view: Navigate to Plesk Home > Links to Additional Services > JetBackup 5 for comprehensive management capabilities.
Linux (Standalone Servers)
For standalone Linux servers, the JetBackup Panel can be accessed securely via your web browser at https://{hostname/ip}:3035. You will use the same login credentials as your root user for authentication. It is essential to ensure that Port 3035 is open on your server's firewall to enable both GUI and API access. Furthermore, if you plan to connect your server to the JetBackup Management Console for centralized management, Port 3032 must also be open to facilitate secure communications.
To configure and specify your own custom SSL Certificate(s) for the JetBackup Linux Panel, please refer to our detailed guide HERE, which provides step-by-step instructions for enhanced security.
IMPORTANT! For optimal security and system integrity on standalone Linux servers, it is crucial that account UIDs/GIDs are set to 1000 and above. UIDs/GIDs below 1000 are typically reserved for system accounts, essential services, and other specialized accounts. For more comprehensive information on user account management with UIDs and GIDs, please consult this resource: User account management with UIDs and GIDs.
To effectively include databases in your Linux Account Backups, leverage our dedicated Manage Databases plugin. This allows for proper assignment of databases to your Linux accounts, ensuring their inclusion in backup jobs.
Initial Setup Process
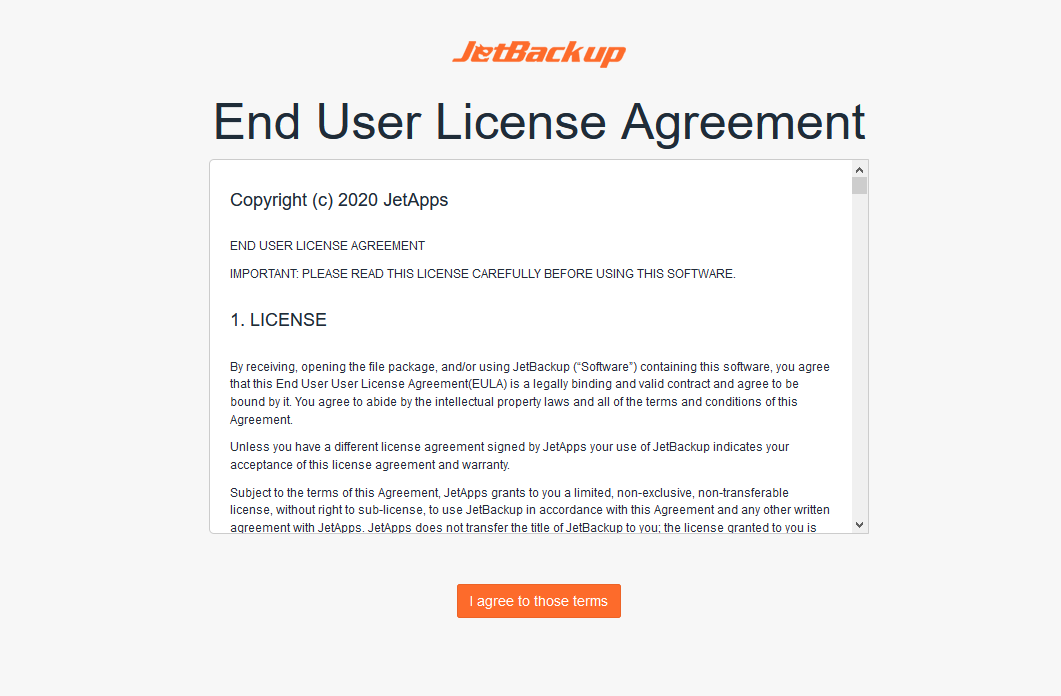
Upon your first launch of JetBackup, you will be presented with the JetBackup End User License Agreement (EULA). Carefully review the comprehensive terms and conditions outlined in our EULA. Once you are in full agreement with these terms, select the "I agree to those terms" option to formally accept the EULA and proceed with the initial setup configuration of JetBackup 5.
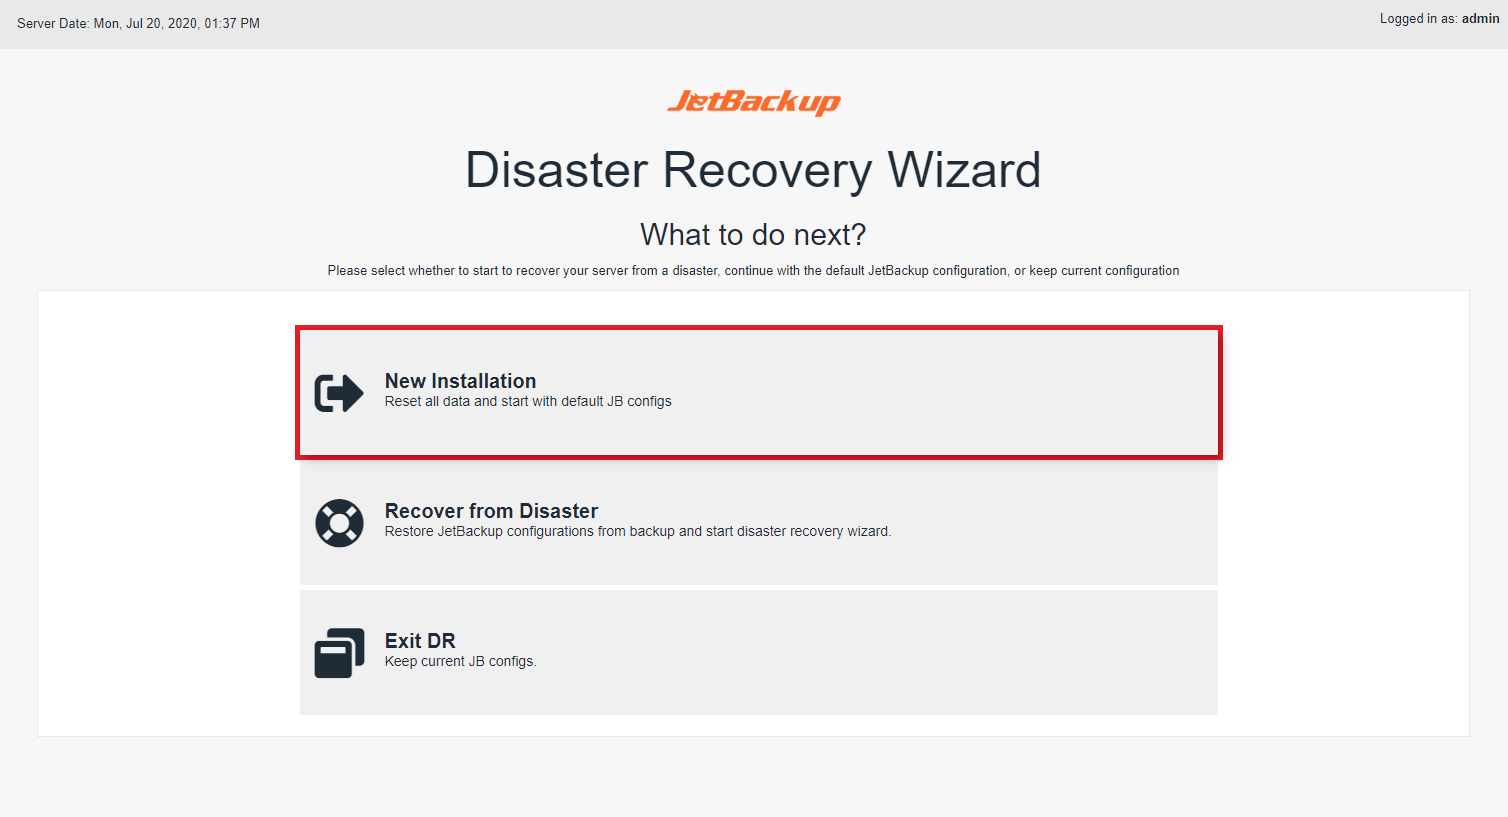
Disaster Recovery Wizard Options
After successfully accepting the EULA agreement, the Disaster Recovery Wizard will provide you with several critical options to initiate your JetBackup 5 configuration, catering to various installation and recovery scenarios.
New Installation
Selecting this option will perform a complete reset of any existing JetBackup 5 configuration, ensuring that the panel loads with a clean, default JetBackup 5 configuration. This choice is ideal for fresh installations or when you wish to start over with a pristine setup.
Recover from Disaster
This option is specifically designed to help you restore your JetBackup 5 configuration from a previously saved backup. This requires that you had "Export JB Config Enabled" on a designated destination prior to any data loss event. Crucially, you must also have securely saved the Master Encryption Key associated with that specific JetBackup 5 configuration to successfully complete the recovery process.
Exit DR
Choosing "Exit DR" will preserve any existing JetBackup 5 configuration on your server and proceed directly to load the JetBackup 5 Panel. NOTE: If this is your very first time installing JetBackup 5 on this server, it is strongly recommended to use the "New Installation" option instead to ensure a proper initial setup.
If your current objective is to recover from a significant data loss event (e.g., re-installing JetBackup after a total server data loss), please consult our comprehensive Disaster Recovery Guide for detailed, subsequent steps that will guide you through the restoration process.
Conversely, if an existing JetBackup configuration is already present on your server and you wish to maintain it, simply click on "Exit DR" to access the panel with your current settings intact.
Otherwise, for a fresh start with a clean installation and default configuration, select "New Installation" to log in to your JetBackup panel and begin your setup from scratch.
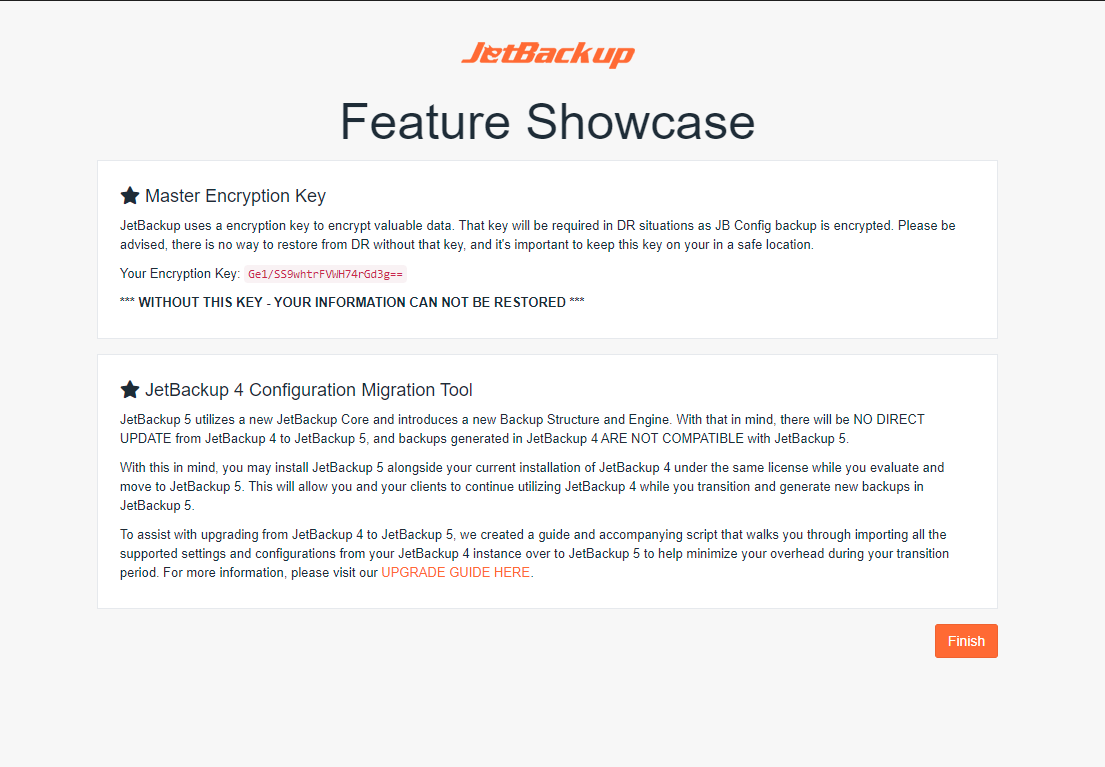
Feature Showcase and Important Announcements
Following a "New Installation," you will be directed to the Feature Showcase. This page prominently displays the newly generated Master Encryption Key, which is vital for Disaster Recovery purposes related to this specific JetBackup 5 configuration. It is imperative to record and store this key in a secure, remote location, as it is indispensable for restoring your configuration. Additionally, this section will periodically feature important announcements, such as details regarding our JetBackup 4 to JetBackup 5 Import Tool, designed to assist with migrating existing backups from previous versions.
Navigating the Dashboard
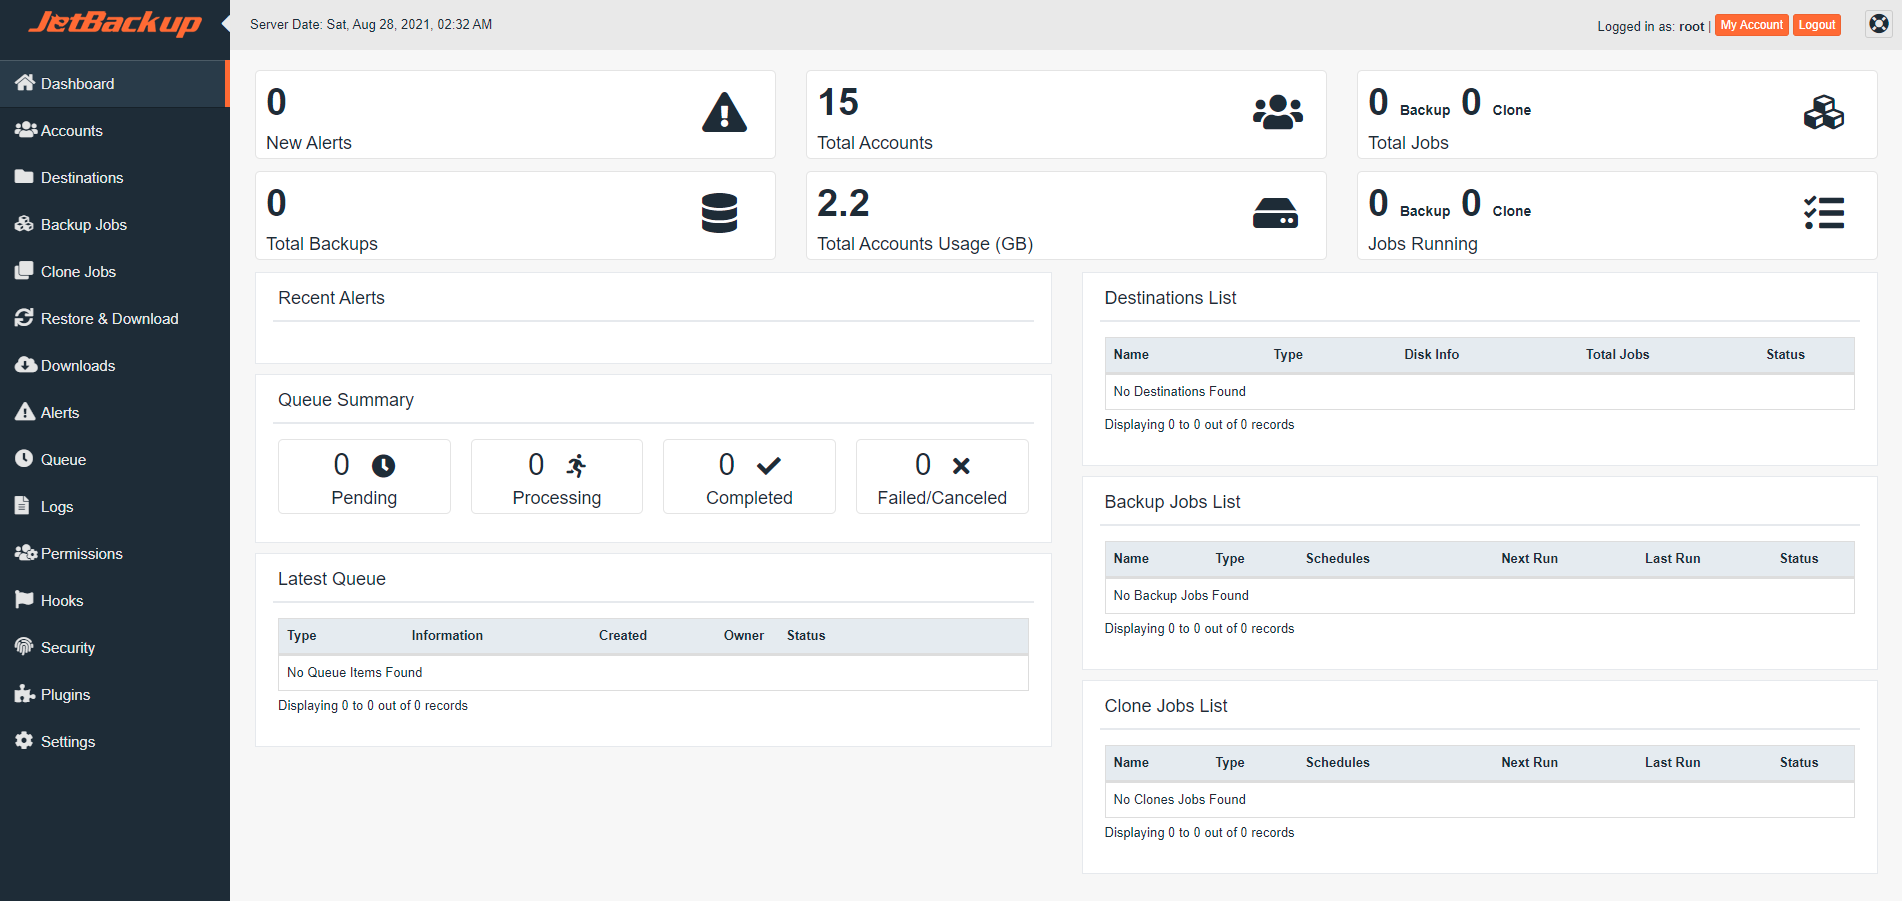
Once you are within the main JetBackup dashboard, your immediate next step should be to add a backup destination. This destination will serve as the primary or secondary storage location(s) for all your backups, dictating where your data will be securely stored.
Subsequently, we strongly recommend enabling Export JB Config on one of your chosen destinations. This critical feature ensures that your JetBackup configurations and settings are regularly backed up, which is absolutely essential for a more streamlined and seamless Disaster Recovery process should it ever be required.
With destinations now configured, you can then proceed to create your first backup job. To effectively set this up, you will need to determine the specific type of backup that best suits your requirements and server environment, considering factors like data sensitivity and retention policies.
Here are some of the most common backup types available within JetBackup:
- Local to Remote: In this setup, account data is copied directly to a remote storage folder, ensuring that no local backups are retained on the primary server. This is often preferred for off-site redundancy.
- Local to Local: This option involves copying account data to a specified local folder on the same server, ideal for quick restorations and local redundancy.
- General Files Backup: This type allows you to back up any specific files or folders on the server, irrespective of their association with user accounts, providing flexibility for system-level backups.
- MySQL Backups: Specifically designed to back up all databases associated with your accounts, ensuring your critical database information is consistently protected.
Configuring JetBackup Settings and Plugins
To further customize and fine-tune JetBackup to align perfectly with your operational needs and preferences, it is highly advisable to dedicate time to review your JetBackup Settings and explore the available Plugins. These configurations allow you to optimize performance, security, and functionality. Below is a shortlist of essential settings we particularly recommend for your attention:
-
Privacy & Security
This section allows you to define and set the User Agreement and Privacy Policy that will be presented to all users interacting with JetBackup on your system. Properly configuring these ensures compliance with data protection regulations and maintains transparency with your users.
Learn more about Privacy & Security settings. -
Delete orphan backups older than
This critical setting controls the retention period for backups associated with terminated accounts. You can specify the number of days JetBackup will retain these backups before automatically deleting them, helping to manage storage space efficiently and adhere to data retention policies.
Learn more about deleting orphan backups. -
Manual Backup Settings
JetBackup provides separate backup retention and Time-to-Live (TTL) settings specifically for backups that are generated manually. This distinction allows for more flexible and distinct management of on-demand backups versus regularly scheduled jobs.
Learn more about Manual Backup Settings. -
Concurrent Tasks
This crucial performance setting enables you to specify the maximum number of backup, restore, and download tasks that JetBackup can execute simultaneously. Adjusting this can significantly impact system load, overall backup completion times, and resource utilization.
Learn more about Concurrent Tasks. -
Server Master Encryption Key
JetBackup automatically generates a unique encryption key designed to secure your JB Config backups. It is of paramount importance to securely record and store this key in a safe, remote location, as it is indispensable for disaster recovery scenarios and restoring your entire JetBackup configuration.
Learn more about the Server Master Encryption Key. -
Plugins Overview
Plugins extend the core functionality of JetBackup, allowing for greater versatility and integration. Through the Plugin Manager, you can install various plugins to add support for different backup destinations, integrate with third-party messaging platforms for notifications, and enhance security features.
-
Manage Databases Plugin (Standalone Linux Only)
For servers operating without a control panel, installing and configuring the "Manage Databases" Plugin is essential. This plugin enables you to either automatically or manually assign databases and database users to specific accounts. NOTE: The "root" account is explicitly NOT listed as an account within JetBackup 5. For robust backup purposes, a new Linux user should always be created to store files/folders and subsequently assigned the desired databases/database users via the Manage Databases Plugin.
Learn more about the Manage Databases Plugin.
-
Optimizing Your Backup Efficiency
For optimal backup efficiency, reliability, and intelligent storage management, our expert recommendation is to implement a Local to Remote backup strategy, utilizing SSH as your primary storage destination. Here’s why this setup is highly effective for most environments:
During the initial run of a backup job, JetBackup will create a comprehensive full backup for all designated accounts. In all subsequent backup runs, the system intelligently identifies and backs up only new or modified file changes, rather than a full copy. This incremental approach significantly reduces backup times, minimizes bandwidth usage, and conserves storage space over time.
Furthermore, by activating "backup retention," JetBackup generates "point-in-time incremental backups." This sophisticated method leverages hardlinks, which minimizes disk space consumption by only storing the differences between backup points. For example, maintaining a 30-day backup retention for a 2GB account will typically only consume the initial 2GB plus the additional storage required for new or changed files accumulated over those 30 days. It is important to note, however, that at present, MySQL databases are fully dumped with each backup run as they do not yet support incremental backups in this specific context.
