


The Plesk Firewall is an essential tool designed to enhance the security posture of your Plesk for Linux server. By carefully restricting network connections both to and from the server, you can significantly mitigate potential security risks. This comprehensive guide will walk you through the process of adding and removing firewall rules and policies, demonstrating how to effectively block incoming connections from specific countries, and explaining how to export and import firewall rules to streamline the replication of configurations across multiple servers.
Caution: Both the Plesk firewall and firewalld are powerful tools for managing the underlying
iptablesfirewall on your Linux server. Utilizing both tools simultaneously can lead to conflicts and potentially close ports that are critical for Plesk's proper operation. For optimal stability and security, we strongly recommend using only one of these firewall management tools at any given time.
Managing Firewall Rules and Policies
The Plesk firewall configuration is fundamentally structured around two core components: policies and rules. Understanding their interaction is key to effective server security:
- Policies: These are broad directives that impact all network connections, either incoming or outgoing, depending on the specific policy. For instance, the "System policy for incoming traffic" can be configured to globally block all incoming connections to the server.
- Rules: In contrast to policies, rules offer a more granular level of control, specifically governing incoming connections to individual Plesk services, such as SMTP (for email) or MySQL/MariaDB (for databases).
A critical aspect of the Plesk firewall is that rules always take precedence over policies. This means if a global policy is set to deny all incoming traffic, but a specific rule permits incoming traffic from a particular IP address, the rule's allowance will override the policy's denial. This hierarchical mechanism provides a flexible way to either tighten or relax the security posture of your server.
For example, implementing policies that forbid all connections to and from the server, with exceptions only for a few explicitly allowed IP addresses or ports, will dramatically enhance security. However, this stringent approach might prevent certain applications from functioning correctly due to network restrictions. Conversely, adopting a default "allow all" connections policy and then using rules to block access to individual services or from specific IP addresses makes your server inherently less secure but ensures broader application compatibility and fewer connection issues. It's crucial to experiment and find the optimal balance between robust security and operational usability for your specific environment.
You have two primary methods for managing the firewall configuration:
- Modifying existing policies and rules, including the default settings.
- Creating and subsequently removing custom rules tailored to your specific needs.
Modifying an Existing Policy or Rule
- Log in to Plesk.
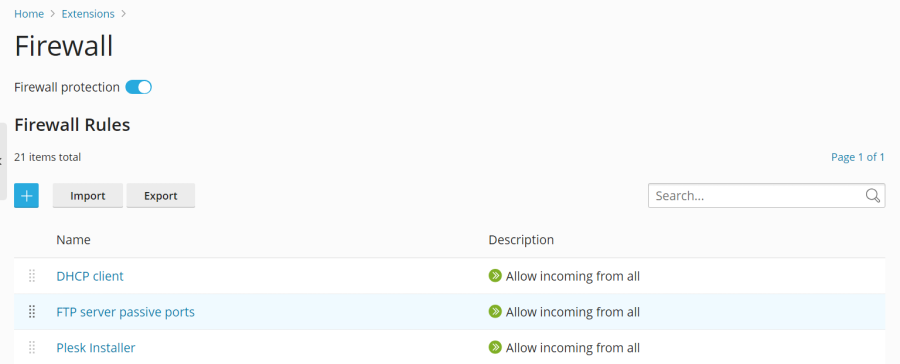
- Navigate to Tools & Settings, then under the “Security” section, click on Firewall.
- Ensure that "Firewall protection" is enabled. If it is not, click the toggle button until it displays “Enabled”. If already enabled, proceed to the next step.
- Click on the specific policy or rule you wish to modify.
- Apply your desired changes, then click Save, followed by Apply Changes, and finally Apply to confirm.
The updated firewall configuration will now be active on your server.
Creating a Custom Rule
- Log in to Plesk.
- Go to Tools & Settings, and then under “Security”, select Firewall.
- Verify that "Firewall protection" is enabled. If it’s not, click the toggle button to switch it to “Enabled”. If already enabled, skip this step.
- Click the
 button to add a new rule.
 - (Optional) Assign a descriptive name to your new rule for easier identification.
- Proceed to configure the rule according to your requirements. For example, to block all incoming connections to the SSH service from a specific IP address like 198.51.100.1 (assuming the standard SSH port 22 is in use), you would set “Match direction” to “Incoming”, “Action” to “Deny”, “Port” to “TCP 22”, and then enter “198.51.100.1” in the “Sources” field.
- Once the rule is configured, click Save, then Apply Changes, and finally Apply.
Your new custom firewall rule is now active. When creating custom rules, exercise caution to avoid inadvertently blocking connections to ports utilized by Plesk services, which could disrupt server functionality.
Note: If you are utilizing Docker containers, be aware that Docker's own firewall rules are managed separately and will not be integrated into the Plesk firewall ruleset.
Removing Custom Rules
- Log in to Plesk.
- Navigate to Tools & Settings > Firewall (under “Security”).
- Ensure that "Firewall protection" is enabled. If it’s not, click the toggle button to set it to “Enabled”. If already enabled, skip this step.
- Select one or more custom rules that you wish to remove. Only custom rules can be deleted; default policies and rules are permanent.
- Click Remove, confirm with Yes, remove, then click Apply Changes, and finally Apply.
The selected custom rules have now been successfully removed from your firewall configuration.
Country Blocking
The Plesk firewall provides a powerful feature to block network access to or from specific IP addresses associated with particular countries. This geo-blocking capability can be highly effective in preventing unwanted traffic or attacks originating from known malicious regions.
Blocking Access from a Specific Country
- Log in to Plesk.
- Go to Tools & Settings > Firewall (under “Security”).
- Confirm that "Firewall protection" is enabled. If it is not, click the toggle button to enable it. If already enabled, proceed.
- Click the button to create a new rule.
- (Optional) Provide a meaningful name for your country blocking rule.
- Set the “Action” for this rule to “Deny”.
- In the “Sources” field, enter the two-letter ISO 3166 country code of the country you intend to block. For instance, to block all incoming connections originating from Afghanistan, you would enter "AF".
- (Optional) To block multiple countries, click “Add one more” and repeat the previous step for each additional country. You can include as many countries as necessary in a single rule.
- Once all desired countries have been added, click Save.
- Finally, click Apply Changes, and then Apply to activate the new configuration.
After the firewall configuration is applied, all incoming connections to your server from the specified blocked country or countries will be automatically denied, significantly enhancing your server's security against region-specific threats.
By default, Plesk utilizes the free “IP to Country Lite” database provided by DB-IP for country identification. For more precise or comprehensive geolocation data, you have the option to switch to a free or paid database from MaxMind. Before proceeding with MaxMind, you will need to obtain a license (either free or paid) and receive your unique license key from their website:
Switching to a MaxMind GeoIP2 Database
To integrate a MaxMind database for country blocking:
- Add the following lines to your
panel.inifile. Use the first option for the free GeoLite2 database, or the second for the paid GeoIP2 database:
or[ext-firewall] geoipDataSource = maxmind-lite[ext-firewall] geoipDataSource = maxmind - Log in to your server via SSH. Then, execute the appropriate command below, replacing
<enter your license key here>with your actual MaxMind license key:
orLICENSE_KEY=<enter your license key here> plesk sbin modules/firewall/ipsets --configure --data-source maxmind-lite --forceLICENSE_KEY=<enter your license key here> plesk sbin modules/firewall/ipsets --configure --data-source maxmind --forceThis command configures Plesk to use the free or paid MaxMind database, respectively. Note: The command might display a
Set cannot be destroyedwarning upon completion. This warning is generally harmless and can be safely disregarded. - Log in to Plesk.
- Navigate to Tools & Settings > Firewall (under “Security”).
- Click Apply Changes, and then Apply.
Note: If the Apply Changes button is not visible, you may need to create a temporary new firewall rule to trigger the option to apply changes. This rule can be removed after the changes are applied.
Once the firewall configuration is applied, Plesk will begin using the selected MaxMind GeoIP2 database for country-based blocking, providing potentially more accurate geolocation data.
To revert to the default free database from DB-IP, simply remove the geoipDataSource = maxmind-lite or geoipDataSource = maxmind line from your panel.ini file, and then reapply the firewall configuration within Plesk.
Importing and Exporting Firewall Configuration
For administrators managing multiple Plesk for Linux servers, the ability to replicate firewall configurations efficiently is a significant time-saver. Instead of manually configuring each server, you can export a working firewall configuration from one server and then import it onto others. This section details both graphical interface (GUI) and command-line interface (CLI) methods for exporting and importing your firewall settings.
Exporting the Firewall Configuration via the GUI
- Log in to Plesk on the server from which you want to copy the firewall configuration.
- Go to Tools & Settings > Firewall (under “Security”).
- Ensure that "Firewall protection" is enabled. If it is not, toggle it to “Enabled” and click Apply. If already enabled, you can skip this step.
- Click the Export button.
The firewall configuration will be saved as a .json file, which you can typically find in your web browser’s default downloads directory.
Importing the Firewall Configuration via the GUI
- Log in to Plesk on the target server where you wish to apply the exported firewall configuration.
- Navigate to Tools & Settings > Firewall (under “Security”).
- Confirm that "Firewall protection" is enabled. If not, toggle it to “Enabled” and click Apply. If already enabled, this step can be skipped.
- Click the Import button, and then browse to locate the
.jsonfile that contains the firewall configuration you previously exported.
The firewall configuration from the selected file will now be applied to the current server.
Exporting the Firewall Configuration via the CLI
- Access your server via SSH from which you intend to export the firewall configuration.
- Execute the following command to export the firewall configuration to a file:
plesk ext firewall --export > rules.jsonYou can choose any desired name for the output file; "rules.json" is provided merely as an example.
The firewall configuration will be saved to the specified file on your server.
Importing the Firewall Configuration via the CLI
Importing firewall configurations via the command line requires a careful, multi-step process, often involving two separate SSH sessions to ensure successful application and confirmation.
- Log in via SSH to the server where you want to import another server's firewall configuration. You will need two separate SSH sessions open concurrently for this process.
- In your first SSH session, run the following command to enable firewall protection. If firewall protection is already active, you can skip this step:
plesk ext firewall --enable - In your second SSH session, execute the following command to confirm the firewall protection. This step is also skippable if protection is already enabled:
plesk ext firewall --confirm - Return to your first SSH session and run the command below to import and apply the firewall configuration. Remember to replace
<the file's URL or local path>with the actual path or URL of your.jsonconfiguration file:plesk ext firewall --import -config <the file's URL or local path> && plesk ext firewall --applyFor example, if your file is hosted online:
plesk ext firewall --import -config https://example.com/rules.json && plesk ext firewall --applyOr if it's located locally on the server (e.g., in
/tmp/):plesk ext firewall --import -config /tmp/rules.json && plesk ext firewall --apply - After applying the new firewall configuration, it is crucial to verify that you can still connect to the server via SSH. If connectivity is successful, proceed to your second SSH session and run the following command to confirm the imported firewall configuration:
plesk ext firewall --confirmNote: It is imperative to confirm the imported firewall configuration within 60 seconds of running the
plesk ext firewall --applycommand. Failure to do so will result in the automatic rollback of your changes, restoring the previous firewall configuration for safety.
Upon successful confirmation, the firewall configuration from your specified file will be fully applied and active on the server.
