


This comprehensive tutorial provides a straightforward, step-by-step guide on how to effortlessly install WordPress on your hosting account with just a few clicks, utilizing the powerful Softaculous auto-installer.
Table of Contents
- 1. Access Your Control Panel
- 2. Select WordPress for Installation
- 3. Complete the Installation Form
- 4. Installation Successfully Completed
1. Access Your Control Panel
To begin the WordPress installation process, navigate to your hosting control panel's login page. This is typically cPanel, DirectAdmin, or a similar interface provided by your web host. Enter your correct login credentials to gain secure access to your account.
Once logged in, locate the Softaculous Apps Installer icon within your control panel. It is usually found under a 'Software' or 'Auto Installers' section, as depicted in the screenshot below. Clicking this icon will seamlessly redirect you to the Softaculous end-user panel, where you can manage various web applications.
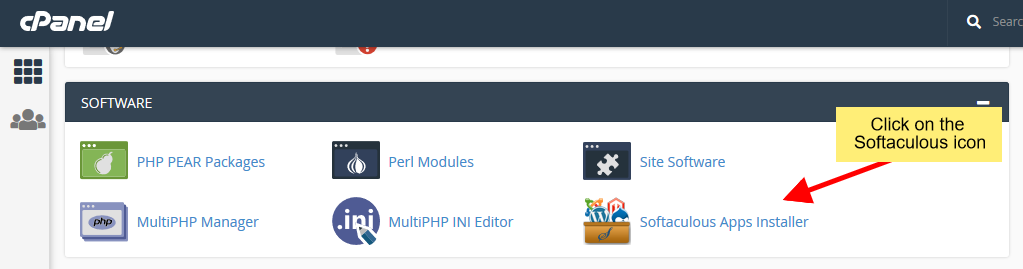 Access Softaculous from your control panel
2. Select WordPress for Installation
Upon entering the Softaculous end-user panel, you'll find a wide array of applications available for installation. To proceed with WordPress, you will need to either search for "WordPress" using the dedicated search bar or locate it within the 'Blogs' category. The screenshot below illustrates how to efficiently find and select WordPress from the available options.
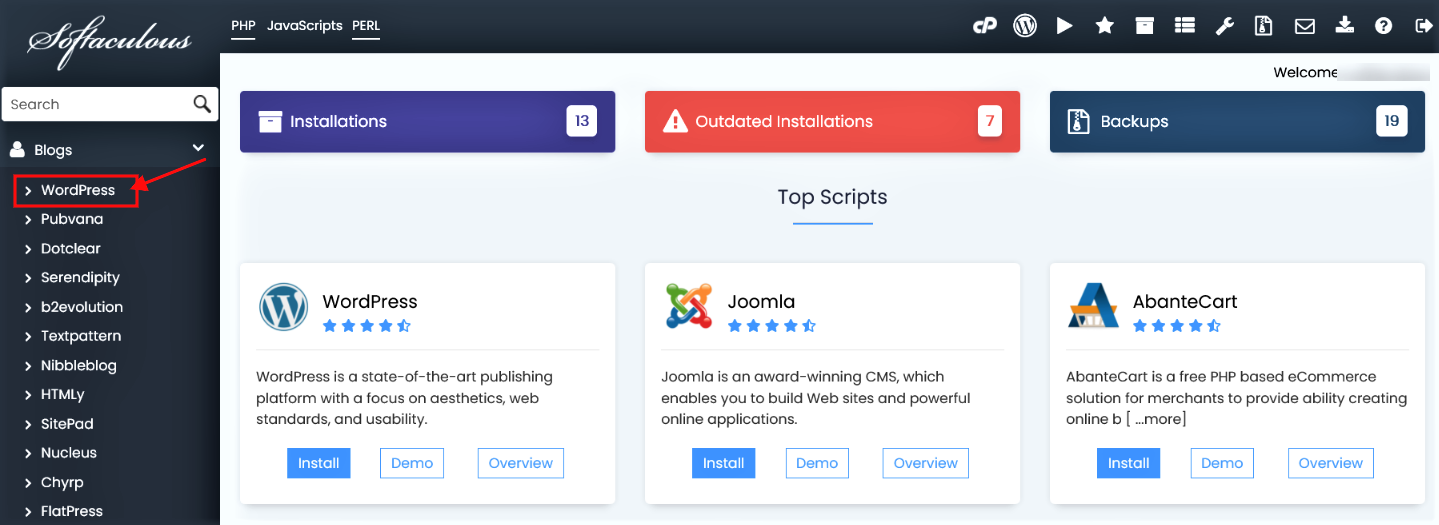 Select WordPress
This action will take you to the dedicated WordPress overview page within Softaculous. On this page, click the prominent "Install" button to initiate the setup. This will then display the comprehensive installation form, which requires you to input specific details for your new WordPress site.
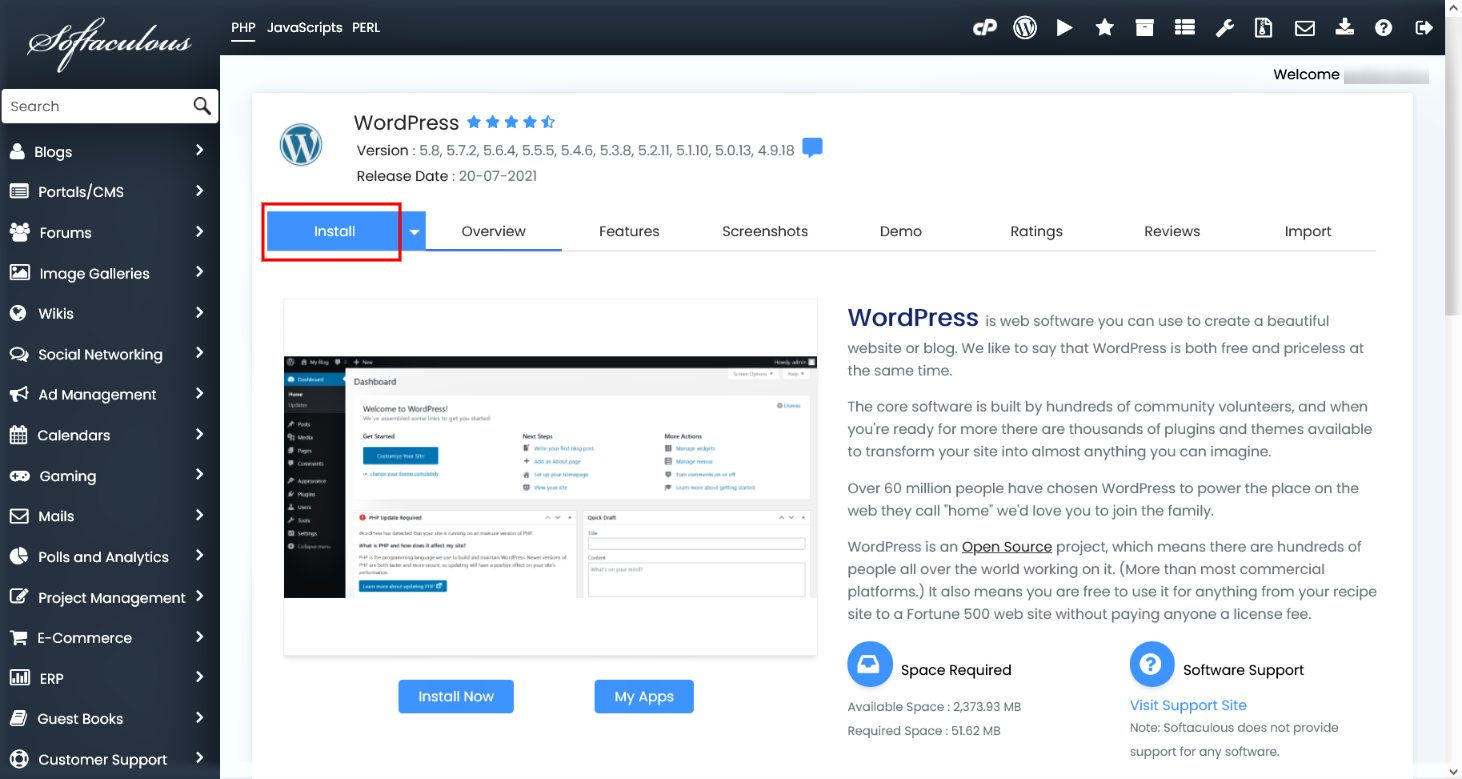 Click on the Install button
3. Complete the Installation Form
After clicking on the "Install" button, a detailed form will be displayed. While many fields are conveniently pre-filled with default values, it is highly recommended to review each section and make any necessary adjustments to suit your specific requirements for the WordPress installation. The form gathers crucial information for setting up your new WordPress site, as demonstrated in the accompanying screenshot.
- Choose Installation URL: Specify the domain and the desired directory where your WordPress site will be installed. This selection determines the public web address for your site.
- Note: If your intention is to install WordPress directly in your domain's root directory (e.g.,
example.com) rather than within a sub-directory (e.g.,example.com/wp), it is crucial to ensure the "In Directory" field is left completely blank. - Admin Username: Create a unique and secure username for your WordPress administrator account. This will be your primary credential for logging into your WordPress dashboard.
- Admin Password: Set a strong and secure password for your administrator account. It is highly recommended to use a complex combination of uppercase and lowercase letters, numbers, and special symbols to enhance security.
- Admin Email: Provide an active and accessible email address for your administrator account. This email will receive important notifications, updates, and password reset requests for your WordPress site.
- Select Language: Choose the preferred language for your WordPress installation. This selection will determine the language of your WordPress dashboard and default theme settings.
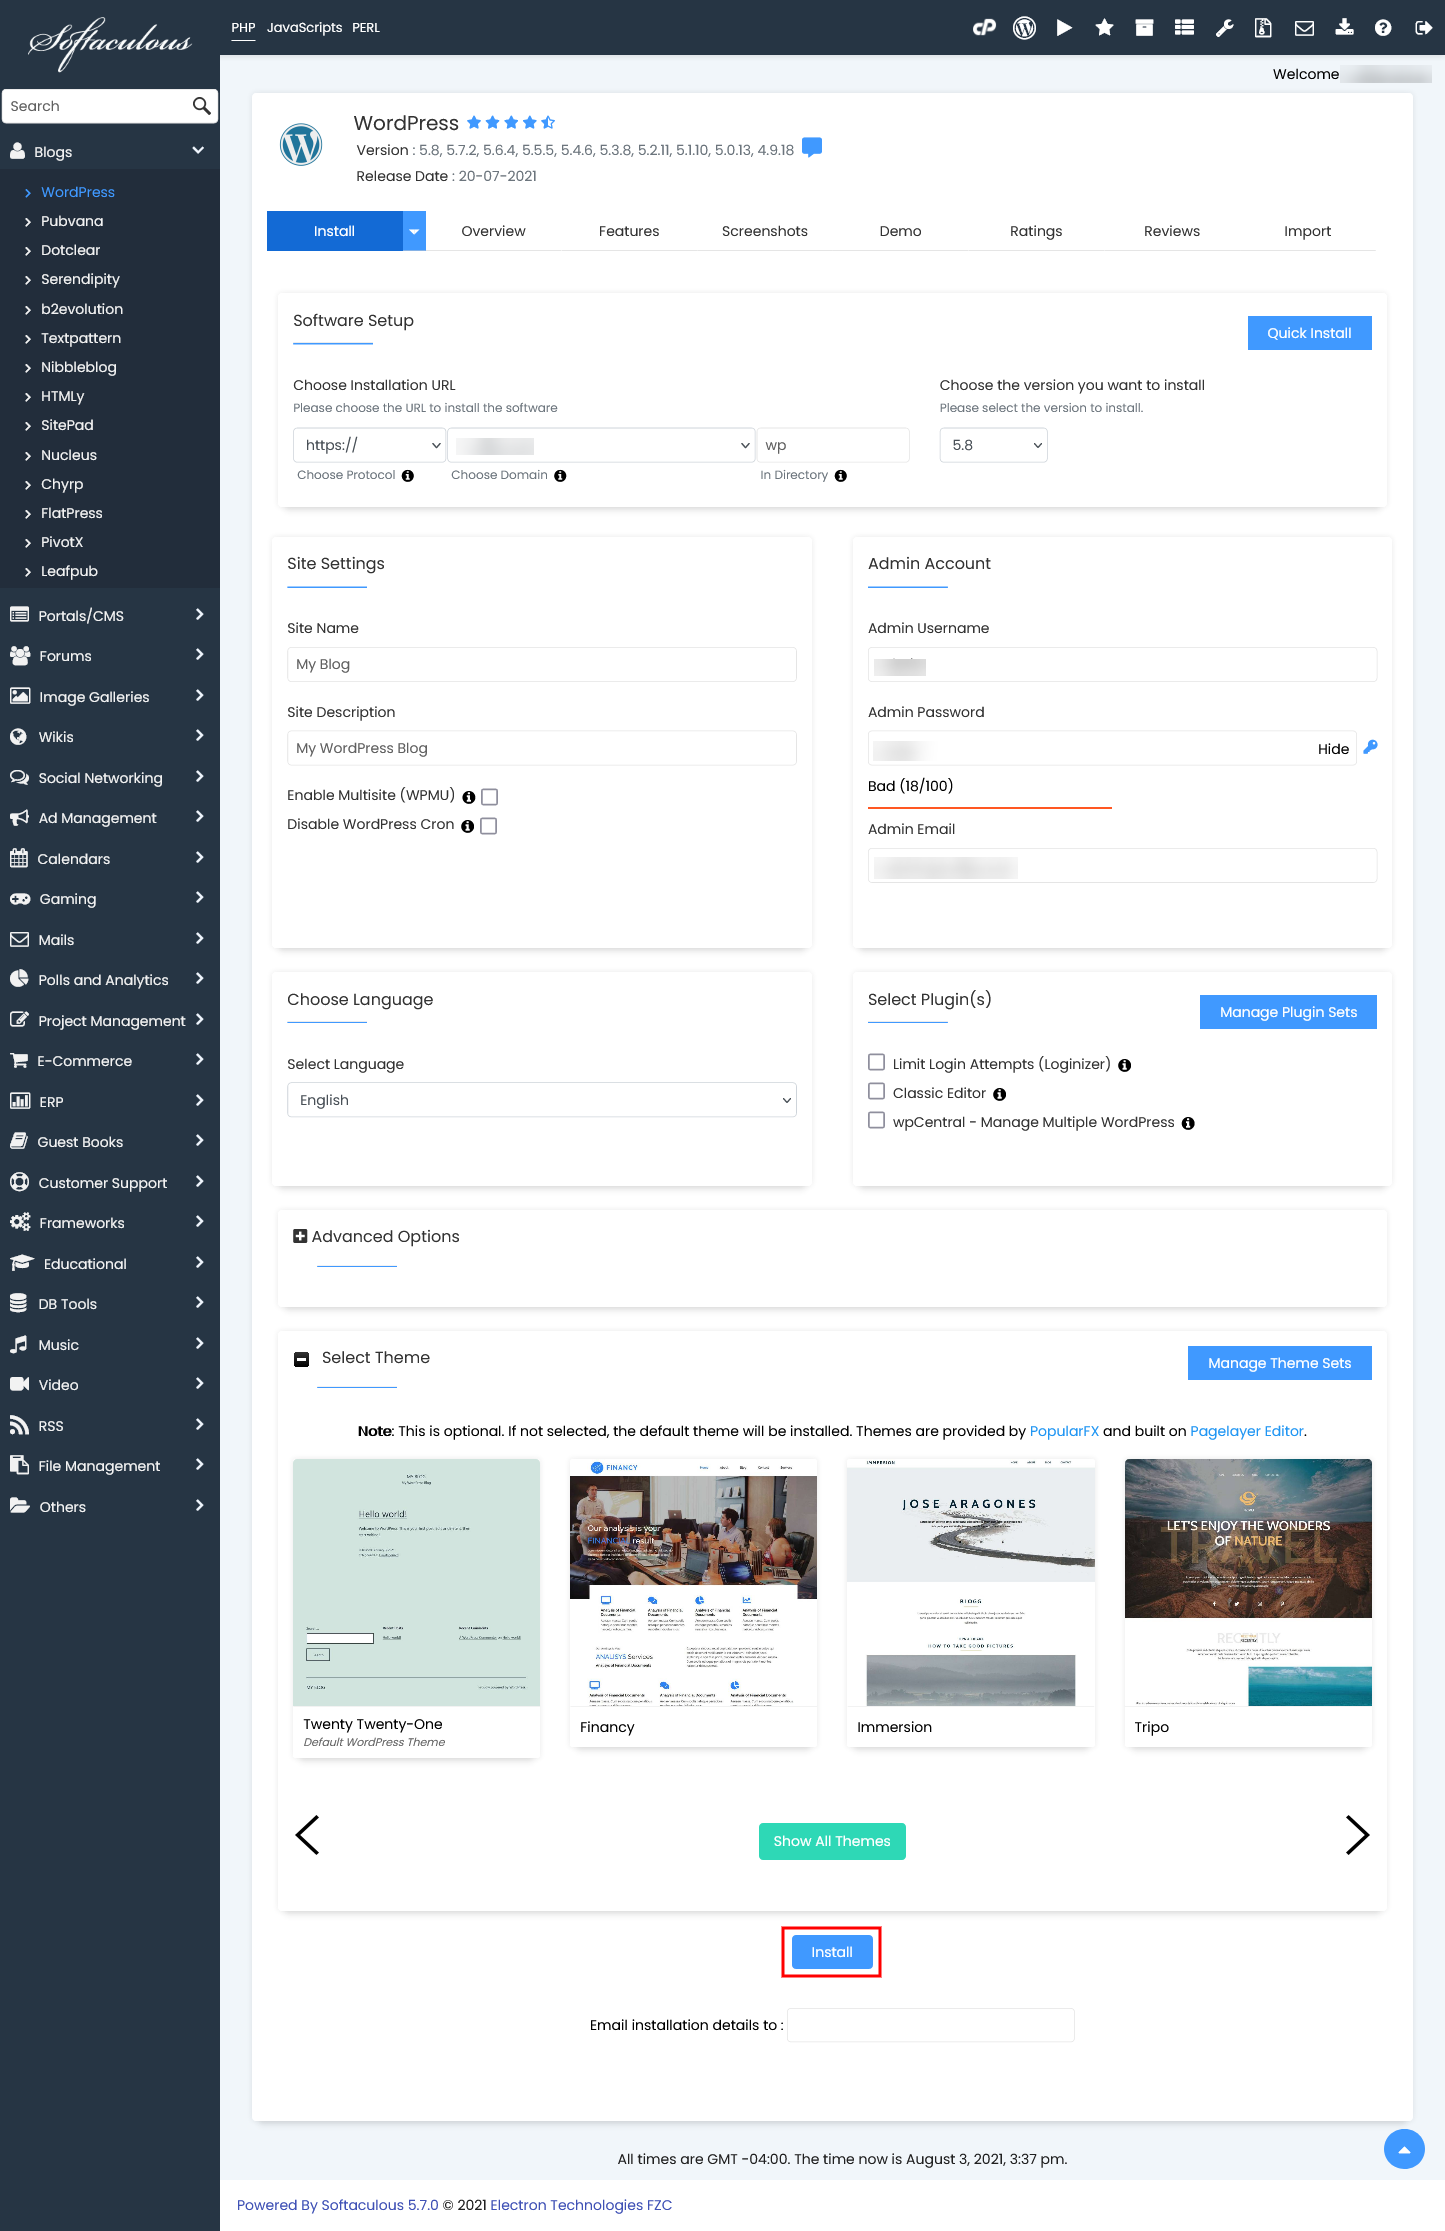 Fill in the install form
Once all the necessary details have been entered and carefully reviewed, click the final "Install" button to initiate the installation process. Softaculous will then efficiently handle all the technical aspects of setting up your WordPress site, allowing you to relax while the system works.
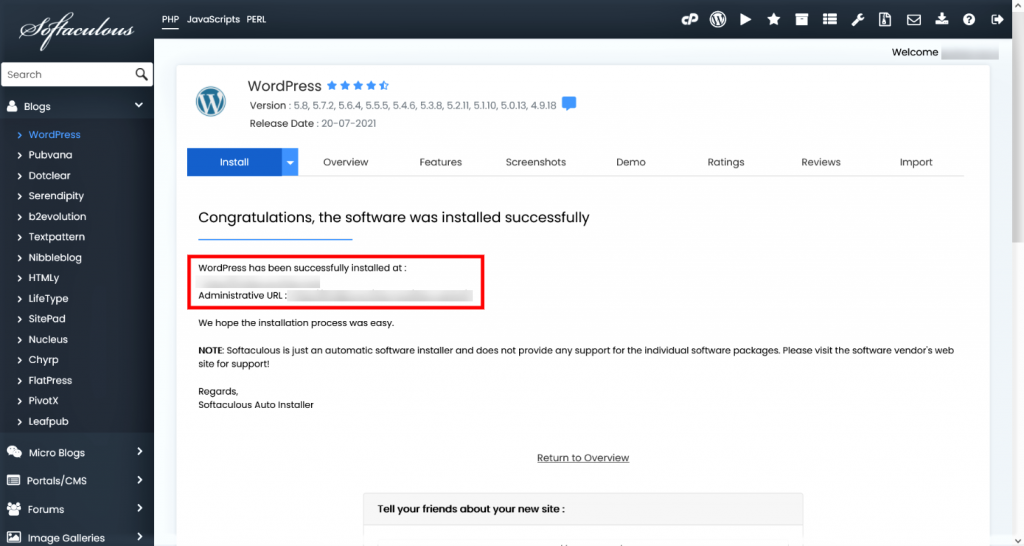
4. Installation Successfully Completed
Upon the successful completion of the installation, Softaculous will display a clear confirmation message, similar to the one shown in the screenshot below. This positive indication signifies that your WordPress site is now live and fully ready to be accessed and utilized.
 Access WordPress admin panel
The success screen will conveniently provide direct links to your newly installed WordPress website and its administrative panel. You can then proceed to log into your WordPress admin dashboard to begin the exciting journey of customizing your website, adding compelling content, configuring essential plugins, and managing all aspects of your online presence.
We trust that this installation process using Softaculous was straightforward, efficient, and user-friendly. Beyond initial setup, Softaculous offers a comprehensive suite of management tools for your WordPress installations. These powerful features include seamless upgrades to the latest versions, reliable backup and restore capabilities for data security, options to clone your site for development, and even the ability to create staging environments for testing changes before they go live. Leveraging these tools ensures the smooth, secure, and optimized ongoing operation of your WordPress website.
