


Subdomains are a powerful feature, acting as additional third-level domain names that provide enhanced flexibility for your online presence. If your hosting package supports them, subdomains can significantly benefit your website's organization and expansion. For a visual guide, consider watching our video tutorial on this topic.
Utilizing subdomains allows you to:
- Organize the logical structure of your website, making navigation intuitive for visitors.
- Host supplementary websites or distinct sections of an existing website on the same server, eliminating the need for registering additional, separate domain names.
Consider this practical example: Imagine you manage a website, your-product.com, dedicated to marketing and selling a specific product. To efficiently handle customer service inquiries and facilitate online order tracking, you could establish a subdomain such as orders.your-product.com. This setup enables your customers to directly access vital information by navigating to this dedicated internet address, streamlining their experience.
Functionally, subdomains possess the same operational status as additional domains. This means you can leverage the complete suite of tools and services available for working with your main domain. These include essential features like robust SSL/TLS protection for secure connections, the intuitive Sitejet Builder for easy website creation, comprehensive web statistics for performance monitoring, and many more, all applicable to your subdomains.
How to Set Up a Subdomain in Plesk Obsidian
To begin the process of configuring a subdomain for either a new site division or an entirely separate website, follow these straightforward steps:
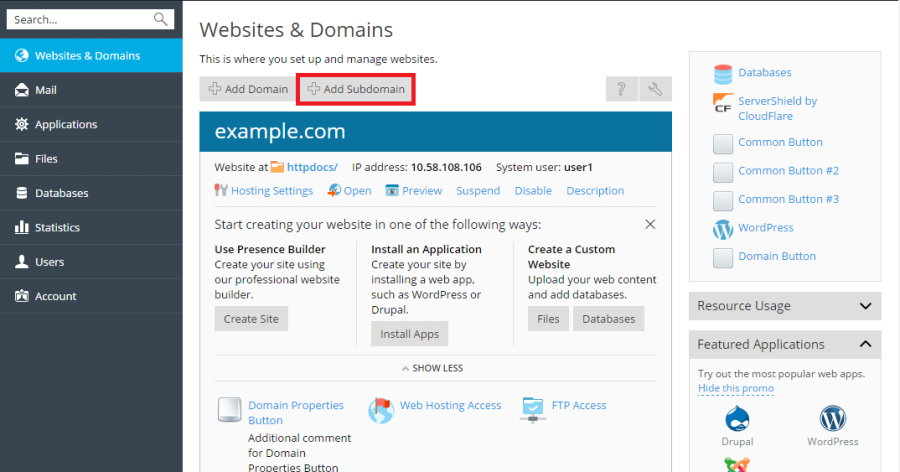
- Navigate to the Websites & Domains section within your Plesk control panel.
- Click on the Add Subdomain button to initiate the setup process.
- You will then be prompted to specify the following details:
- In the Subdomain name field, enter the desired prefix that will be appended to the domain name of your primary site. For instance, if your main domain is
example.comand you wantblog.example.com, you would type "blog". - In the Document root field, define the preferred location for the directory where all files and subdirectories associated with this new subdomain will be stored. You have the option to use the default
httpdocsdirectory of your main site, or you can specify a unique, custom directory path.
- In the Subdomain name field, enter the desired prefix that will be appended to the domain name of your primary site. For instance, if your main domain is
- Once you have entered the necessary information, click OK to confirm.
Upon successful creation, your new subdomain name will be prominently displayed within the list at the bottom of the screen in the Websites & Domains section. After the subdomain has been established, you are ready to upload your web content to its designated directory on the server. Detailed instructions for this process can be found in our documentation under the Website Content section, specifically within the Uploading Content Using FTP subsection.
Understanding Wildcard Subdomains
For more advanced domain management, Plesk offers the functionality of wildcard subdomains. By entering the asterisk (*) symbol as a subdomain name during setup, Plesk creates a special type of subdomain known as a wildcard subdomain. The primary function of a wildcard subdomain is to redirect site visitors who attempt to access *any* subdomain name that has not been explicitly registered within your Plesk environment to this predefined wildcard subdomain.
It's important to note that wildcard subdomains can be established on various domain name levels. For example, you have the flexibility to create a wildcard subdomain such as *.mystore.example.com. For a comprehensive understanding and further details on implementing wildcard subdomains, particularly on Linux-based systems, please refer to the dedicated section Adding Wildcard Subdomains (Linux) in our documentation.
