


This guide provides a comprehensive walkthrough on how to efficiently restore backups using the JetBackup for WordPress plugin. Whether you need to revert your website to a previous state due to an unexpected issue or simply restore specific files, JetBackup offers a straightforward and reliable process to get your WordPress site back on track.
Restoring Backups with JetBackup for WordPress
To commence the restoration process, carefully follow these sequential steps to ensure a smooth and successful recovery of your WordPress site's data and functionality.
Step 1: Choose a Backup to Restore
- Navigate to the JetBackup > Backups section within your WordPress administration dashboard. This area lists all available backups for your website.
- Review the displayed backup entries, paying close attention to the date and specific details provided for each. It is crucial to select the precise backup version that you intend to restore.
Step 2: Initiate the Restore Process
- Once you have identified the desired backup, click the "Restore" button conveniently located next to it.

- A confirmation popup will appear, presenting vital information regarding the impending restoration. Take a moment to thoroughly review these details. If everything is accurate and you wish to proceed, confirm your action by clicking the "Add to Queue" button. This action will successfully place your restore request into the processing queue.
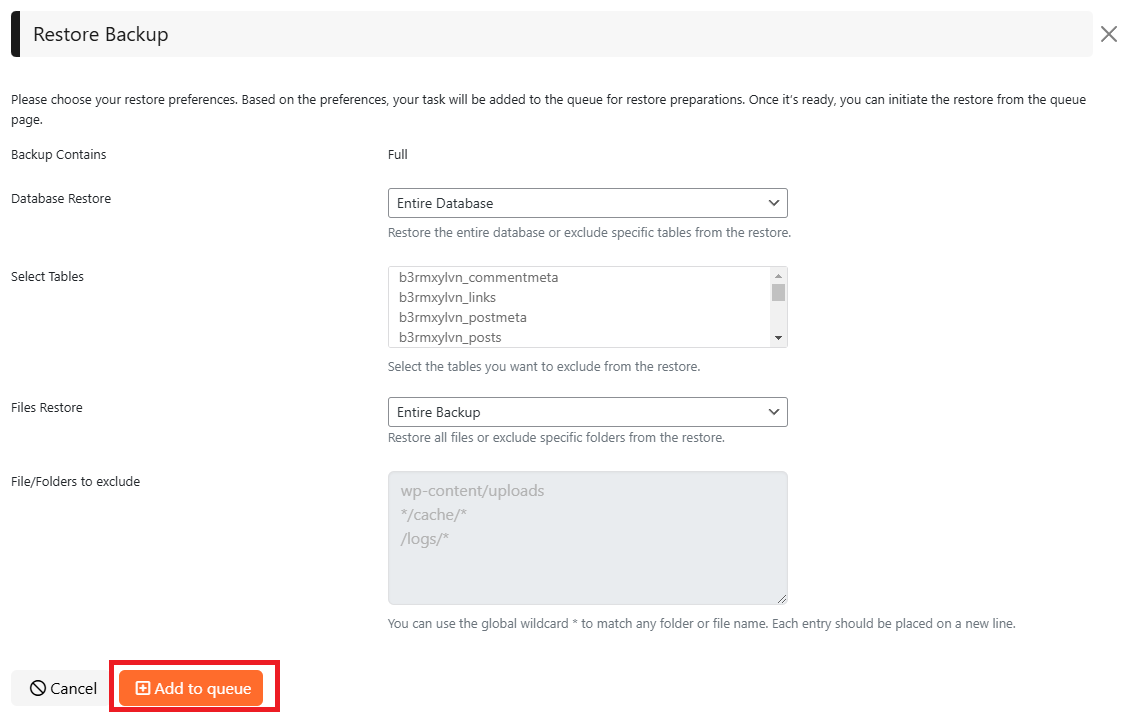
Important Restore Options
Before finalizing your restoration, JetBackup provides several critical options that allow you to customize the recovery process according to your specific requirements. These options ensure you have granular control over what gets restored.
Select Tables
- This sophisticated option empowers you to meticulously select which specific database tables should be included or explicitly excluded from the restoration. This feature is particularly valuable if you only need to restore certain parts of your database, such as post content or user profiles, while ensuring other tables remain untouched.

Files Restore
- Activate this crucial option to restore specific files, directories, or your entire website's file system. This is an essential step for recovering any lost, corrupted, or inadvertently deleted website files.

File/Folders to Exclude
- You have the ability to specify particular file or folder paths that you wish to explicitly exclude from the restoration process. This prevents certain directories or files from being overwritten or restored. To match any folder or file name, utilize the global wildcard symbol (*). Ensure each entry is placed on a new line for proper and accurate processing.

Step 3: Monitor the Restoration Process
- Once you have successfully added the restore task to the queue, the Pre-Restore process will automatically begin. You can conveniently track its real-time progress and status by navigating to the JetBackup > Queue section within your WordPress dashboard. This section provides comprehensive updates on all ongoing and pending tasks.
Step 4: Complete the Restore
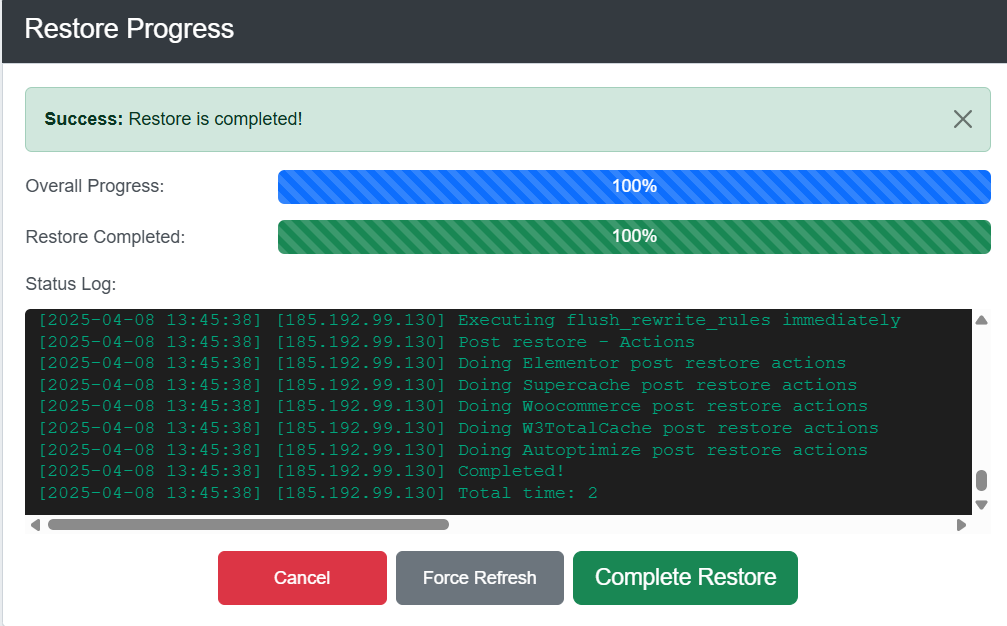
- Upon the successful conclusion of the Pre-Restore process, your data will be fully prepared for finalization and integration into your website.
- Simply click the "Complete Restore »" button to proceed with the final stage of the restoration, bringing your website back online.

- You will then be automatically redirected to a dedicated page designed to finalize the restoration. Please follow any on-screen prompts or instructions carefully.
- Once this final step successfully concludes, your entire website, or the selected components, will be fully restored to their desired previous state, ensuring full functionality.
- To return to your fully restored site and continue managing your WordPress installation, click the "Complete Restore" button, which will seamlessly redirect you back to your WordPress dashboard.
