


The integrity of your data is paramount. In the event of data corruption or loss, Plesk provides robust backup and restoration capabilities. This comprehensive guide details the process of restoring data from a backup file within the Plesk environment, ensuring your websites and applications remain operational.
Plesk offers two primary methods for data recovery: you can opt to restore the entire system from a backup, or precisely select individual objects, such as a specific website, all databases, or particular files, for restoration. This flexibility allows for targeted recovery tailored to your specific needs.
It is important to note that only backups created with Plesk Onyx 17.0 or any later version are compatible with this restoration process.
Crucial Warning: Please be aware that when you restore objects from a backup, they will directly overwrite and replace any existing objects that share the same name on your server. The system will not issue a prompt or warning before an object is overwritten. Consequently, any changes made to these objects after the backup was created will be permanently lost. Exercise caution and ensure you understand the implications before proceeding with a restore operation.
Restoring All Objects from a Backup
To perform a comprehensive restoration of all objects from a chosen backup file, follow these detailed steps:
- Navigate to Websites & Domains, then select Backup Manager. This interface displays all available backups, including those stored locally on the server and those located in remote storage solutions.
- Identify and click on the specific backup file you wish to restore from the list.
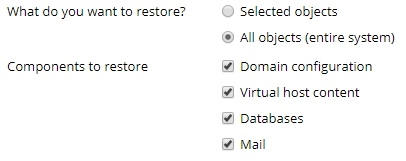
- Under the section titled “What do you want to restore?”, ensure that the “All objects (entire system)” radio button is selected to initiate a full system recovery.
- In the “Components to restore” section, you have the option to deselect checkboxes next to any classes of objects you do not wish to include in the restoration. For example, if the “Databases” checkbox is selected, all databases and their associated users will be restored. Clearing this checkbox will prevent any databases from being restored.
- If the backup file is secured with a password, you will be prompted to provide it. Select the “Get password from settings of Remote storage” radio button for Plesk to automatically retrieve the password. If automatic retrieval fails (e.g., the backup was created on a different server), choose the “Input password manually” radio button and accurately enter the password in the designated fields.
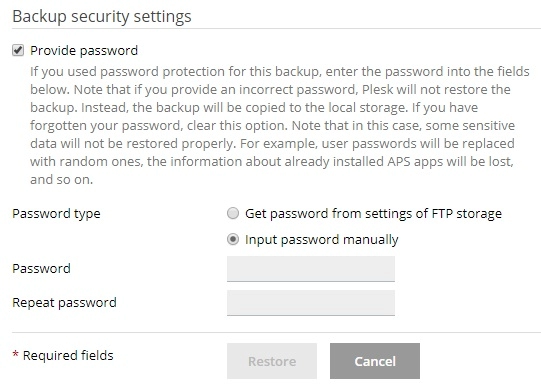
Should automatic fetching fail and you do not recall the password, you may clear the “Provide password” checkbox. In this scenario, Plesk will proceed with the restoration, but all passwords for restored objects (such as database users or mail accounts) will be randomly generated, requiring you to reset them post-restoration.
- Before finalizing the restoration, consider configuring these optional settings to tailor the process to your needs:
- Select the “Suspend domains until the restoration is completed” checkbox to temporarily take your website offline. This ensures the integrity of the restoration process by preventing visitor access until completion. During this period, visitors will encounter an error page with the 503 HTTP status code.
- Enable the “When the restoration is completed, send a notification to” checkbox if you wish to receive an email alert upon the successful completion of the restoration. Verify that the specified email address is correct.
- Once all settings are configured to your satisfaction, click the Restore button to commence the data restoration process.
Upon initiating the restoration, you will be redirected to the Websites & Domains > Backup Manager screen, where you can monitor the progress of your backup restoration. The duration of this process varies depending on the overall size and complexity of the data being restored. A notification will appear on this screen once the backup has been successfully restored, confirming the completion of the operation.

Restoring Individual Objects from a Backup
Plesk offers the flexibility to restore specific configuration elements or content without needing to recover the entire backup file. This allows you to precisely select individual objects, such as a single domain and its associated components, a specific mail account, or even just particular files, for restoration.
To restore selected individual objects from a backup, follow these instructions:
- Access the Websites & Domains section, then proceed to the Backup Manager. Here, you will find a comprehensive list of all backups, including those stored on the server and those configured in remote storage locations.
- Click on the specific backup file from which you intend to restore data.
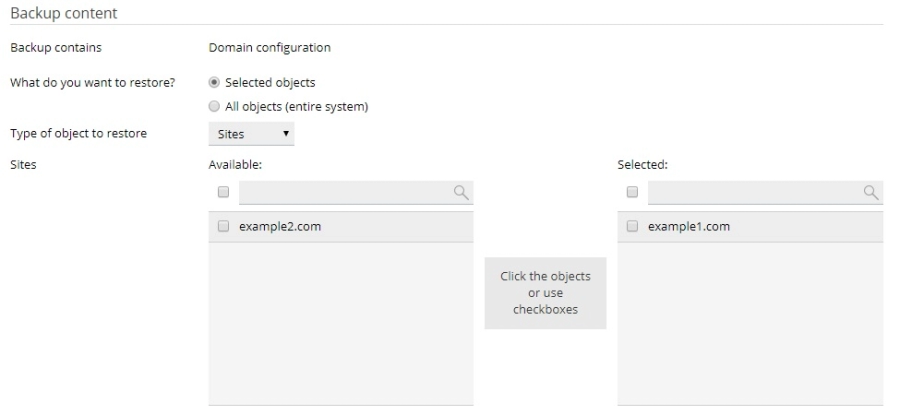
- Under “What do you want to restore?”, select the “Selected objects” radio button to enable granular restoration options.
- In the “Type of object to restore” menu, choose the category of objects you wish to recover. Your options include:
- Mail account: For restoring specific email accounts.
- Database: For restoring individual databases.
- Sites: For restoring entire websites, along with all their associated objects and content (such as mail accounts and databases).
- DNS Zone: For restoring the DNS zone configurations for particular domains.
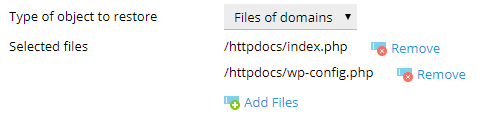
- Files of domains: For restoring individual files.
Note: If your restoration plan involves objects of different types (e.g., one mail account and two distinct databases), you will need to execute separate restoration operations for each object type (e.g., one restoration for databases and another for mail accounts).
- Proceed to select the specific objects for restoration. All available objects of your chosen type will be listed in the “Available” column on the left. Click on the objects you wish to restore, which will then move them to the “Selected” column.
If you selected “Files of domains” in the previous step, click the Add files button, then browse and select the specific file or files you intend to restore, and finally click OK. You have the flexibility to select any number of individual files for recovery.
- Under the “Restore” section, specify whether you want to restore only the configuration of the selected objects, or both their configuration and content.

For example, if you are restoring a database, choosing to restore only the configuration will recover the database structure and associated user accounts but will not restore the actual tables or data within them. This option will be unavailable if the backup file strictly contains configuration data without corresponding content.
- The backup is now prepared for restoration. Before proceeding, you may configure several optional settings:
- Check the “Suspend domains until the restoration is completed” box if you wish to temporarily suspend access to your website. This ensures the restoration's integrity by displaying a 503 HTTP status code error page to visitors until the process concludes.
- Select the “When the restoration is completed, send a notification to” checkbox to receive an email notification once the restoration is successfully finished. Confirm the accuracy of the provided email address.
- If the backup you are restoring is password-protected, Plesk will prompt you for the password. It is recommended to select the “Get password from settings of Remote storage” radio button, which attempts to automatically retrieve the password stored in your Remote Storage settings. If this automatic retrieval is unsuccessful (e.g., the backup originated from a different server), opt for the “Input password manually” radio button and type the correct password into the designated fields.

In the event that the password cannot be fetched automatically and you have forgotten it, you can clear the “Provide password” checkbox. While Plesk will attempt to restore the backup, certain data may not be recovered correctly. For instance, all passwords within the backup database will be randomly generated, necessitating manual resets post-restoration.
- Finally, click the Restore button to initiate the restoration of the selected objects.
You will be directed back to the Websites & Domains > Backup Manager interface, where you can monitor the ongoing restoration of your backup. The time required for this process will vary based on the volume of content being restored. A confirmation notification will appear on this screen once the individual object restoration is complete.

