


This section provides a clear, step-by-step guide to performing the most essential web hosting tasks using Plesk. By following this tutorial, you will gain the knowledge to create a fully functional website, set up a database and a mail account, efficiently manage DNS records, and implement crucial website backups. This guide is designed to empower you with the core skills needed for effective web hosting management.
Step 1. Create Your First Website
Setting up your initial website involves three key stages, ensuring a robust online presence:
- Registering a suitable domain name.
- Adding this domain within your Plesk control panel.
- Developing and publishing your website content.
Registering a Domain Name
Consider your domain name as the primary online address for your business or project. It is how your audience will locate you on the internet, making its selection critical. Optimal domain names are typically short, memorable, and easy to type. An example is example.com. Domain names can be registered through various accredited organizations known as domain registrars. Many hosting providers also offer domain name registration services, often bundling them with web hosting packages.
Note: If you are a web hosting customer, it is essential to ensure that any domain name registered through your hosting provider is formally registered in your name. This precaution can prevent potential complications should you decide to switch hosting providers in the future.
Adding a Domain in Plesk
For most web hosting customers, your provider will likely have already configured your primary domain. If this is not the case, please reach out to your provider for assistance. For web administrators operating in the Power User view, your initial subscription would have been established during the Plesk setup process. Adding a domain in Plesk is the prerequisite for uploading website content, utilizing the Presence Builder, or installing a content management system.
While you will have the flexibility to add more domains later, for the scope of this tutorial, managing your first domain will be sufficient.
Creating Your Website
Plesk offers several versatile approaches to create the content for your website, each with distinct advantages. Below is a concise overview of these methods:
- Employ a Professional Designer and Upload Content: This method provides the highest degree of customization, ensuring your website precisely matches your vision, though it is often the most significant investment. Your web designer will supply the necessary files, which you can then upload to your hosting account via FTP or the File Manager. For detailed instructions on this process, refer to the relevant documentation.
- Utilize Presence Builder: Integrated directly with Plesk, the Presence Builder is a user-friendly tool that enables website creation through an intuitive web interface. You can select from a variety of professional templates to quickly launch an attractive website. For step-by-step guidance on using Presence Builder, consult the specific documentation.
- Implement a Content Management System (CMS): Content Management Systems are powerful third-party applications designed for creating and maintaining dynamic websites. They offer extensive versatility and a vast ecosystem of optional add-ons and plugins. While CMS platforms provide greater customization than Presence Builder, they generally require a more advanced level of technical understanding from the user. Information on how to effectively use a CMS can be found in the detailed guides.
Option A. Upload Website Content
If you have developed your website code yourself or hired a professional web designer, the next step is to upload the website content to Plesk. This action makes your website accessible on the internet. Plesk facilitates content uploading through two primary methods: FTP (File Transfer Protocol) or the integrated File Manager. Choose the method that best suits your preferences and technical comfort level.
To publish a website using FTP:
- Download an FTP Client Program: You can select any FTP client of your choice. A popular and widely recommended option is FileZilla.
- Download FileZilla from its official site: https://filezilla-project.org/download.php?type=client
- Access FileZilla's comprehensive documentation here: https://wiki.filezilla-project.org/Documentation
- Connect to Your Subscription on the Server: Using your chosen FTP client, establish a connection to your hosting account. You will need the following credentials:
- FTP server address: Typically formatted as ftp://your-domain-name.com, where 'your-domain-name.com' is your website's registered internet address.
- FTP username: This is equivalent to your system username. Please note that this may differ from the username you use to log into Plesk. To locate your system username, navigate to the Websites & Domains tab and click on Web Hosting Access. You will find it listed under "Username." You have the option to modify this username if desired.
- FTP password: This is identical to your system user password. If you need to retrieve or reset your system user password, go to the Websites & Domains tab, click Web Hosting Access, and utilize the password reset option.
- Enable Passive Mode (if behind a firewall): If your network environment includes a firewall, it is often necessary to switch to passive mode for successful FTP transfers. Consult your FTP client's documentation for instructions on how to activate passive mode.
- Upload Files: Transfer all your website's files and directories into the
httpdocsdirectory. If your website incorporates CGI scripts, these should be placed within thecgi-bindirectory.
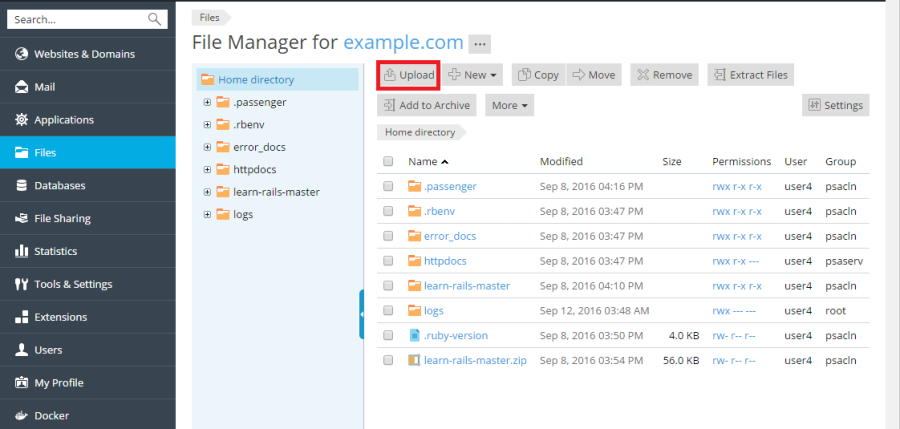
To publish a website using the File Manager:
- On your local computer, compress the folder containing all your website's files into a single .ZIP archive.
- Within the Plesk Control Panel, navigate to Files, then click the
httpdocsfolder to open it. Click the Upload button, select your .ZIP archive file, and then click Open. - Once the archive has been successfully uploaded, select the checkbox next to the file, click the More button, and choose the Extract Files option to unpack your website content.
It is possible that the website you have uploaded requires a database for its functionality. If so, please proceed to the next section to learn how to create and manage a database.
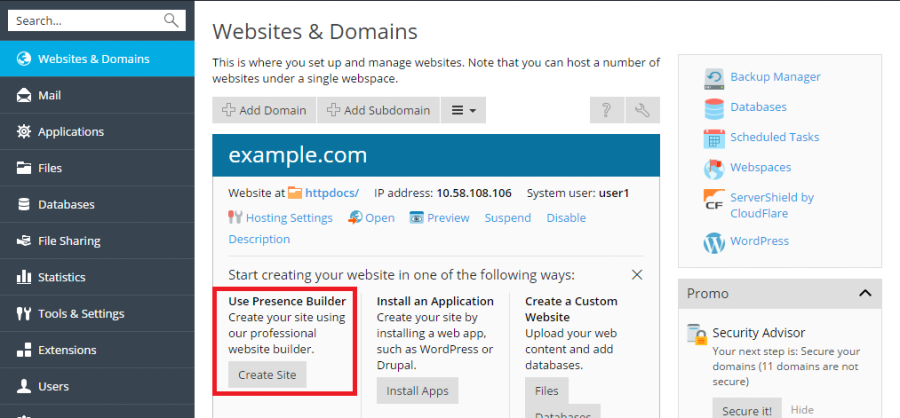
Option B. Create Your Website Using Presence Builder
To embark on creating your website with Presence Builder, simply go to Websites & Domains > Presence Builder and then click on Create Site. This intuitive tool will guide you through the process.
For more extensive information on how to effectively create, customize, and manage websites using Presence Builder, you can refer to the comprehensive customer guide available at http://docs.plesk.com/current/customer-guide/. Notably, when you build your website with Presence Builder, a separate database is typically not required. After completing your website, you can proceed to the next essential step: creating a mail account in Plesk.
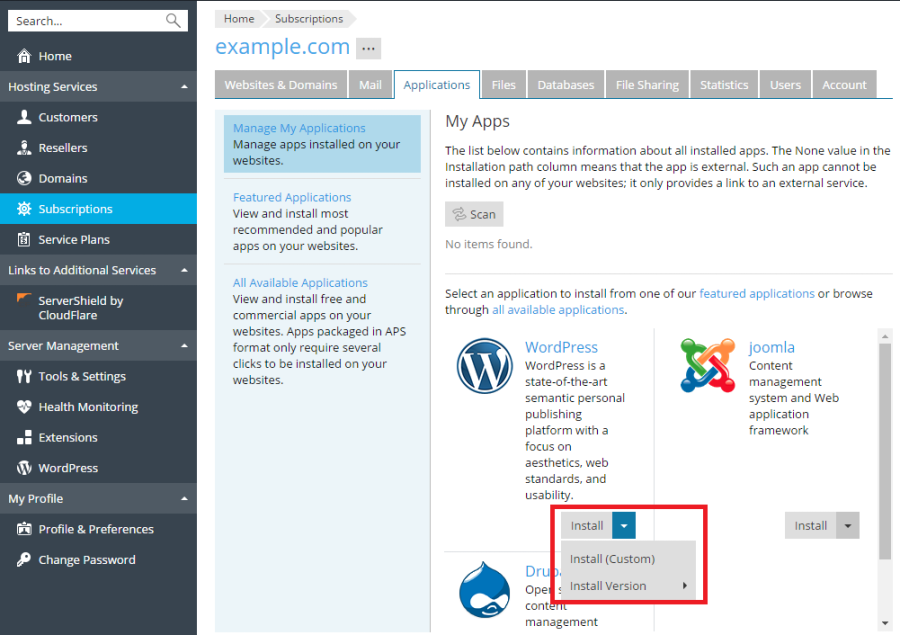
Option C. Install a Content Management System (CMS)
To establish a website utilizing a Content Management System (CMS), navigate to Applications > Install within your Plesk control panel. This section provides access to a wide array of popular CMS platforms that can be installed with ease.
It is important to note that when you install a CMS following these instructions, a dedicated database for your website will be automatically generated and configured. Once your CMS is set up and ready, you can move on to the subsequent step of creating a mail account within Plesk.
Step 2. Create a Database
Databases are fundamental relational structures designed for efficient data storage and retrieval. They are absolutely essential for modern web hosting, with the majority of popular Content Management Systems (CMSs) relying on them for their operation. Plesk offers robust support for MySQL, MSSQL, and PostgreSQL database servers, providing you with comprehensive tools to add, remove, and access databases, as well as manage associated database users effectively.
If your website does not have a requirement for a database, you may proceed directly to the next step, which outlines how to create a mail account in Plesk.
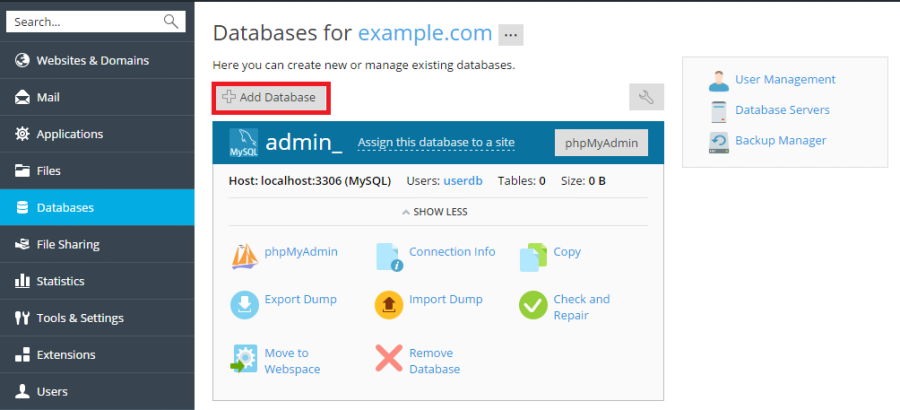
To create a database and a database user:
Navigate to Databases > Add Database within your Plesk interface to begin the creation process.
Step 3. Create a Mail Account
The mail service is a cornerstone of internet communication, enabling users worldwide to exchange email messages. Plesk can capably serve as your dedicated mail server, offering extensive functionality to create and manage multiple mail accounts. This includes performing a variety of common mail-related operations, such as changing account passwords, configuring automatic replies, and much more, ensuring seamless communication for your domain.
Should you not require the creation of a mail account at this time, feel free to advance to the next step, where you will learn how to add a custom DNS record within Plesk.
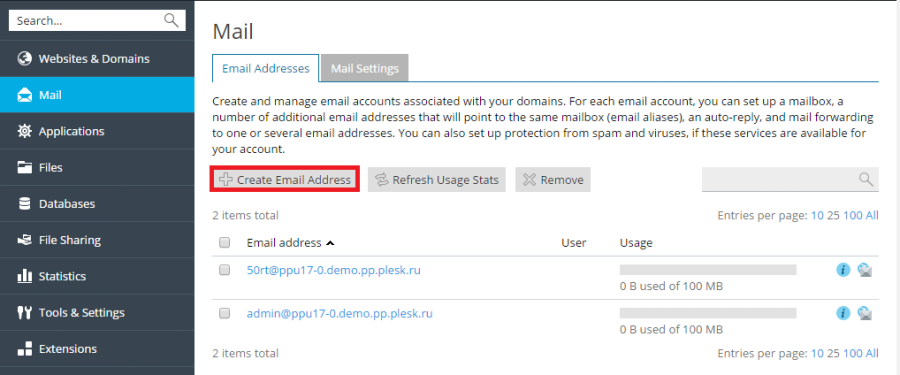
To create a mail account:
Go to Mail > Create Email Address to initiate the setup of a new email account.
Step 4. Add a Custom DNS Record
DNS (Domain Name System) records are critical for translating human-readable domain names into IP addresses, thereby directing visitors to your website online. When a domain is initially created in Plesk, all the necessary default DNS records are automatically configured. However, Plesk also provides the flexibility to add custom DNS records, which is explained in the instructions below, allowing for advanced configuration and specific routing needs.
If your current setup does not necessitate the creation of a custom DNS record, you may proceed to the subsequent step, focusing on how to effectively back up your website.
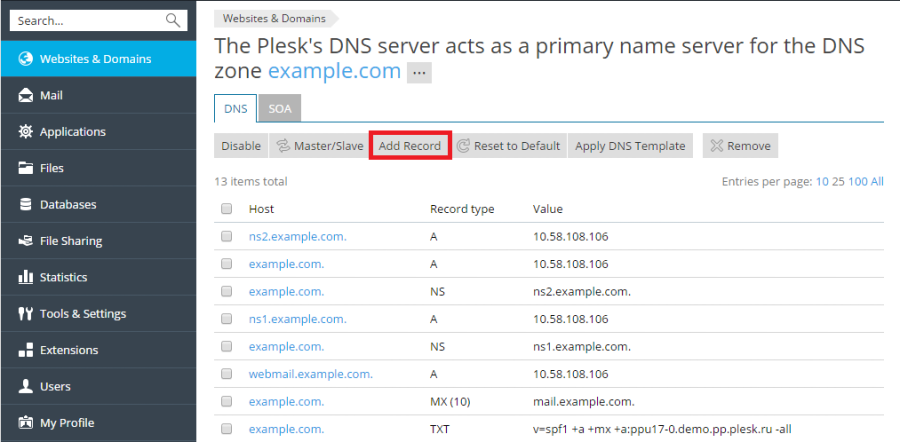
To add a custom DNS record to the domain's DNS zone:
Navigate to Websites & Domains > DNS Settings > Add Record to customize your domain's DNS configuration.
Step 5. Back Up Your Website
Maintaining regular backup copies of your websites is a highly recommended and critical practice. In the unfortunate event that your website's configuration or content becomes damaged, corrupted, or lost, a recent backup provides the means for a swift and complete recovery, safeguarding your online assets and ensuring business continuity.
If creating a website backup is not immediately necessary for your current tasks, you can advance to the final step, which covers changing your password and logging out of Plesk securely.
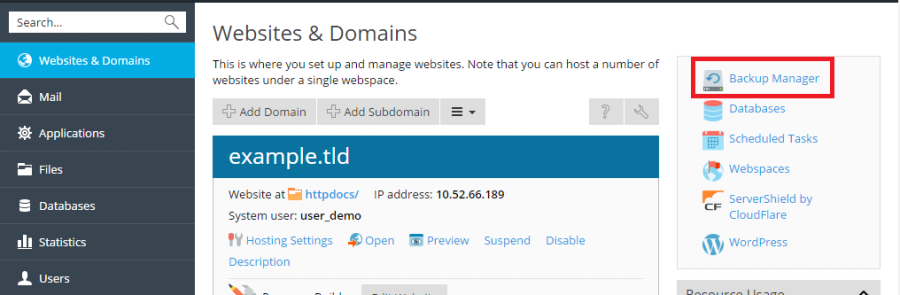
To access the backup function:
- For Hosting Customers: Go to Websites & Domains > Backup Manager > Back Up.
- For Server Administrators (using Power User view): Navigate directly to Backup Manager > Back Up.
Step 6. Change Your Password and Log Out
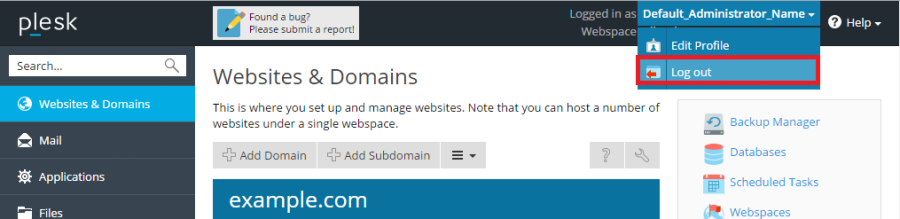
If you are a web hosting customer, it is quite probable that the password you use for logging into Plesk was initially configured by your hosting provider. For security best practices, it is highly advisable to change this password. To do so, hover your mouse pointer over your username located at the top-right corner of the page and then click on Edit Profile. Here you can set a new, strong password.

Upon successfully completing all your desired tasks within Plesk, it is crucial to securely log out. To do this, simply hover your mouse pointer over your username, again located at the top of the page, and click Log out. This action ensures the security of your account and prevents unauthorized access.
We trust that this tutorial has been an informative and valuable resource. We highly encourage you to delve deeper into Plesk's extensive features to discover the myriad ways it can simplify and enhance the management of your web hosting account. For further learning and exploration, the following resources are readily available:
- The Plesk Functionality Explained section within this guide offers expanded insights into the topics covered here.
- The comprehensive Plesk Customer’s Guide provides detailed information on all functionalities accessible to web hosting customers.
- The authoritative Plesk Administrator’s Guide contains complete information tailored for server administrators regarding all available Plesk functionalities.
