


This tutorial provides a straightforward guide on how to install WordPress with remarkable ease using Softaculous, a popular auto-installer. With just a few clicks, you can have your WordPress site up and running in no time, ready for your content and customizations.
Login to Your Control Panel
The initial step involves accessing your web hosting control panel. Navigate to your control panel's designated login page (e.g., cPanel, DirectAdmin, Plesk) and input your correct login credentials to successfully gain access to your hosting environment.
Once logged in, your next task is to locate the Softaculous Apps Installer icon. This icon is typically prominent within the control panel interface and serves as your gateway to the Softaculous end-user panel, where all the applications are listed.
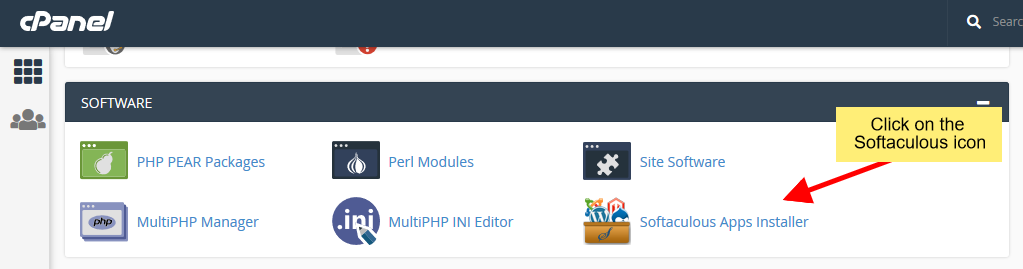 Accessing Softaculous from your control panel interface.
Select WordPress for Installation
Upon entering the Softaculous end-user panel, you will be presented with a diverse array of web applications available for installation. To proceed with setting up WordPress, you can either utilize the search function provided or browse through the various categories to quickly locate WordPress, as clearly illustrated in the screenshot below.
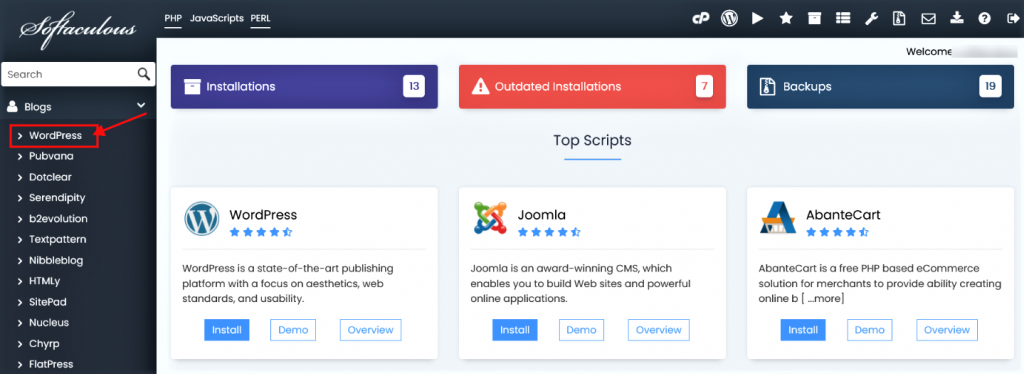 Locating and selecting WordPress within Softaculous.
Clicking on the WordPress icon will seamlessly direct you to its dedicated installation page. On this page, you will find and need to click the prominent Install button. This crucial action will then present you with the WordPress installation form, which requires a few essential details to finalize the setup process.
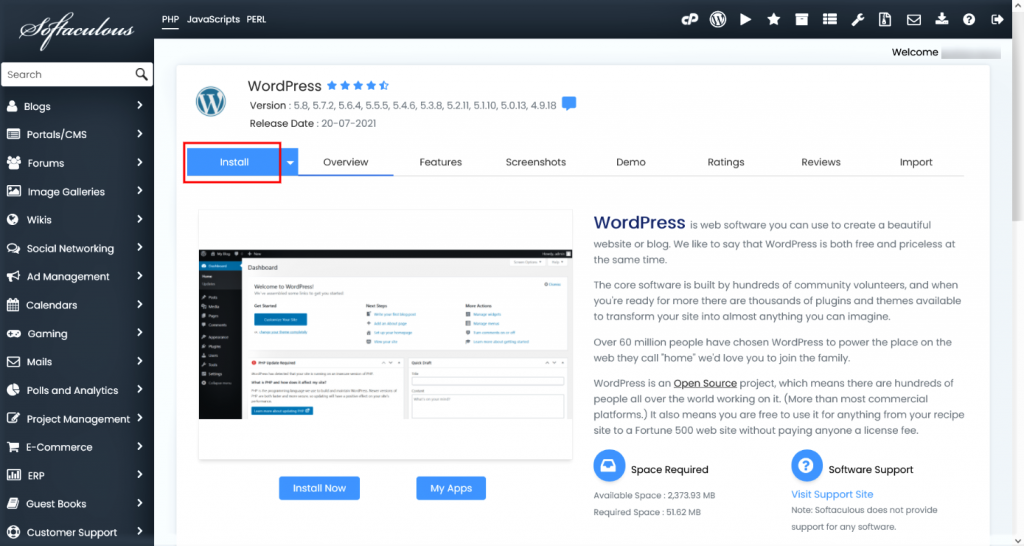 Initiating the WordPress installation by clicking the 'Install' button.
Complete the Installation Form
Following your click on the Install button, a comprehensive form will appear on your screen. A significant convenience of Softaculous is that most of the fields are pre-filled with sensible default values, significantly simplifying the installation process. You are afforded the flexibility to either retain these default settings, which are often suitable for a basic setup, or to customize them meticulously according to your specific project requirements or personal preferences.
- Choose Installation URL: This field requires you to specify both the domain and the exact directory on your server where you intend to install WordPress.
- Important Note: If your objective is to install WordPress directly in the document root of your domain (e.g.,
https://example.com) rather than within a sub-directory (e.g.,https://example.com/blogorhttps://example.com/wp), it is absolutely crucial to leave the In Directory field entirely blank. - Admin Username: Here, you must create a unique and memorable username that you will subsequently use to log in to your WordPress administrator account.
- Admin Password: It is highly recommended to set a strong, secure, and complex password for your WordPress administrator account to ensure optimal security for your website.
- Admin Email: Provide an active and accessible email address for your WordPress administrator account; this email will be essential for receiving notifications, system alerts, and for initiating password recovery procedures if ever needed.
- Select Language: This option allows you to choose the preferred language for your WordPress installation, affecting the dashboard and core texts.
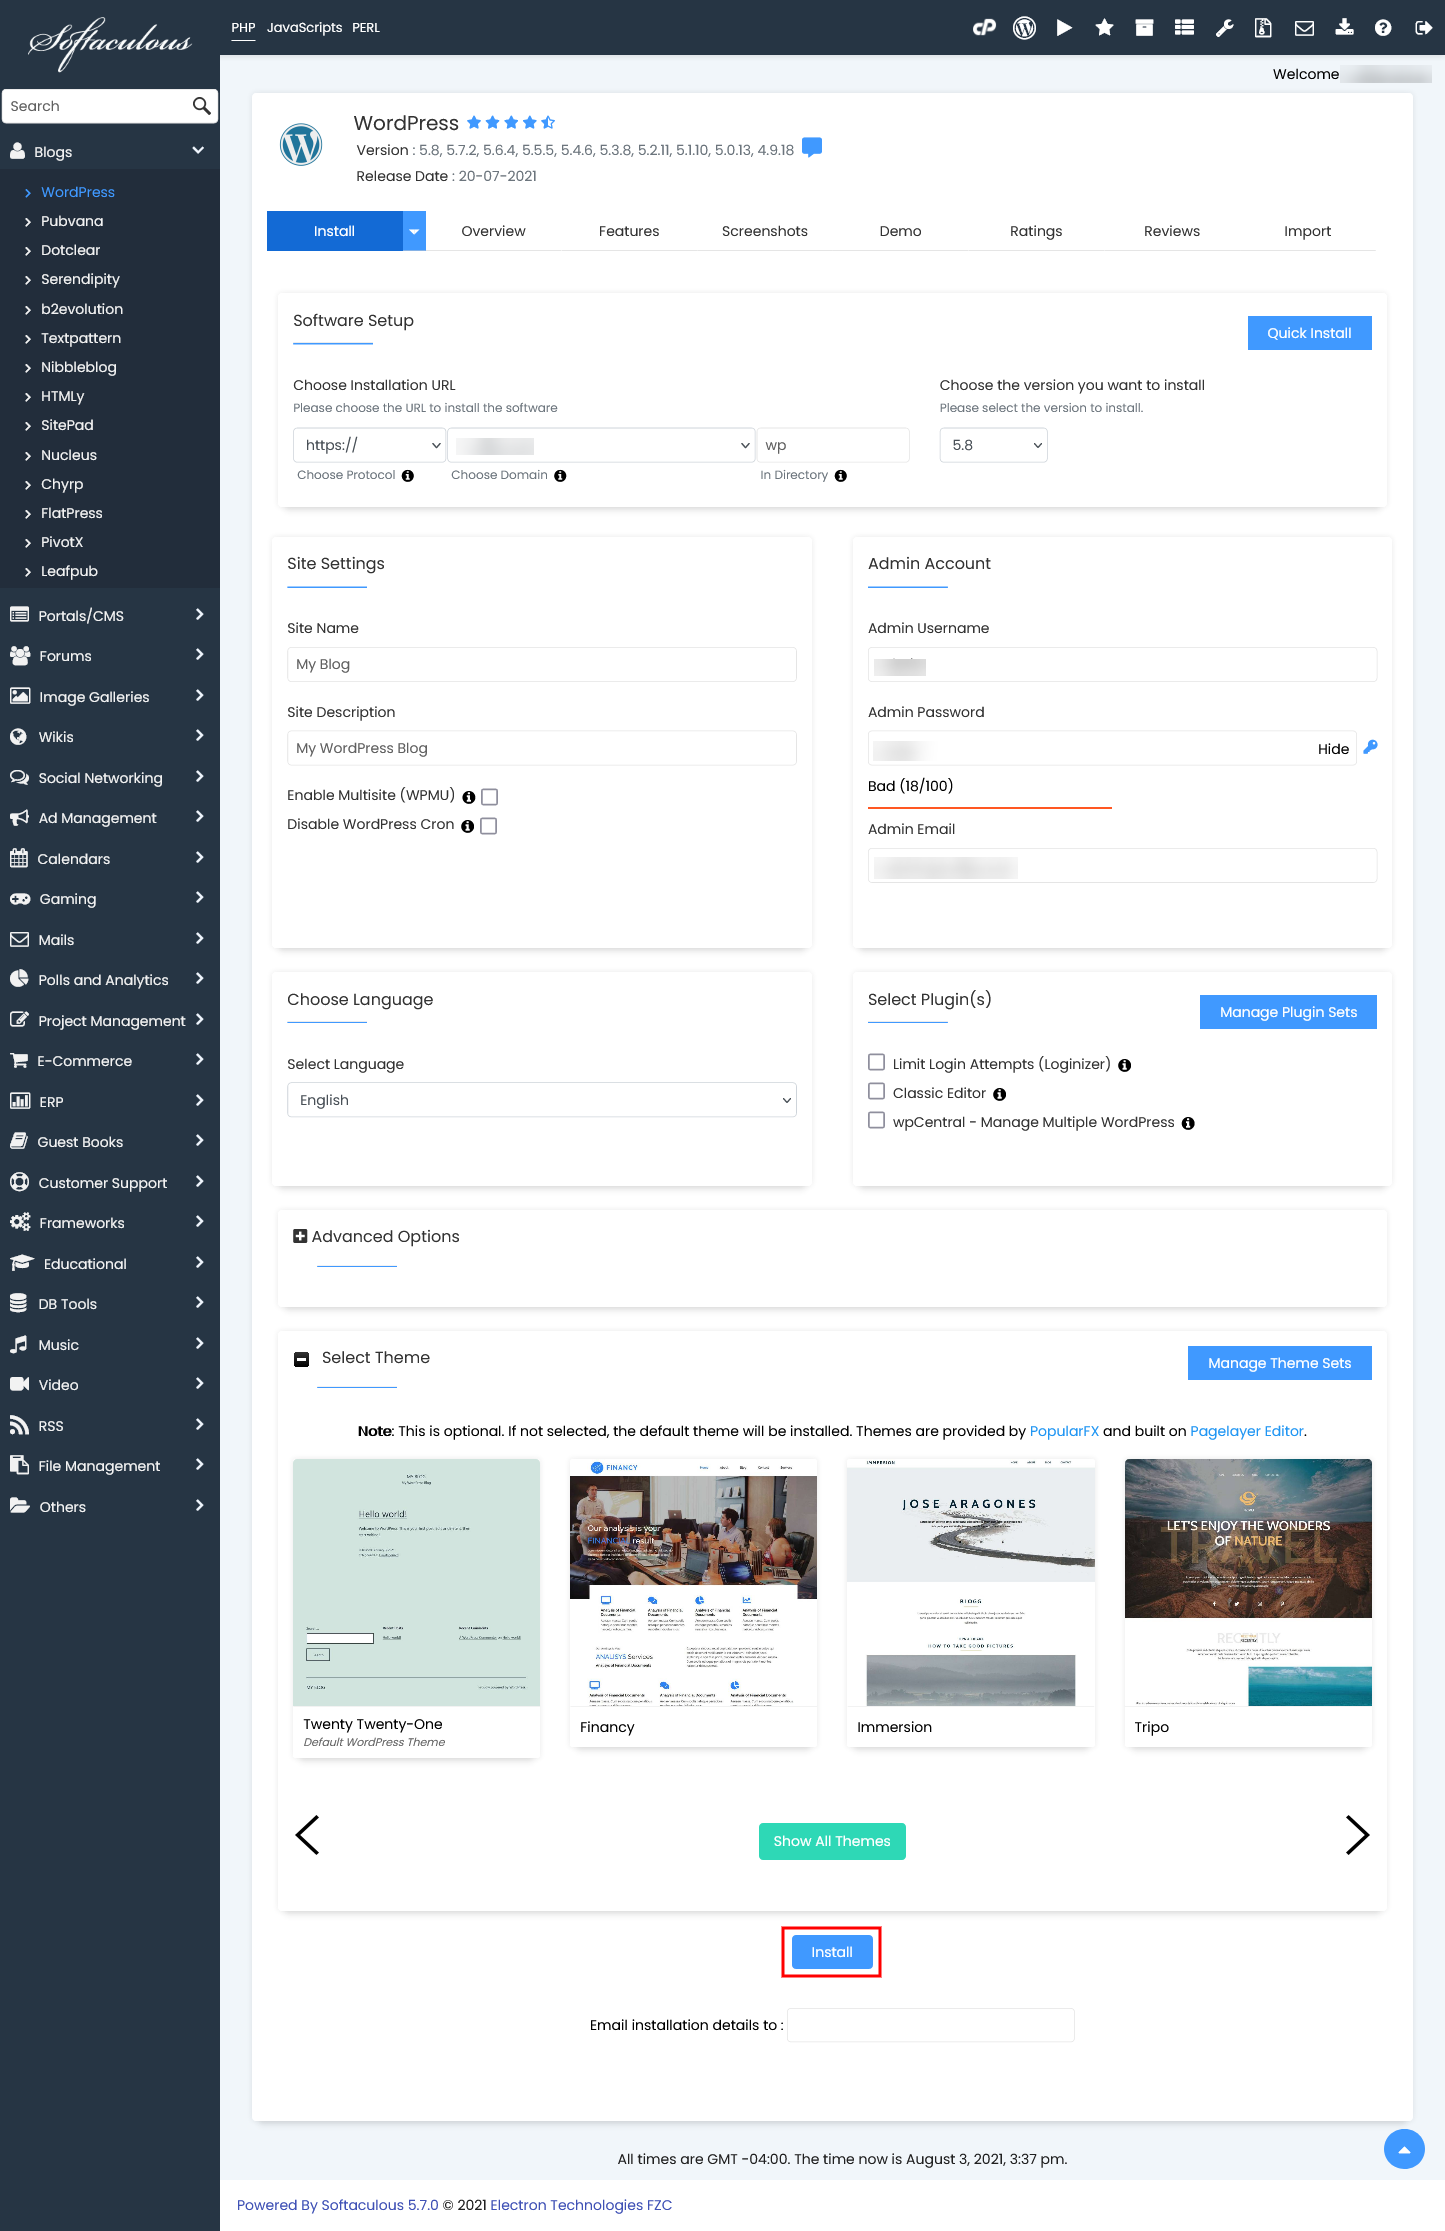 Filling in the necessary details on the WordPress installation form.
Once all the required fields have been meticulously reviewed and completed to your satisfaction, proceed to click the final Install button located at the bottom of the form. This action will commence the automated installation process. Softaculous will then efficiently take over, diligently handling all the intricate technical aspects of setting up WordPress for you. This sophisticated automation allows you to simply sit back, relax, and await the automatic completion of the installation.
Installation Successfully Completed
Upon the successful conclusion of the installation process, Softaculous will display a clear and reassuring confirmation message. This message signifies that your WordPress site has been meticulously set up and is now operational. Importantly, this success notification will typically include direct links to your newly launched WordPress website and its administrative panel, providing immediate access.
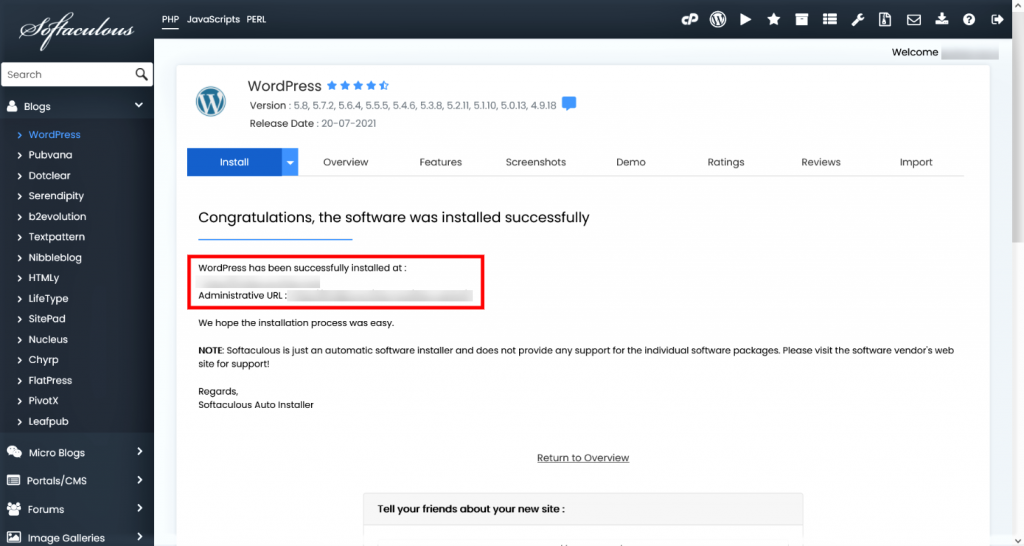 Confirmation of successful WordPress installation and access details.
From this point, you are empowered to immediately access your freshly installed WordPress site and embark on the exciting journey of customizing it to fit your vision. You can also effortlessly log into the WordPress admin panel using the credentials you carefully provided during the installation. This panel serves as your central hub for managing all aspects of your content, themes, plugins, and overall site settings.
It is worth noting that Softaculous extends its utility far beyond just simplifying the initial installation. It also provides a comprehensive suite of robust tools designed for managing the entire lifecycle of your WordPress installation. This invaluable functionality includes convenient features such as upgrading your WordPress version to the latest release, performing regular and reliable backups of your site, efficiently restoring from those backups if needed, cloning your site for development purposes, and effortlessly setting up staging environments, among many other advanced and beneficial functionalities.
