


Creating a Manual Backup
To ensure the safety and integrity of your website and domain data, follow these steps to create a manual backup:
- Navigate to Websites & Domains > Backup Manager > Back up.
- In the "Back up" section, you have the flexibility to select the specific content you wish to include in your backup. Domain configuration is always a mandatory inclusion. You can opt to exclude "Mail messages" and/or "Databases" by simply clearing their respective checkboxes, tailoring the backup to your specific needs.
- Under "Store in", you can specify the desired location for your backup. By default, backups are conveniently stored on the Plesk server. However, if you have already configured remote storage, you can select this option to save your backups to an external location, providing greater redundancy and flexibility.
- Proceed to the "Type" section to choose the appropriate backup type:
- A "Full" backup comprehensively includes all data specified in step 2, ensuring a complete snapshot of your selected content at a given point in time.
- An "Incremental" backup is designed to save only the changes made since the last successful backup. These backups are significantly quicker to create and consume less disk space compared to full backups. It is important to note that restoring an incremental backup requires the presence of its corresponding full backup, along with all preceding incremental backups in the sequence.
Note: If no backups currently exist, the very first backup created will always be a full backup. Subsequently, you will have the option to choose between full or incremental backup types for future operations. Should you select only "Domain Configuration" in step 2, only a full backup option will be available for selection.
- If you opted for remote storage in step 3, you have the ability to divide the backup file into multiple volumes. Select the "Create a multivolume backup, volume size (MB)" checkbox and then specify the desired volume size. This feature is particularly useful when remote storage solutions impose restrictions on the maximum file size for individual uploads.
- Before initiating the backup, you can fine-tune your settings with a range of optional configurations:
- Provide a descriptive comment about the backup under "Comments". These comments are displayed within the Plesk interface, aiding in the easy identification and differentiation of various backup files.
- To minimize the disk space used by the backup, select the "Exclude log files" checkbox, preventing log files from being included in the backup archive.
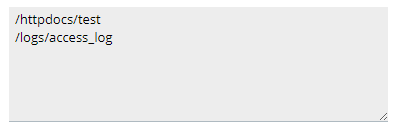
- For more granular control, select the "Exclude specific files from the backup" checkbox to omit particular files or directories. Enter the relative paths to these files or directories from your home directory in the provided field. For example:

- If you wish to receive an email notification upon the successful completion of the backup task, select the "When a backup task is completed, send a notification email to" checkbox. Ensure that the specified email address is accurate and up-to-date.
- Finally, click OK to commence the backup creation process.
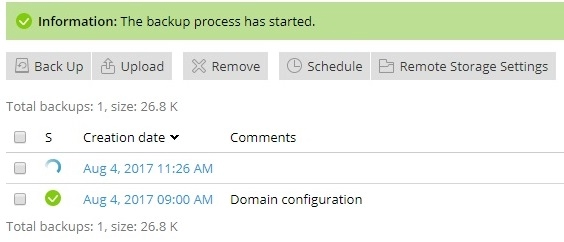
You will then be redirected to the Websites & Domains > Backup Manager screen, where you can monitor the progress of your backup. The duration of the backup process will vary depending on the total size of the content selected in step 2. Once completed, your newly created backup will be listed here, ready for future use and restoration.
Creating a Scheduled Backup
For automated and consistent data protection, setting up scheduled backups is highly recommended. Follow these instructions to configure a recurring backup task and ensure your data is regularly saved:
- Navigate to Websites & Domains > Backup Manager > Schedule and activate the task by clicking the Activate this backup task checkbox.
- Under the "Run this backup task" section, define the desired frequency (e.g., daily, weekly, monthly) and the precise time at which the backup process should automatically begin.
- Determine whether incremental backups should be utilized. By default, all scheduled backups are initially configured as full backups, encompassing all data types specified in step 5.
To enable the creation of incremental backups, which only store changes since the last backup, select the "Use incremental backup" checkbox. Incremental backups offer significant advantages in terms of speed and reduced disk space usage. However, for a successful restoration, the corresponding full backup and all preceding incremental backups must be accessible.
If you choose to use incremental backups, specify the frequency for performing a full backup under the "Perform full backup" setting, ensuring a new baseline is regularly established.
- In the "Keep backup files for" field, enter a numerical value if you want Plesk to automatically manage and remove outdated full backups. Any full backups stored beyond this specified period will be automatically deleted, helping to conserve storage space.
Conversely, if you prefer that Plesk does not automatically remove full backups, simply leave this field empty, and you will manage them manually.
- Under "Back up", select the specific content you wish to include in your scheduled backup. Domain configuration is always included by default. You have the option to exclude "Mail configuration and content" and/or "User files and databases" by clearing their respective checkboxes.
- Within the "Store in" section, you can designate the storage location for your backups. By default, backups are stored on the Plesk server. Alternatively, if you have already configured remote storage, you can select this option to store your backups externally, enhancing data security and accessibility.
- If you selected the remote storage option in the previous step, you can enable multivolume backups. Select the "Create a multivolume backup, volume size (MB)" checkbox and then specify the volume size. This functionality is beneficial when your remote storage provider has limitations on the maximum file size for individual uploads.
- Prior to finalizing the scheduled backup, several optional settings are available for configuration:
- To reduce the disk space consumed by scheduled backups, particularly for daily backups where log files can be substantial, select the "Exclude log files" checkbox.
- For precise control over included files, select the "Exclude specific files from the backup" checkbox. In the provided field, enter the relative paths of the directories or files you wish to exclude from your home directory. For instance:
- To receive email notifications in the event of errors during the scheduled backup task, select the "If errors occur during the execution of this backup task, send a notification email to" checkbox. Please verify the correctness of the email address displayed next to the checkbox.
- Finally, click OK to successfully create and activate your scheduled backup.
Plesk will now automatically generate backups at the intervals and times you have precisely defined, ensuring continuous data protection for your environment and peace of mind.
