


Welcome to JetBackup 5! This guide will walk you through the essential steps to access the JetBackup 5 console and complete the initial setup process after installation. Following these instructions will ensure your backup solution is configured correctly and ready for use.
Introduction to JetBackup 5 Setup
Once you have successfully completed the JetBackup 5 Installation, the next crucial step is to configure the software for its initial use. This process involves logging into your Admin Panel and navigating to JetBackup. If you are already familiar with how to access JetBackup, you may skip directly to the Initial Setup section below. Otherwise, continue reading for detailed access instructions based on your server environment.
How to Access JetBackup 5
Accessing JetBackup 5 varies slightly depending on the control panel or operating system you are using. Below are the common methods for accessing the JetBackup 5 interface after a successful installation.
cPanel/WHM
For cPanel/WHM environments, you can access JetBackup 5 by navigating through your WebHost Manager (WHM) interface. Simply go to WHM Home > Plugins > JetBackup 5.
DirectAdmin
If you are using DirectAdmin, access to JetBackup 5 is straightforward. Log in to your DirectAdmin panel at the Admin Level, then navigate to Extra Features > JetBackup.
Interworx
In an Interworx environment, you can find JetBackup 5 through NodeWorx. Navigate to NodeWorx Home > SiteWorx > JetBackup 5.
Please Note: JetBackup v5.3.16 is currently the latest version available for Interworx installations.
Plesk
Plesk users have two main views, and the access path depends on which view you are using:
- Power User view: Navigate to Plesk Home > JetBackup 5.
- Service Provider view: Navigate to Plesk Home > Links to Additional Services > JetBackup 5.
Linux Standalone
For standalone Linux servers, the JetBackup Panel is accessible via your web browser at https://{hostname/ip}:3035. You will use your root login credentials to access the panel. It is critical to ensure that Port 3035 is open on your server's firewall to allow both GUI and API access. Furthermore, if you plan to connect your server to the JetBackup Management Console, ensure that Port 3032 is also open for secure communications.
To configure your own SSL Certificate(s) for the JetBackup Linux Panel, please refer to the detailed instructions HERE.
IMPORTANT! For standalone Linux servers, it is crucial that account User IDs (UIDs) and Group IDs (GIDs) are set to 1000 or higher. UIDs/GIDs below 1000 are reserved for system accounts, services, and other special system-level accounts, and using them for user accounts can lead to conflicts and security issues. For more in-depth information on user account management with UIDs and GIDs, please visit this resource: User account management with UIDs and GIDs.
Additionally, to include databases in your Account Backups on standalone Linux servers, you must utilize our Manage Databases plugin. This plugin enables you to assign databases to specific Linux accounts, ensuring they are properly included in your backup jobs.
Initial Setup
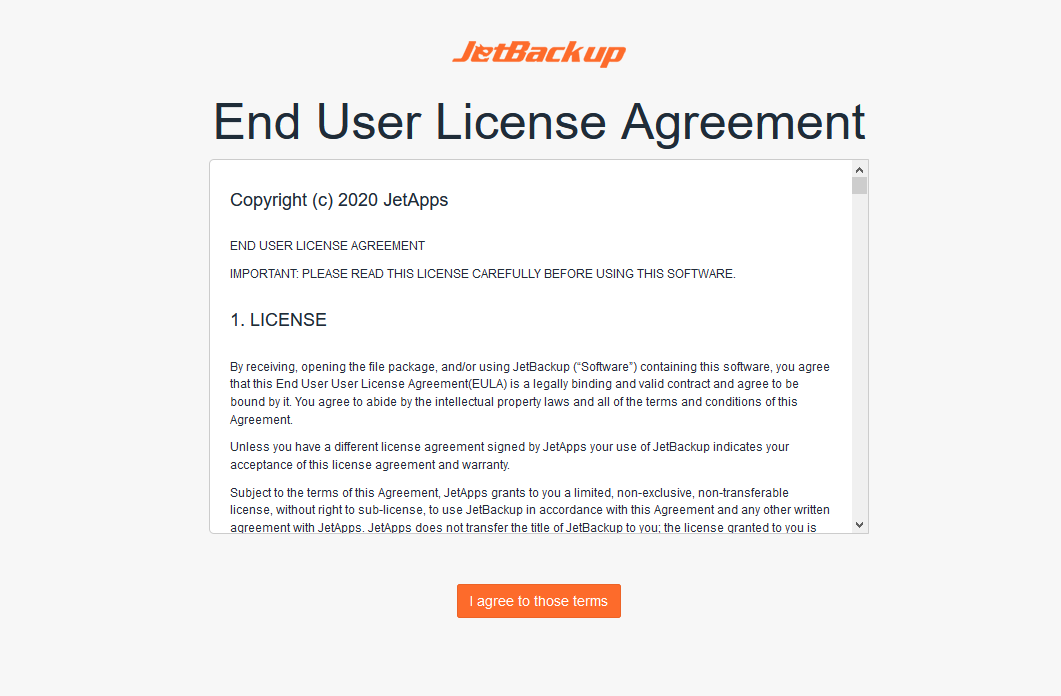
The very first time you launch JetBackup 5, you will be presented with the JetBackup End User License Agreement (EULA). Carefully review the terms and conditions outlined in the EULA. To proceed with the initial setup and begin configuring your backup solution, you must accept these terms by selecting the checkbox labeled "I agree to those terms."
Disaster Recovery Wizard Options
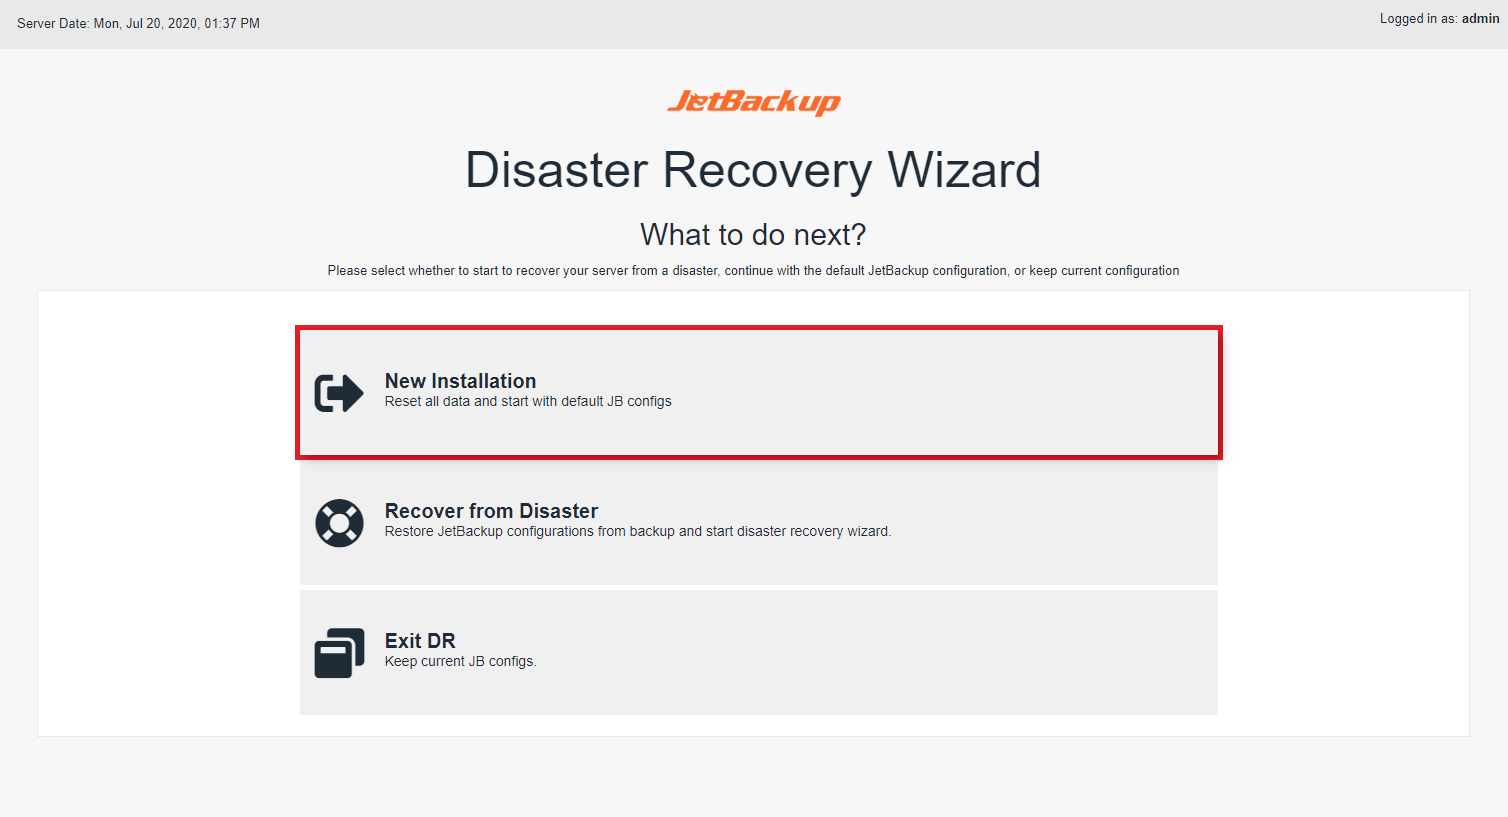
After successfully accepting the EULA, the Disaster Recovery Wizard will appear, offering you several options to begin or continue your JetBackup 5 configuration. Understanding these options is vital for proper setup or recovery.
New Installation
Choosing "New Installation" will initiate a fresh start for your JetBackup 5 configuration. This option will effectively reset any pre-existing JetBackup 5 settings and load the panel with the default configuration. It is recommended for all first-time installations.
Recover from Disaster
The "Recover from Disaster" option is designed for restoring your JetBackup 5 configuration from a previously saved backup destination where "Export JB Config" was enabled. This process requires the Master Encryption Key associated with that specific JetBackup 5 Configuration, which you should have securely saved.
Exit DR
Selecting "Exit DR" will bypass the initial setup wizard and load the JetBackup 5 Panel while preserving any existing JetBackup 5 configuration on your server. This option is generally used when you are re-accessing an already configured JetBackup installation. NOTE: If this is your very first time installing JetBackup 5, please ensure you use the "New Installation" option instead.
If your purpose here is to recover from a significant data loss event (e.g., re-installing JetBackup after a complete server failure), please consult our comprehensive Disaster Recovery Guide for detailed subsequent steps and best practices.
For servers that already have an existing JetBackup configuration, choose "Exit DR" to maintain your current settings and load the panel. Otherwise, if you are performing a clean installation, select "New Installation" to log in to your JetBackup panel with a fresh, default configuration.
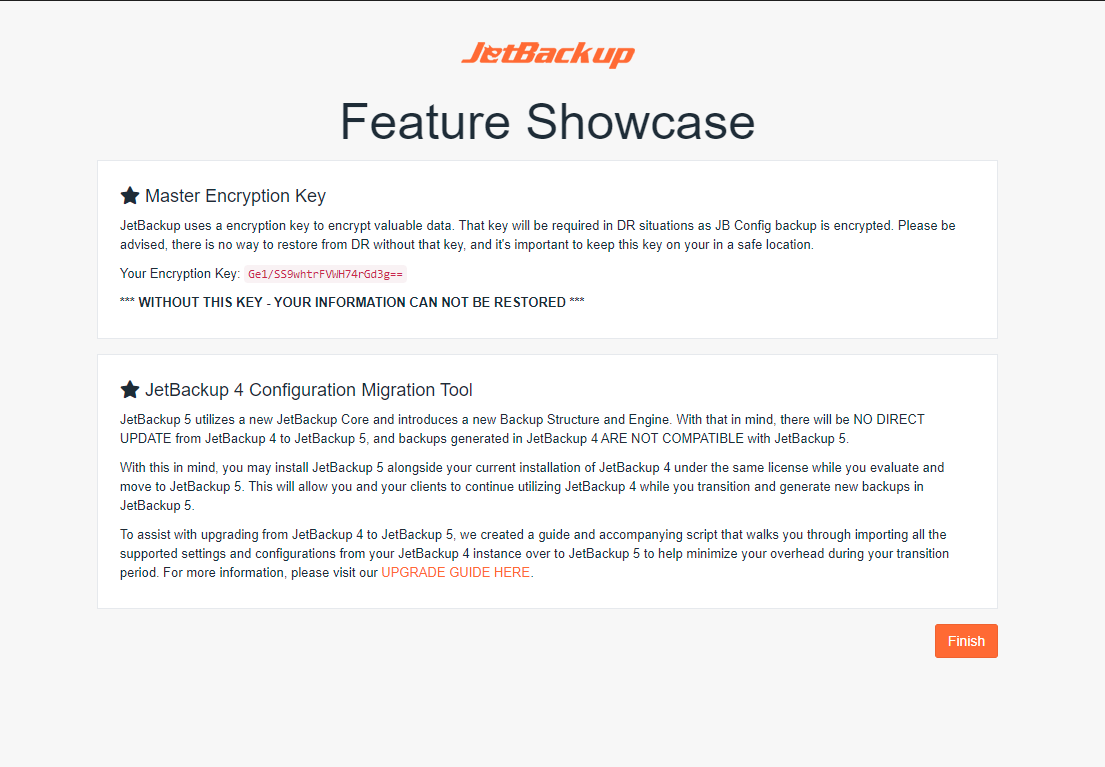
Feature Showcase
Upon completing a "New Installation," you will be directed to the Feature Showcase page. This page is important for two main reasons: it displays the newly generated Master Encryption Key unique to this JetBackup 5 Configuration—a critical component for any future Disaster Recovery scenarios. It also serves as a platform for occasional announcements, such as updates regarding our JetBackup 4 to JetBackup 5 Import Tool, keeping you informed about new features and migration tools.
Dashboard Overview and Initial Configuration Steps
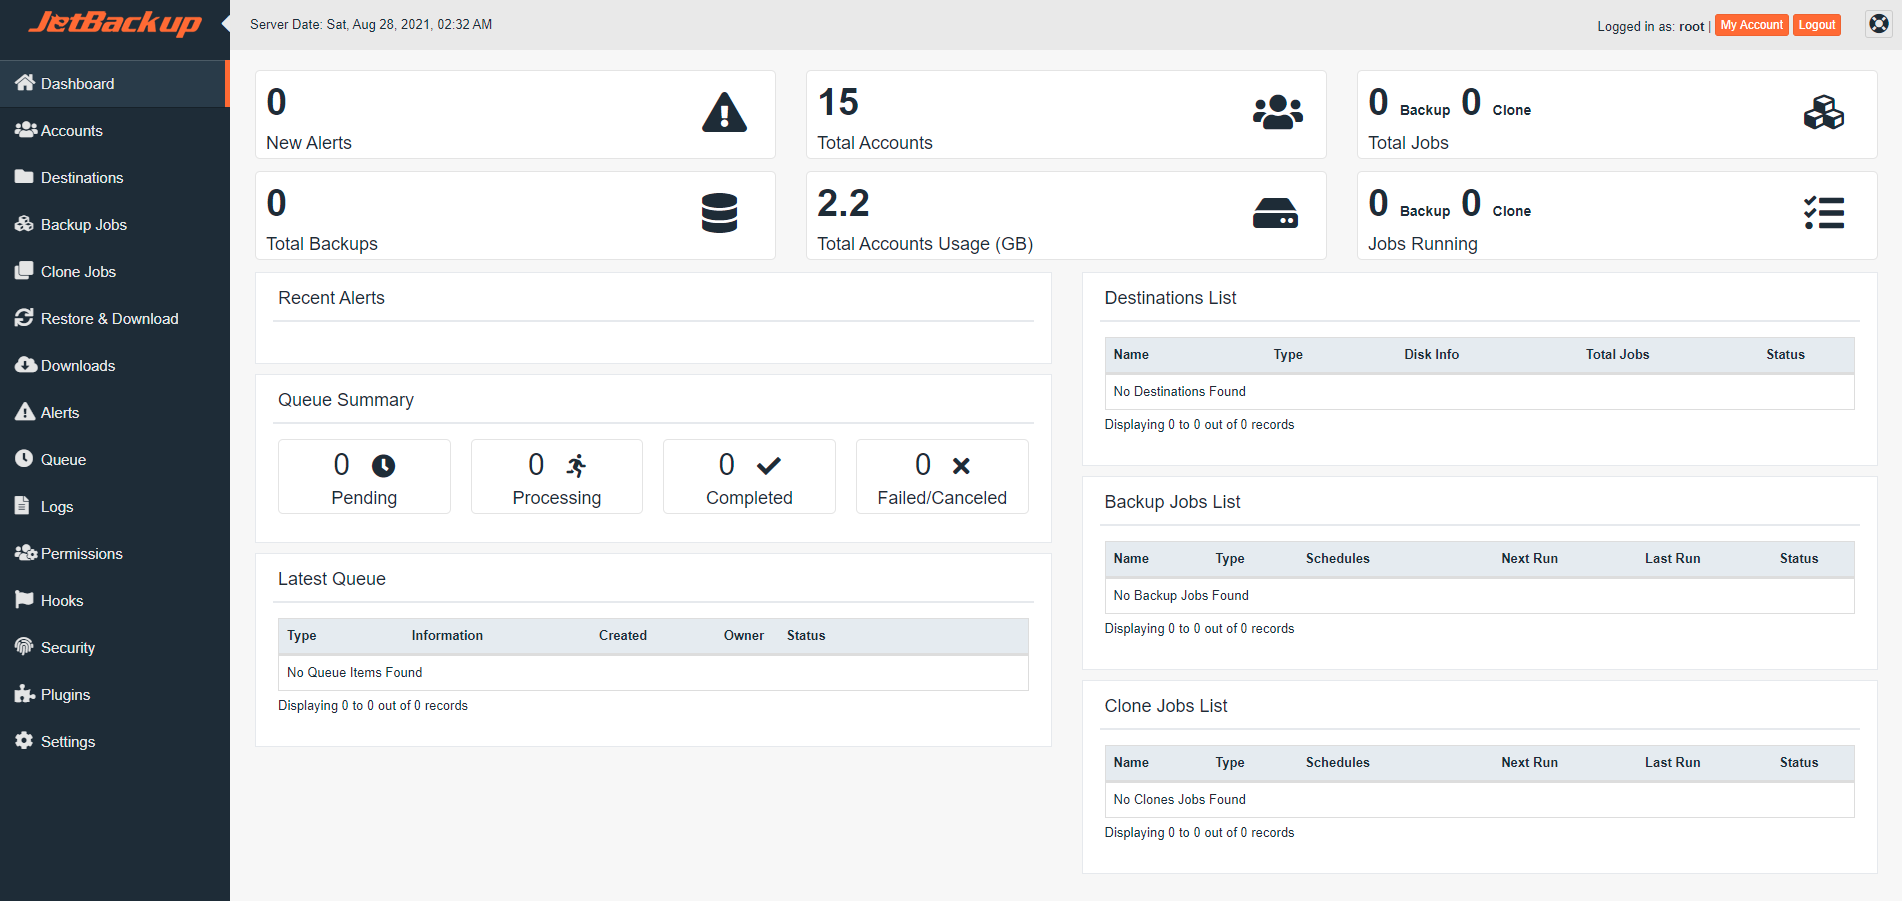
Once you have reached the JetBackup dashboard, you are ready to begin the core configuration of your backup system. The immediate next step is to add one or more backup destinations. These destinations are the storage locations where your backups will be securely saved.
Following this, we highly recommend enabling Export JB Config on at least one of your chosen destinations. This feature backs up your crucial JetBackup configurations and settings, which is indispensable for a seamless Disaster Recovery process should it ever be needed.
Finally, you can proceed to create your first backup job. To optimize your backup strategy, it's important to characterize the specific type of backup you require. JetBackup offers several common backup types to suit various needs:
- Local to Remote: In this configuration, account data is copied directly to a remote folder, and no local backups are retained on the server, saving local storage space.
- Local to Local: This option copies account data to a specified local folder on the same server.
- General Files Backup: This type allows you to back up any files located on the server, irrespective of whether they are associated with specific user accounts.
- MySQL Backups: Specifically designed to back up databases associated with your accounts, ensuring your crucial data is protected.
JetBackup Settings and Plugins for Advanced Configuration
To further tailor JetBackup to your specific operational requirements and fine-tune its behavior, dedicate some time to review the various JetBackup Settings and explore available Plugins. Here is a curated list of essential settings and plugins that we strongly recommend you examine:
- Privacy & Security: This section allows you to establish the User Agreement and Privacy Policy that will be presented to all your end-users.
- Delete orphan backups older than: Configure the retention period, specifying how many days JetBackup will keep backups for accounts that have been terminated from the server.
- Manual Backup Settings: JetBackup provides distinct backup retention and Time-To-Live (TTL) settings specifically for backups that are generated manually, allowing for flexible management of ad-hoc backups.
- Concurrent Tasks: This critical performance setting allows you to specify the maximum number of backup, restore, and download tasks that JetBackup can execute simultaneously, optimizing server resource usage.
- Server Master Encryption Key: JetBackup automatically generates an encryption key to secure your JB Config backups. It is paramount to store this key in a secure, remote location, as it is essential for disaster recovery scenarios.
- Plugins Overview: The Plugins section enables you to extend JetBackup's functionality by installing various plugins. These can include support for additional backup destinations, notification plugins for integration with third-party messaging platforms, and enhanced security plugins.
- Manage Databases Plugin (Standalone Linux Only): For servers operating without a control panel, installing and configuring the "Manage Databases" Plugin is essential. It allows you to automatically or manually assign databases and database users to specific accounts. NOTE: The "root" account is not listed as a standard account within JetBackup 5. For backup purposes, a new Linux user should be created to store desired files/folders and assigned databases/database users via this plugin.
Optimizing Backup Efficiency: Our Recommended Setup
To achieve the most efficient and space-saving backup solution, we highly recommend the following setup:
Utilize Local to Remote backups, with "SSH" as your primary storage destination. When JetBackup performs its initial run, it will create a comprehensive full backup for all your accounts. For all subsequent backup jobs, only new or modified file changes will need to be backed up, significantly reducing backup times and bandwidth usage. Furthermore, if you activate "backup retention," JetBackup will intelligently create "point-in-time incremental backups." This advanced feature leverages hardlinks to consume as little disk space as possible, storing only the changes between backup points.
For instance, with a 30-day backup retention policy for a 2GB account, the total storage consumed will typically be around 2GB plus the size of new or changed files over those 30 days. This method offers substantial storage efficiency.
(Note: At present, MySQL databases are fully dumped with each backup run, as incremental backups are not yet supported for MySQL.)
